
Grow Mushrooms at Home – sounds like something out of a fantasy novel, right? But trust me, it’s totally achievable, and I’m here to show you how! Forget trekking through damp forests; you can cultivate these fascinating fungi right in your own kitchen, basement, or even a spare closet. For centuries, mushrooms have been revered across cultures, not just for their unique flavors but also for their medicinal properties. From ancient Chinese emperors seeking the “elixir of life” in Reishi mushrooms to the Romans indulging in the earthy delights of truffles, mushrooms have always held a special place in our history and cuisine.
But why should you bother learning to grow mushrooms at home? Well, for starters, it’s incredibly rewarding to nurture something from spore to delicious meal. Plus, store-bought mushrooms can be pricey and sometimes lack the freshness and variety you crave. Imagine the satisfaction of harvesting your own oyster mushrooms for a stir-fry, or adding homegrown shiitakes to a comforting soup. Beyond the culinary benefits, it’s a fantastic way to connect with nature, learn about the fascinating world of fungi, and even reduce your carbon footprint by growing your own food. So, are you ready to embark on this exciting journey? Let’s dive into some simple, yet effective DIY tricks and hacks that will have you harvesting your own gourmet mushrooms in no time!
Grow Your Own Gourmet Mushrooms at Home: A Beginner’s Guide
Hey there, fellow fungi fanatics! Ever dreamt of harvesting your own delicious mushrooms right in your kitchen? Well, dream no more! I’m going to walk you through a simple, yet rewarding, method for growing mushrooms at home. We’ll be focusing on oyster mushrooms, as they’re relatively easy to cultivate and incredibly versatile in the kitchen. Get ready to embark on a fun and fascinating journey into the world of mycology!
What You’ll Need: The Essential Supplies
Before we dive in, let’s gather our supplies. Don’t worry, you probably have a lot of this stuff lying around already!
* **Oyster Mushroom Spawn:** This is essentially the “seed” for your mushrooms. You can find it online or at a local gardening supply store. Make sure it’s a reputable source to ensure healthy spawn. I recommend starting with a pre-inoculated bag for your first time.
* **Substrate:** This is the material the mushrooms will grow on. Straw is a great option because it’s readily available and affordable. You can also use coffee grounds, cardboard, or even hardwood sawdust. For this guide, we’ll be using straw.
* **Large Heat-Resistant Container:** Think a big pot or even a clean trash can. This is for pasteurizing the straw.
* **Large Plastic Bags (Sterile):** These will be our growing bags. Make sure they’re thick and durable. You can find these online specifically for mushroom cultivation.
* **Spray Bottle:** For misting the mushrooms.
* **Rubbing Alcohol:** For sanitizing everything.
* **Gloves:** To keep things sterile.
* **Drill or Knife:** For creating ventilation holes in the bag.
* **Thermometer:** To monitor the temperature of the straw during pasteurization.
* **Optional: Hydrogen Peroxide (3%):** Can be used to further sanitize the straw.
Phase 1: Preparing the Substrate (Straw Pasteurization)
This is arguably the most crucial step. We need to pasteurize the straw to kill off any competing organisms that might hinder mushroom growth. Think of it like preparing a clean slate for your mushrooms to thrive.
1. **Chop the Straw:** Cut the straw into smaller pieces, about 2-3 inches long. This will make it easier to pack into the bags and allow the mycelium (the mushroom’s root system) to colonize it more effectively. I like to use garden shears for this.
2. **Soak the Straw:** Place the chopped straw in your large heat-resistant container and cover it with water. Make sure all the straw is submerged. You might need to weigh it down with a brick or a heavy plate. Let it soak for at least 24 hours. This will hydrate the straw and make it easier to pasteurize.
3. **Pasteurize the Straw:** Drain the soaked straw and place it back in the container. Fill the container with fresh water. Now, we need to heat the water to around 160-180°F (71-82°C) and maintain that temperature for about 60-90 minutes. This can be done on a stovetop or with a propane burner if you’re using a large trash can. Use your thermometer to monitor the temperature closely. Don’t let it boil! Boiling can damage the straw and make it less suitable for mushroom growth.
4. **Cool and Drain:** After pasteurization, carefully drain the hot water. Let the straw cool down to room temperature. This is important because the heat can kill the mushroom spawn. You can spread the straw out on a clean surface to speed up the cooling process. Make sure to squeeze out any excess water. The straw should be moist but not dripping wet. Think of a wrung-out sponge.
Phase 2: Inoculating the Bags
Now comes the fun part – introducing the mushroom spawn to the prepared straw!
1. **Sanitize Everything:** Before you start, thoroughly sanitize your work area, your hands (wear gloves!), and the plastic bags with rubbing alcohol. This will minimize the risk of contamination.
2. **Layering the Straw and Spawn:** In a clean plastic bag, start by adding a layer of pasteurized straw. Then, sprinkle a layer of oyster mushroom spawn over the straw. Repeat this process, layering straw and spawn, until the bag is almost full. The final layer should be straw. I usually aim for about 10-20% spawn by weight. So, if you have 10 pounds of straw, use 1-2 pounds of spawn.
3. **Pack the Bag:** Gently pack the straw and spawn mixture into the bag. You don’t want to compress it too much, but you want to ensure good contact between the spawn and the straw.
4. **Seal the Bag:** Seal the bag tightly with tape or a zip tie.
5. **Create Ventilation Holes:** Using a drill or a knife, create several small ventilation holes (about ¼ inch in diameter) in the bag. These holes will allow the mushrooms to breathe. Space them evenly around the bag. I usually make about 10-15 holes per bag.
Phase 3: Incubation
This is where the magic happens! The mycelium will start to colonize the straw, forming a white, fuzzy network.
1. **Find a Suitable Location:** Place the inoculated bags in a dark, warm, and humid location. A basement, closet, or even under the sink can work well. The ideal temperature is around 65-75°F (18-24°C).
2. **Monitor the Bags:** Check the bags regularly for signs of contamination. Look for any unusual colors or smells. If you see any mold or other contaminants, discard the bag immediately to prevent it from spreading.
3. **Wait for Colonization:** Over the next few weeks, the mycelium will spread throughout the straw. You’ll see a white, fuzzy growth covering the straw. This is a good sign! The colonization process usually takes about 2-4 weeks, depending on the temperature and humidity. The bag should be almost completely white before moving on to the next phase.
Phase 4: Fruiting
Time to fruit those mushrooms!
1. **Increase Light and Humidity:** Once the bag is fully colonized, move it to a location with more light. Indirect sunlight is ideal. You’ll also need to increase the humidity. You can do this by misting the bag with water several times a day. A humidity of 80-90% is ideal. You can also use a humidity tent or a humidifier to maintain the humidity.
2. **Initiate Pinning:** To encourage pinning (the formation of baby mushrooms), you can try “shocking” the mycelium. This involves lowering the temperature slightly for a few days. You can also try scratching the surface of the colonized straw with a fork.
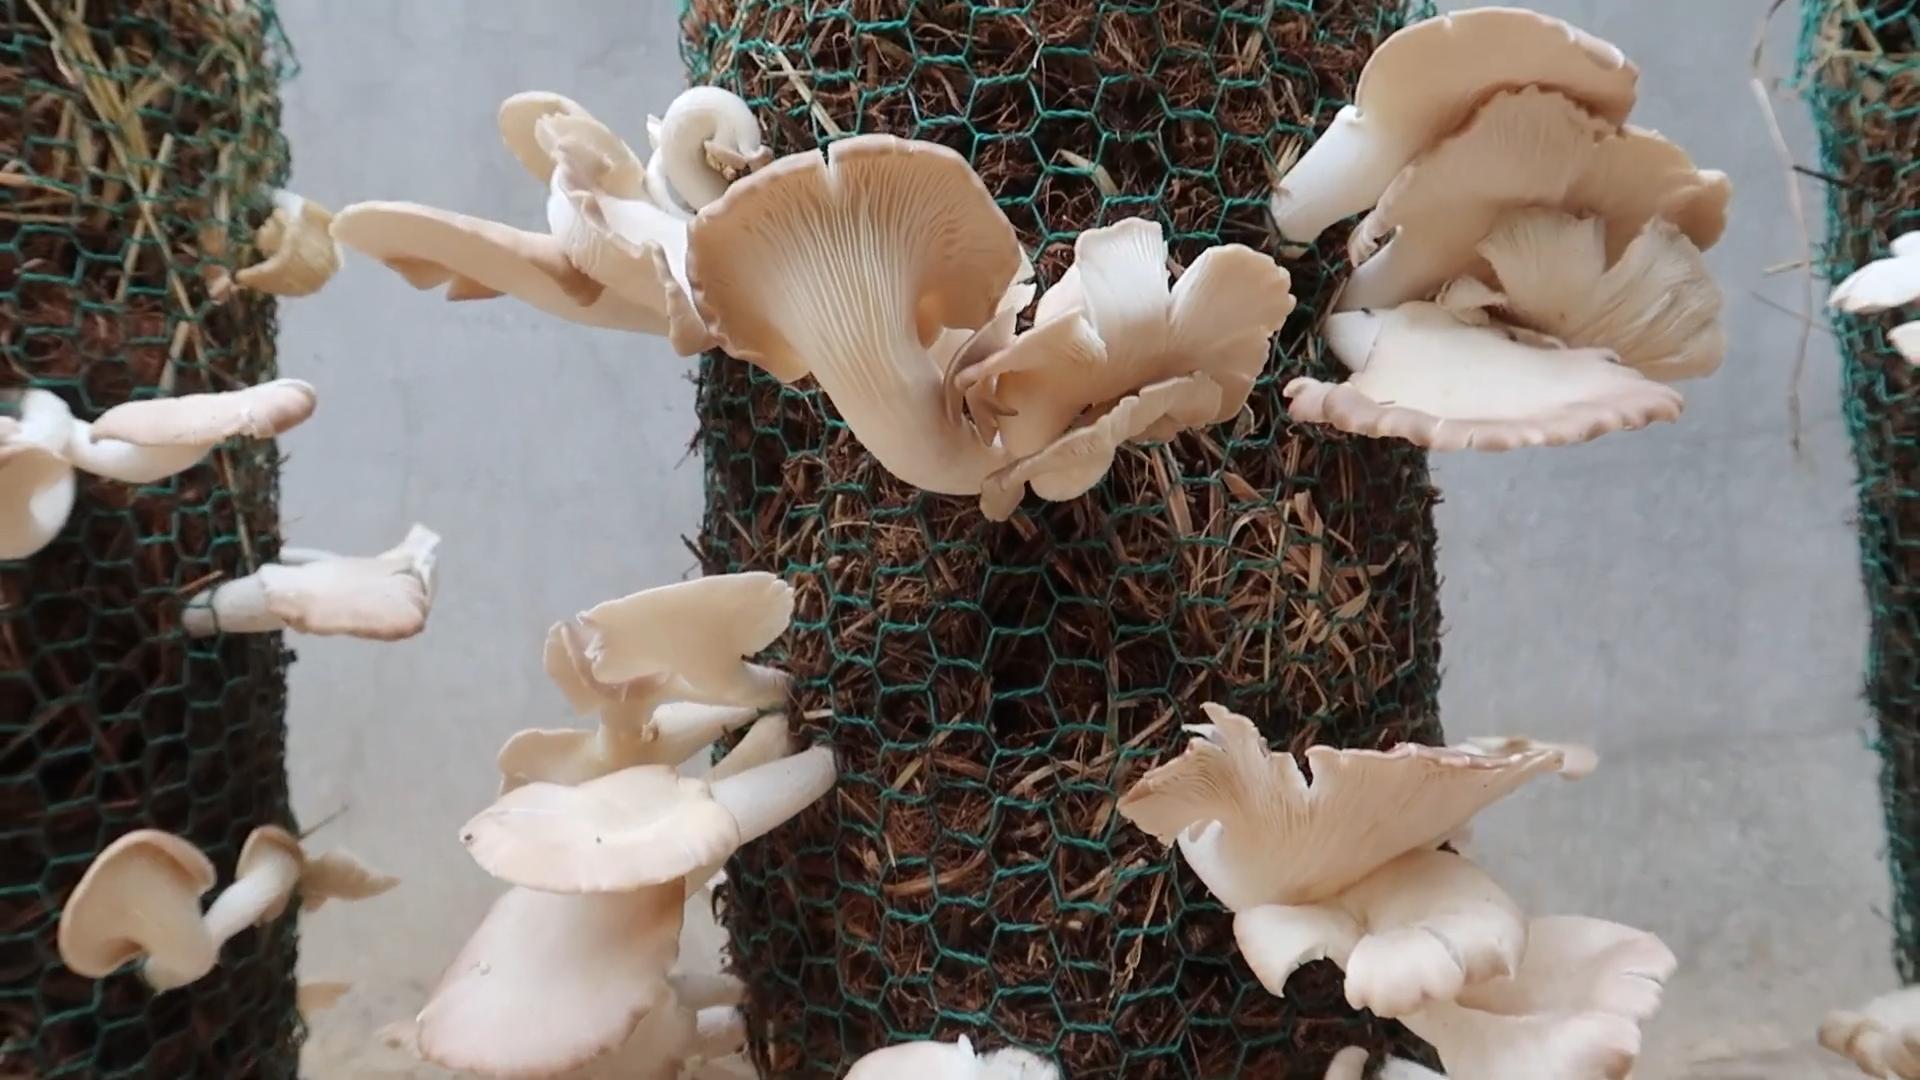
3. **Watch for Mushroom Formation:** Within a few days, you should start to see small mushroom “pins” forming on the surface of the straw. These pins will quickly grow into mature mushrooms.
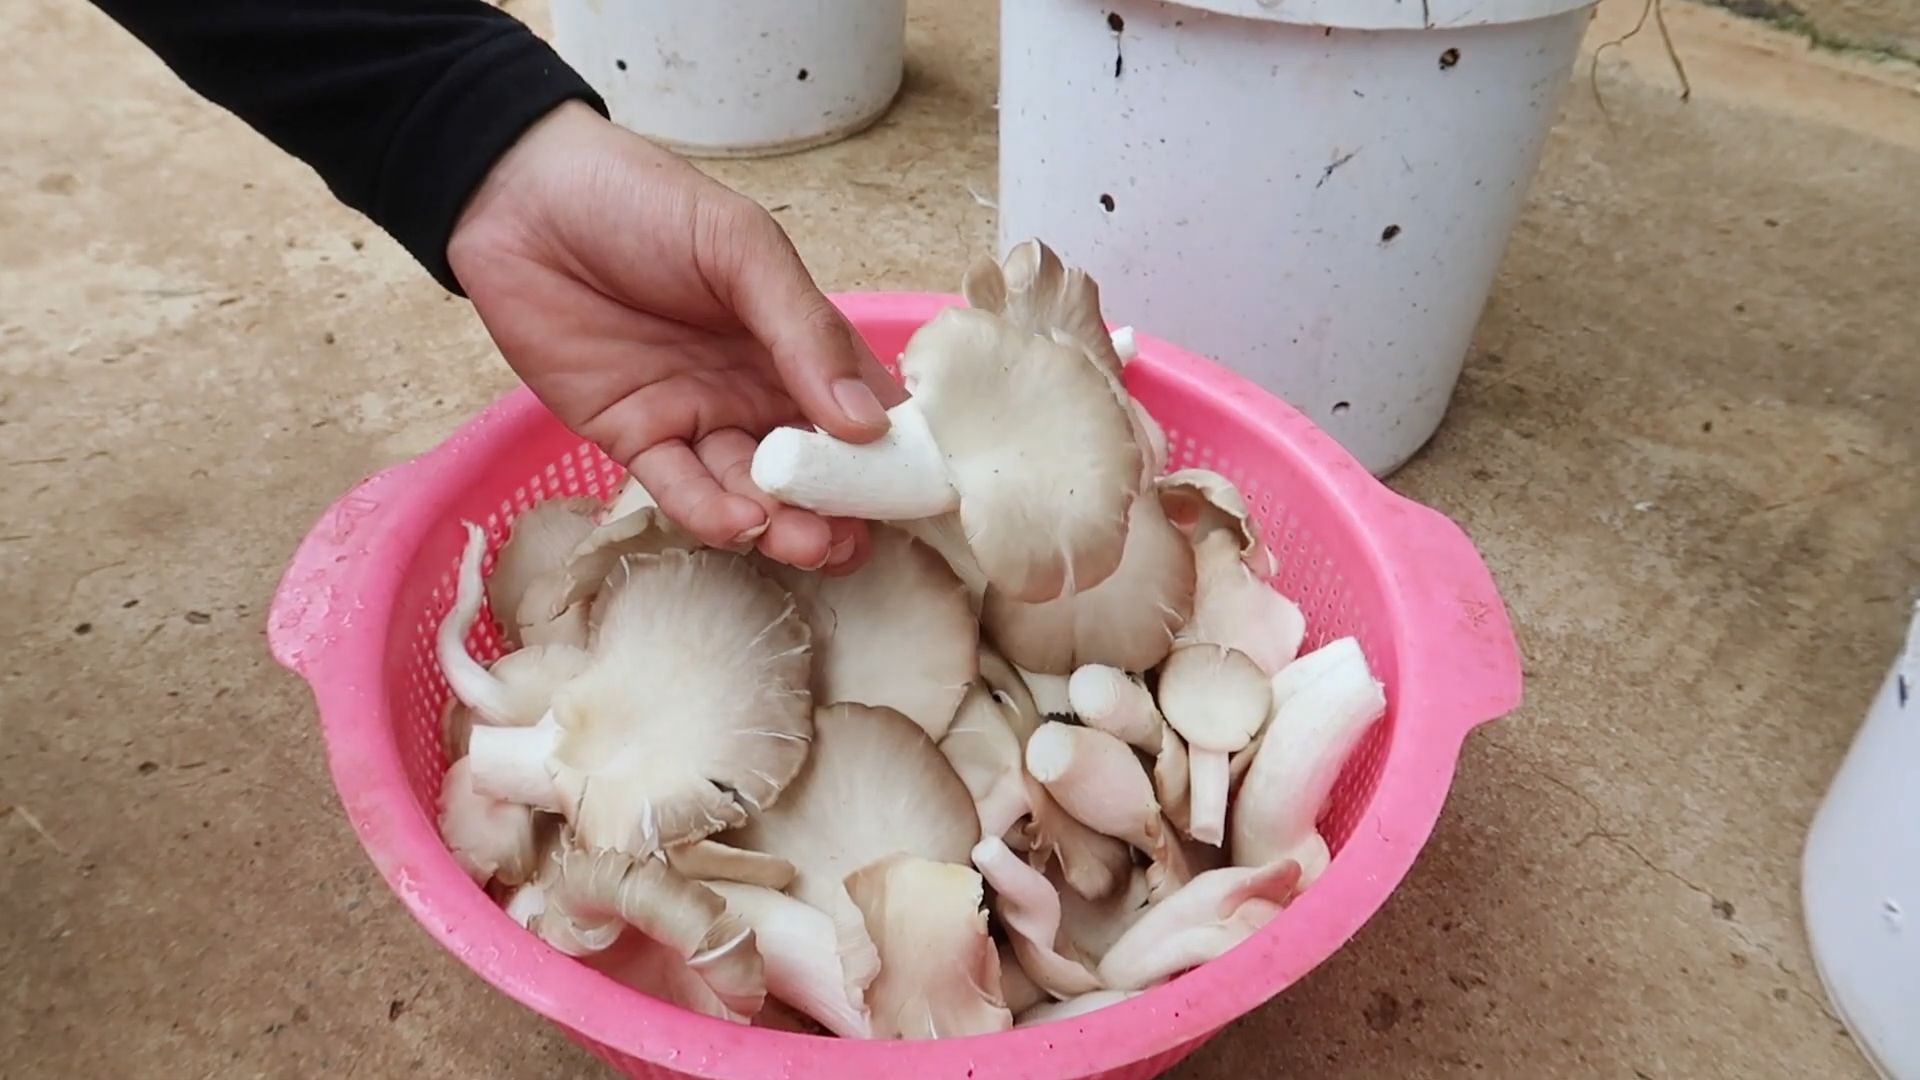
4. **Harvest the Mushrooms:** Harvest the mushrooms when the caps are fully developed but before they start to release spores. You can harvest them by twisting them off the straw or by cutting them off with a knife.
Phase 5: Subsequent Flushes
Congratulations! You’ve harvested your first flush of mushrooms. But the fun doesn’t have to end there. You can usually get several flushes of mushrooms from the same bag.
1. **Soak the Bag:** After harvesting, soak the bag in water for 24 hours. This will rehydrate the straw and encourage another flush of mushrooms.
2. **Repeat the Fruiting Process:** After soaking, repeat the fruiting process as described above. You can usually get 2-3 flushes of mushrooms from each bag.
Troubleshooting Tips
* **Contamination:** Contamination is the biggest challenge in mushroom cultivation. To minimize the risk of contamination, always sanitize everything thoroughly.
* **Slow Colonization:** Slow colonization can be caused by low temperatures, low humidity, or poor-quality spawn. Make sure the temperature and humidity are within the ideal range.
* **No Pinning:** If you’re not seeing any pins, try shocking the mycelium by lowering the temperature or scratching the surface of the straw.
* **Small Mushrooms:** Small mushrooms can be caused by low humidity or insufficient nutrients. Make sure the humidity is high enough and consider adding a small amount of nutrient supplement to the straw.
Enjoy Your Homegrown Mushrooms!
Growing your own mushrooms is a rewarding and delicious experience. With a little patience and attention to detail, you can enjoy fresh, gourmet mushrooms right from your own home. Experiment with different substrates and varieties of mushrooms to find what works best for you. Happy growing!
Conclusion
So, there you have it! Growing mushrooms at home isn’t some mystical, complicated process reserved for expert mycologists. It’s an accessible, rewarding, and frankly, quite fascinating endeavor that anyone can undertake with a little patience and the right guidance. We’ve walked you through the steps, demystified the jargon, and hopefully, ignited a spark of curiosity within you to explore the world of fungi.
Why is this DIY trick a must-try? Because it puts you in control of your food source. Imagine the satisfaction of harvesting fresh, organic mushrooms, knowing exactly where they came from and what went into their cultivation. No more wondering about pesticides or long-distance transportation. You’re contributing to a more sustainable lifestyle, reducing your carbon footprint, and enjoying a culinary delight that’s bursting with flavor and nutrients. Plus, it’s a fantastic conversation starter!
But the benefits extend beyond just the culinary. Growing mushrooms at home is a therapeutic activity. The process of nurturing life, observing the mycelium spread, and witnessing the fruiting bodies emerge is incredibly calming and rewarding. It’s a chance to connect with nature, learn about the intricate workings of the fungal kingdom, and develop a new appreciation for the hidden wonders of our planet.
Now, let’s talk about variations. While we’ve focused on a specific method, the possibilities are endless. Experiment with different substrates. Coffee grounds, straw, cardboard – each offers a unique flavor profile to your mushrooms. Try different mushroom varieties. Oyster mushrooms are a great starting point, but once you’ve mastered the basics, venture into the world of shiitake, lion’s mane, or even the elusive morel (though that requires a bit more expertise!). Consider different growing environments. A simple plastic tub works wonders, but you could also explore building a more elaborate fruiting chamber for optimal humidity and temperature control.
Don’t be afraid to experiment and adapt the process to your specific needs and resources. The beauty of DIY is the freedom to customize and create something truly unique. Remember, every successful mushroom grower started somewhere, and every mistake is a learning opportunity.
We wholeheartedly encourage you to embark on this exciting journey of growing mushrooms at home. It’s an investment in your health, your well-being, and your connection to the natural world. And most importantly, it’s a lot of fun!
So, grab your supplies, follow our guide, and prepare to be amazed by the magic of mushrooms. And once you’ve harvested your first flush, don’t forget to share your experience with us! We’d love to hear your stories, see your photos, and learn from your successes (and even your failures!). Share your tips, your tricks, and your culinary creations. Let’s build a community of home mushroom growers and spread the word about this incredible DIY adventure. Happy growing!
Frequently Asked Questions (FAQ)
What are the easiest mushrooms to grow at home for beginners?
Oyster mushrooms are widely considered the easiest mushrooms to grow for beginners. They are fast-growing, relatively forgiving of environmental fluctuations, and can thrive on a variety of substrates like straw, coffee grounds, and even cardboard. Their adaptability makes them an excellent choice for those just starting their mushroom-growing journey.
What is the best substrate to use for growing mushrooms at home?
The “best” substrate depends on the type of mushroom you’re growing. However, for beginners growing oyster mushrooms, pasteurized straw is a popular and readily available option. Coffee grounds are another excellent choice, especially if you have access to a steady supply. Other options include hardwood sawdust, cardboard, and even agricultural waste products. Research the specific substrate requirements of the mushroom variety you’re interested in growing for optimal results.
How long does it take to grow mushrooms at home?
The time it takes to grow mushrooms varies depending on the species, the substrate, and the environmental conditions. Oyster mushrooms, for example, can typically be harvested within 2-3 weeks of inoculation. Shiitake mushrooms, on the other hand, may take several months to fruit. Factors like temperature, humidity, and light exposure also play a significant role in the growth rate.
What are the ideal environmental conditions for growing mushrooms?
Most mushrooms thrive in cool, humid environments with indirect light. The specific temperature and humidity requirements vary depending on the species. Oyster mushrooms generally prefer temperatures between 60-75°F (15-24°C) and high humidity (80-90%). Maintaining proper humidity is crucial for successful mushroom cultivation. You can achieve this by misting the growing area regularly or using a humidity tent.
How do I prevent contamination when growing mushrooms?
Contamination is a common challenge in mushroom cultivation. To minimize the risk of contamination, it’s essential to maintain a clean and sterile environment. Pasteurize or sterilize your substrate thoroughly before inoculation. Use sterile tools and gloves when handling the substrate and spawn. Ensure proper ventilation to prevent the buildup of mold and bacteria. Regularly inspect your growing area for signs of contamination, such as unusual colors or odors. If you detect contamination, remove the affected area immediately to prevent it from spreading.
What are the signs that my mushrooms are ready to harvest?
The signs of maturity vary depending on the mushroom species. For oyster mushrooms, look for fully developed caps with slightly upturned edges. The gills should be visible and the caps should be firm to the touch. Harvest your mushrooms before they start to release spores, as this can reduce their quality and flavor.
Can I grow mushrooms indoors without any special equipment?
Yes, you can grow mushrooms indoors without any special equipment. A simple plastic tub or container can be used as a growing chamber. You can maintain humidity by misting the growing area regularly or covering the container with a plastic bag. Indirect light from a window is usually sufficient for most mushroom species. While specialized equipment like humidity controllers and grow lights can enhance your results, they are not essential for beginners.
What should I do if my mushrooms are not growing?
If your mushrooms are not growing, there could be several reasons. First, ensure that the environmental conditions are optimal for the species you’re growing. Check the temperature, humidity, and light levels. Make sure the substrate is properly hydrated. Contamination can also inhibit mushroom growth. Inspect your growing area for signs of mold or bacteria. If you suspect contamination, remove the affected area. Finally, be patient. Mushroom cultivation takes time, and it may take several weeks or even months for your mushrooms to fruit.
Is it safe to eat home-grown mushrooms?
Yes, it is generally safe to eat home-grown mushrooms, provided that you have correctly identified the species and followed proper cultivation techniques. Only consume mushrooms that you are 100% certain are edible. If you are unsure about the identity of a mushroom, do not eat it. It’s also important to cook your mushrooms thoroughly before eating them, as some species can be toxic when raw.
Where can I buy mushroom spawn?
Mushroom spawn can be purchased from a variety of sources, including online retailers, garden centers, and specialty mushroom suppliers. Look for reputable suppliers that offer high-quality spawn of the species you’re interested in growing. Be sure to choose spawn that is appropriate for your growing environment and substrate.
Leave a Comment