
Corn bag growing: Ever dreamt of harvesting your own sweet, juicy corn without a sprawling farm? I know I have! Forget acres of land and back-breaking labor; I’m about to let you in on a little secret that’s been whispered among savvy gardeners for years – growing corn in a bag! This isn’t just some trendy gardening fad; it’s a practical, space-saving solution that brings the taste of summer right to your doorstep.
The concept of container gardening, including techniques like corn bag growing, has roots stretching back centuries. From the hanging gardens of Babylon to the rooftop farms of modern cities, humans have always found innovative ways to cultivate food in limited spaces. But why is this DIY trick so essential now? Well, with shrinking urban spaces and a growing desire for fresh, locally sourced produce, the ability to grow your own food, even in a small area, is more important than ever. Plus, who doesn’t love the satisfaction of nurturing a plant from seed to table?
This DIY guide will walk you through every step of the process, from choosing the right bag and soil to watering and harvesting. Get ready to impress your friends and family with your green thumb and enjoy the delicious rewards of your very own homegrown corn!
Grow Your Own Corn in a Bag: A Fun and Easy DIY Project!
Hey there, fellow gardening enthusiasts! Ever thought about growing corn but felt intimidated by the space requirements? Well, I’ve got a fantastic solution for you: growing corn in a bag! It’s a surprisingly simple and rewarding project, perfect for small spaces like balconies, patios, or even just a sunny corner of your yard. Plus, it’s a great way to get kids involved in gardening. Let’s dive in!
What You’ll Need
Before we get started, let’s gather our supplies. Here’s what you’ll need to successfully grow corn in a bag:
* A large, sturdy bag: Think of a heavy-duty garbage bag, a burlap sack, or even a large grow bag specifically designed for plants. The bigger, the better – aim for at least 20-30 gallons in capacity. This will give your corn roots plenty of room to spread out.
* Potting mix: Don’t use garden soil directly! It’s often too dense and doesn’t drain well in a container. A good quality potting mix is essential for healthy corn growth.
* Compost: Compost is like a superfood for plants! It adds nutrients and improves soil structure. Mix it in with your potting mix for an extra boost.
* Corn seeds: Choose a variety that’s suitable for your climate and growing season. Sweet corn is a popular choice, but you can also experiment with other types like popcorn or ornamental corn.
* Slow-release fertilizer: Corn is a heavy feeder, meaning it needs a lot of nutrients to grow. A slow-release fertilizer will provide a steady supply of nutrients over time.
* Water: Of course! Water is essential for all plant life.
* Sunlight: Corn needs at least 6-8 hours of direct sunlight per day. Choose a sunny spot for your bag.
* Optional: Stakes or support: As your corn plants grow tall, they may need some support to prevent them from falling over, especially in windy conditions.
* Optional: Mulch: Mulch helps to retain moisture in the soil and suppress weeds.
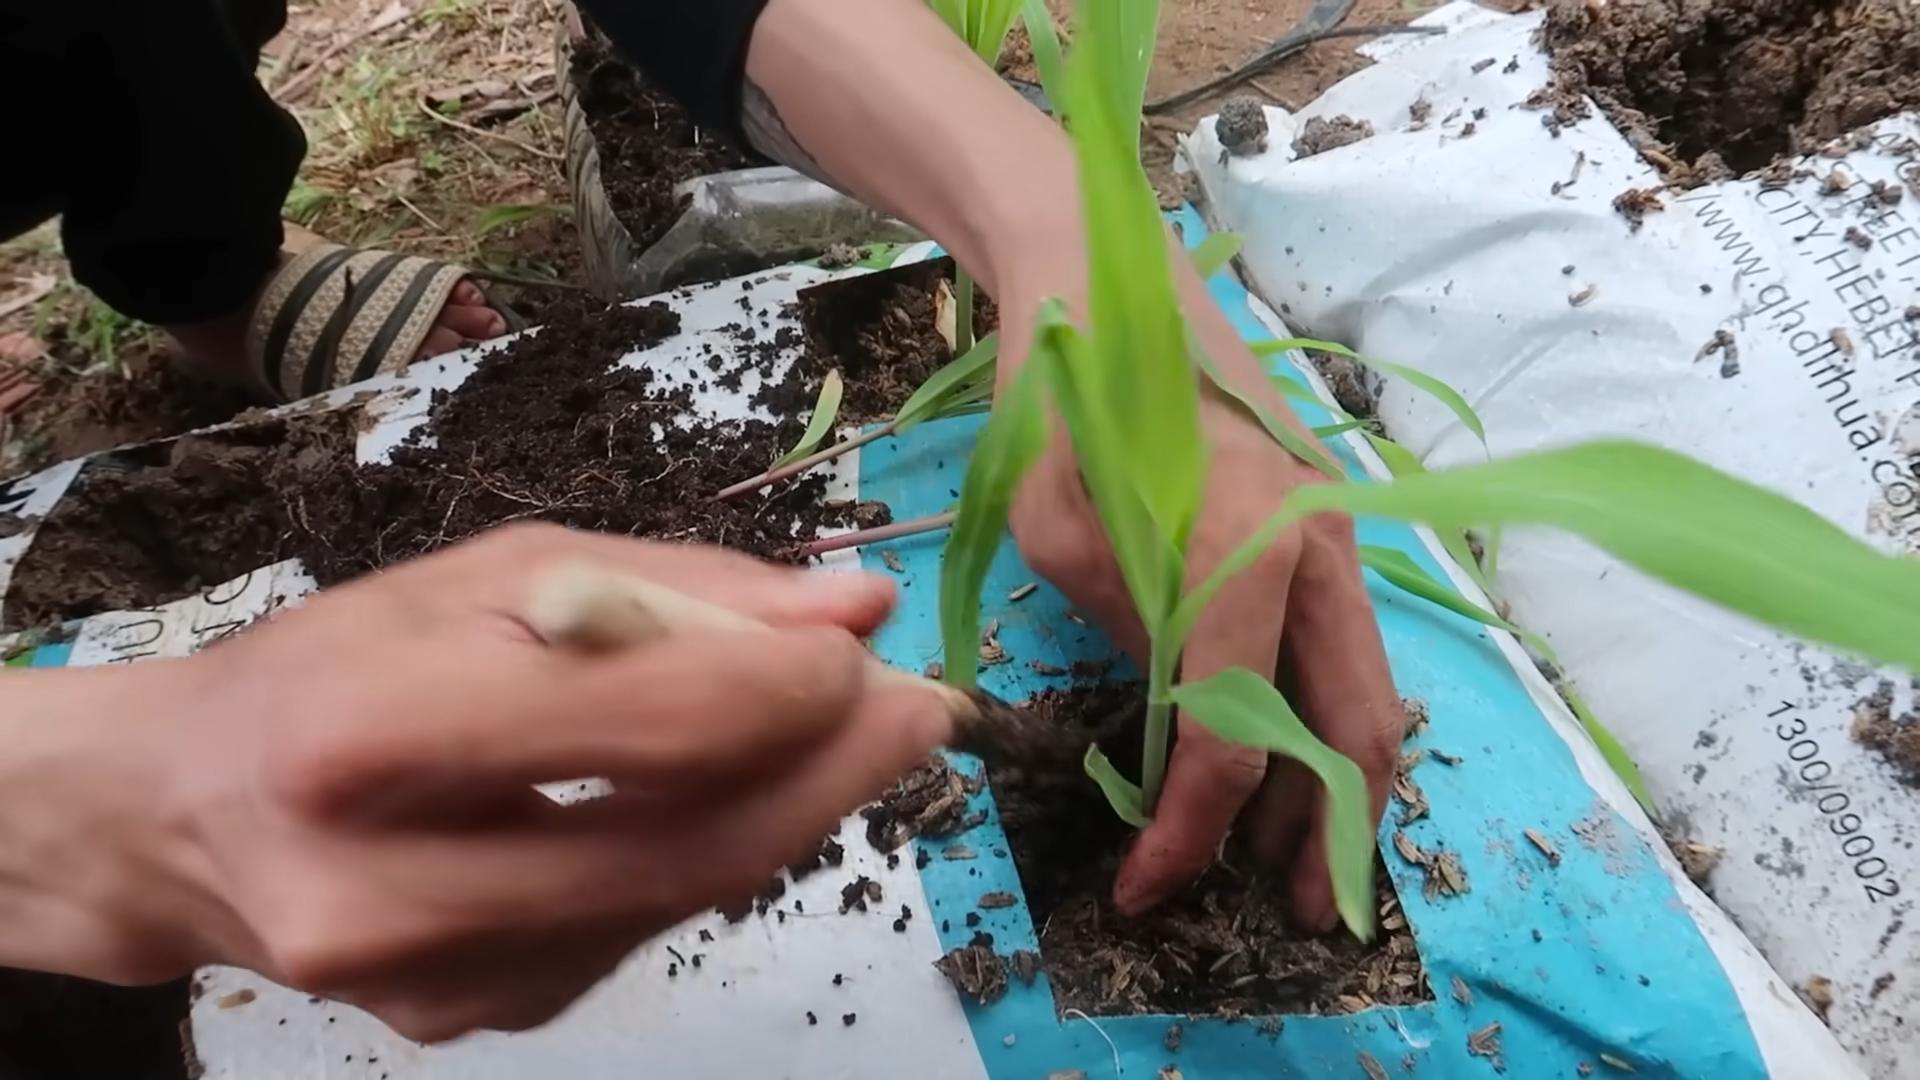
Step-by-Step Instructions: Planting Your Corn
Now that we have everything we need, let’s get planting!
1. Prepare the Bag: If you’re using a plastic bag, poke several drainage holes in the bottom. This is crucial to prevent waterlogging, which can rot the roots. If you’re using a burlap sack, drainage is usually less of an issue.
2. Mix the Soil: In a large container or wheelbarrow, mix your potting mix and compost together. A good ratio is about 2 parts potting mix to 1 part compost. This will create a rich, well-draining soil for your corn.
3. Fill the Bag: Fill the bag with the soil mixture, leaving about 4-6 inches of space at the top. This space will help prevent soil from spilling out when you water.
4. Plant the Seeds: Corn needs to be planted in blocks rather than rows for proper pollination. Plant your corn seeds about 1-2 inches deep and 4-6 inches apart in a grid pattern. I usually plant about 6-8 seeds in a 20-gallon bag. Planting more seeds than you need ensures you’ll get a good stand of corn, even if some seeds don’t germinate.
5. Water Thoroughly: After planting, water the bag thoroughly until the soil is evenly moist. Be careful not to overwater, as this can cause the seeds to rot.
6. Add Slow-Release Fertilizer: Sprinkle a slow-release fertilizer over the soil surface according to the package directions. Gently mix it into the top inch of soil.
7. Mulch (Optional): Add a layer of mulch, such as straw or wood chips, to the soil surface. This will help retain moisture and suppress weeds.
8. Place in a Sunny Location: Move the bag to a sunny location that receives at least 6-8 hours of direct sunlight per day.
9. Water Regularly: Keep the soil consistently moist, but not soggy. Water deeply whenever the top inch of soil feels dry to the touch. The frequency of watering will depend on the weather and the type of soil you’re using.
Caring for Your Growing Corn
Once your corn seeds have sprouted, it’s time to focus on providing the care they need to thrive.
1. Thinning: After the seedlings have emerged and have a few sets of leaves, thin them out to the strongest plants. Aim for about 8-12 inches between plants. This will give each plant enough room to grow and develop properly. Don’t just pull out the unwanted seedlings; gently snip them off at the soil line to avoid disturbing the roots of the remaining plants.
2. Watering: Corn needs consistent moisture, especially during hot weather. Water deeply whenever the top inch of soil feels dry. Avoid overhead watering, as this can increase the risk of fungal diseases. Instead, water at the base of the plants.
3. Fertilizing: Corn is a heavy feeder, so it needs regular fertilization. In addition to the slow-release fertilizer you added at planting, you can also supplement with a liquid fertilizer every 2-3 weeks. Choose a fertilizer that’s high in nitrogen, which is essential for leaf growth.
4. Weeding: Keep the bag free of weeds, as they can compete with your corn plants for nutrients and water. Hand-pull any weeds that emerge.
5. Supporting: As your corn plants grow tall, they may need some support to prevent them from falling over, especially in windy conditions. You can use stakes or a tomato cage to provide support. Gently tie the corn stalks to the stakes with twine.
6. Pollination: Corn is wind-pollinated, so it’s important to ensure that the plants are close enough together for pollination to occur. If you’re growing corn in a bag, you may need to hand-pollinate the plants to ensure a good harvest. To hand-pollinate, gently shake the tassels (the male flowers at the top of the plant) to release pollen. Then, brush the pollen onto the silks (the female flowers that emerge from the developing ears of corn).
7. Pest and Disease Control: Keep an eye out for pests and diseases. Common corn pests include corn earworms, aphids, and spider mites. Common corn diseases include rust and leaf blight. If you notice any signs of pests or diseases, take action immediately. You can use organic pesticides or fungicides to control these problems.
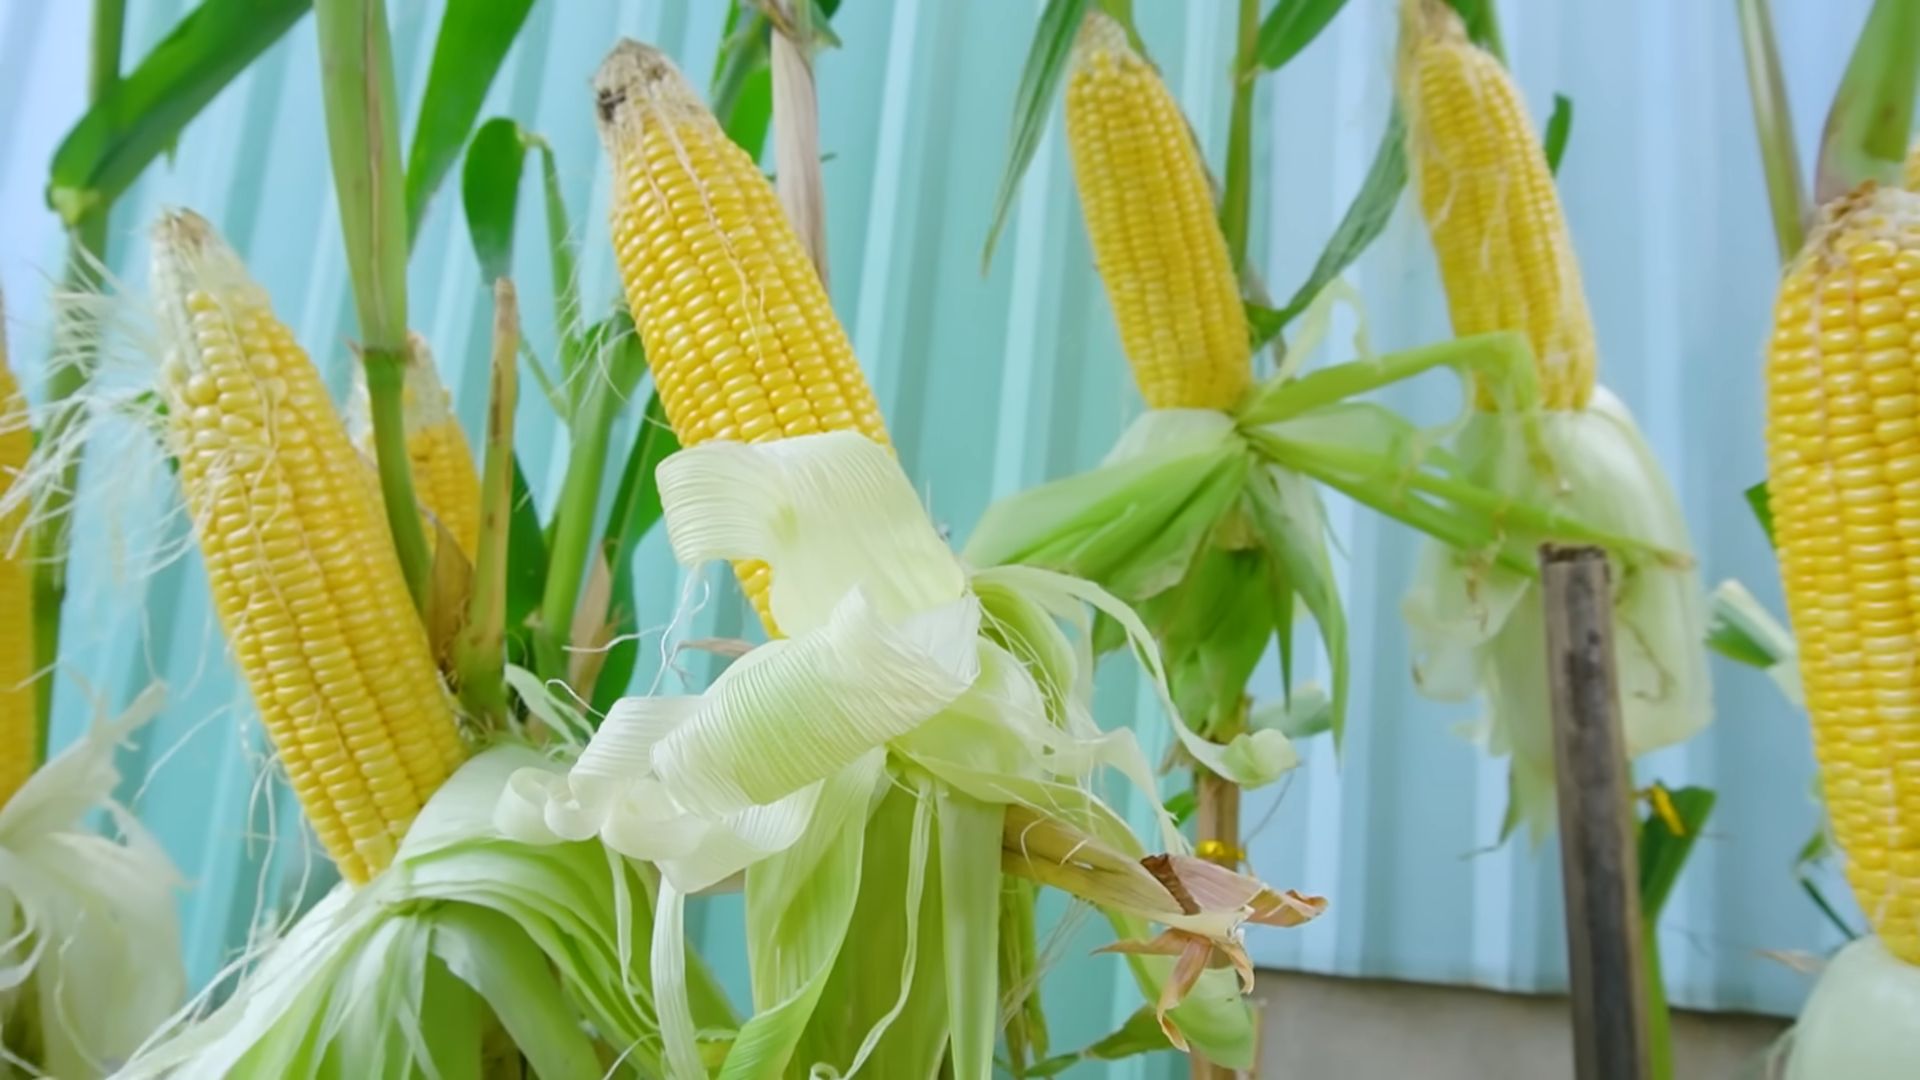
Harvesting Your Corn
The moment we’ve all been waiting for! Harvesting your homegrown corn is incredibly satisfying.
1. Timing: The timing of your corn harvest will depend on the variety you’re growing. Sweet corn is typically ready to harvest about 60-90 days after planting. Popcorn and ornamental corn take longer to mature.
2. Signs of Ripeness: There are several signs that your corn is ready to harvest. The silks will turn brown and dry, and the ears will feel plump and full. You can also gently peel back the husk to check the kernels. The kernels should be plump and milky.
3. Harvesting: To harvest your corn, grasp the ear firmly and twist it downward. The ear should snap off easily from the stalk.
4. Enjoy! Once you’ve harvested your corn, you can enjoy it fresh, grilled, boiled, or roasted. You can also freeze or can your corn for later use.
Troubleshooting Tips
Even with the best planning, sometimes things don’t go exactly as expected. Here are a few common problems you might encounter and how to address them:
* Poor Germination: If your corn seeds aren’t germinating, it could be due to several factors. The soil may be too cold, too wet, or too dry. Make sure the soil is consistently moist but not soggy. You can also try starting the seeds indoors in a warm location.
* Yellowing Leaves: Yellowing leaves can be a sign of nutrient deficiency. Corn is a heavy feeder, so it needs plenty of nutrients to grow. Make sure you’re fertilizing regularly with a fertilizer that’s high in nitrogen.
* Stunted Growth: Stunted growth can be caused by a variety of factors, including poor soil, lack of sunlight, and pests or diseases. Make sure your corn plants are getting enough sunlight and water, and that the soil is well-draining.
* Poor Pollination: If your corn ears aren’t filling out properly, it could be due to poor pollination. Corn is wind-pollinated, so it’s important to ensure that the plants are close enough together for pollination to occur. You can also hand-pollinate the plants to ensure a good harvest.
* Pests and Diseases: Keep an eye out for pests and diseases. Common corn pests include corn earworms, aphids, and spider mites. Common
Conclusion
So, there you have it! Growing corn in a bag might sound unconventional, but it’s a game-changer for small spaces, limited gardens, or even just for the sheer fun of trying something new. This DIY corn bag growing method offers a surprisingly effective way to cultivate your own delicious corn, right at your doorstep.
Why is this a must-try? Because it democratizes gardening. You don’t need acres of land or a green thumb passed down through generations. All you need is a bag, some soil, corn seeds, and a little bit of sunshine. It’s incredibly accessible, cost-effective, and a fantastic learning experience for gardeners of all levels. Plus, the satisfaction of harvesting your own homegrown corn, knowing you nurtured it from seed to cob, is simply unparalleled.
But the beauty of this method lies in its adaptability. Feel free to experiment! Try different varieties of corn – sweet corn, popcorn, even ornamental corn. Consider adding companion plants like beans or squash to your bag to create a mini-ecosystem. You can also adjust the size of the bag depending on the space you have available and the number of corn stalks you want to grow. Remember to ensure proper drainage by adding extra holes if needed, especially in wetter climates.
Don’t be afraid to get creative with your soil mix. While a standard potting mix works well, you can enrich it with compost, aged manure, or other organic matter to boost nutrient levels and improve drainage. Observe your plants closely and adjust your watering and fertilizing schedule as needed. Remember, each environment is unique, and what works for one gardener might need tweaking for another.
This DIY corn bag growing technique isn’t just about growing corn; it’s about connecting with nature, learning about the life cycle of plants, and enjoying the fruits (or in this case, vegetables!) of your labor. It’s a sustainable and rewarding way to supplement your diet and reduce your reliance on store-bought produce.
We wholeheartedly encourage you to give this method a try. It’s a fun, educational, and ultimately delicious project that will bring joy to your garden and your table. And most importantly, we want to hear about your experience! Share your photos, tips, and challenges in the comments below. Let’s build a community of corn bag growers and learn from each other. What variety of corn did you choose? What challenges did you face, and how did you overcome them? Your insights could help other gardeners succeed and inspire even more people to embrace this innovative growing method. So, grab a bag, some seeds, and get growing! We can’t wait to see your corn bag creations.
Frequently Asked Questions (FAQ)
What kind of bag should I use for corn bag growing?
The best type of bag to use is a large, sturdy grow bag made of fabric or a heavy-duty plastic bag. Fabric grow bags are preferable because they allow for better drainage and aeration, which is crucial for healthy root development. Look for bags that are at least 10-15 gallons in size to provide enough space for the corn roots to grow. If you’re using a plastic bag, make sure to poke plenty of drainage holes in the bottom to prevent waterlogging. Avoid using bags that have been used for chemicals or other potentially harmful substances.
How many corn plants can I grow in one bag?
The number of corn plants you can grow in one bag depends on the size of the bag and the variety of corn you’re growing. As a general rule, you can plant 3-4 corn plants in a 10-15 gallon bag. It’s important to give each plant enough space to grow and develop properly. Overcrowding can lead to stunted growth and reduced yields. If you’re growing a larger variety of corn, you may want to limit yourself to 2-3 plants per bag.
What type of soil should I use for corn bag growing?
Corn thrives in well-draining, nutrient-rich soil. A good potting mix is a great starting point. You can amend it with compost, aged manure, or other organic matter to improve its fertility and drainage. Avoid using heavy clay soil, as it can become waterlogged and suffocate the roots. A slightly acidic to neutral pH (around 6.0-7.0) is ideal for corn growth.
How often should I water my corn bag?
Watering frequency depends on the weather, the size of the bag, and the type of soil you’re using. Generally, you should water your corn bag whenever the top inch of soil feels dry to the touch. Corn needs consistent moisture, especially during the tasseling and silking stages. Avoid overwatering, as this can lead to root rot. A good rule of thumb is to water deeply and less frequently, rather than shallowly and more often.
What kind of fertilizer should I use for corn bag growing?
Corn is a heavy feeder, so it’s important to provide it with adequate nutrients. A balanced fertilizer with a higher nitrogen content is ideal for promoting healthy growth. You can use a slow-release granular fertilizer or a liquid fertilizer. Follow the instructions on the fertilizer packaging for application rates. Fertilize your corn plants every 2-3 weeks during the growing season.
How much sunlight does corn need?
Corn needs at least 6-8 hours of direct sunlight per day to thrive. Choose a location for your corn bag that receives plenty of sunlight throughout the day. If you live in a particularly hot climate, you may want to provide some afternoon shade to prevent the plants from overheating.
How do I pollinate my corn plants in a bag?
Corn is wind-pollinated, so you may need to assist with pollination if your corn plants are grown in a sheltered location. When the tassels (male flowers) appear at the top of the plant, gently shake the stalks to release pollen. You can also collect pollen from the tassels and sprinkle it onto the silks (female flowers) that emerge from the developing ears of corn. Repeat this process every day for several days to ensure adequate pollination.
How long does it take to grow corn in a bag?
The time it takes to grow corn in a bag depends on the variety of corn you’re growing and the growing conditions. Generally, it takes about 60-100 days from planting to harvest. Sweet corn varieties typically mature faster than other types of corn.
How do I know when my corn is ready to harvest?
There are several signs that indicate your corn is ready to harvest. The silks will turn brown and dry, and the ears will feel plump and full. You can also peel back the husk slightly to check the kernels. The kernels should be milky and juicy. If the kernels are hard and dry, the corn is overripe.
What are some common problems with corn bag growing and how can I prevent them?
Some common problems with corn bag growing include pests, diseases, and nutrient deficiencies. To prevent pests, inspect your plants regularly and remove any insects you find. You can also use organic pest control methods, such as insecticidal soap or neem oil. To prevent diseases, ensure good air circulation and avoid overwatering. To prevent nutrient deficiencies, fertilize your plants regularly with a balanced fertilizer.
Can I reuse the soil from my corn bag for other plants?
Yes, you can reuse the soil from your corn bag for other plants, but it’s important to amend it with fresh compost or other organic matter to replenish the nutrients that were used by the corn plants. You may also want to test the soil pH and adjust it as needed for the plants you’re planning to grow.
Is corn bag growing suitable for all climates?
Corn bag growing can be adapted to various climates, but it’s most successful in regions with warm summers and plenty of sunshine. In colder climates, you may need to start your corn seeds indoors and transplant them into the bags after the last frost. You may also need to provide additional protection from frost or cold temperatures. In hotter climates, you may need to provide some afternoon shade to prevent the plants from overheating.
Leave a Comment