
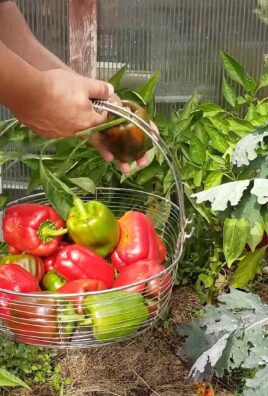
Upcycling plastic home garden projects are not just a trendy way to spend your weekend; they’re a fantastic way to contribute to a greener planet while beautifying your living space! Have you ever looked at that pile of empty plastic bottles and thought, “There has to be a better use for these than just throwing them away?” I know I have! For centuries, humans have found innovative ways to repurpose materials, from ancient civilizations building structures with recycled stone to modern artists creating masterpieces from discarded objects.
But in our current era of plastic waste, the need for creative solutions like upcycling plastic home garden ideas is more critical than ever. Landfills are overflowing, and our oceans are choking on plastic debris. That’s where this DIY guide comes in! I’m going to show you some simple, fun, and incredibly effective ways to transform those unwanted plastic containers into thriving mini-gardens.
Why is this important? Because gardening shouldn’t be an exclusive hobby reserved for those with sprawling backyards. With a little ingenuity, anyone can enjoy the therapeutic benefits of nurturing plants, even in the smallest of apartments. Plus, you’ll be reducing your environmental footprint and saving money on expensive planters. So, grab your scissors, gather your plastic stash, and let’s get started on creating your very own upcycled plastic paradise!
Growing Sweet Potatoes Indoors: From Sprout to Spud!
Okay, so you want to grow sweet potatoes indoors? Awesome! It’s a surprisingly rewarding project, and while you won’t get a massive harvest like a commercial farm, you can definitely enjoy some homegrown goodness. I’m going to walk you through the whole process, from sprouting your sweet potato to (hopefully!) harvesting some delicious tubers.
Choosing Your Sweet Potato and Getting Started
First things first, you need a sweet potato! Not just any sweet potato will do, though.
* Opt for Organic: I highly recommend using an organic sweet potato. Non-organic ones are often treated with growth inhibitors to prevent sprouting, which is exactly what we *want* them to do!
* Look for Firmness: Choose a sweet potato that’s firm to the touch, without any soft spots, bruises, or signs of decay.
* Size Matters (Sort Of): A medium-sized sweet potato is ideal for starting. A giant one might take up too much space, and a tiny one might not have enough energy to produce good sprouts.
Now, let’s get that sweet potato ready to sprout! There are two main methods: water propagation and soil propagation. I personally prefer water propagation because it’s easier to monitor the root development, but I’ll explain both.
Water Propagation: The Glass of Water Method
This is the method I usually use, and it’s super simple.
1. Gather Your Supplies: You’ll need your sweet potato, a glass or jar (wide enough to hold the potato), toothpicks, and water.
2. Prepare the Sweet Potato: Give your sweet potato a good wash to remove any dirt.
3. Insert Toothpicks: Insert 3-4 toothpicks around the middle of the sweet potato. These will act as supports to suspend the potato in the water.
4. Submerge the Bottom Half: Fill the glass or jar with water, making sure the bottom half of the sweet potato is submerged. The top half should remain dry.
5. Find a Sunny Spot: Place the glass in a warm, sunny location. A windowsill is perfect!
6. Change the Water Regularly: Change the water every 2-3 days to prevent mold and bacteria growth. This is really important!
7. Wait Patiently: This is the hardest part! It can take anywhere from a few weeks to a month for sprouts (slips) to emerge. Be patient and keep the water fresh. You should see roots forming first, followed by little sprouts appearing on the top of the potato.
Soil Propagation: Burying the Potato
This method is a bit more straightforward, but you can’t see the root development as easily.
1. Gather Your Supplies: You’ll need your sweet potato, a pot (at least 8 inches in diameter), potting soil, and water.
2. Prepare the Pot: Fill the pot with potting soil, leaving a couple of inches of space at the top.
3. Bury the Sweet Potato: Bury the sweet potato horizontally in the soil, leaving the top third exposed.
4. Water Thoroughly: Water the soil thoroughly until it’s moist but not soggy.
5. Find a Sunny Spot: Place the pot in a warm, sunny location.
6. Keep the Soil Moist: Keep the soil consistently moist, but don’t overwater.
7. Wait Patiently: Again, patience is key! It can take several weeks for sprouts to emerge.
Harvesting and Planting the Slips
Once your sweet potato has developed slips (the sprouts), it’s time to harvest them and plant them in their own pots.
1. Wait for Size: Let the slips grow to be about 6-8 inches long before harvesting. This ensures they have a good chance of survival.
2. Gently Remove the Slips: Carefully twist or cut the slips off the sweet potato. If you’re using the water propagation method, you can gently pull them off. If you’re using the soil method, you might need to dig around the base of the slip to cut it off.
3. Rooting the Slips (Optional but Recommended): You can plant the slips directly into soil, but I’ve found that rooting them in water first increases their success rate. Place the slips in a glass of water, making sure the bottom inch or two is submerged. Roots should develop within a week or two.
4. Prepare Your Pots: You’ll need individual pots for each slip. Choose pots that are at least 6 inches in diameter. Fill them with a well-draining potting mix.
5. Plant the Slips: Make a small hole in the soil and gently plant the slip, burying the roots and the bottom inch or two of the stem.
6. Water Thoroughly: Water the newly planted slips thoroughly.
7. Provide Support (Optional): If your slips are a bit leggy, you can provide them with a small stake or trellis for support.
Caring for Your Sweet Potato Plants
Now that your slips are planted, it’s time to provide them with the care they need to thrive.
* Sunlight: Sweet potatoes need plenty of sunlight, at least 6-8 hours per day. If you don’t have a sunny window, you might need to supplement with a grow light.
* Watering: Water your sweet potato plants regularly, keeping the soil consistently moist but not soggy. Overwatering can lead to root rot.
* Fertilizing: Feed your sweet potato plants with a balanced fertilizer every 2-3 weeks. Look for a fertilizer that’s high in phosphorus and potassium, which are essential for tuber development.
* Temperature: Sweet potatoes prefer warm temperatures, between 70-85°F (21-29°C).
* Humidity: While not essential, sweet potatoes appreciate a bit of humidity. You can increase humidity by misting the plants regularly or placing a tray of water near them.
* Pest Control: Keep an eye out for pests like aphids, spider mites, and whiteflies. Treat any infestations promptly with insecticidal soap or neem oil.
Choosing the Right Pot and Soil
This is crucial for a successful indoor sweet potato harvest.
* Pot Size: Remember, sweet potatoes need room to grow! A pot that’s at least 12 inches deep and 12 inches in diameter is ideal. Larger is always better! You can even use a large container or tub.
* Drainage: Make sure your pot has good drainage holes. Sweet potatoes don’t like to sit in soggy soil.
* Soil Type: Use a well-draining potting mix that’s rich in organic matter. You can amend your potting mix with compost or aged manure. A slightly acidic soil pH (around 6.0-6.5) is ideal.
Encouraging Tuber Development
This is where the magic happens! Here are some tips to encourage your sweet potato plants to produce tubers.
* Hilling: As your sweet potato plants grow, you can “hill” the soil around the base of the stems. This encourages more roots to develop, which can lead to more tubers. Simply add more soil to the pot, covering the lower part of the stems.
* Pruning: Pruning the vines can help redirect the plant’s energy towards tuber development. Trim back any long, rambling vines.
* Phosphorus and Potassium: As mentioned earlier, phosphorus and potassium are essential for tuber development. Make sure your fertilizer is rich in these nutrients. Bone meal is a good source of phosphorus, and wood ash is a good source of potassium.
When and How to Harvest
This is the moment you’ve been waiting for!
* Timing: Sweet potatoes typically take about 90-120 days to mature. You’ll know they’re ready to harvest when the leaves start to turn yellow and die back.
* Harvesting: Gently dig around the base of the plant to unearth the sweet potatoes. Be careful not to damage the tubers.
* Curing: Curing sweet potatoes is essential for developing their sweetness and improving their storage life. After harvesting, brush off any excess dirt and place the sweet potatoes in a warm, humid place (around 80-85°F or 27-29°C) for about a week. This allows the skins to harden and any minor cuts or bruises to heal.
* Storage: Store cured sweet potatoes in a cool, dry, and dark place (around 55-60°F or 13-16°C). They should keep for several months.
Troubleshooting
Even with the best care, you might encounter some problems along the way. Here are some common issues and how to address them.
* Yellowing Leaves: This could be a sign of overwatering, underwatering, nutrient
Conclusion
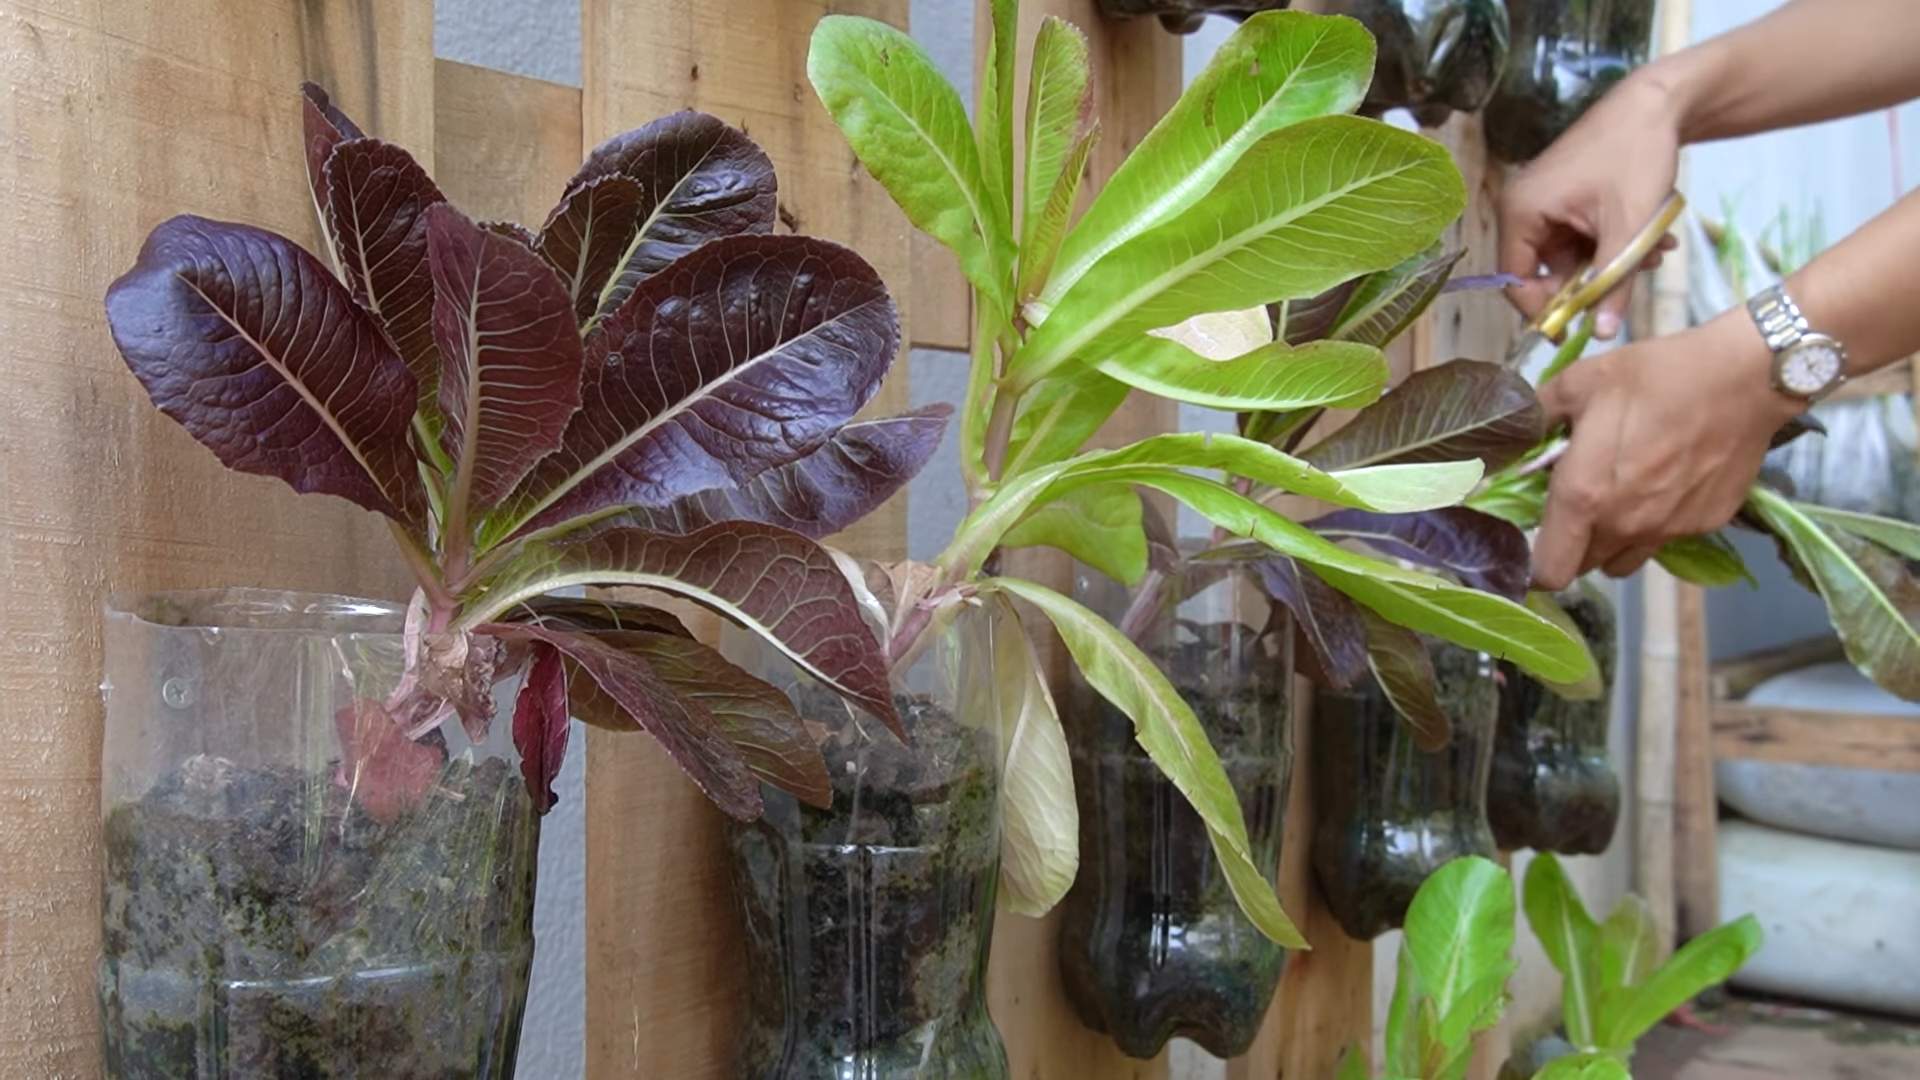
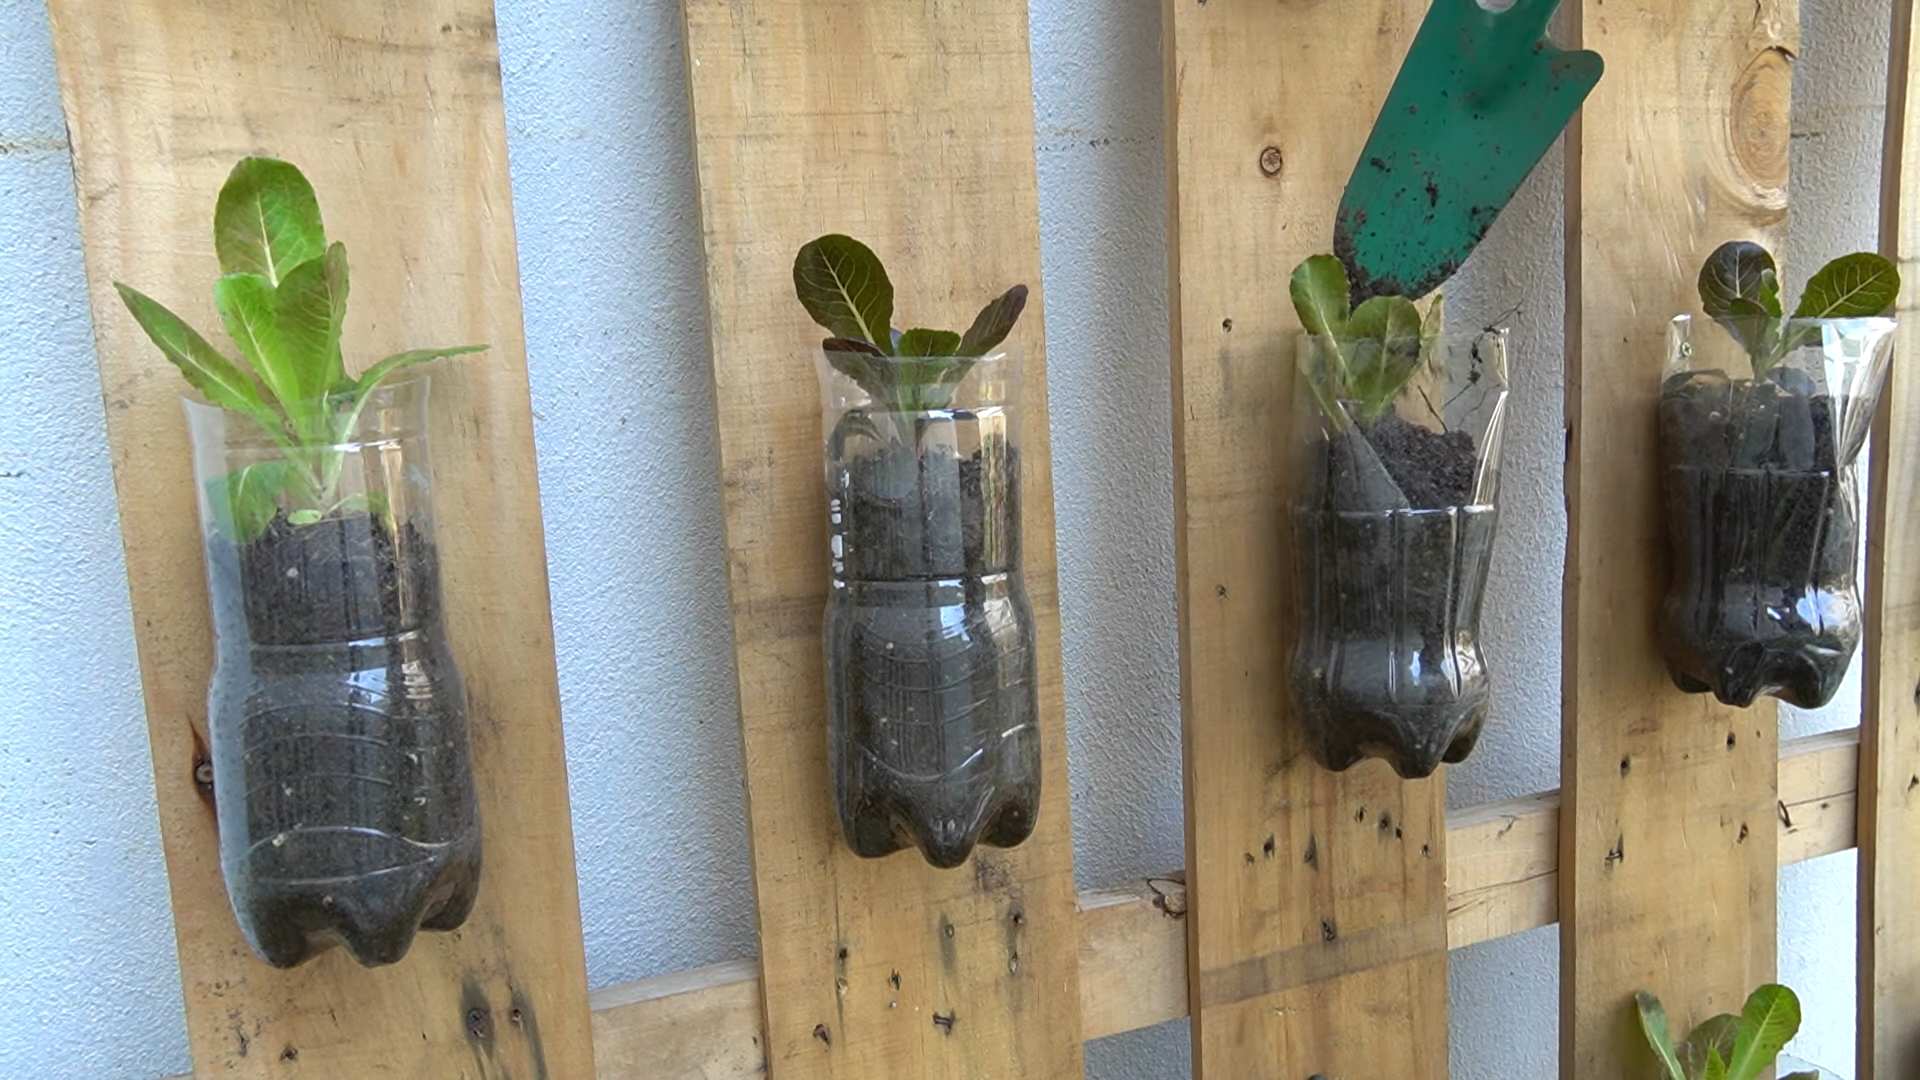
So, there you have it! Transforming discarded plastic into vibrant, functional elements for your home garden isn’t just a trendy DIY project; it’s a powerful way to reduce waste, save money, and add a unique, personal touch to your outdoor space. We’ve explored a range of ideas, from simple planters crafted from plastic bottles to more ambitious projects like vertical gardens built from repurposed containers. The possibilities are truly endless, limited only by your imagination and the amount of plastic you’re willing to rescue from the landfill.
Why is this upcycling plastic home garden approach a must-try? Because it’s a win-win-win! You’re actively contributing to a more sustainable environment by diverting plastic waste. You’re saving money by avoiding the purchase of expensive new gardening supplies. And you’re unleashing your creativity, crafting one-of-a-kind pieces that reflect your personal style and passion for gardening.
But don’t stop there! Feel free to experiment with different types of plastic, different painting techniques, and different planting arrangements. Consider adding drainage holes to your planters to prevent waterlogging. Use colorful plastic bottles to create eye-catching hanging baskets. Build a miniature greenhouse from recycled plastic sheeting. The beauty of this DIY approach is its adaptability.
Here are a few variations to spark your imagination:
* Herb Spiral from Plastic Bottles: Cut the bottoms off plastic bottles and arrange them in a spiral shape, securing them with wire or strong adhesive. Fill with soil and plant your favorite herbs.
* Self-Watering Planters: Create a self-watering system by inverting a plastic bottle inside a larger container, using the bottle’s neck to wick water up to the soil.
* Vertical Garden Wall: Attach plastic containers to a wooden pallet or frame to create a stunning vertical garden wall, perfect for small spaces.
* Seedling Starters: Use plastic yogurt cups or egg cartons as seedling starters before transplanting them into larger upcycled containers.
* Plastic Bottle Bird Feeder: Convert a plastic bottle into a bird feeder by cutting holes and inserting perches. Fill with birdseed and hang it in your garden.
We strongly encourage you to give this upcycling plastic home garden a try. It’s a rewarding experience that will not only beautify your outdoor space but also make you feel good about contributing to a more sustainable future.
And most importantly, we want to hear about your experiences! Share your creations, your challenges, and your successes with us. Post photos of your upcycled garden projects on social media using the hashtag #UpcycledGarden or #PlasticToPlanters. Let’s inspire each other to find new and innovative ways to transform waste into beauty. Your ingenuity could be the spark that ignites someone else’s passion for sustainable gardening. So, get creative, get resourceful, and get gardening! Let’s turn trash into treasure and create thriving, eco-friendly gardens together.
Frequently Asked Questions (FAQ)
What types of plastic are safe to use for gardening?
Generally, plastics labeled with recycling codes 1 (PET or PETE), 2 (HDPE), 4 (LDPE), and 5 (PP) are considered relatively safe for gardening purposes. These plastics are less likely to leach harmful chemicals into the soil, especially if they are not exposed to direct sunlight for extended periods. However, it’s always best to avoid using plastics with recycling codes 3 (PVC) and 6 (PS or Styrofoam) as they may contain potentially harmful chemicals. Always thoroughly clean any plastic container before using it for planting. If you are concerned about leaching, consider lining the inside of the container with a natural material like burlap or coconut coir.
How do I properly clean plastic containers before using them for planting?
Cleaning plastic containers is crucial to remove any residue or contaminants that could harm your plants. Start by rinsing the containers with warm, soapy water. Use a mild dish soap and a scrub brush to remove any dirt, grime, or food residue. For stubborn stains or odors, you can soak the containers in a solution of water and baking soda or vinegar. After scrubbing, rinse the containers thoroughly with clean water to remove all traces of soap. Allow the containers to air dry completely before using them for planting. If the containers previously held chemicals, it’s best to avoid using them for edible plants.
How do I ensure proper drainage in my upcycled plastic planters?
Proper drainage is essential to prevent waterlogging and root rot in your plants. If your upcycled plastic container doesn’t have drainage holes, you’ll need to create some. Use a drill or a sharp knife to make several holes in the bottom of the container. The size and number of holes will depend on the size of the container and the type of plants you’re growing. For larger containers, you may also want to add a layer of gravel or pebbles to the bottom to improve drainage. You can also use a layer of landscape fabric to prevent the soil from washing out through the drainage holes.
Will the plastic degrade in the sun and release harmful chemicals into the soil?
Prolonged exposure to sunlight can cause plastic to degrade over time, potentially releasing small amounts of chemicals into the soil. However, the risk is generally low, especially with the types of plastic recommended for gardening (PET, HDPE, LDPE, PP). To minimize the risk, you can use UV-resistant paints or coatings on the plastic containers. You can also place the containers in shaded areas or use them for plants that prefer partial shade. Lining the inside of the container with a natural material like burlap can also help to prevent direct contact between the soil and the plastic.
What types of plants are best suited for growing in upcycled plastic containers?
Many types of plants can thrive in upcycled plastic containers, depending on the size and shape of the container. Herbs, vegetables, flowers, and even small shrubs can be successfully grown in repurposed plastic. Consider the specific needs of the plants you want to grow, such as sunlight requirements, water needs, and root depth. Smaller containers are ideal for herbs, succulents, and shallow-rooted vegetables like lettuce and spinach. Larger containers can accommodate larger plants like tomatoes, peppers, and eggplants. Be sure to choose a container that is appropriately sized for the plant’s mature size.
How can I make my upcycled plastic garden look more aesthetically pleasing?
While functionality is important, aesthetics also play a role in creating a beautiful upcycled garden. You can enhance the appearance of your plastic containers by painting them with bright colors, adding decorative elements, or grouping them in visually appealing arrangements. Use stencils, stamps, or freehand designs to create unique patterns on the containers. You can also wrap the containers with natural materials like twine, burlap, or bamboo for a more rustic look. Consider using a variety of container sizes and shapes to add visual interest. Arrange the containers in tiers or clusters to create a focal point in your garden.
Where can I find inspiration for upcycling plastic in my garden?
The internet is a treasure trove of inspiration for upcycling plastic in your garden. Search online for “upcycled garden ideas,” “plastic bottle planters,” or “DIY garden projects” to find a wealth of tutorials, photos, and videos. Social media platforms like Pinterest and Instagram are also great sources of inspiration. Look for hashtags like #UpcycledGarden, #PlasticToPlanters, and #SustainableGardening to discover creative projects from gardeners around the world. Don’t be afraid to experiment and adapt ideas to suit your own style and resources.
How do I dispose of the plastic containers responsibly when I’m finished with them?
When you’re finished with your upcycled plastic containers, it’s important to dispose of them responsibly. If the containers are still in good condition, consider donating them to a local community garden or school. You can also offer them to friends or neighbors who might be interested in using them for gardening. If the containers are damaged or no longer usable, check with your local recycling center to see if they accept those types of plastic. If recycling is not an option, dispose of the containers in your regular trash. Avoid burning plastic, as it can release harmful toxins into the air.
Leave a Comment