
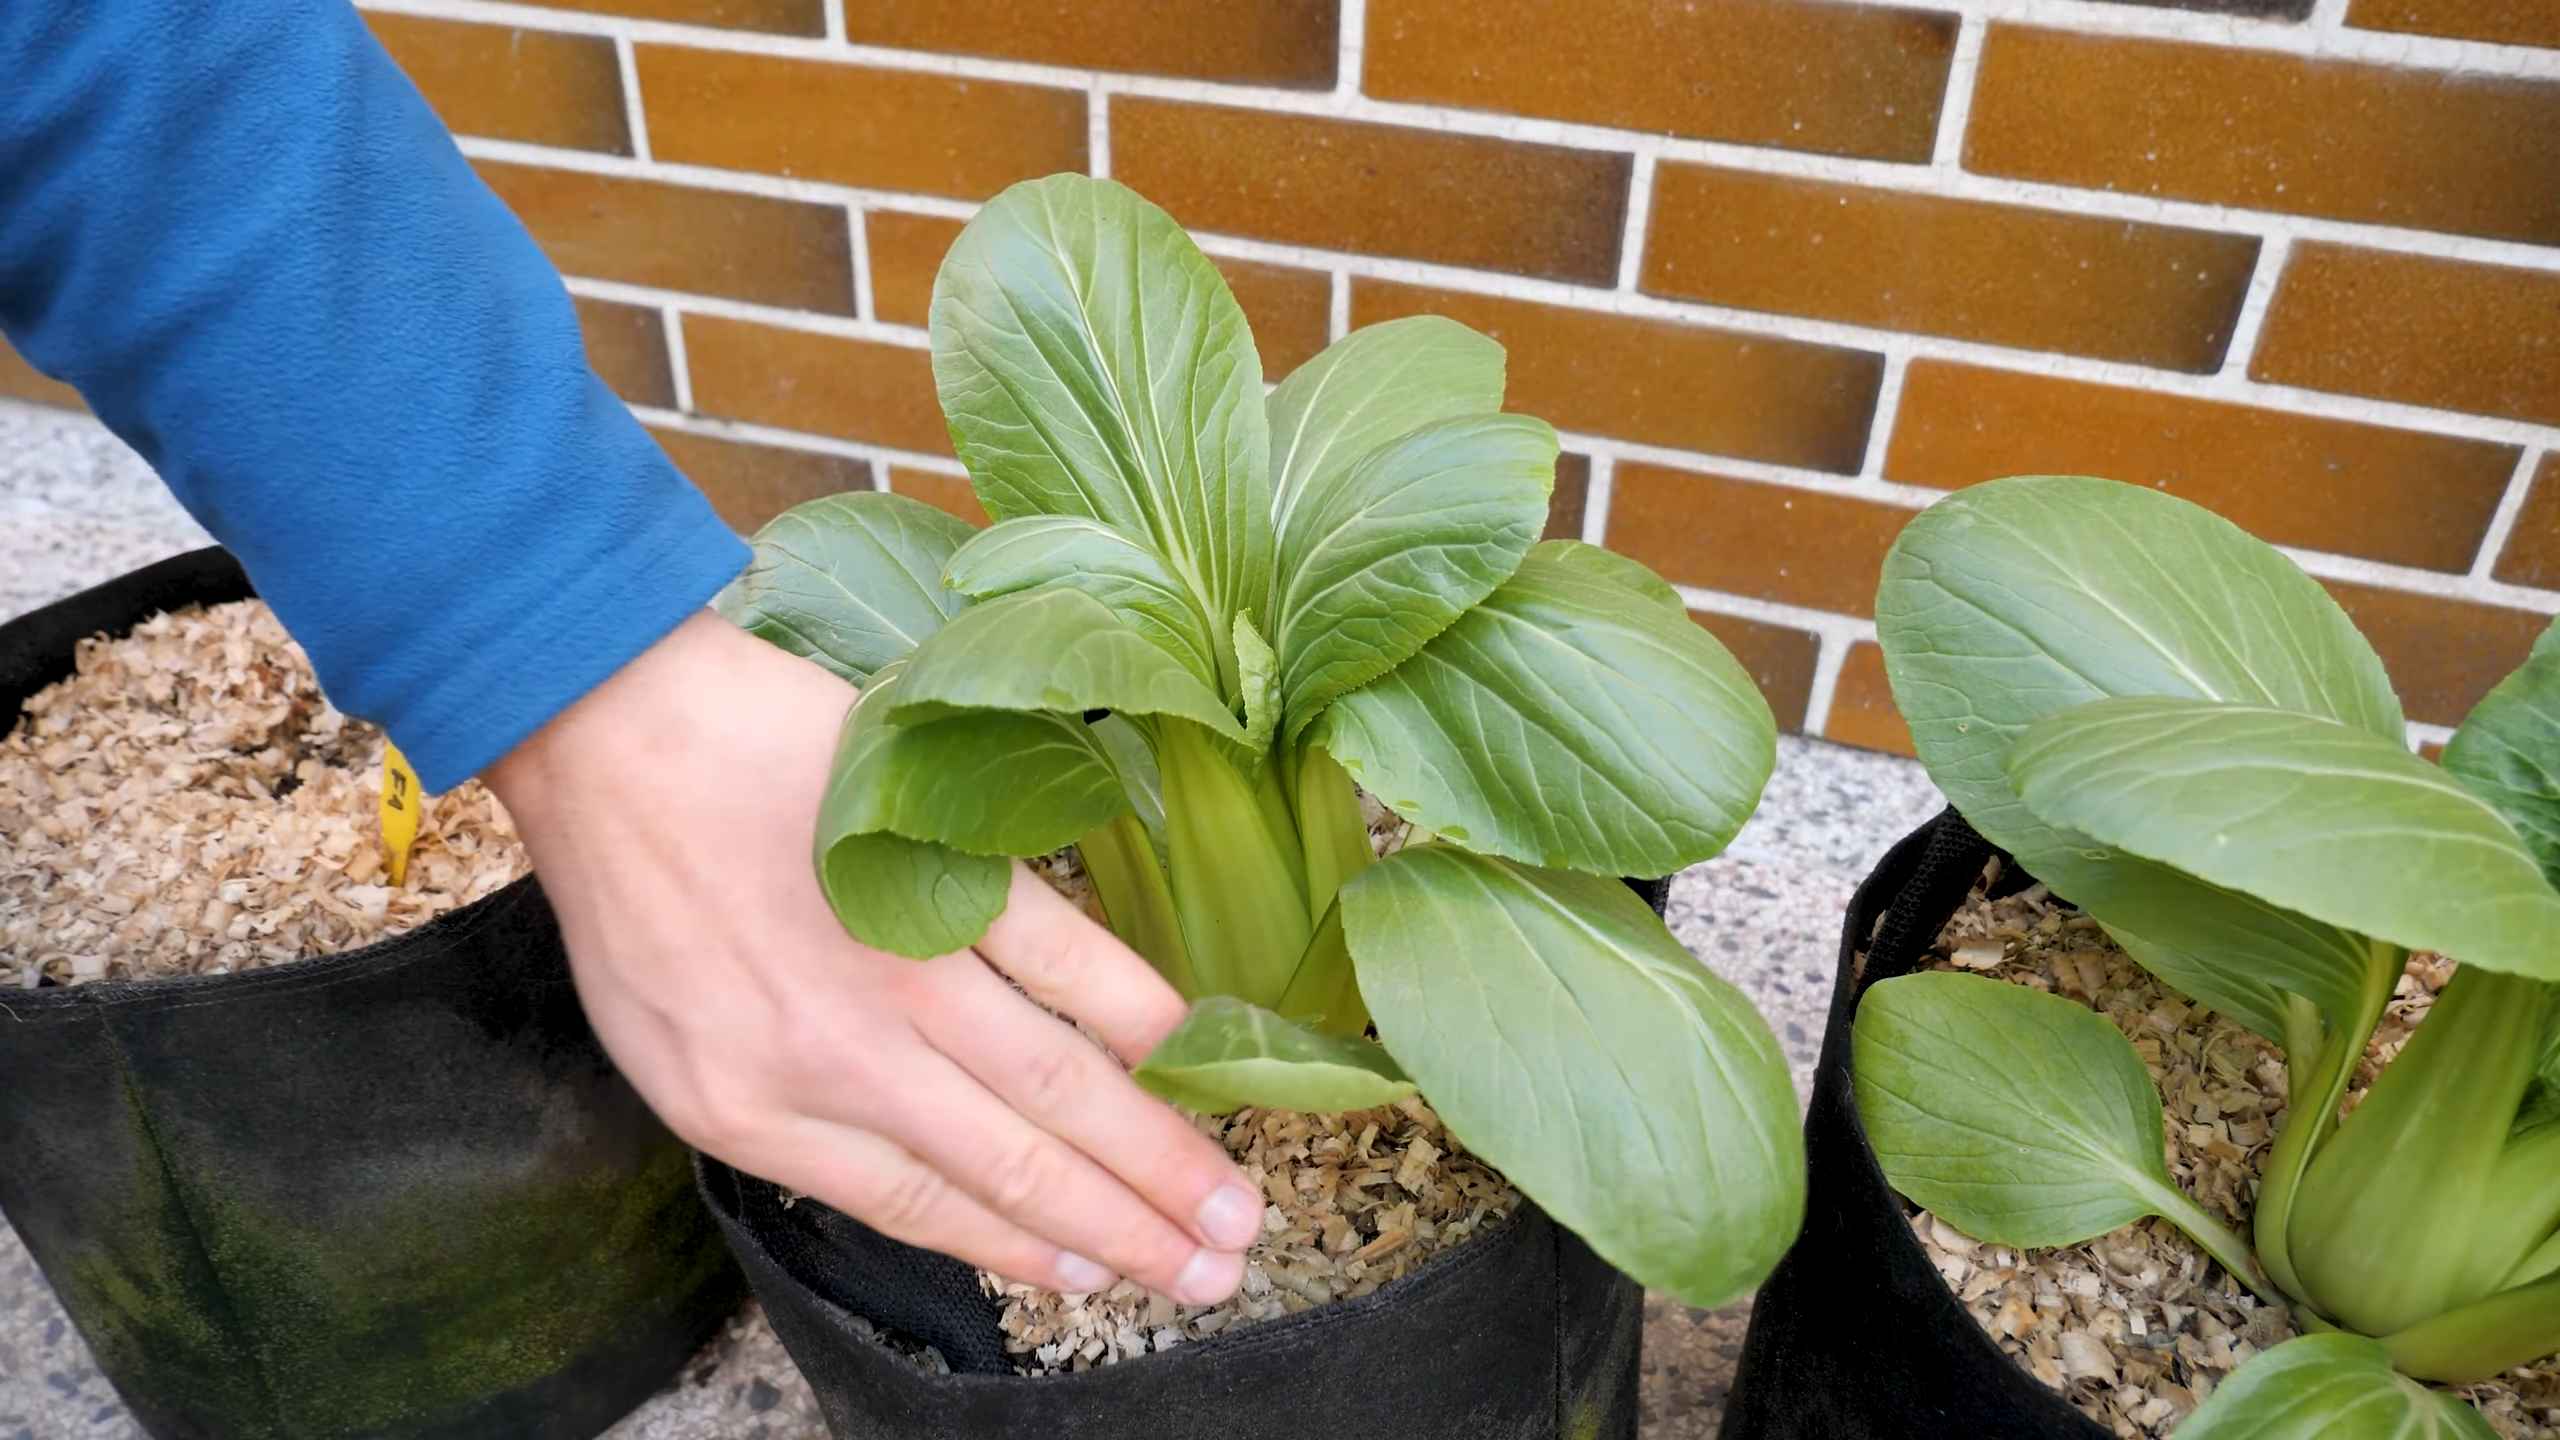
Grow Bok Choy in Bags: Imagine harvesting fresh, crisp bok choy right from your patio, even if you don’t have a sprawling garden! It’s easier than you think, and this DIY guide will show you exactly how to do it. For centuries, bok choy, also known as pak choi, has been a staple in Asian cuisine, prized for its mild flavor and nutritional benefits. From stir-fries to soups, this versatile vegetable adds a healthy and delicious touch to any meal.
But why should you grow bok choy in bags? Well, space is often a constraint for many urban dwellers, and traditional gardening can seem daunting. Growing in bags offers a fantastic solution! It’s a compact, portable, and surprisingly productive way to cultivate your own fresh produce. Plus, it gives you complete control over the soil quality and growing conditions, leading to healthier and tastier bok choy. I’m excited to share these simple tricks and hacks that will empower you to enjoy homegrown bok choy, no matter how limited your space may be. Let’s get started and unlock the secrets to a bountiful bag garden!
Grow Bok Choy in Bags: A Beginner’s Guide
Hey there, fellow gardening enthusiasts! I’m so excited to share my experience growing bok choy in bags. It’s a fantastic way to enjoy fresh, homegrown veggies, even if you don’t have a traditional garden. Plus, it’s super easy and budget-friendly! Let’s dive in!
Why Grow Bok Choy in Bags?
Before we get started, you might be wondering why bags are a good option. Well, here’s the scoop:
* Space-Saving: Perfect for balconies, patios, or small yards.
* Portability: You can easily move your bok choy around to follow the sun or protect them from harsh weather.
* Improved Drainage: Bags often provide better drainage than garden beds, preventing root rot.
* Less Weeding: Bags are less prone to weed infestations compared to open ground.
* Easy to Start: It’s a simple and accessible project for beginner gardeners.
Materials You’ll Need
Okay, let’s gather our supplies. Here’s what you’ll need to grow your own delicious bok choy in bags:
* Bags: Choose sturdy, dark-colored plastic bags (like heavy-duty garbage bags) or grow bags specifically designed for plants. Aim for bags that are at least 12-18 inches deep and wide. Fabric grow bags are great because they allow the roots to breathe.
* Potting Mix: Use a high-quality potting mix, not garden soil. Potting mix is lighter and provides better drainage. I like to use a mix that includes compost, peat moss, and perlite.
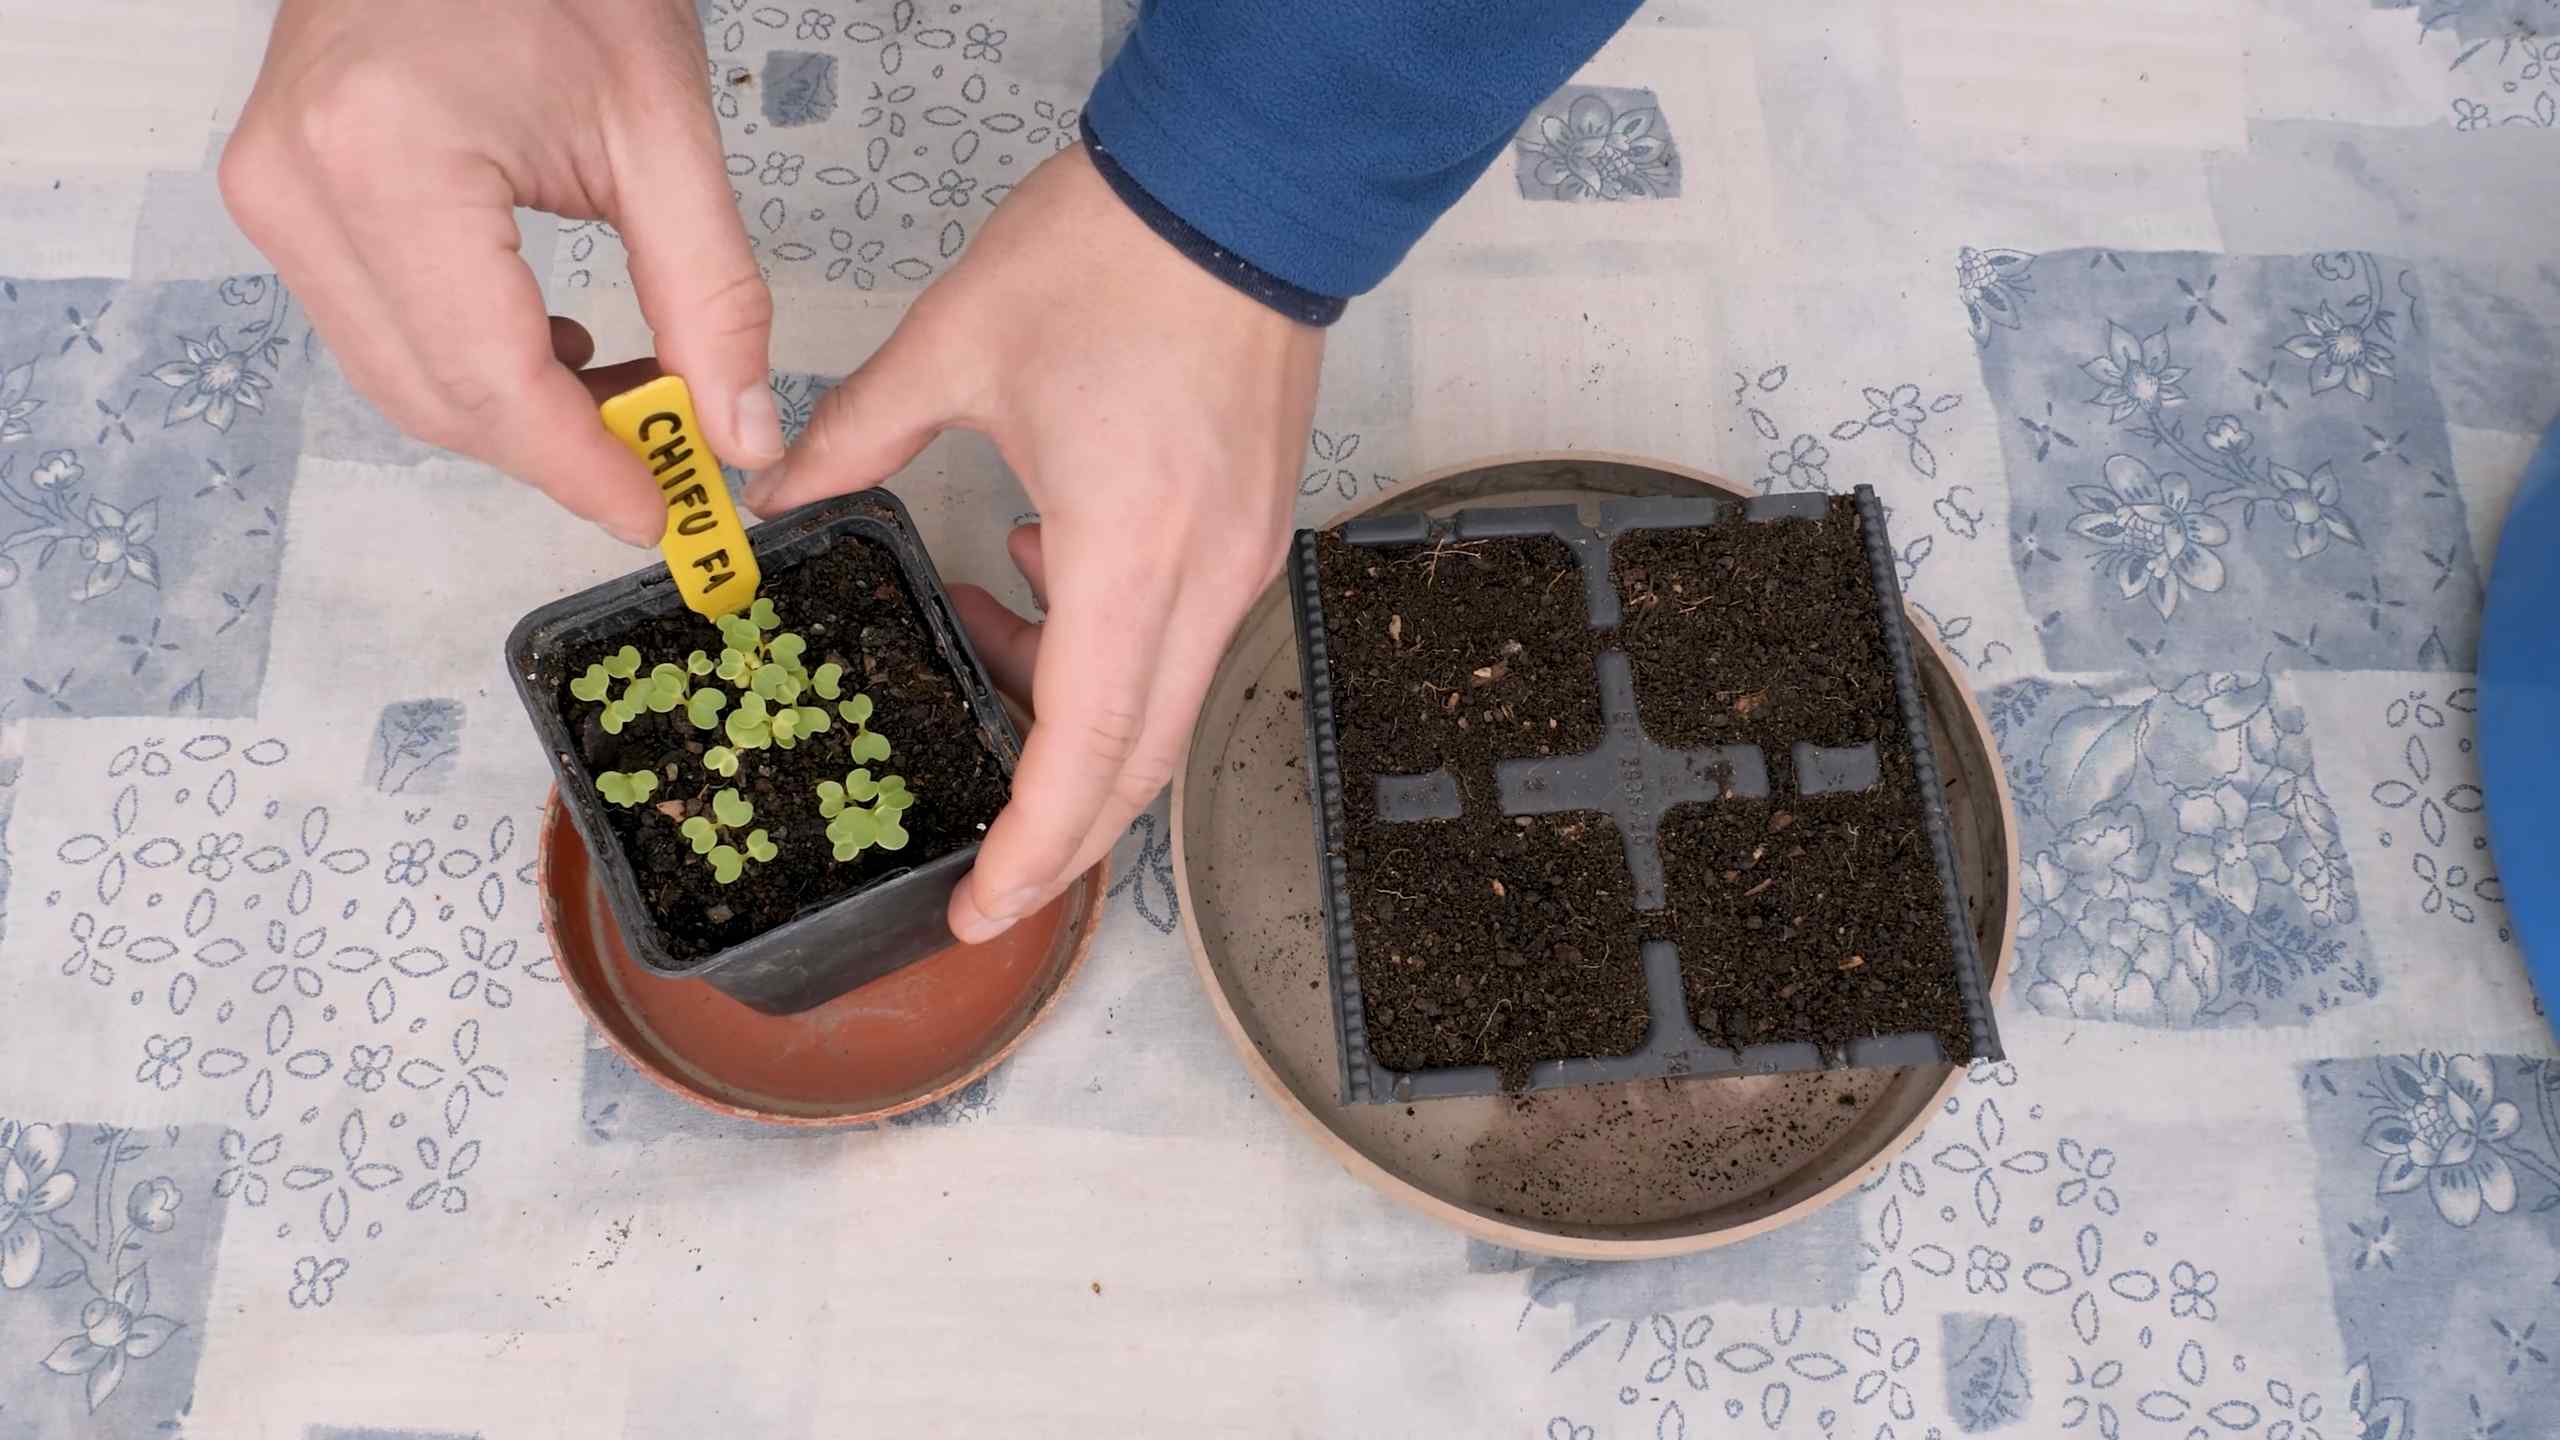
* Bok Choy Seeds or Seedlings: You can start from seeds or buy seedlings from a local nursery. Starting from seeds is more economical, but seedlings will give you a head start.
* Watering Can or Hose: For watering your bok choy.
* Fertilizer (Optional): A balanced, water-soluble fertilizer can help your bok choy thrive.
* Scissors or Knife: For making drainage holes in the bags.
* Trowel or Small Shovel: For filling the bags with potting mix.
Step-by-Step Instructions: Planting Your Bok Choy
Alright, let’s get our hands dirty! Here’s how to plant your bok choy in bags:
1. Prepare the Bags:
* First, grab your bags and lay them flat on the ground.
* Using your scissors or knife, carefully poke several drainage holes in the bottom of each bag. This is crucial to prevent waterlogging. I usually make about 6-8 holes, spaced evenly.
2. Fill the Bags with Potting Mix:
* Now, it’s time to fill the bags with potting mix.
* Use your trowel or small shovel to scoop the potting mix into the bags.
* Fill the bags almost to the top, leaving about 2-3 inches of space at the rim. This will make watering easier.
* Gently pat down the potting mix to remove any air pockets.
3. Plant the Seeds or Seedlings:
* If planting seeds:
* Follow the instructions on the seed packet for spacing and depth. Generally, you’ll want to sow the seeds about 1/4 inch deep and space them about 1-2 inches apart.
* I usually sow a few extra seeds in each bag to ensure good germination.
* Once the seedlings emerge, you can thin them out to the strongest plants.
* If planting seedlings:
* Gently remove the seedlings from their containers.
* Dig small holes in the potting mix, large enough to accommodate the root balls of the seedlings.
* Place the seedlings in the holes and gently backfill with potting mix.
* Space the seedlings about 6-8 inches apart.
4. Water Thoroughly:
* After planting, water the bags thoroughly until the water drains out of the drainage holes.
* This will help settle the potting mix and ensure that the roots are well-hydrated.
5. Choose a Sunny Location:
* Bok choy needs at least 4-6 hours of sunlight per day.
* Place your bags in a sunny location, such as a balcony, patio, or garden.
* If you live in a very hot climate, provide some afternoon shade to prevent the leaves from scorching.
Caring for Your Bok Choy
Now that your bok choy is planted, it’s time to take care of them. Here’s what you need to do:
1. Watering:
* Bok choy needs consistent moisture, but don’t overwater.
* Check the soil moisture regularly by sticking your finger into the potting mix.
* If the top inch of soil feels dry, it’s time to water.
* Water deeply, until the water drains out of the drainage holes.
* Avoid getting the leaves wet, as this can promote fungal diseases.
* Water early in the morning to allow the leaves to dry before nightfall.
2. Fertilizing (Optional):
* If you want to give your bok choy a boost, you can fertilize them every 2-3 weeks with a balanced, water-soluble fertilizer.
* Follow the instructions on the fertilizer package for dosage and application.
* I like to use a fertilizer that is high in nitrogen, as this promotes leafy growth.
3. Weeding:
* Even though bags are less prone to weeds, you may still find a few popping up.
* Remove any weeds as soon as you see them to prevent them from competing with your bok choy for nutrients and water.
4. Pest Control:
* Bok choy can be susceptible to pests such as aphids, cabbage worms, and slugs.
* Inspect your plants regularly for signs of pests.
* If you find any pests, you can try to remove them by hand or use an organic insecticide, such as neem oil or insecticidal soap.
* You can also use row covers to protect your plants from pests.
5. Sunlight Adjustment:
* Keep an eye on how much sun your bok choy is getting.
* If the leaves start to look pale or scorched, move the bags to a shadier location.
* If the plants are not growing well, move them to a sunnier location.
Harvesting Your Bok Choy
The best part of growing your own bok choy is harvesting it! Here’s how to know when your bok choy is ready to harvest:
1. Timing:
* Bok choy is typically ready to harvest in about 45-60 days from planting seeds, or 30-45 days from transplanting seedlings.
* The exact timing will depend on the variety of bok choy you are growing and the growing conditions.
2. Size:
* The leaves should be about 6-8 inches long.
* The plant should be firm and compact.
3. Harvesting Method:
* You can harvest the entire plant at once, or you can harvest individual leaves as needed.
* To harvest the entire plant, use a sharp knife to cut the stem at the base of the plant.
* To harvest individual leaves, simply snap them off at the base of the plant.
4. Storage:
* Bok choy is best used fresh, but it can be stored in the refrigerator for up to a week.
* To store bok choy, wrap it in a damp paper towel and place it in a plastic bag.
Troubleshooting
Even with the best care, you might encounter some problems while growing bok choy. Here are a few common issues and how to address them:
* Yellowing Leaves: This could be a sign of overwatering, underwatering, or nutrient deficiency. Check the soil moisture and adjust your watering accordingly. If the soil is consistently moist, reduce watering. If it’s dry, water more frequently. You can also try fertilizing with a balanced fertilizer.
* Bolting (Premature Flowering): Bok choy can bolt if it experiences stress, such as extreme heat or cold. Try to provide consistent growing conditions and protect your plants from temperature extremes. If your bok choy bolts, the leaves will become bitter.
* Pest Infestations: As mentioned earlier, bok choy can be susceptible to pests. Regularly inspect your plants and take action as soon as you see any signs of pests.
* Slow Growth: This could be due to insufficient sunlight, poor soil, or lack of nutrients. Make
Conclusion
So, there you have it! Growing your own bok choy in bags is not just a gardening trend; it’s a practical, space-saving, and incredibly rewarding way to enjoy fresh, crisp greens right at your fingertips. We’ve walked you through the simple steps, from selecting the right bag and soil to nurturing your bok choy to a bountiful harvest.
Why is this DIY trick a must-try? Because it democratizes gardening. You don’t need acres of land or a green thumb passed down through generations. All you need is a bag, some soil, bok choy seeds (or seedlings), and a little bit of patience. It’s perfect for apartment dwellers, balcony gardeners, or anyone looking to maximize their yield in a limited space. Plus, there’s nothing quite like the satisfaction of harvesting your own food, knowing exactly where it came from and what went into it.
But the beauty of this method lies in its adaptability. Feel free to experiment!
* Try different varieties of bok choy. From the classic Shanghai bok choy with its pale green stalks to the vibrant purple bok choy, each variety offers a unique flavor and visual appeal.
* Consider companion planting. Tuck in some radishes or carrots around your bok choy to deter pests and improve soil health.
* Adjust your watering schedule based on your climate. Bok choy loves moisture, but avoid overwatering, which can lead to root rot.
* Get creative with your bag selection. While grow bags are ideal, you can also repurpose old shopping bags or even burlap sacks, as long as they have drainage holes.
This method of growing bok choy is also a fantastic way to introduce children to the wonders of gardening. It’s a hands-on learning experience that teaches them about responsibility, patience, and the importance of healthy eating. Imagine the pride they’ll feel when they harvest their own bok choy and help prepare a delicious meal!
Ultimately, growing bok choy in bags is more than just a gardening project; it’s a lifestyle choice. It’s about connecting with nature, reducing your carbon footprint, and enjoying the freshest, most flavorful ingredients possible. It’s about taking control of your food supply and empowering yourself to live a healthier, more sustainable life.
We are confident that you will find this method easy and rewarding. So, grab a bag, some soil, and some bok choy seeds, and get started today! We encourage you to share your experiences with us. Post pictures of your bok choy bags on social media using #BagBokChoy and let us know how it goes. We can’t wait to see your thriving gardens! Happy growing!
Frequently Asked Questions (FAQs)
What kind of bag is best for growing bok choy?
The ideal bag for growing bok choy is a fabric grow bag, typically made from breathable materials like felt or non-woven fabric. These bags allow for good drainage and aeration, which are crucial for healthy root development. Look for bags that are at least 10-12 inches in diameter and depth to provide enough space for the bok choy to grow. However, you can also use repurposed bags like sturdy shopping bags or burlap sacks, provided you create adequate drainage holes in the bottom. Avoid using plastic bags, as they can trap moisture and lead to root rot.
What type of soil should I use for growing bok choy in bags?
Bok choy thrives in well-draining, nutrient-rich soil. A good potting mix specifically formulated for vegetables is an excellent choice. You can also create your own mix by combining equal parts of compost, peat moss (or coconut coir), and perlite or vermiculite. Compost provides essential nutrients, peat moss or coconut coir helps retain moisture, and perlite or vermiculite improves drainage. Avoid using garden soil directly in bags, as it can be too heavy and compact, hindering root growth.
How often should I water my bok choy in bags?
Bok choy needs consistent moisture, but it’s important to avoid overwatering. Water your bok choy when the top inch of soil feels dry to the touch. The frequency of watering will depend on the weather conditions and the type of bag you’re using. In hot, sunny weather, you may need to water daily, while in cooler, cloudy weather, you may only need to water every few days. Ensure that the bag has adequate drainage to prevent waterlogging. A good way to check is to lift the bag; if it feels unusually heavy, it’s likely overwatered.
How much sunlight does bok choy need?
Bok choy prefers partial shade, especially during the hottest part of the day. Aim for at least 4-6 hours of sunlight per day. If you live in a region with intense sunlight, consider placing your bok choy bags in a location that receives morning sun and afternoon shade. Too much direct sunlight can cause the leaves to wilt and burn. If you’re growing bok choy indoors, use grow lights to supplement natural sunlight.
How do I fertilize bok choy grown in bags?
Bok choy is a heavy feeder and benefits from regular fertilization. Start by incorporating a slow-release fertilizer into the soil mix at planting time. Then, supplement with a liquid fertilizer every 2-3 weeks. Choose a fertilizer that is high in nitrogen, which promotes leafy growth. You can also use organic fertilizers like compost tea or fish emulsion. Follow the instructions on the fertilizer package carefully to avoid over-fertilizing, which can damage the plants.
What are some common pests and diseases that affect bok choy, and how can I prevent them?
Common pests that affect bok choy include aphids, cabbage worms, and flea beetles. To prevent pest infestations, inspect your plants regularly and remove any pests you find by hand. You can also use insecticidal soap or neem oil to control pests. Row covers can also be used to protect your bok choy from pests. Common diseases include downy mildew and clubroot. To prevent diseases, ensure good air circulation around your plants and avoid overwatering. Rotate your crops each year to prevent soilborne diseases from building up.
When is the best time to harvest bok choy?
Bok choy can be harvested at any stage of growth, depending on your preference. Baby bok choy can be harvested as early as 30 days after planting, while mature bok choy can be harvested in 45-60 days. To harvest, simply cut the entire plant at the base with a sharp knife. You can also harvest individual leaves as needed, starting with the outer leaves.
Can I grow bok choy in bags during the winter?
Yes, you can grow bok choy in bags during the winter, especially in regions with mild winters. Bok choy is a cool-season crop and can tolerate light frost. If you live in a region with harsh winters, you can protect your bok choy by moving the bags indoors or covering them with a frost blanket.
How many bok choy plants can I grow in one bag?
The number of bok choy plants you can grow in one bag depends on the size of the bag and the variety of bok choy you’re growing. For a 10-12 inch bag, you can typically grow 1-2 mature bok choy plants or 3-4 baby bok choy plants. Be sure to space the plants adequately to allow for good air circulation and prevent overcrowding.
Can I reuse the soil in my bok choy bags?
Yes, you can reuse the soil in your bok choy bags, but it’s important to replenish the nutrients. After harvesting your bok choy, remove any plant debris and amend the soil with compost or other organic matter. You may also want to add a slow-release fertilizer to provide a boost of nutrients for the next crop. If you suspect that the soil is contaminated with pests or diseases, it’s best to replace it with fresh soil.
Leave a Comment