
Growing Spicy Chili Peppers at home can feel like a fiery adventure, and trust me, it’s one you won’t regret! Imagine plucking vibrant, scorching peppers straight from your own garden, ready to spice up your favorite dishes. Forget bland store-bought options; with a few simple tricks and a little DIY magic, you can cultivate a chili pepper paradise right outside your door.
The history of chili peppers is as rich and vibrant as their flavors. Originating in South America, these fiery fruits have been cultivated for thousands of years, playing a significant role in culinary traditions and even medicinal practices across various cultures. From the ancient Aztecs to modern-day foodies, the allure of the chili pepper has remained constant.
But why should you embark on this spicy journey? Well, for starters, growing spicy chili peppers yourself gives you complete control over the growing process, ensuring you’re using organic methods and avoiding harmful pesticides. Plus, it’s incredibly rewarding to nurture a plant from seed to harvest. More importantly, in a world where flavor often feels mass-produced, having access to a diverse range of homegrown chilies allows you to truly elevate your cooking and explore a world of exciting tastes. I’m here to share some easy-to-follow DIY tricks and hacks that will help you achieve a bountiful harvest of the hottest peppers you’ve ever tasted. Let’s get started!
Growing Fiery Chili Peppers: My Guide to a Bountiful Harvest!
Hey fellow spice enthusiasts! I’m so excited to share my tried-and-true method for growing incredibly flavorful and fiery chili peppers right at home. Forget bland store-bought peppers – with a little patience and these tips, you’ll be harvesting your own stash of heat in no time!
Choosing Your Chili Pepper Varieties
Before we dive into the nitty-gritty, let’s talk about pepper selection. The world of chili peppers is vast and exciting, ranging from mild Jalapeños to scorching Ghost Peppers. Consider your heat tolerance and what you plan to use the peppers for.
* Beginner-Friendly: Jalapeños, Poblano, Anaheim. These are relatively easy to grow and offer a manageable level of heat.
* Intermediate: Serrano, Cayenne, Thai Chili. Stepping up the spice level, these varieties require a bit more attention.
* Advanced: Habanero, Scotch Bonnet, Ghost Pepper (Bhut Jolokia). These are for the true chili heads! They need consistent care and a long growing season.
I personally love growing a mix of Jalapeños for everyday use, Cayenne for drying and making chili flakes, and a few Habaneros for adding serious heat to my sauces.
Getting Started: Seed Starting or Seedlings?
You have two main options for starting your chili pepper journey: growing from seed or purchasing seedlings.
* Starting from Seed: This gives you more control over the variety and can be more cost-effective. However, it requires more time and effort.
* Buying Seedlings: This is a quicker and easier option, especially if you’re short on time or space. Just make sure to choose healthy-looking plants from a reputable nursery.
I usually start my peppers from seed indoors about 8-10 weeks before the last expected frost. This gives them a head start and ensures a longer growing season.
Phase 1: Starting Chili Pepper Seeds Indoors
This is where the magic begins! Here’s my step-by-step guide to starting chili pepper seeds indoors:
1. Gather Your Supplies: You’ll need:
* Chili pepper seeds
* Seed starting trays or small pots
* Seed starting mix (a light, well-draining mix is crucial)
* Spray bottle
* Heat mat (optional, but highly recommended)
* Grow light (optional, but helps prevent leggy seedlings)
* Clear plastic dome or plastic wrap (to create humidity)
2. Prepare the Seed Starting Trays: Fill your seed starting trays or pots with the seed starting mix. Gently tap the trays to settle the soil.
3. Sow the Seeds: Make a small indentation (about ¼ inch deep) in the soil of each cell or pot. Place 1-2 seeds in each indentation. Cover the seeds with a thin layer of soil.
4. Water Gently: Use a spray bottle to gently moisten the soil. Avoid overwatering, as this can lead to damping off (a fungal disease that kills seedlings).
5. Create a Humid Environment: Cover the seed starting trays with a clear plastic dome or plastic wrap. This will help to create a humid environment that is ideal for germination.
6. Provide Warmth: Place the seed starting trays on a heat mat. Chili pepper seeds germinate best at temperatures between 75-85°F (24-29°C).
7. Provide Light: If you’re using a grow light, position it a few inches above the seed starting trays. If you’re not using a grow light, place the trays in a sunny window.
8. Monitor and Water: Check the soil moisture daily. Keep the soil consistently moist, but not soggy. Remove the plastic dome or plastic wrap for a few hours each day to allow for air circulation.
9. Be Patient: Chili pepper seeds can take anywhere from 7-21 days to germinate, depending on the variety and temperature.
10. Thin Seedlings (If Necessary): Once the seedlings have emerged and have their first true leaves (the second set of leaves), thin them to one seedling per cell or pot. Choose the strongest, healthiest-looking seedling and snip off the others at the soil line.
Phase 2: Caring for Your Chili Pepper Seedlings
Once your seedlings have sprouted, it’s time to provide them with the care they need to grow strong and healthy.
1. Provide Adequate Light: If you’re using a grow light, continue to keep it a few inches above the seedlings. If you’re using a sunny window, rotate the trays regularly to ensure that the seedlings receive even light. This prevents them from stretching towards the light and becoming leggy.
2. Water Regularly: Water the seedlings when the top inch of soil feels dry to the touch. Avoid overwatering, as this can lead to root rot.
3. Fertilize Sparingly: Once the seedlings have their second set of true leaves, start fertilizing them with a diluted liquid fertilizer. I like to use a balanced fertilizer (e.g., 20-20-20) diluted to half strength. Fertilize every 2-3 weeks.
4. Harden Off the Seedlings: About a week before you plan to transplant the seedlings outdoors, you’ll need to harden them off. This process gradually acclimates the seedlings to outdoor conditions. Start by placing the seedlings outdoors in a sheltered location for a few hours each day. Gradually increase the amount of time they spend outdoors each day. After a week, they should be ready to be transplanted into the garden.
Phase 3: Transplanting Chili Peppers Outdoors
The moment we’ve been waiting for! Transplanting your seedlings into their permanent home.
1. Choose a Sunny Location: Chili peppers need at least 6-8 hours of sunlight per day. Choose a location in your garden that receives plenty of sun.
2. Prepare the Soil: Chili peppers prefer well-drained soil that is rich in organic matter. Amend the soil with compost or well-rotted manure before planting.
3. Space the Plants Properly: Space the plants according to the variety. Generally, space Jalapeños and other smaller varieties about 18 inches apart. Space larger varieties, such as Habaneros, about 24-36 inches apart.
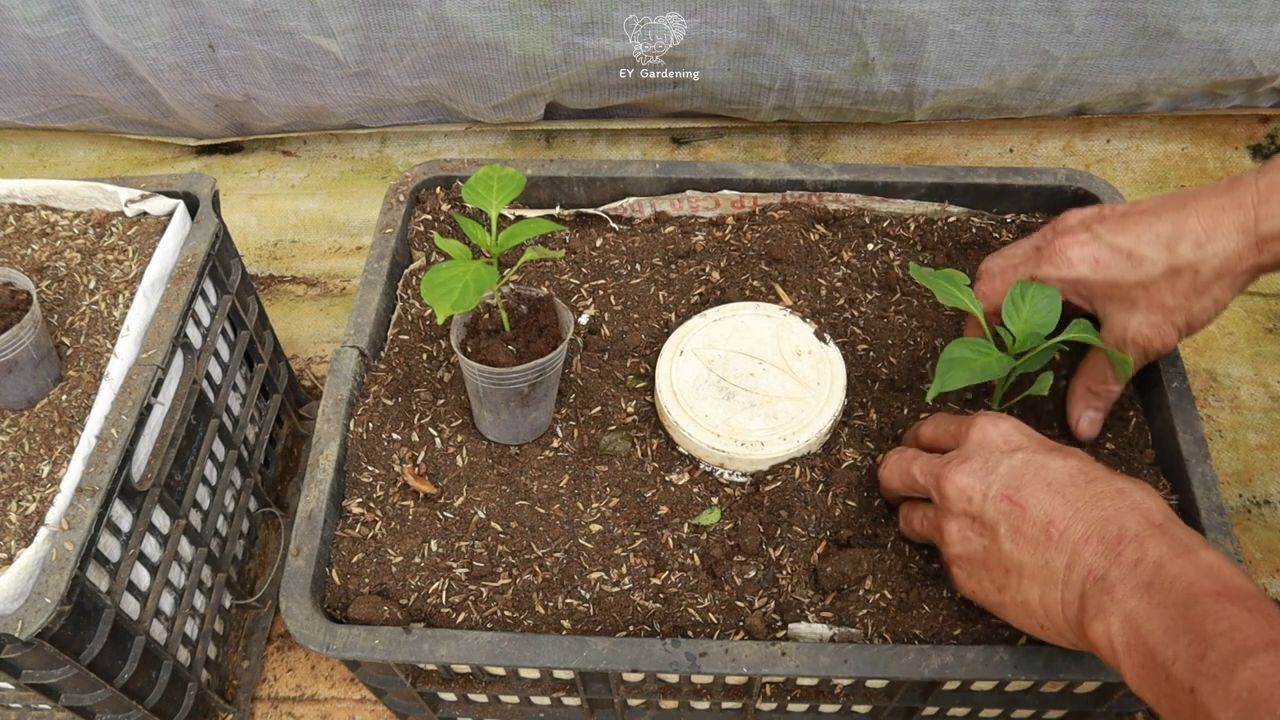
4. Dig the Holes: Dig holes that are slightly larger than the root balls of the seedlings.
5. Transplant the Seedlings: Gently remove the seedlings from their pots or trays. Loosen the root balls slightly and place the seedlings in the holes. Backfill the holes with soil and gently firm the soil around the base of the plants.
6. Water Thoroughly: Water the newly transplanted seedlings thoroughly.
7. Mulch: Apply a layer of mulch around the base of the plants. Mulch helps to retain moisture, suppress weeds, and regulate soil temperature. I like to use straw or wood chips.
Phase 4: Caring for Your Chili Pepper Plants
Now that your chili pepper plants are in the ground, it’s time to provide them with ongoing care.
1. Water Regularly: Water the plants when the top inch of soil feels dry to the touch. Avoid overwatering, as this can lead to root rot. Chili peppers prefer consistent moisture, especially during flowering and fruiting.
2. Fertilize Regularly: Fertilize the plants every 2-3 weeks with a balanced fertilizer. You can also use a fertilizer that is specifically formulated for peppers and tomatoes.
3. Provide Support: As the plants grow, they may need support to prevent them from falling over. You can use stakes, cages, or trellises to support the plants. This is especially important for taller varieties or those with heavy fruit loads.
4. Pinch Off Early Flowers (Optional): Pinching off the first few flowers that appear on the plants can encourage them to focus on vegetative growth, resulting in stronger, more productive plants. This is a matter of personal preference, though.
5. Watch Out for Pests and Diseases: Chili peppers can be susceptible to a variety of pests and diseases, such as aphids, spider mites, and blossom end rot. Inspect the plants regularly for signs of pests or diseases. If you find any, take action immediately to control them. I prefer using organic pest control methods whenever possible.
6. Prune (Optional): Pruning can help to improve air circulation and sunlight penetration, which can lead to healthier plants and more peppers. Remove any dead, damaged, or diseased leaves or branches. You can also prune the plants to shape them and encourage bushier growth.
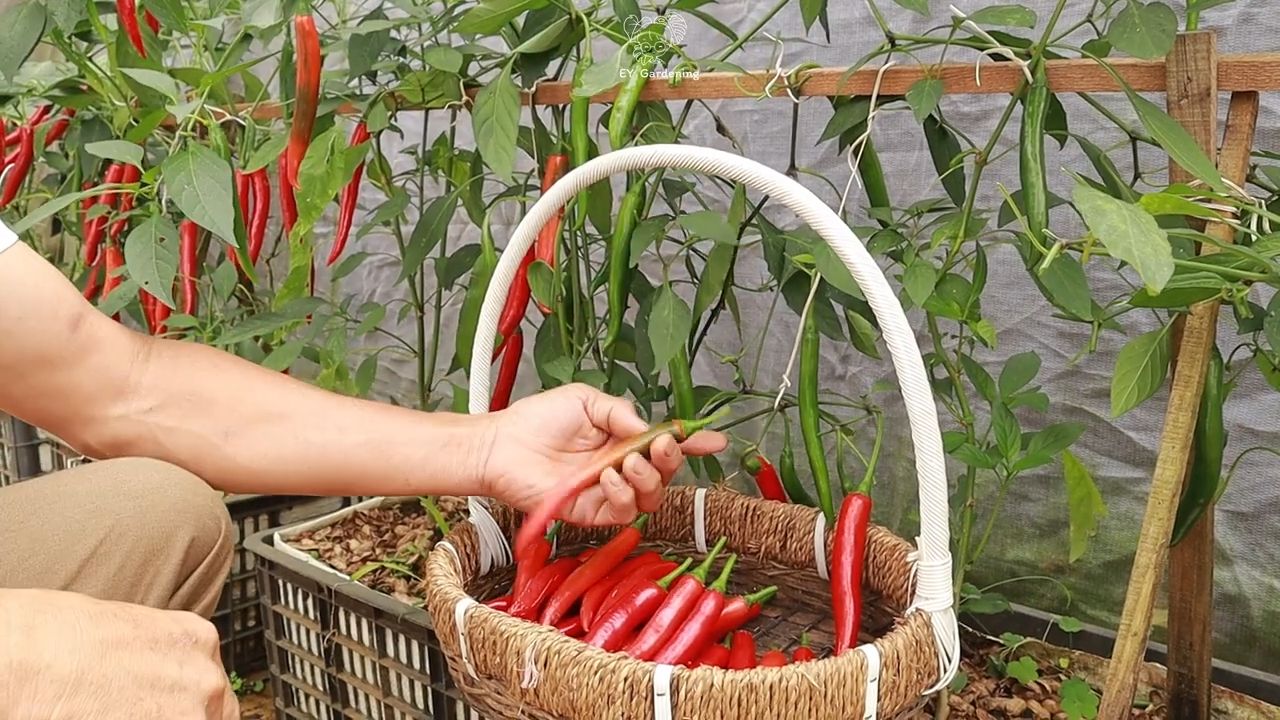
Phase 5: Harvesting Your Chili Peppers
The most rewarding part! Knowing when to pick your peppers is key to getting the best flavor and heat.
1. Know When to Harvest: The time to harvest chili peppers depends on the variety and your personal preference. Generally, peppers are ready to harvest when they have reached their mature size and color.
Conclusion
So, there you have it! Mastering the art of growing spicy chili peppers doesn’t require a green thumb blessed by the gardening gods. It’s about understanding their needs, providing the right environment, and employing a few clever DIY tricks to boost their fiery potential. This guide has armed you with the knowledge to cultivate your own personal inferno, right in your backyard or even on your windowsill.
Why is this DIY approach a must-try? Because it empowers you to take control of the entire process, from seed to sizzling sauce. You’re not just buying peppers; you’re nurturing them, understanding their growth cycle, and tailoring their environment to maximize their heat and flavor. Plus, let’s be honest, there’s a unique satisfaction in harvesting something you’ve grown yourself, especially when it packs a serious punch.
But the journey doesn’t end here. Feel free to experiment with different variations. Try using different types of soil amendments to see how they affect the pepper’s heat level. Explore companion planting to naturally deter pests and improve growth. Consider different methods of drying or preserving your harvest to enjoy your spicy bounty year-round. Perhaps you’ll discover a new secret ingredient or a unique technique that elevates your chili pepper growing game to the next level.
Don’t be afraid to get your hands dirty and embrace the learning process. Every pepper you grow, whether it’s a mild jalapeno or a scorching habanero, will teach you something new. The key is to be patient, observant, and willing to adapt your approach as needed.
And most importantly, we want to hear about your experiences! Did this DIY guide help you grow the spiciest chili peppers of your life? Did you discover any unexpected challenges or triumphs along the way? Share your stories, tips, and photos in the comments below. Let’s create a community of chili pepper enthusiasts who are passionate about growing their own heat.
Growing spicy chili peppers is more than just a hobby; it’s a journey of discovery, a celebration of flavor, and a testament to the power of DIY. So, grab your seeds, prepare your soil, and get ready to unleash the fiery potential of your garden. Happy growing!
Frequently Asked Questions (FAQ)
What are the best types of chili peppers to grow for beginners?
For beginners, starting with milder varieties like jalapenos, poblano peppers, or Anaheim peppers is a great way to ease into the world of chili pepper cultivation. These peppers are relatively easy to grow and offer a good balance of flavor and heat. As you gain experience, you can gradually move on to hotter varieties like serranos, cayenne peppers, or even habaneros. Remember to always handle chili peppers with care, wearing gloves when necessary, and avoid touching your eyes or face after handling them.
How often should I water my chili pepper plants?
The watering frequency for chili pepper plants depends on several factors, including the climate, soil type, and the plant’s stage of growth. Generally, you should water your plants when the top inch of soil feels dry to the touch. Avoid overwatering, as this can lead to root rot. During hot and dry periods, you may need to water more frequently. Conversely, during cooler or rainy periods, you may need to water less often. A good rule of thumb is to water deeply but infrequently, allowing the soil to dry out slightly between waterings.
What kind of fertilizer should I use for my chili pepper plants?
Chili pepper plants benefit from a balanced fertilizer that provides essential nutrients like nitrogen, phosphorus, and potassium. A fertilizer with an NPK ratio of 5-10-10 or 10-10-10 is a good starting point. During the early stages of growth, a fertilizer with a higher nitrogen content can promote leafy growth. However, once the plants start to flower and produce fruit, switch to a fertilizer with a higher phosphorus and potassium content to encourage fruit development and ripening. Organic fertilizers like compost tea or fish emulsion are also excellent options for providing nutrients to your plants.
How can I increase the heat level of my chili peppers?
Several factors can influence the heat level of chili peppers. Stressing the plants slightly by withholding water or nutrients can sometimes increase their heat. However, be careful not to overstress the plants, as this can negatively impact their overall health and yield. Providing plenty of sunlight and warm temperatures is also crucial for developing the peppers’ heat. Some growers believe that adding Epsom salts to the soil can also increase the heat level, but this is not scientifically proven. Ultimately, the genetics of the pepper variety play the most significant role in determining its heat level.
What are some common pests and diseases that affect chili pepper plants?
Chili pepper plants are susceptible to various pests and diseases, including aphids, spider mites, whiteflies, and fungal diseases like powdery mildew and blossom end rot. Regularly inspect your plants for signs of infestation or disease. Use organic pest control methods like insecticidal soap or neem oil to control pests. Ensure good air circulation around your plants to prevent fungal diseases. Blossom end rot is often caused by calcium deficiency, so adding calcium to the soil can help prevent this problem.
How do I know when my chili peppers are ripe and ready to harvest?
The color of the chili pepper is a good indicator of its ripeness. Most chili peppers will turn from green to red, yellow, or orange when they are fully ripe. However, some varieties may have different color changes. The pepper should also feel firm and slightly heavy for its size. Gently tug on the pepper; if it comes off the plant easily, it’s likely ripe. You can also taste a small piece of the pepper to check its heat level and flavor.
Can I grow chili peppers indoors?
Yes, you can grow chili peppers indoors, but you’ll need to provide them with adequate light and warmth. Place your plants near a sunny window or use grow lights to supplement natural light. Ensure that the plants receive at least 6-8 hours of light per day. Use a well-draining potting mix and water regularly. Indoor chili pepper plants may require hand-pollination to ensure fruit set.
How do I store my harvested chili peppers?
There are several ways to store harvested chili peppers. You can dry them by stringing them together and hanging them in a well-ventilated area. You can also dehydrate them using a food dehydrator. Dried chili peppers can be stored in airtight containers for several months. Another option is to freeze the peppers whole or chopped. You can also pickle them or make chili oil or hot sauce.
What are some creative ways to use my homegrown chili peppers?
The possibilities are endless! You can use your homegrown chili peppers to make salsa, hot sauce, chili oil, or chili powder. You can add them to soups, stews, stir-fries, and other dishes. You can also use them to make infused oils or vinegars. Get creative and experiment with different recipes to discover your favorite ways to use your spicy bounty.
How can I save seeds from my chili peppers for future planting?
To save seeds from your chili peppers, allow the peppers to fully ripen on the plant. Once they are ripe, carefully cut them open and remove the seeds. Spread the seeds out on a paper towel and allow them to dry completely. Once the seeds are dry, store them in an airtight container in a cool, dark, and dry place. Be aware that if you are growing multiple varieties of chili peppers, cross-pollination can occur, which may result in hybrid seeds that produce different peppers than the parent plants.
Leave a Comment