
Growing Leeks at Home might seem intimidating, but trust me, it’s easier than you think! Imagine stepping outside your back door and snipping fresh, flavorful leeks to add to your favorite soup or stew. No more trips to the grocery store for limp, overpriced leeks – just homegrown goodness at your fingertips.
Leeks have a rich history, dating back to ancient Egypt, where they were prized for their culinary and medicinal properties. The Romans were also big fans, spreading leek cultivation throughout Europe. Today, they remain a staple in cuisines worldwide, adding a subtle oniony flavor to countless dishes. But why buy them when you can easily cultivate them yourself?
Let’s face it, we’re all looking for ways to save money and eat healthier. Growing leeks at home allows you to do both! Plus, you’ll know exactly what’s going into your food – no harmful pesticides or chemicals. In this DIY guide, I’ll share my favorite tips and tricks for successfully growing leeks, even if you have limited space or gardening experience. Get ready to unleash your inner gardener and enjoy the delicious rewards of homegrown leeks!
Growing Leeks at Home: A Beginner’s Guide
Okay, so you want to grow leeks at home? Awesome! Leeks are surprisingly easy to cultivate, and nothing beats the flavor of homegrown. Plus, they’re super versatile in the kitchen. I’m going to walk you through everything you need to know, from starting seeds to harvesting your delicious leeks. Let’s get started!
Choosing Your Leek Variety
First things first, let’s talk about leek varieties. There are a bunch to choose from, and the best one for you will depend on your climate and when you want to harvest.
* ‘American Flag’: This is a classic, reliable variety that’s known for its long, white shanks and mild flavor. It’s a good all-around choice.
* ‘Giant Musselburgh’: As the name suggests, this one gets big! It’s a hardy variety that’s great for overwintering in milder climates.
* ‘King Richard’: This is a fast-growing variety, perfect if you’re a bit impatient (like me!). It has a shorter shank but a lovely, sweet flavor.
* ‘Bandit’: A popular choice for its cold hardiness and long harvest window.
I usually go with ‘American Flag’ because it’s readily available and performs well in my garden. But feel free to experiment and find what works best for you!
Starting Leeks from Seed
Leeks have a long growing season, so starting them from seed indoors is usually the way to go, especially if you live in a colder climate.
When to Start:
* I usually start my leek seeds indoors about 8-10 weeks before the last expected frost. Check your local frost dates to get the timing right.
Materials You’ll Need:
* Leek seeds (obviously!)
* Seed starting trays or small pots
* Seed starting mix (this is important – don’t use regular garden soil)
* A spray bottle with water
* A heat mat (optional, but helpful)
* A grow light (also optional, but highly recommended)
Step-by-Step Instructions:
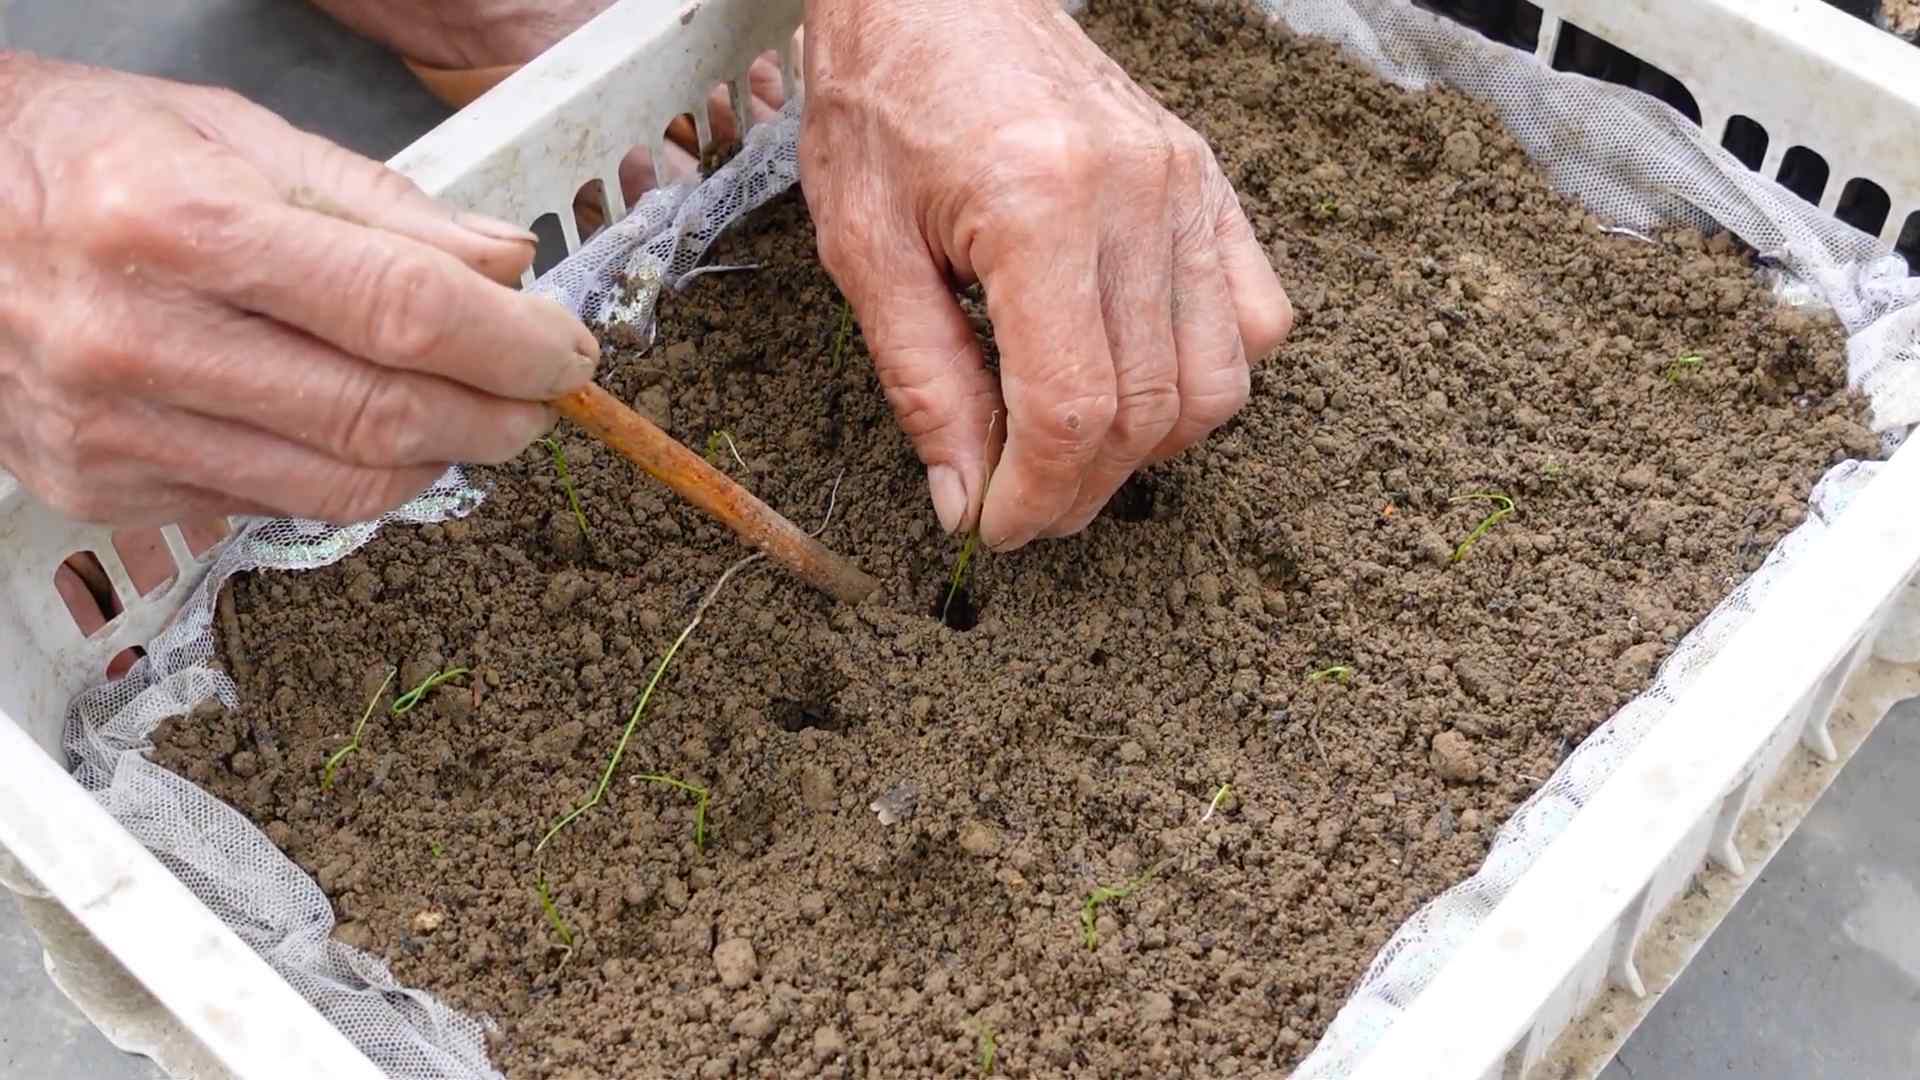
1. Prepare Your Seed Starting Trays: Fill your seed starting trays or pots with seed starting mix. Gently pat it down to remove any air pockets.
2. Sow the Seeds: Sow the leek seeds about ¼ inch deep, placing 2-3 seeds per cell or pot. I like to sow a few extra just in case some don’t germinate.
3. Water Gently: Use a spray bottle to gently water the soil. You want it to be moist, but not soggy.
4. Provide Warmth: Place the trays on a heat mat if you have one. This will help speed up germination. The ideal temperature is around 70-75°F (21-24°C).
5. Provide Light: If you’re using a grow light, position it a few inches above the trays. If not, place the trays in a sunny window. However, be aware that seedlings grown in windowsills can become leggy (tall and spindly) if they don’t get enough light.
6. Keep the Soil Moist: Check the soil daily and water as needed to keep it moist. Don’t let it dry out completely.
7. Thin the Seedlings: Once the seedlings have emerged and have a couple of true leaves (the second set of leaves), thin them out, leaving only the strongest seedling in each cell or pot. I know it’s hard to do, but it’s necessary for healthy growth!
Transplanting Leeks Outdoors
Once your leek seedlings are about 6-8 inches tall and the danger of frost has passed, it’s time to transplant them outdoors.
Preparing the Garden Bed:
* Leeks prefer well-drained soil that’s rich in organic matter. Before transplanting, amend your garden bed with compost or well-rotted manure. This will provide the leeks with the nutrients they need to thrive.
* Choose a sunny spot in your garden. Leeks need at least 6 hours of sunlight per day.
* Make sure the soil is loose and free of rocks and debris.
The Trench Method:
This is the method I prefer, and it helps to blanch the leeks (make the white part longer).
1. Dig Trenches: Dig trenches that are about 6 inches deep and 6 inches wide. Space the trenches about 12 inches apart.
2. Prepare the Seedlings: Gently remove the leek seedlings from their trays or pots. If the roots are tightly bound, gently loosen them with your fingers.
3. Plant the Seedlings: Plant the leek seedlings in the bottom of the trenches, spacing them about 6 inches apart.
4. Water Thoroughly: Water the seedlings thoroughly after planting.
5. Gradually Fill the Trenches: As the leeks grow, gradually fill in the trenches with soil. This will blanch the shanks and encourage them to grow longer. I usually do this in stages, adding a couple of inches of soil every few weeks.
The Hole Method:
This is a simpler method, but it doesn’t blanch the leeks as effectively.
1. Make Holes: Make holes that are about 6 inches deep and 2 inches wide. Space the holes about 6 inches apart.
2. Prepare the Seedlings: Gently remove the leek seedlings from their trays or pots. If the roots are tightly bound, gently loosen them with your fingers.
3. Plant the Seedlings: Drop the leek seedlings into the holes.
4. Water Thoroughly: Water the seedlings thoroughly after planting.
5. Don’t Fill the Holes Completely: Leave a few inches of the hole unfilled. As the leeks grow, you can gradually fill in the holes with soil to blanch the shanks.
Caring for Your Leeks
Once your leeks are planted, it’s important to provide them with the care they need to thrive.
* Watering: Leeks need consistent moisture, especially during dry periods. Water them deeply once or twice a week, or more often if the soil is sandy.
* Weeding: Keep the garden bed free of weeds. Weeds compete with leeks for nutrients and water. I like to use mulch to suppress weeds and retain moisture.
* Fertilizing: Leeks are heavy feeders, so fertilize them regularly with a balanced ferti
Okay, so you want to grow leeks at home? Awesome! Leeks are surprisingly easy to cultivate, and nothing beats the flavor of homegrown. Plus, they’re super versatile in the kitchen. I’m going to walk you through everything you need to know, from starting seeds to harvesting your delicious leeks. Let’s get started!
Choosing Your Leek Variety
First things first, let’s talk about leek varieties. There are a bunch to choose from, and the best one for you will depend on your climate and when you want to harvest.
* ‘American Flag’: This is a classic, reliable variety that’s known for its long, white shanks and mild flavor. It’s a good all-around choice.
* ‘Giant Musselburgh’: As the name suggests, this one gets big! It’s a hardy variety that’s great for overwintering in milder climates.
* ‘King Richard’: This is a fast-growing variety, perfect if you’re a bit impatient (like me!). It has a shorter shank but a lovely, sweet flavor.
* ‘Bandit’: A popular choice for its cold hardiness and long harvest window.
I usually go with ‘American Flag’ because it’s readily available and performs well in my garden. But feel free to experiment and find what works best for you!
Starting Leeks from Seed
Leeks have a long growing season, so starting them from seed indoors is usually the way to go, especially if you live in a colder climate.
When to Start:
* I usually start my leek seeds indoors about 8-10 weeks before the last expected frost. Check your local frost dates to get the timing right.
Materials You’ll Need:
* Leek seeds (obviously!)
* Seed starting trays or small pots
* Seed starting mix (this is important – don’t use regular garden soil)
* A spray bottle with water
* A heat mat (optional, but helpful)
* A grow light (also optional, but highly recommended)
Step-by-Step Instructions:
1. Prepare Your Seed Starting Trays: Fill your seed starting trays or pots with seed starting mix. Gently pat it down to remove any air pockets.
2. Sow the Seeds: Sow the leek seeds about ¼ inch deep, placing 2-3 seeds per cell or pot. I like to sow a few extra just in case some don’t germinate.
3. Water Gently: Use a spray bottle to gently water the soil. You want it to be moist, but not soggy.
4. Provide Warmth: Place the trays on a heat mat if you have one. This will help speed up germination. The ideal temperature is around 70-75°F (21-24°C).
5. Provide Light: If you’re using a grow light, position it a few inches above the trays. If not, place the trays in a sunny window. However, be aware that seedlings grown in windowsills can become leggy (tall and spindly) if they don’t get enough light.
6. Keep the Soil Moist: Check the soil daily and water as needed to keep it moist. Don’t let it dry out completely.
7. Thin the Seedlings: Once the seedlings have emerged and have a couple of true leaves (the second set of leaves), thin them out, leaving only the strongest seedling in each cell or pot. I know it’s hard to do, but it’s necessary for healthy growth!
Transplanting Leeks Outdoors
Once your leek seedlings are about 6-8 inches tall and the danger of frost has passed, it’s time to transplant them outdoors.
Preparing the Garden Bed:
* Leeks prefer well-drained soil that’s rich in organic matter. Before transplanting, amend your garden bed with compost or well-rotted manure. This will provide the leeks with the nutrients they need to thrive.
* Choose a sunny spot in your garden. Leeks need at least 6 hours of sunlight per day.
* Make sure the soil is loose and free of rocks and debris.
The Trench Method:
This is the method I prefer, and it helps to blanch the leeks (make the white part longer).
1. Dig Trenches: Dig trenches that are about 6 inches deep and 6 inches wide. Space the trenches about 12 inches apart.
2. Prepare the Seedlings: Gently remove the leek seedlings from their trays or pots. If the roots are tightly bound, gently loosen them with your fingers.
3. Plant the Seedlings: Plant the leek seedlings in the bottom of the trenches, spacing them about 6 inches apart.
4. Water Thoroughly: Water the seedlings thoroughly after planting.
5. Gradually Fill the Trenches: As the leeks grow, gradually fill in the trenches with soil. This will blanch the shanks and encourage them to grow longer. I usually do this in stages, adding a couple of inches of soil every few weeks.
The Hole Method:
This is a simpler method, but it doesn’t blanch the leeks as effectively.
1. Make Holes: Make holes that are about 6 inches deep and 2 inches wide. Space the holes about 6 inches apart.
2. Prepare the Seedlings: Gently remove the leek seedlings from their trays or pots. If the roots are tightly bound, gently loosen them with your fingers.
3. Plant the Seedlings: Drop the leek seedlings into the holes.
4. Water Thoroughly: Water the seedlings thoroughly after planting.
5. Don’t Fill the Holes Completely: Leave a few inches of the hole unfilled. As the leeks grow, you can gradually fill in the holes with soil to blanch the shanks.
Caring for Your Leeks
Once your leeks are planted, it’s important to provide them with the care they need to thrive.
* Watering: Leeks need consistent moisture, especially during dry periods. Water them deeply once or twice a week, or more often if the soil is sandy.
* Weeding: Keep the garden bed free of weeds. Weeds compete with leeks for nutrients and water. I like to use mulch to suppress weeds and retain moisture.
* Fertilizing: Leeks are heavy feeders, so fertilize them regularly with a balanced fertilizer. I usually fertilize them every 2-3 weeks. You can also side-dress them with compost or well-rotted manure.
* Pest and Disease Control: Leeks are generally pest-resistant, but they can be susceptible to onion thrips and leek moths. Check your plants regularly for signs of pests and diseases. If you find any, treat them promptly with an appropriate insecticide or fungicide. I prefer to use organic methods whenever possible.
Harvesting Your Leeks
The best part! You can start harvesting leeks when they are about 1 inch in diameter. This is usually about 100-120 days after planting.
How to Harvest:
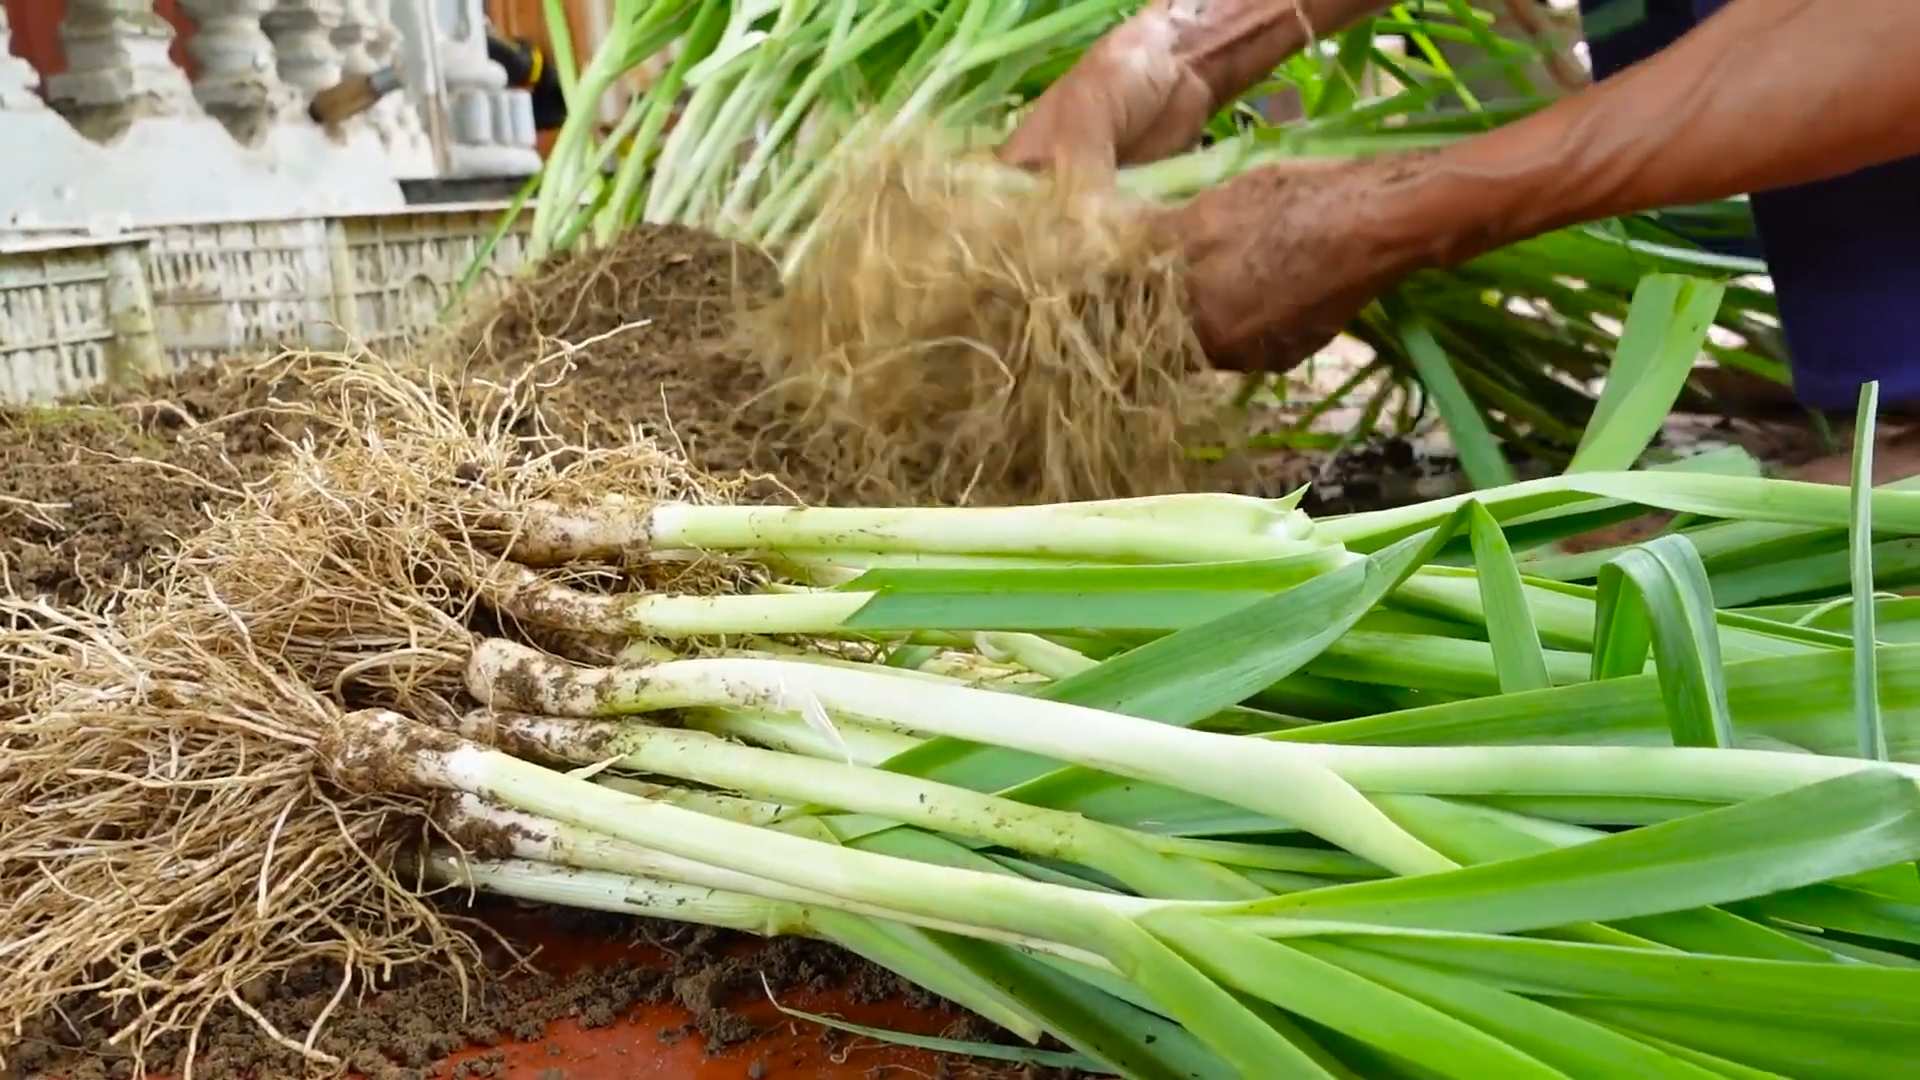
1. Loosen the Soil: Use a garden fork or trowel to loosen the soil around the leek.
2. Pull the Leek: Gently pull the leek from the ground.
3. Clean the Leek: Remove any excess soil from the leek.
4. Trim the Roots and Tops: Trim the roots and tops of the leek.
Storing Leeks:
* Leeks can be stored in the refrigerator for up to 2 weeks. Wrap them in a damp paper towel and place them in a plastic bag.
* You can also freeze leeks. Blanch them for 2-3 minutes, then cool them in ice water. Drain them well and freeze them in freezer bags.
Troubleshooting
Even with the best care, you might encounter some problems when growing leeks. Here are a few common issues and how to deal with them:
* Leeks are not growing tall: This could be due to a lack of nutrients, water, or sunlight. Make sure you’re fertilizing and watering your leeks regularly, and that they’re getting enough sunlight.
* Leeks are yellowing: This could be a sign of overwatering or a nutrient deficiency. Check the soil moisture and adjust your watering accordingly. You may also need to fertilize your leeks.
* Leeks are infested with pests: Check your plants regularly for signs of pests and diseases. If you find any, treat them promptly with an appropriate insecticide or fungicide.
Enjoying Your Homegrown Leeks
Now that you’ve harvested your leeks, it’s time to enjoy them! Leeks are incredibly versatile and can be used in a variety of dishes. Here are a few of my favorite ways to use them
Conclusion
So, there you have it! Growing leeks at home isn’t just a gardening project; it’s a gateway to fresher, more flavorful meals and a deeper connection with the food you eat. We’ve walked you through the simple steps, from starting seeds indoors to transplanting and nurturing your leeks to maturity. The beauty of this DIY trick lies in its accessibility. Whether you have a sprawling garden or just a few containers on a balcony, you can cultivate these delicious alliums.
Why is this a must-try? Because the taste of homegrown leeks is simply unparalleled. The subtle sweetness and delicate oniony flavor are intensified when you harvest them fresh from your own garden. Plus, you control the entire process, ensuring they’re grown without harmful pesticides or chemicals. You’re not just growing leeks; you’re growing peace of mind.
But the fun doesn’t stop there! Feel free to experiment with different varieties of leeks. ‘Giant Musselburgh’ is a classic choice known for its impressive size, while ‘American Flag’ offers a milder flavor. You can also try succession planting, sowing seeds every few weeks, to ensure a continuous harvest throughout the growing season.
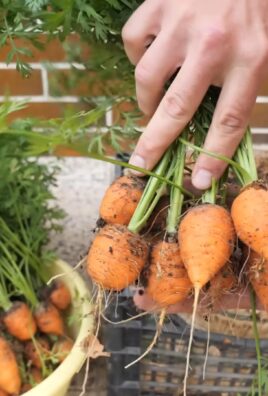
Consider companion planting to further enhance your leek-growing experience. Carrots and leeks are a classic pairing, as the leeks deter carrot root flies, and the carrots deter onion flies that can affect leeks. Marigolds are also excellent companions, repelling nematodes and other pests.
Don’t be afraid to get creative with your leek recipes too! Beyond the classic leek and potato soup, try adding them to quiches, frittatas, stir-fries, or even grilling them for a smoky side dish. The possibilities are endless!
We wholeheartedly encourage you to embark on this rewarding gardening adventure. Growing leeks at home is a surprisingly simple and satisfying way to elevate your culinary creations and connect with nature. So, grab your seeds, prepare your soil, and get ready to enjoy the delicious rewards of your labor.
And most importantly, we want to hear about your experiences! Share your tips, tricks, and triumphs in the comments below. Let us know what varieties you’re growing, what challenges you’ve faced, and what delicious dishes you’ve created with your homegrown leeks. Your insights will not only inspire others but also help us all become better gardeners. Happy growing!
Frequently Asked Questions (FAQ)
Q: How long does it take to grow leeks from seed?
A: Growing leeks from seed typically takes around 120-150 days from sowing to harvest. This timeframe can vary depending on the specific variety, climate, and growing conditions. You’ll generally start seeds indoors 8-10 weeks before the last expected frost. After transplanting outdoors, it takes another 90-120 days for the leeks to mature to a harvestable size. Be patient; the wait is worth it!
Q: What kind of soil is best for growing leeks?
A: Leeks thrive in well-drained, fertile soil that is rich in organic matter. A slightly acidic to neutral pH (6.0-7.0) is ideal. Before planting, amend your soil with compost or well-rotted manure to improve drainage and fertility. If your soil is heavy clay, consider adding sand or perlite to improve drainage. Leeks are heavy feeders, so ensuring the soil is nutrient-rich is crucial for optimal growth.
Q: How often should I water my leeks?
A: Leeks need consistent moisture, especially during hot and dry periods. Water deeply and regularly, aiming to keep the soil consistently moist but not waterlogged. Check the soil moisture regularly by sticking your finger about an inch deep. If the soil feels dry, it’s time to water. Mulching around the leeks can help retain moisture and suppress weeds. During periods of heavy rain, ensure the soil is well-draining to prevent root rot.
Q: What are some common pests and diseases that affect leeks, and how can I prevent them?
A: Leek moth, onion fly, and thrips are common pests that can affect leeks. Diseases like rust and white rot can also be problematic. To prevent these issues, practice crop rotation, avoid overhead watering (which can promote fungal diseases), and remove any infected plants promptly. Companion planting with carrots and marigolds can help deter pests. You can also use row covers to protect your leeks from insect infestations. Regularly inspect your plants for signs of pests or diseases and take action promptly if you notice any problems. Organic pest control methods, such as insecticidal soap or neem oil, can be effective for managing infestations.
Q: How do I blanch leeks to get the white stem?
A: Blanching leeks is essential for achieving the desirable white stem. There are several methods you can use. One common method is to hill up soil around the stems as they grow, gradually burying more of the plant. Another option is to use cardboard tubes or plastic pipes to cover the stems, excluding light. Start blanching when the leeks are about 6-8 inches tall and continue as they grow. The blanched portion will be tender and milder in flavor.
Q: Can I grow leeks in containers?
A: Yes, you can absolutely grow leeks in containers! Choose a container that is at least 8-12 inches deep and wide to accommodate the roots. Use a high-quality potting mix that is well-draining and rich in organic matter. Ensure the container has drainage holes to prevent waterlogging. Water regularly and fertilize every few weeks with a balanced liquid fertilizer. Container-grown leeks may require more frequent watering than those grown in the ground.
Q: How do I harvest leeks?
A: Leeks are ready to harvest when they reach a desirable size, typically around 1-2 inches in diameter. To harvest, gently loosen the soil around the base of the leek with a garden fork or trowel. Carefully pull the leek from the ground, being mindful not to damage the roots. You can harvest leeks as needed throughout the growing season. If you live in a mild climate, you can even leave them in the ground over winter and harvest them as needed.
Q: Can I save seeds from my leeks?
A: Saving seeds from leeks is possible, but it requires allowing the plants to overwinter and flower in their second year. Leeks are biennials, meaning they complete their life cycle over two years. After flowering, the leeks will produce seed pods. Allow the seed pods to dry on the plant before harvesting them. Once dry, you can extract the seeds and store them in a cool, dry place for future planting. However, be aware that leeks can cross-pollinate with other members of the onion family, so the seeds may not produce true-to-type plants.
Q: What are some creative ways to use homegrown leeks in cooking?
A: Homegrown leeks are incredibly versatile in the kitchen! Beyond the classic leek and potato soup, try adding them to quiches, frittatas, and omelets for a delicate oniony flavor. Sautéed leeks make a delicious topping for pizzas or flatbreads. You can also grill leeks for a smoky side dish or add them to stir-fries and pasta dishes. Leeks can also be used to flavor stocks and broths. Don’t forget to use the green tops of the leeks as well! They can be chopped and added to soups, stews, or salads for extra flavor and nutrients. Get creative and experiment with different ways to incorporate your homegrown leeks into your favorite recipes!

Leave a Comment