
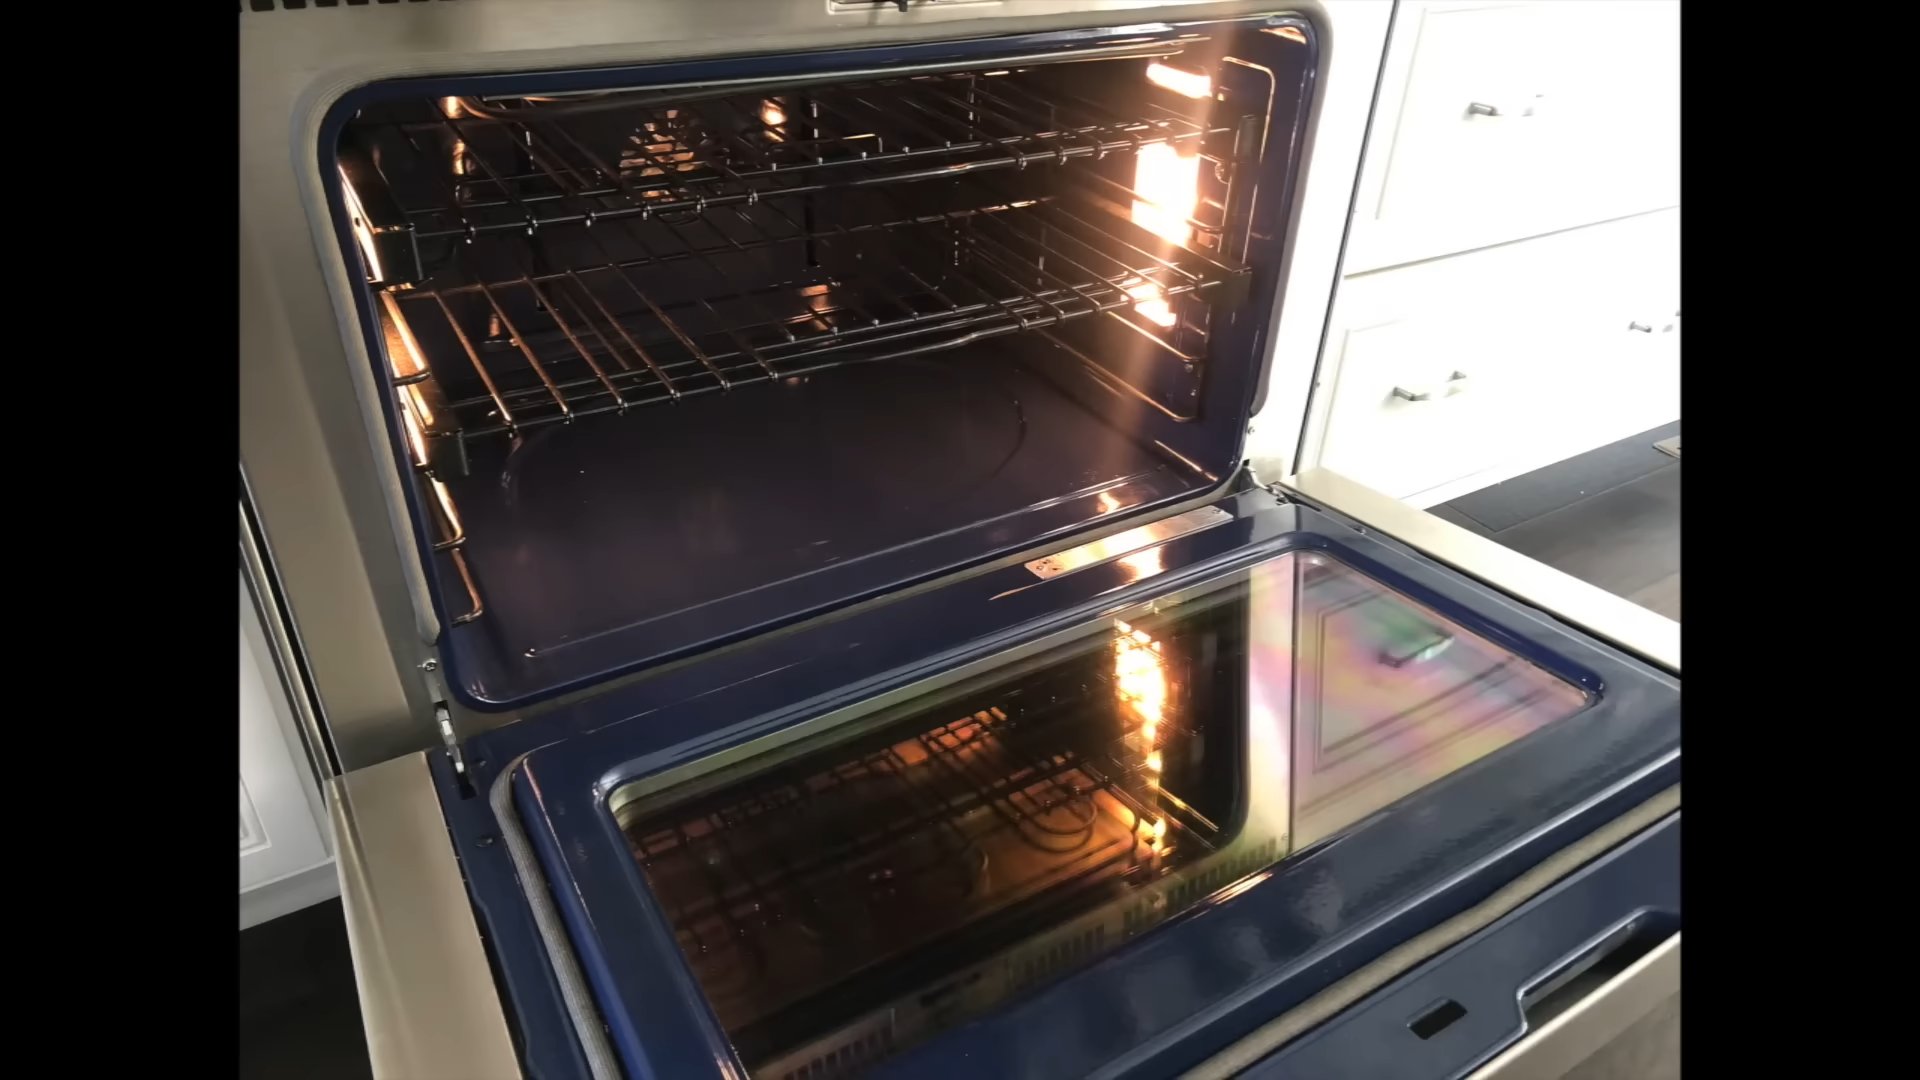
Natural Oven Cleaning: Is your oven looking less like a culinary haven and more like a burnt offering? Don’t despair! I know the dread of facing a grimy oven, but before you reach for those harsh chemicals, let’s explore a gentler, more effective way to restore its sparkle. For generations, resourceful homemakers have relied on the power of natural ingredients to tackle tough cleaning tasks. Think about it – our grandmothers didn’t have access to the array of commercial cleaners we do today, yet their ovens were often spotless! They understood the magic of simple solutions like baking soda and vinegar.
Why is natural oven cleaning so important now? Well, beyond the obvious health benefits of avoiding harsh chemicals in your cooking space, it’s also incredibly budget-friendly and environmentally conscious. Plus, let’s be honest, who wants to spend hours scrubbing with toxic fumes filling the air? This DIY guide will walk you through a simple, step-by-step process to achieve a sparkling clean oven using ingredients you likely already have in your pantry. Get ready to say goodbye to baked-on grime and hello to a fresh, clean oven – naturally!
DIY Natural Oven Cleaning: Say Goodbye to Harsh Chemicals!
Okay, let’s be honest, cleaning the oven is probably on everyone’s list of least favorite chores. But it doesn’t have to be a toxic nightmare filled with harsh chemicals! I’m going to show you how to clean your oven naturally, using ingredients you probably already have in your pantry. This method is effective, eco-friendly, and much gentler on your lungs. Trust me, you’ll never go back to those store-bought oven cleaners again!
What You’ll Need: The Arsenal of Natural Cleaning Power
Before we dive in, let’s gather our supplies. This is a pretty simple list, which is one of the things I love about this method.
* Baking Soda: Our main cleaning agent! It’s mildly abrasive and deodorizing.
* White Vinegar: The magic ingredient that reacts with baking soda to create a powerful cleaning fizz.
* Water: For mixing and rinsing.
* Spray Bottle: To apply the vinegar solution.
* Spatula or Scraper: For loosening stubborn baked-on grime.
* Cleaning Cloths or Sponges: For wiping and scrubbing.
* Rubber Gloves: To protect your hands (optional, but recommended).
* Old Towels or Newspaper: To protect your floor.
* Small Bowl: For mixing the baking soda paste.
Step-by-Step Guide: Conquering the Oven Grime
Alright, now for the fun part! Follow these steps, and you’ll have a sparkling clean oven in no time.
1. Prepare the Oven: Safety First! Before you do anything, make sure your oven is completely cool. Unplug it or turn off the breaker to be extra safe. Remove the oven racks, pizza stone, thermometer, or anything else that’s inside. We’ll clean the racks separately.
2. Protect Your Workspace: Contain the Mess. Lay down old towels or newspaper around the base of your oven to catch any drips or spills. This will save you from having to clean the floor later. Trust me, future you will thank you.
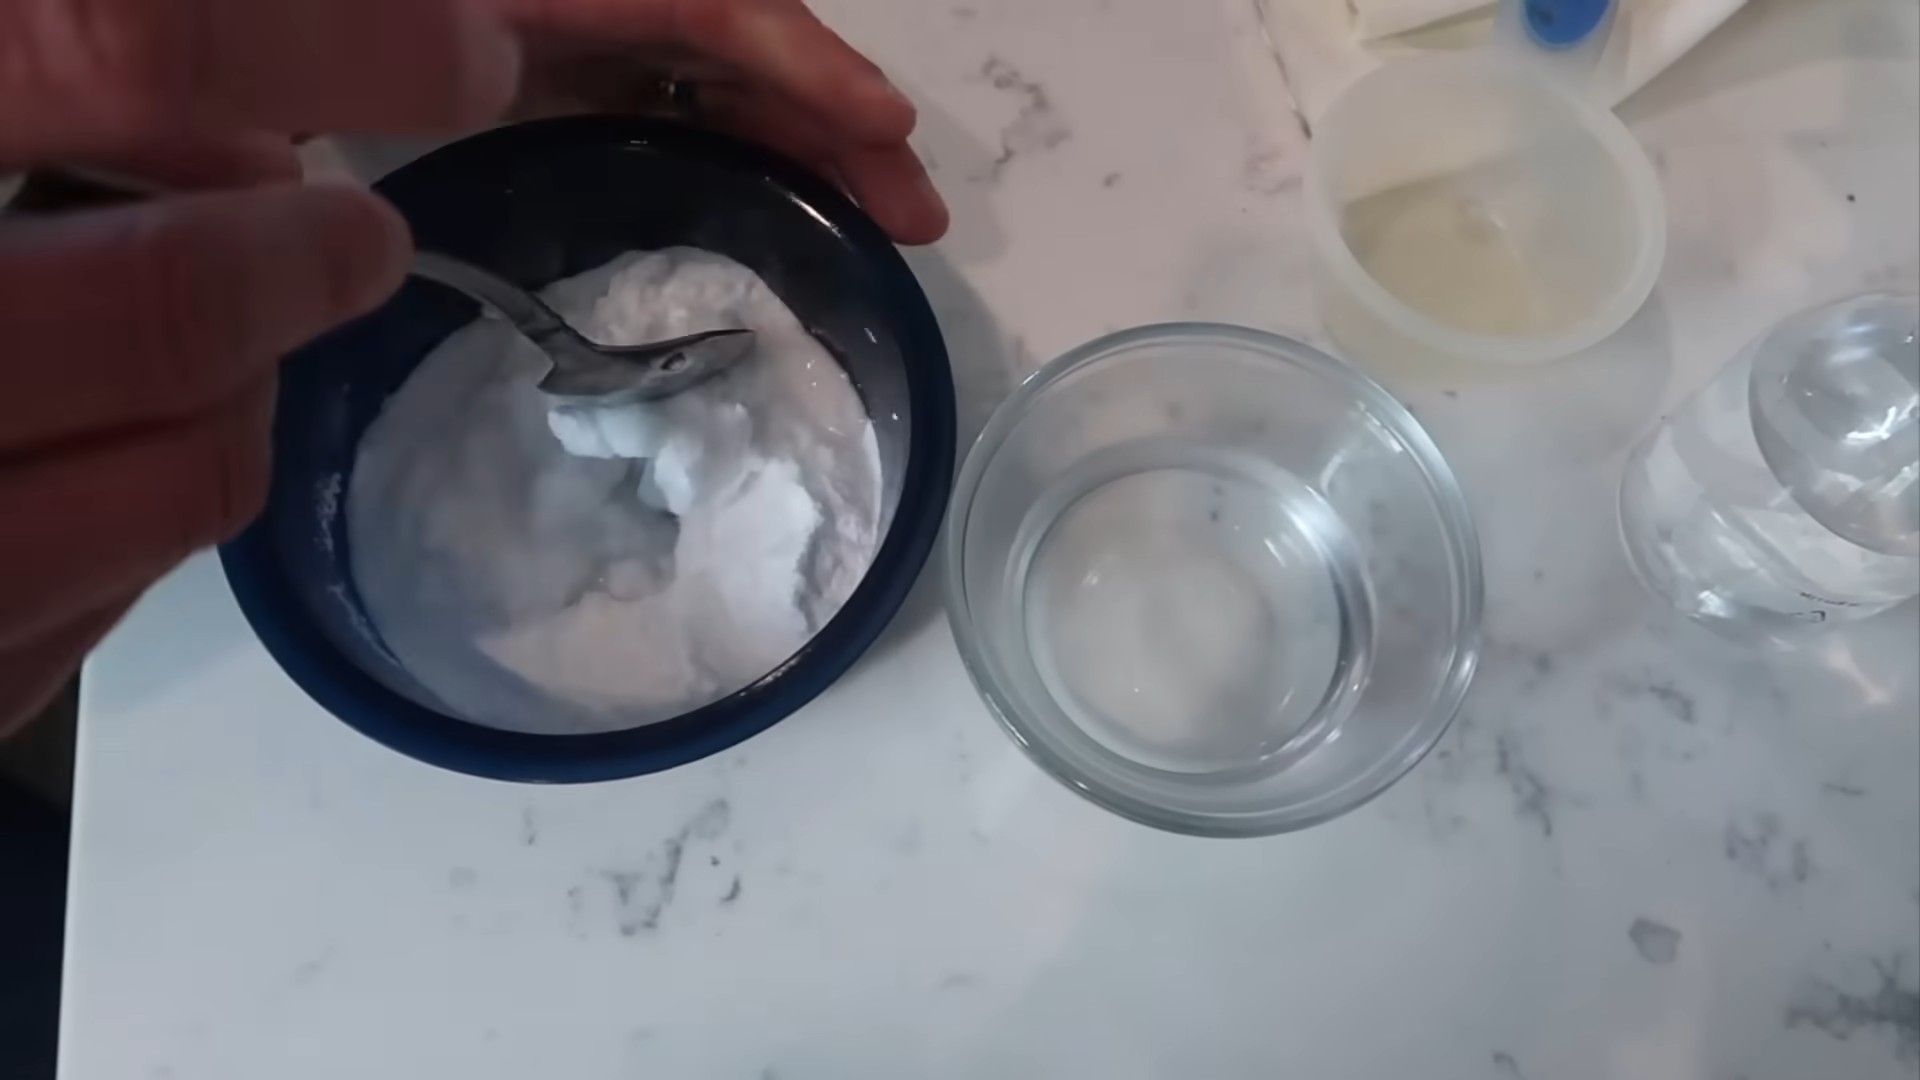
3. Create the Baking Soda Paste: The Cleaning Powerhouse. In your small bowl, mix together 1/2 cup of baking soda with a few tablespoons of water. Add water gradually until you form a thick, spreadable paste. You want it to be like a thick frosting consistency.
4. Coat the Oven Interior: Apply the Paste Generously. Using your hands (with gloves on, if you prefer) or a spatula, spread the baking soda paste all over the inside surfaces of your oven. This includes the back, sides, top, bottom, and door. Avoid the heating elements! You want a nice, even layer. Don’t be shy – really get in there and cover all the greasy spots.
5. Let it Sit: The Waiting Game (But Worth It!). This is the most important step! Let the baking soda paste sit for at least 12 hours, or even better, overnight. The longer it sits, the more time it has to loosen the baked-on grime. I usually do this before I go to bed so it can work its magic while I sleep.
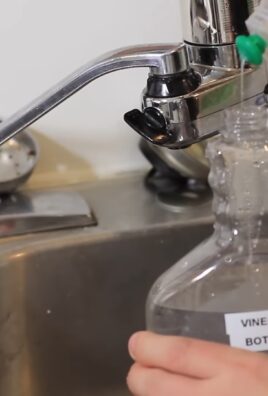
6. Prepare the Vinegar Spray: The Fizz Factor. The next day (or after at least 12 hours), fill your spray bottle with plain white vinegar. No need to dilute it.
7. Spray the Vinegar: Witness the Reaction! Spray the vinegar all over the baking soda paste inside the oven. You’ll see it start to fizz and bubble as it reacts with the baking soda. This is a good thing! It means the vinegar is helping to break down the grime even further.
8. Wipe Away the Grime: Elbow Grease Time. Now it’s time to put in a little elbow grease. Using a damp cleaning cloth or sponge, start wiping away the baking soda paste and loosened grime. You might need to use a spatula or scraper to help remove stubborn baked-on bits. Be patient and persistent!
9. Rinse Thoroughly: Remove All Residue. Once you’ve wiped away most of the baking soda paste, rinse the oven interior thoroughly with a clean, damp cloth. You want to make sure you remove all traces of baking soda, as it can leave a white residue if left behind. Keep rinsing and wiping until the water runs clear.
10. Clean the Oven Door: Don’t Forget the Glass! Don’t forget to clean the oven door, both inside and out. You can use the same baking soda paste and vinegar method for the glass. If you have particularly stubborn stains on the glass, you can try making a paste of baking soda and a little bit of lemon juice.
11. Clean the Oven Racks: A Separate Operation. While the baking soda paste is working its magic inside the oven, you can clean the oven racks. There are a few ways to do this:
* In the Bathtub: Line your bathtub with old towels to protect the surface. Fill the tub with hot water and add 1/2 cup of dish soap and 1/2 cup of baking soda. Submerge the oven racks in the water and let them soak for several hours, or overnight. Then, scrub them with a sponge or brush and rinse thoroughly.
* Outside with a Hose: Lay the oven racks on a tarp or old sheet outside. Spray them with a degreaser (you can even use a natural degreaser like a mixture of water and dish soap). Let it sit for a few minutes, then scrub them with a brush and rinse with a hose.
* Wrapped in Dryer Sheets: This sounds crazy, but it works! Place each rack on a large towel. Wet several dryer sheets and lay them all over the racks. Then, wrap the racks tightly in the towel and let them sit overnight. The dryer sheets will help loosen the grime, making it easier to wipe away.
12. Dry Everything: Prevent Water Spots. Once you’ve rinsed everything thoroughly, dry the oven interior, door, and racks with a clean towel. This will help prevent water spots and leave your oven looking sparkling clean.
13. Reassemble and Enjoy: Admire Your Handiwork! Finally, put the oven racks back in place, plug the oven back in (or turn the breaker back on), and admire your sparkling clean oven!
Troubleshooting: Tackling Tough Stains
Sometimes, you might encounter some really stubborn stains that just won’t budge. Here are a few tips for dealing with those:
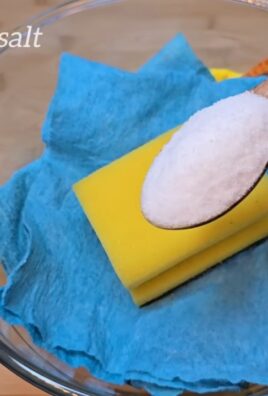
* For Extra-Tough Baked-On Food: Make a thicker baking soda paste and let it sit for even longer – up to 24 hours. You can also try adding a little bit of salt to the paste for extra scrubbing power.
* For Greasy Residue: Try using a mixture of water and dish soap to cut through the grease. You can also try using a natural degreaser like vinegar or lemon juice.
* For Burnt Sugar: Burnt sugar can be particularly difficult to remove. Try soaking the affected area with hot water for a few minutes before scrubbing. You can also try using a paste of baking soda and hydrogen peroxide.
Maintaining Your Clean Oven: Prevention is Key!
Now that you’ve gone to all the trouble of cleaning your oven, you’ll want to keep it clean! Here are a few tips for maintaining your oven and preventing future build-up:
* Wipe Up Spills Immediately: The easiest way to keep your oven clean is to wipe up spills as soon as they happen. Don’t let them bake onto the bottom of the oven!
* Use Oven Liners: Oven liners can help catch drips and spills, preventing them from baking onto the bottom of the oven. You can buy reusable oven liners or use aluminum foil.
* Clean Regularly: Don’t wait until your oven is completely covered in grime to clean it. Try to clean it every few months, or more often if you use it frequently.
* Consider a Self-Cleaning Oven (But Still Clean Naturally Sometimes!): If your oven has a self-cleaning function, you can use it to help keep it clean. However, self-cleaning ovens can produce a lot of smoke and odors, so it’s still a good idea to clean your oven naturally from time to time.
Why This Method Works: The Science Behind the Sparkle
So, why does this natural oven cleaning method work so well? It’s all about the chemistry!
* Baking Soda: Baking soda is a mild alkali, which means it can help to neutralize acids and break down grease and grime. It’s also a mild abrasive, which helps to scrub away stubborn stains.
* White Vinegar: White vinegar is a mild acid, which means it can help to dissolve mineral deposits and cut through grease. When it reacts with baking soda, it creates carbon dioxide gas, which helps to lift dirt and grime away from the surface.
By combining these two ingredients, you create a powerful cleaning solution that is both effective and safe for your family and the environment.
Final Thoughts: A Clean Oven,
Conclusion
So, there you have it! Ditching those harsh chemicals and embracing this natural oven cleaning method is more than just a trend; it’s a game-changer for your kitchen, your health, and the environment. We’ve walked you through a simple, effective process that utilizes ingredients you likely already have in your pantry: baking soda, vinegar, and a little bit of elbow grease.
But why is this DIY trick a must-try? Let’s recap. First and foremost, it’s about safety. Commercial oven cleaners are notorious for their fumes and caustic ingredients, posing risks to your respiratory system and potentially leaving harmful residues in your oven. This natural alternative eliminates those concerns, allowing you to clean your oven with peace of mind, especially if you have children or pets.
Secondly, it’s incredibly cost-effective. A box of baking soda and a bottle of vinegar are significantly cheaper than a can of oven cleaner, making this a budget-friendly solution for maintaining a sparkling clean oven. Think of all the delicious meals you can make with the money you save!
Thirdly, and perhaps most importantly, it works! While it might require a little more time and effort than spraying and wiping, the results are undeniable. The baking soda paste effectively loosens baked-on grease and grime, while the vinegar reacts to create a powerful cleaning action. You’ll be amazed at how easily the dirt lifts away, leaving you with a fresh, clean oven ready for your next culinary adventure.
Now, let’s talk about variations. While the baking soda and vinegar method is a fantastic starting point, you can customize it to suit your specific needs and preferences. For instance, if you have particularly stubborn stains, you can add a few drops of lemon essential oil to the baking soda paste for extra cleaning power and a refreshing scent. Alternatively, you can preheat your oven to a low temperature (around 200°F or 93°C) for about 15-20 minutes before applying the paste. This will help to soften the grime and make it easier to remove.
Another variation involves using a pumice stone (the kind used for removing calluses) to gently scrub away baked-on food particles. Be careful not to scratch the oven surface, and always test in an inconspicuous area first. You can also use a specialized oven cleaning brush with stiff bristles to reach tight corners and crevices.
For those who prefer a more liquid solution, you can create a spray by mixing equal parts water and vinegar in a spray bottle. Spray the mixture inside the oven and let it sit for a few minutes before wiping it clean. This is a great option for light cleaning and maintenance between deep cleans.
Remember, consistency is key. Regular cleaning, even if it’s just a quick wipe-down after each use, will prevent grime from building up and make future cleaning sessions much easier.
We wholeheartedly encourage you to try this natural oven cleaning method. It’s a simple, safe, and effective way to keep your oven clean and your kitchen healthy. Once you’ve given it a try, we’d love to hear about your experience! Share your tips, tricks, and before-and-after photos in the comments below. Let’s build a community of eco-conscious cooks who are passionate about keeping their kitchens clean and green! Your feedback will help others discover the benefits of this amazing DIY cleaning solution. So, grab your baking soda, vinegar, and a sponge, and get ready to transform your oven! Happy cleaning!
Frequently Asked Questions (FAQ)
1. Is this natural oven cleaning method safe for all types of ovens?
Generally, yes, this method is safe for most ovens, including electric, gas, and convection ovens. However, it’s always a good idea to check your oven’s manual for any specific cleaning recommendations or warnings. Avoid using abrasive scrubbers on self-cleaning ovens, as this can damage the coating. For self-cleaning ovens, it’s best to consult the manufacturer’s instructions for cleaning. If you have any doubts, test the baking soda paste in an inconspicuous area first to ensure it doesn’t damage the surface.
2. How long does it take to clean an oven using this method?
The total time can vary depending on how dirty your oven is. The initial application of the baking soda paste and letting it sit overnight is the most time-consuming part. The actual scrubbing and wiping usually takes about 30-60 minutes. If your oven is heavily soiled, you may need to repeat the scrubbing process or let the paste sit for a longer period. Remember, patience is key!
3. What if the baking soda paste dries out and becomes difficult to remove?
If the baking soda paste dries out and hardens, simply spray it with a generous amount of vinegar. The vinegar will react with the baking soda, loosening the paste and making it easier to wipe away. You can also use a damp sponge or cloth to rehydrate the paste before scrubbing.
4. Can I use this method to clean the oven door glass?
Yes, this method works well for cleaning oven door glass. Apply the baking soda paste to the glass, let it sit for a few hours or overnight, and then scrub it clean with a sponge or cloth. For stubborn stains, you can use a razor blade scraper (carefully!) to remove the grime. Be sure to avoid scratching the glass. A mixture of vinegar and water in a spray bottle can also be used for a lighter cleaning of the oven door glass.
5. What if I don’t have vinegar? Can I use something else?
While vinegar is the ideal ingredient for reacting with the baking soda and loosening the grime, you can try using lemon juice as a substitute. Lemon juice contains citric acid, which has cleaning properties similar to vinegar. However, vinegar is generally more effective and readily available.
6. How often should I clean my oven using this method?
The frequency of cleaning depends on how often you use your oven and how much food spills inside. As a general rule, it’s a good idea to deep clean your oven every 3-6 months. However, if you notice spills or splatters, it’s best to clean them up immediately to prevent them from baking on and becoming difficult to remove. Regular wiping down of the oven interior after each use can also help to keep it clean and prevent the buildup of grime.
7. Is this method effective for removing burnt-on sugar or grease?
Yes, this method is effective for removing burnt-on sugar and grease, but it may require some extra effort. For particularly stubborn stains, you can try preheating your oven to a low temperature (around 200°F or 93°C) for about 15-20 minutes before applying the baking soda paste. This will help to soften the grime and make it easier to remove. You can also use a pumice stone or a specialized oven cleaning brush to gently scrub away the burnt-on residue.
8. Will this method eliminate all odors from my oven?
This method is effective at neutralizing odors, but it may not completely eliminate all lingering smells, especially if they are deeply embedded in the oven’s interior. To further eliminate odors, you can place a bowl of vinegar or baking soda inside the oven overnight. You can also try heating a mixture of water and lemon juice in the oven for about 30 minutes.
9. Can I use this method to clean the oven racks?
Yes, you can use this method to clean the oven racks. Soak the racks in a solution of hot water and baking soda for several hours or overnight. Then, scrub them clean with a brush or sponge. For stubborn stains, you can use a paste of baking soda and water to scrub the racks. Rinse thoroughly with water and dry before placing them back in the oven.
10. What are the benefits of using natural oven cleaning methods compared to commercial cleaners?
The benefits are numerous! Natural methods are safer for your health, as they don’t contain harsh chemicals or fumes. They are also more environmentally friendly, as they don’t contribute to air or water pollution. Plus, they are often more cost-effective than commercial cleaners. By choosing a natural oven cleaning approach, you’re making a conscious decision to protect your health, the environment, and your wallet.

Leave a Comment