
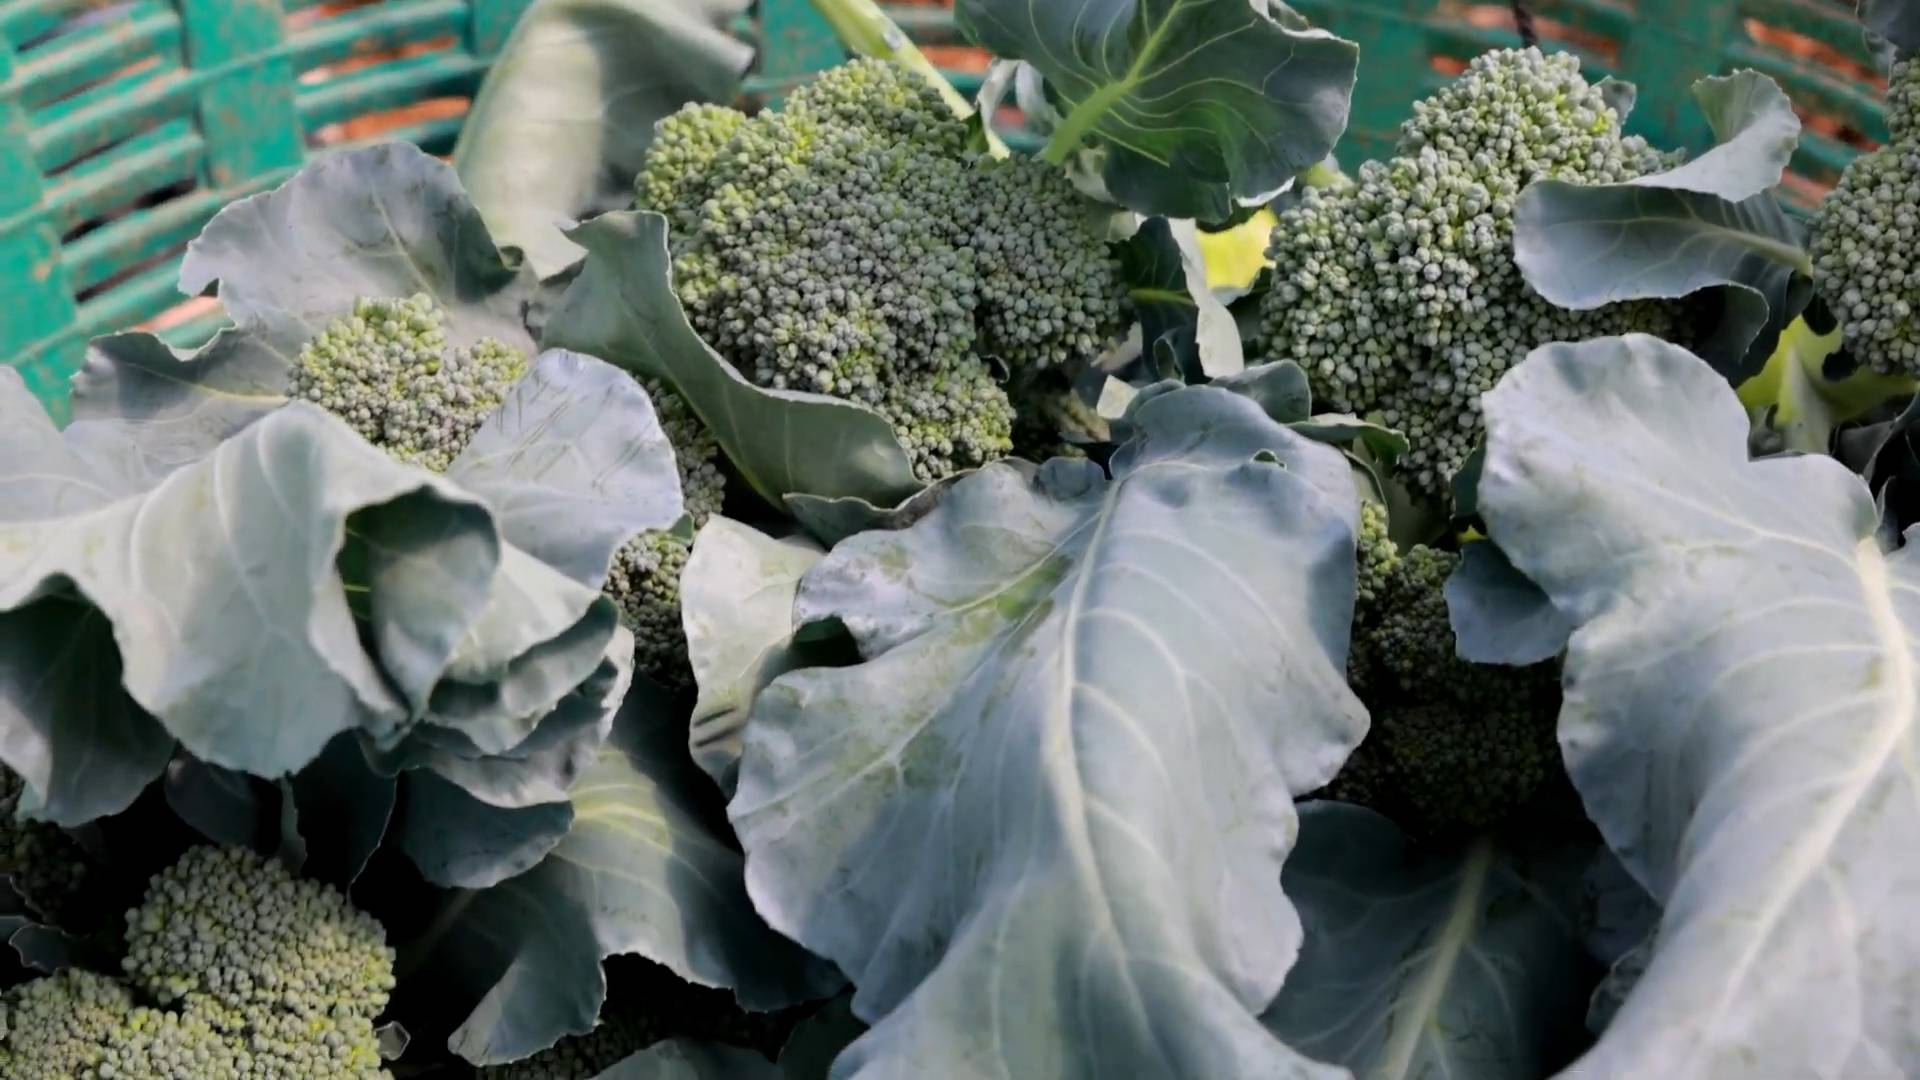
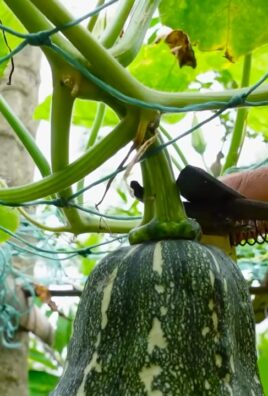
Harvesting Broccoli: Your Guide to a Bountiful Home Garden
Harvesting broccoli might seem straightforward, but there’s a real art to getting the most delicious and productive harvest from your home garden. I’ve learned a thing or two over the years about maximizing my broccoli yield, and I’m excited to share my secrets with you in this guide filled with easy-to-follow tips and tricks. Forget those sad, woody florets from the supermarket; we’re talking about tender, flavorful broccoli bursting with nutrients, straight from your backyard!
For centuries, broccoli has held a place of honor in various cultures, from its origins in the Mediterranean to its widespread popularity today. It’s a testament to its versatility and nutritional value. But growing your own broccoli isn’t just about enjoying a delicious vegetable; it’s about connecting with nature, understanding the life cycle of your food, and experiencing the immense satisfaction of harvesting something you’ve nurtured from seed to plate. And let’s be honest, homegrown broccoli tastes infinitely better than anything you can buy!
Why Master the Art of Harvesting Broccoli?
Knowing the proper techniques for harvesting broccoli is crucial for several reasons. Firstly, it ensures you get the most tender and flavorful florets. Harvesting at the right time prevents the broccoli from becoming tough and woody, which is a common problem. Secondly, proper harvesting encourages the plant to produce more florets, extending your harvest season and maximizing your yield. Finally, understanding the process of harvesting broccoli empowers you to take control of your food source and enjoy the freshest, most nutritious broccoli possible.
So, whether you’re a seasoned gardener or just starting out, this guide will equip you with the knowledge and confidence to harvest your broccoli like a pro. Let’s get started and unlock the secrets to a bountiful harvest!
Smart Sponge Cleaning Hacks: Get Your Sponges Sparkling!
Sponges. We use them daily, but how often do we really clean them? A dirty sponge is a breeding ground for bacteria, so keeping them clean is crucial. This guide will show you how to get your sponges sparkling and sanitized, extending their life and keeping your kitchen hygienic.
Phase 1: Daily Sponge Care – Keeping it Fresh
- Rinse thoroughly after each use: This is the single most important step. Immediately after washing dishes, rinse your sponge under hot, running water to remove food particles and excess soap. Squeeze out as much water as possible.
- Air dry completely: Don’t leave your sponge sitting in a damp dish rack. Hang it up or lay it flat to allow for complete air drying. This prevents the growth of mold and bacteria.
- Consider a two-sponge system: Many people find it helpful to use two sponges – one for washing dishes and one for wiping counters. This helps to prevent cross-contamination.
Phase 2: Weekly Deep Cleaning – Banishing Germs
Once a week, you need to give your sponges a more thorough cleaning to eliminate any lingering bacteria. Here’s how:
- Microwave Method (for cellulose sponges): This is my go-to method for cellulose sponges. First, thoroughly rinse your sponge under hot water to remove any large food particles. Then, wet the sponge completely and place it in a microwave-safe dish with about ½ cup of water. Microwave on high for one to two minutes. Caution: The sponge will be very hot, so use oven mitts to remove it. Let it cool completely before using.
- Boiling Method (for cellulose and some synthetic sponges): If you don’t have a microwave, boiling is a great alternative. Bring a pot of water to a rolling boil. Place the rinsed sponge in the boiling water and let it simmer for about five minutes. Use tongs to remove the sponge and allow it to cool completely.
- Dishwasher Method (for heat-resistant sponges): Many modern sponges are dishwasher safe. Simply place the sponge in the dishwasher and run a complete cycle on the hottest setting. This is a convenient option if you already run the dishwasher regularly.
- Vinegar Soak (for all sponge types): A vinegar soak is a fantastic way to disinfect and deodorize your sponges. Fill a bowl with equal parts white vinegar and water. Submerge your rinsed sponge completely and let it soak for at least 30 minutes, or even overnight. Rinse thoroughly afterward.
- Baking Soda Scrub (for stubborn stains): For sponges with stubborn stains or odors, create a paste of baking soda and water. Gently scrub the paste onto the sponge, paying attention to stained areas. Let it sit for a few minutes before rinsing thoroughly.
Phase 3: Recognizing When to Replace Your Sponge
Even with diligent cleaning, sponges eventually wear out and need replacing. Here are some signs it’s time for a new one:
- Persistent odors: If your sponge continues to smell bad even after thorough cleaning, it’s time to replace it. The odor indicates that bacteria have likely colonized the sponge’s fibers.
- Visible mold or mildew: Mold and mildew are not only unsightly but also pose health risks. If you see any signs of mold or mildew, discard the sponge immediately.
- Physical deterioration: Sponges become less effective over time. If your sponge is falling apart, tearing, or no longer absorbs water well, it’s time for a new one.
- Frequent use: Even with proper care, heavily used sponges should be replaced every two to four weeks. This is especially important for sponges used for cleaning raw meat or other potentially contaminated surfaces.
Phase 4: Choosing the Right Sponge
The type of sponge you use can also impact its lifespan and cleaning effectiveness. Consider these factors:
- Cellulose sponges: These are highly absorbent and generally more environmentally friendly than synthetic sponges. However, they tend to wear out faster.
- Synthetic sponges: These are more durable and often last longer than cellulose sponges. Look for sponges made from materials that are resistant to bacteria.
- Specialty sponges: Consider using different sponges for different tasks. For example, a non-scratch sponge for delicate surfaces and a scrub sponge for tougher cleaning jobs.
Phase 5: Beyond the Sponge: Keeping Your Kitchen Clean
Remember, a clean sponge is only part of the equation. Maintaining a clean kitchen overall is essential for preventing the spread of bacteria. This includes regularly cleaning your countertops, sink, and other surfaces.
- Clean your sink daily: A dirty sink can contaminate your sponges and dishes. Wipe down your sink with a disinfectant cleaner after each use.
- Disinfect your countertops: Use a disinfectant spray or wipe to clean your countertops after preparing food, especially raw meat or poultry.
- Wash your dishcloths and towels frequently: Dishcloths and towels can harbor bacteria just like sponges. Wash them in hot water with detergent at least once a week.
By following these tips, you can keep your sponges clean, extend their lifespan, and maintain a hygienic kitchen environment. Remember, a clean sponge is a happy sponge – and a happy sponge means a happy you!
Conclusion
This DIY guide to harvesting broccoli has shown you how simple and rewarding it can be to bring the freshest, most flavorful broccoli from your garden to your table. By following these easy steps, you’ll not only save money but also gain a deeper appreciation for the process of growing your own food. Harvesting broccoli at the perfect time is crucial for maximizing its taste and texture, and this method ensures you get it just right every time. The satisfaction of cutting your own broccoli, knowing exactly where it came from and how it was grown, is unparalleled. It’s a truly fulfilling experience that connects you directly to your food source. This isn’t just about saving money; it’s about cultivating a deeper connection with nature and enjoying the fruits (or rather, florets!) of your labor. Beyond the immediate gratification, you’ll also find yourself more inclined to experiment with different broccoli varieties and cooking methods, expanding your culinary horizons.
This DIY harvesting technique isn’t just limited to broccoli; you can adapt the principles to other brassicas like cauliflower and kale. Experiment with different harvesting times to see how it affects the flavor profile. For instance, harvesting slightly earlier might result in a more tender floret, while harvesting later could yield a more intense flavor. Consider planting different varieties of broccoli to extend your harvest season. Some varieties are more heat-tolerant than others, allowing you to enjoy fresh broccoli even during the hottest months. You can also explore companion planting, using herbs or other plants to deter pests and improve the overall health of your broccoli plants. The possibilities are endless!
We strongly encourage you to try this DIY broccoli harvesting method and share your experience with us. Whether you’re a seasoned gardener or a complete beginner, this technique is accessible to everyone. Post your photos on social media using #DIYBroccoliHarvest and tag us – we’d love to see your bountiful harvest! Share your tips and tricks, and let’s build a community of home gardeners who are passionate about growing their own food. Remember, the journey of growing your own food is as rewarding as the final product. So grab your knife, head to your garden, and experience the joy of harvesting your own delicious, homegrown broccoli. You won’t regret it! This simple DIY trick will transform your relationship with food and empower you to take control of your culinary journey. It’s a small step towards a more sustainable and fulfilling lifestyle.
Frequently Asked Questions
What are the signs that my broccoli is ready for harvesting?
The ideal time to harvest broccoli is when the heads are firm and tightly closed, but before they start to flower. The florets should be a deep green color and feel dense to the touch. Avoid harvesting broccoli that shows signs of yellowing or browning, as this indicates it’s past its prime.
How often should I harvest broccoli?
The frequency of harvesting depends on the variety of broccoli and the growing conditions. Generally, you can harvest broccoli every 7-10 days. Regular harvesting encourages the plant to produce more side shoots, extending the harvest season. Always harvest the main head first, followed by the smaller side shoots as they develop.
What should I do with the harvested broccoli?
Freshly harvested broccoli is best enjoyed immediately. You can store it in the refrigerator for a few days, but it’s best to use it within 2-3 days for optimal flavor and texture. You can eat it raw in salads, steam it, roast it, or use it in stir-fries. The possibilities are endless!
What if my broccoli heads are small?
Small broccoli heads can be due to several factors, including insufficient sunlight, poor soil quality, or improper watering. Ensure your broccoli plants receive at least 6-8 hours of sunlight per day and are planted in well-drained soil rich in organic matter. Consistent watering is also crucial for healthy growth. Consider using fertilizer to provide essential nutrients.
Can I harvest broccoli in the rain?
While you can technically harvest broccoli in the rain, it’s generally recommended to wait until the plants are dry. Wet broccoli is more susceptible to spoilage and may not store as well. Harvesting on a dry day ensures the best quality and longevity of your broccoli.
What are some common pests or diseases that affect broccoli?
Broccoli is susceptible to various pests and diseases, including aphids, cabbage worms, and fungal diseases like downy mildew. Regularly inspect your plants for signs of infestation or disease. Consider using organic pest control methods, such as neem oil or insecticidal soap, to manage pests. Good garden hygiene and proper spacing between plants can also help prevent disease.
My broccoli plants are bolting. What does that mean and what should I do?
Bolting occurs when broccoli plants prematurely produce flowers instead of focusing on head development. This is often triggered by stress, such as heat or drought. While you can still harvest the florets, they will be smaller and less tender. To prevent bolting, ensure your broccoli plants receive consistent watering and are planted in a location with partial shade during hot weather.
How can I extend my broccoli harvest?
Successive planting is a great way to extend your broccoli harvest. Plant new seeds or seedlings every few weeks to ensure a continuous supply of fresh broccoli throughout the growing season. You can also try planting different varieties with varying maturity times.
What are some good companion plants for broccoli?
Good companion plants for broccoli include herbs like dill, rosemary, and thyme, which can help deter pests. Marigolds are also known to repel certain insects. Avoid planting broccoli near heavy feeders like tomatoes or peppers, as they can compete for nutrients.
Where can I find broccoli seeds or seedlings?
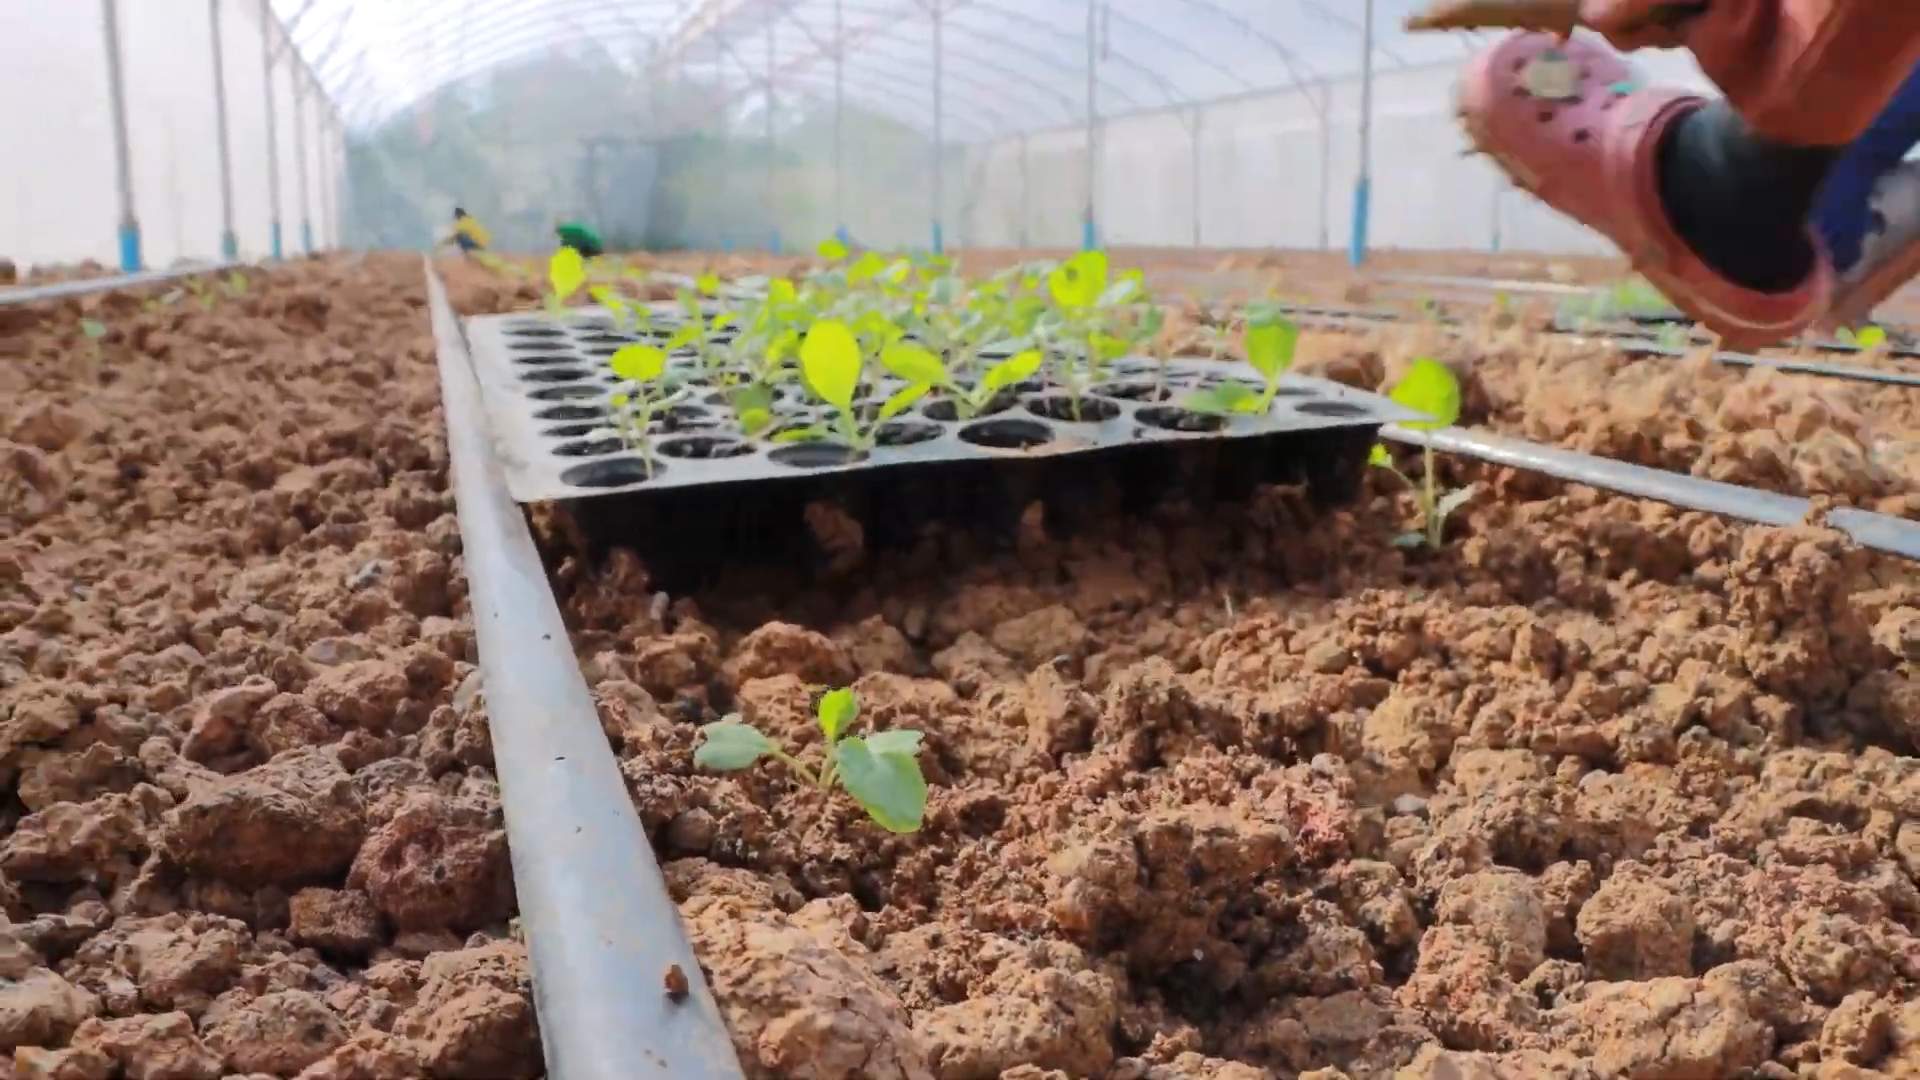
Broccoli seeds and seedlings are readily available at most garden centers, nurseries, and online retailers. Choose high-quality seeds or seedlings from reputable sources to ensure a successful harvest. Consider starting seeds indoors several weeks before the last expected frost for an earlier harvest.
Leave a Comment