
Grow Microgreens at Home: Imagine adding a burst of fresh, vibrant flavor and a nutritional powerhouse to your meals, all from your own kitchen! For centuries, cultures around the world have recognized the incredible benefits of sprouts and young greens. From ancient Chinese medicine utilizing sprouted grains to modern chefs adorning dishes with delicate microgreens, the appeal of these tiny plants is timeless. But did you know that cultivating these little wonders is surprisingly easy and incredibly rewarding?
I’m here to tell you that you don’t need a green thumb or acres of land to enjoy the benefits of fresh, homegrown greens. In today’s fast-paced world, we’re all looking for ways to eat healthier, save money, and connect with nature. That’s where this DIY guide comes in! Learning how to grow microgreens at home is the perfect solution. It’s a simple, cost-effective way to boost your nutrient intake, reduce your grocery bill, and experience the joy of watching something grow from seed to plate in just a matter of days.
Ready to ditch those expensive store-bought greens and embark on a fun and flavorful journey? Let’s dive into the wonderful world of microgreens and discover how easy it is to cultivate your own miniature garden indoors!
Grow Your Own Delicious Microgreens: A Beginner’s Guide
Hey there, fellow food enthusiasts! Ever wanted to add a burst of fresh flavor and nutrients to your meals without even leaving your kitchen? Well, you’re in the right place! I’m going to walk you through the super simple process of growing your own microgreens at home. Trust me, it’s easier than you think, and the rewards are totally worth it.
What are Microgreens Anyway?
Before we dive in, let’s quickly cover what microgreens actually are. They’re basically baby versions of vegetables and herbs, harvested just a few weeks after germination. Think of them as super-powered sprouts! They’re packed with vitamins, minerals, and antioxidants, and they add a fantastic pop of color and flavor to salads, sandwiches, soups, and just about anything else you can imagine.
Why Grow Your Own?
Okay, so you can buy microgreens at the store, right? Sure, but growing your own is way more fun, cost-effective, and you know exactly what you’re getting. Plus, there’s something incredibly satisfying about watching those tiny seeds sprout and transform into delicious, edible greens.
Choosing Your Seeds
The first step to microgreen success is picking the right seeds. Here are some popular and easy-to-grow options:
* **Radish:** Spicy and peppery, a classic choice.
* **Broccoli:** Mild and nutritious.
* **Sunflower:** Nutty and crunchy.
* **Pea Shoots:** Sweet and tender.
* **Mustard:** Tangy and flavorful.
* **Arugula:** Peppery and slightly bitter.
* **Kale:** Earthy and nutritious.
* **Cress:** Zesty and refreshing.
Important Tip: Make sure you’re using seeds specifically intended for sprouting or microgreens. Regular garden seeds might be treated with chemicals that you don’t want to eat.
Gathering Your Supplies
Now, let’s get our hands on the necessary supplies. The beauty of this project is that you probably already have most of what you need!
* **Growing Trays:** You’ll need two trays – one with drainage holes and one without. The one without holes will act as a water reservoir. You can find these at most garden centers or online. Recycled plastic containers work great too! Just make sure they’re clean and food-safe.
* **Growing Medium:** I recommend using a soilless mix like coconut coir or a seed starting mix. These mediums are lightweight, retain moisture well, and are less prone to mold growth than regular soil.
* **Spray Bottle:** For misting your microgreens.
* **Seeds:** Of course! Choose your favorite variety.
* **Water:** Filtered water is best.
* **Weight (Optional):** A small plate or book to weigh down the seeds during germination. This helps them establish good root contact.
* **Light Source (Optional):** While microgreens can grow indoors with indirect sunlight, a grow light can significantly improve their growth and color, especially during the darker months.
Step-by-Step Instructions: From Seed to Salad
Alright, let’s get growing! Here’s a detailed breakdown of the process:
1. Soaking the Seeds (Optional but Recommended)
Some seeds benefit from a pre-soak to kickstart the germination process. This is especially helpful for larger seeds like peas and sunflowers.
1. Place your seeds in a bowl.
2. Cover them with cool water.
3. Let them soak for the recommended time (usually 4-8 hours). Check your seed packet for specific instructions.
4. Drain the seeds thoroughly using a fine-mesh sieve.
2. Preparing the Growing Tray
1. Take the tray with drainage holes and fill it with your chosen growing medium.
2. Gently level the surface and lightly compact it. You want a nice, even bed for your seeds.
3. Moisten the growing medium thoroughly with your spray bottle. It should be damp but not soggy.
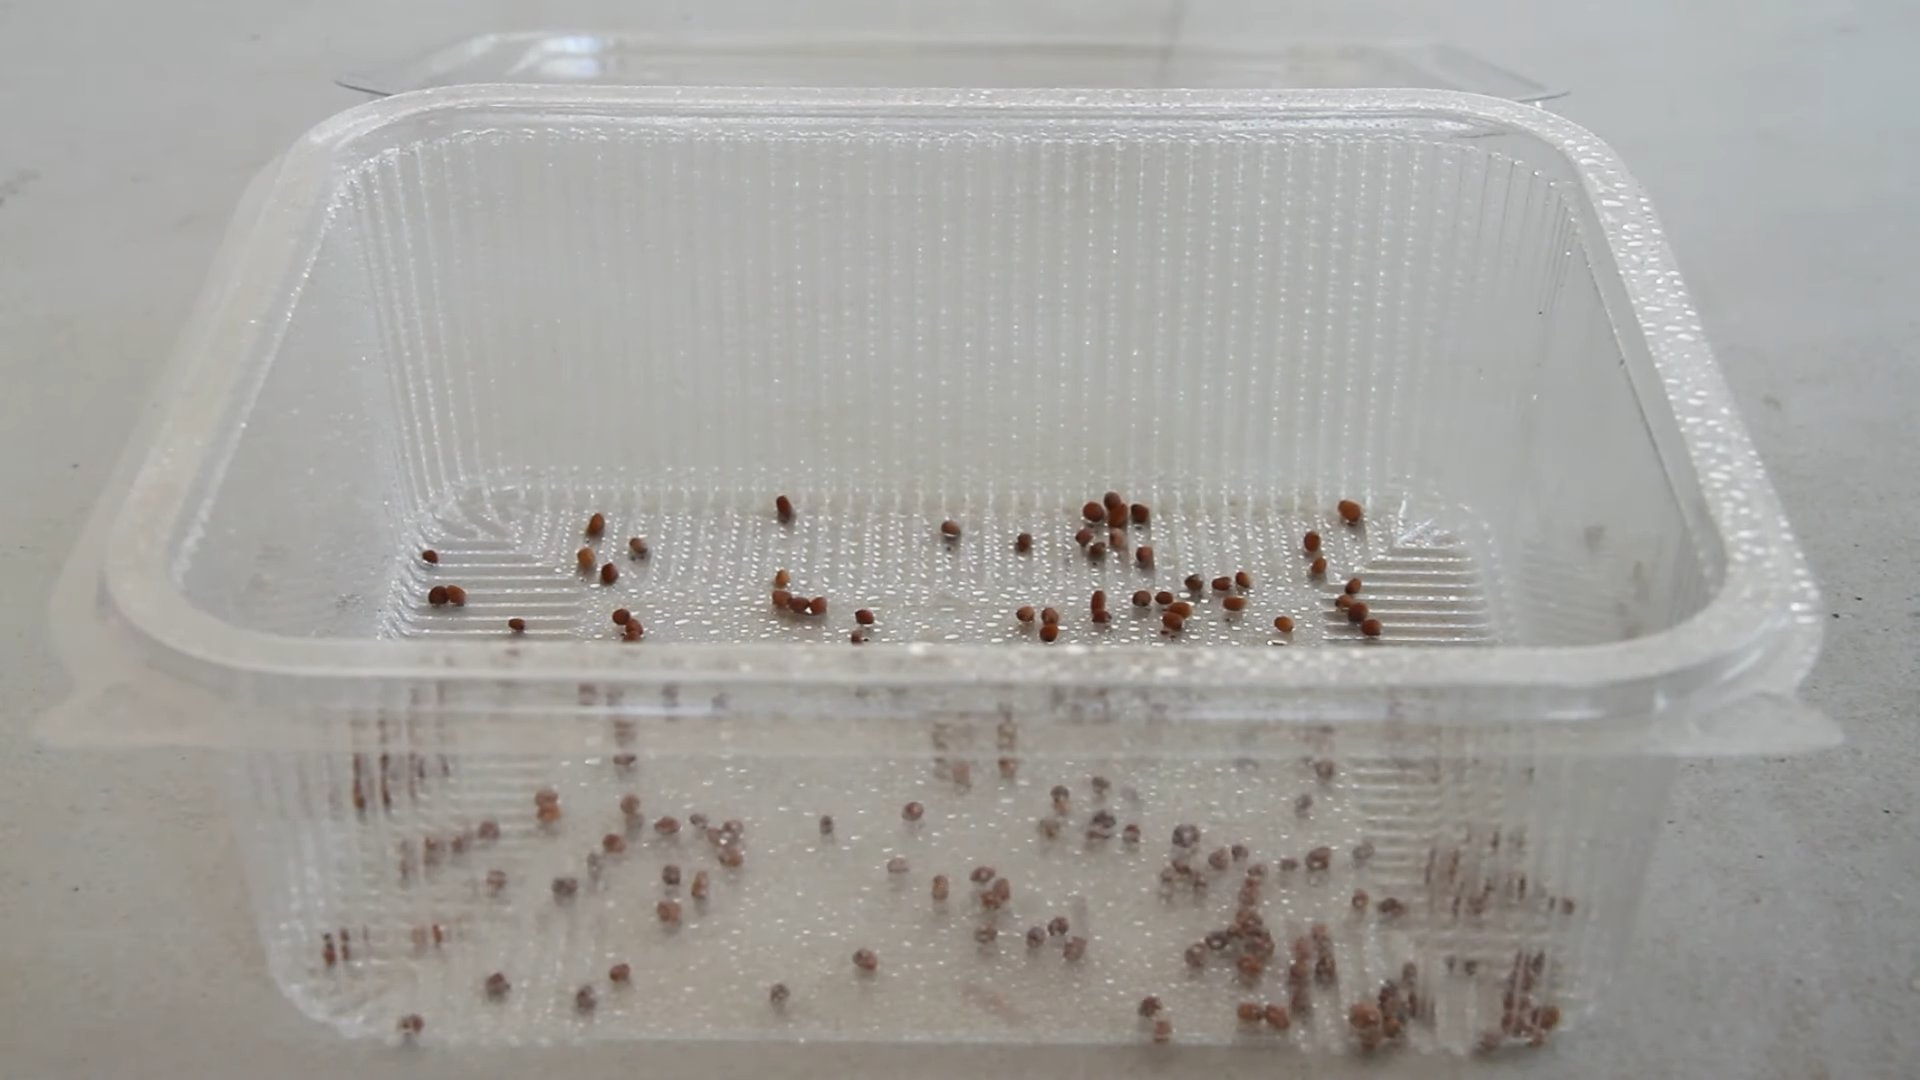
3. Sowing the Seeds
1. Sprinkle the seeds evenly over the surface of the growing medium. Don’t overcrowd them! You want them to have enough space to grow. A good rule of thumb is to aim for about 75% coverage.
2. Gently press the seeds into the growing medium with your hand or a flat object. This ensures good contact.
3. Mist the seeds lightly with water.
4. Blackout Period (The Key to Success!)
This is a crucial step! Microgreens need darkness to germinate properly.
1. Place the second tray (the one without drainage holes) on top of the seeded tray, creating a dark, enclosed environment.
2. Alternatively, you can cover the tray with a dark towel or a lid.
3. If you’re using a weight, place it on top of the cover to help the seeds establish root contact.
4. Keep the tray in a dark, room-temperature location for 2-4 days, or until the seeds have germinated and started to sprout. Check the seeds daily to ensure the growing medium stays moist. Mist with water as needed.
5. Introducing Light
Once the seeds have sprouted and you see tiny leaves emerging, it’s time to introduce light!
1. Remove the cover or weight.
2. Place the tray under a grow light or in a location with bright, indirect sunlight. Avoid direct sunlight, which can scorch the delicate seedlings.
3. If you’re using a grow light, position it a few inches above the tray and keep it on for 12-16 hours per day.
6. Watering and Maintenance
Consistent moisture is key to healthy microgreens.
1. Water your microgreens regularly, but be careful not to overwater them. The growing medium should be damp, not soggy.
2. The easiest way to water is to pour water into the bottom tray (the one without drainage holes). The growing medium will absorb the water from below, preventing the leaves from getting wet and potentially developing mold.
3. Check the water level in the bottom tray daily and refill as needed.
4. If you notice any mold growth, improve air circulation by placing a small fan near the tray. You can also try spraying the affected area with a diluted hydrogen peroxide solution (1 part hydrogen peroxide to 10 parts water).
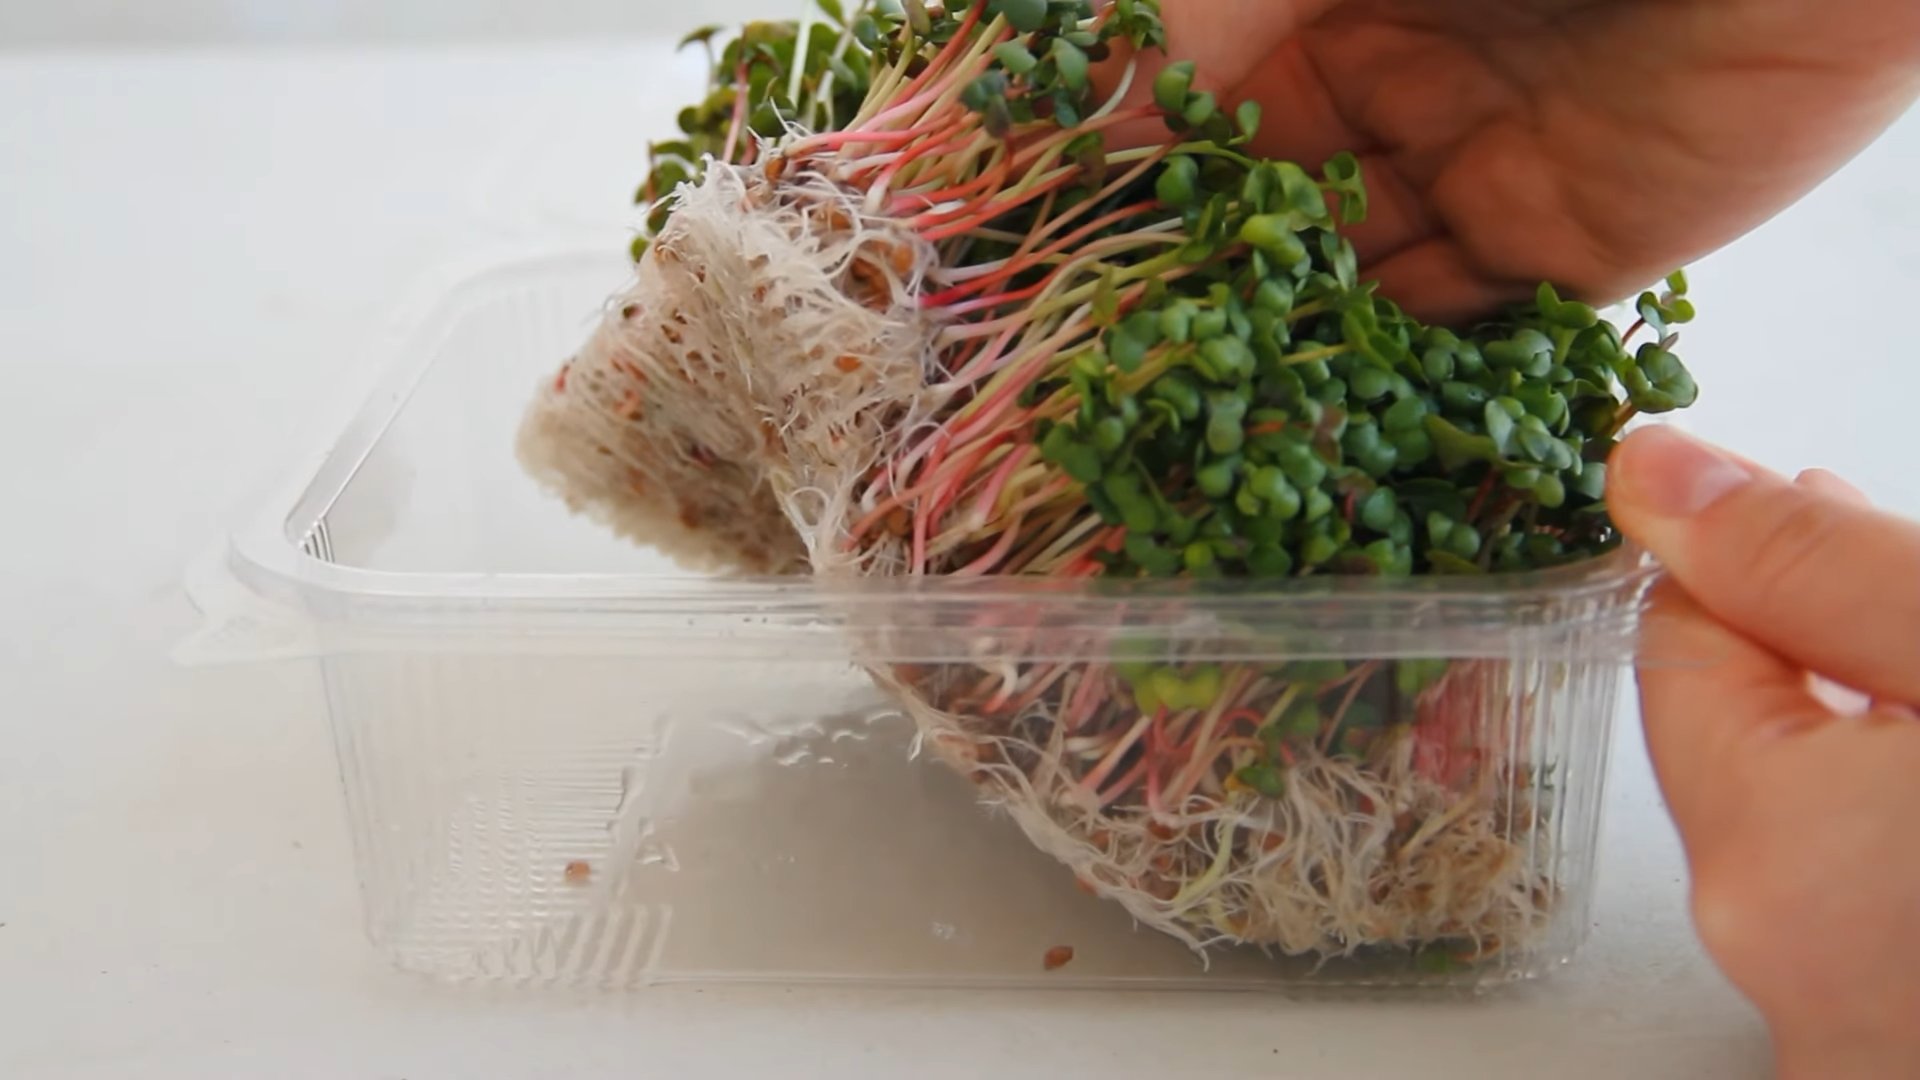
7. Harvesting Your Microgreens
The moment you’ve been waiting for! Your microgreens are ready to harvest when they have developed their first set of true leaves (the second set of leaves after the initial seed leaves). This usually takes about 7-14 days, depending on the variety.
1. Use sharp scissors or a knife to cut the microgreens just above the growing medium.
2. Rinse the harvested microgreens gently with water.
3. Pat them dry with a paper towel.
8. Enjoying Your Harvest
Now for the best part – eating your delicious, homegrown microgreens!
1. Add them to salads, sandwiches, soups, smoothies, or use them as a garnish for your favorite dishes.
2. Store leftover microgreens in an airtight container in the refrigerator for up to a week.
Troubleshooting Tips
Even with the best intentions, things can sometimes go wrong. Here are a few common issues and how to fix them:
* **Mold Growth:** This is usually caused by overwatering or poor air circulation. Improve air circulation with a fan and reduce watering. You can also try spraying the affected area with a diluted hydrogen peroxide solution.
* **Leggy Microgreens:** This means your microgreens are stretching towards the light because they’re not getting enough. Move them to a brighter location or use a grow light.
* **Slow Germination:** This could be due to cold temperatures or old seeds. Make sure the seeds are stored properly and the growing environment is warm enough.
* **Uneven Growth:** This could be due to uneven seed distribution or inconsistent watering. Try to sow the seeds more evenly and make sure the growing medium is consistently moist.
Experiment and Have Fun!
The best part about growing microgreens is that it’s a fun and rewarding experiment. Don’t be afraid to try different varieties, growing mediums, and techniques. With a little practice, you’ll be growing your own delicious and nutritious microgreens in no time! Happy growing!
Conclusion
So, there you have it! Growing microgreens at home is not only incredibly simple and cost-effective, but it’s also a fantastic way to infuse your meals with a burst of fresh flavor and concentrated nutrients. Forget those expensive, pre-packaged containers from the grocery store. With just a few readily available supplies and a little bit of patience, you can cultivate your own thriving microgreen garden right on your windowsill.
This DIY trick is a must-try for several compelling reasons. First and foremost, you have complete control over the growing process. You know exactly what you’re putting into your microgreens, ensuring they are free from harmful pesticides and herbicides. Secondly, the freshness is unparalleled. Harvesting your microgreens just moments before adding them to your salad, sandwich, or smoothie guarantees maximum flavor and nutritional value. And finally, let’s not forget the sheer satisfaction of nurturing something from seed to sprout. It’s a rewarding experience that connects you to the natural world, even in the heart of the city.
But the beauty of growing microgreens at home lies in its versatility. Feel free to experiment with different seed varieties to discover your favorite flavor combinations. Radish microgreens offer a peppery kick, while broccoli microgreens are mild and slightly sweet. Sunflower microgreens provide a nutty crunch, and pea shoots are delightfully tender. You can even create your own custom blends to suit your specific taste preferences.
Consider these variations to elevate your microgreen growing game:
* Vertical Gardening: If you’re short on space, try a vertical microgreen garden using stacked trays or repurposed containers.
* Hydroponic Microgreens: Explore hydroponic growing methods for a soil-free alternative.
* Microgreen Smoothies: Blend your harvested microgreens into your morning smoothie for a nutrient-packed boost.
* Microgreen Garnishes: Use microgreens as a vibrant and flavorful garnish for soups, salads, and main courses.
We wholeheartedly encourage you to give this DIY trick a try. It’s a simple, rewarding, and delicious way to enhance your culinary creations and boost your overall well-being. Once you experience the joy of harvesting your own fresh microgreens, you’ll never look at store-bought greens the same way again.
Don’t be afraid to experiment, get creative, and most importantly, have fun! We’re confident that you’ll be amazed by how easy and rewarding it is to grow microgreens at home.
We’d love to hear about your experiences! Share your photos, tips, and favorite microgreen varieties in the comments below. Let’s build a community of home microgreen growers and inspire others to embrace this simple and sustainable practice. Happy growing!
Frequently Asked Questions (FAQ)
What exactly are microgreens?
Microgreens are essentially young vegetable greens that are harvested shortly after germination, typically when the first true leaves have emerged. They are larger than sprouts but smaller than baby greens, and they pack a concentrated punch of flavor and nutrients. Think of them as miniature versions of mature vegetables, offering a similar taste profile but with a more delicate texture.
What kind of seeds can I use to grow microgreens?
The possibilities are vast! Some of the most popular and easy-to-grow microgreen seeds include:
* Radish
* Broccoli
* Sunflower
* Pea
* Mustard
* Arugula
* Kale
* Cilantro
* Beet
* Swiss Chard
However, it’s crucial to use seeds specifically intended for sprouting or microgreen production. Avoid using seeds that have been treated with fungicides or other chemicals, as these are not safe for consumption. Look for seeds labeled as “organic” or “untreated” to ensure the highest quality and safety.
What kind of container should I use?
You don’t need anything fancy to get started. Shallow trays or containers with drainage holes are ideal. You can repurpose plastic takeout containers, seedling trays, or even baking dishes. Just make sure the container is clean and has adequate drainage to prevent waterlogging, which can lead to mold growth. A good depth is around 1-2 inches.
What kind of soil should I use?
A good quality seed starting mix or potting mix works best. Avoid using garden soil, as it can be too heavy and may contain pests or diseases. The soil should be well-draining and provide adequate support for the developing roots. You can also use soilless growing mediums like coconut coir or vermiculite.
How much light do microgreens need?
Microgreens need plenty of light to thrive. A sunny windowsill that receives at least 4-6 hours of direct sunlight per day is ideal. If you don’t have access to enough natural light, you can supplement with artificial grow lights. Fluorescent or LED grow lights are energy-efficient and provide the necessary spectrum of light for healthy growth. Position the lights a few inches above the microgreens to prevent burning.
How often should I water my microgreens?
Keep the soil consistently moist but not waterlogged. Water gently from the bottom by placing the tray in a shallow dish of water and allowing the soil to absorb the moisture. Alternatively, you can use a spray bottle to mist the surface of the soil. Avoid overwatering, as this can lead to mold growth. Check the soil moisture daily and water as needed.
How long does it take for microgreens to grow?
The growing time varies depending on the seed variety, but most microgreens are ready to harvest in 7-14 days. Radish microgreens, for example, are among the fastest-growing, while sunflower microgreens may take a bit longer. You’ll know your microgreens are ready to harvest when they have developed their first true leaves and are about 1-3 inches tall.
How do I harvest microgreens?
Harvest your microgreens by snipping them off just above the soil line with a pair of scissors or kitchen shears. Wash them gently before using. It’s best to harvest microgreens just before you plan to use them for optimal freshness and flavor.
How do I prevent mold growth?
Mold growth is a common concern when growing microgreens, but it can be prevented with proper care. Ensure adequate ventilation by providing good airflow around the microgreens. Avoid overwatering and allow the soil surface to dry slightly between waterings. If you notice any mold growth, remove the affected area immediately. You can also try spraying the microgreens with a diluted solution of hydrogen peroxide (1 part hydrogen peroxide to 10 parts water).
Can I regrow microgreens after harvesting?
Unfortunately, microgreens typically don’t regrow after being harvested. Once you’ve snipped them off, the plant has exhausted its energy reserves. However, you can easily start a new batch of microgreens by sowing more seeds in the same container.
Are there any microgreens I shouldn’t grow?
Yes, some seeds are not suitable for growing as microgreens. Avoid growing microgreens from nightshade vegetables like tomatoes, peppers, and eggplants, as their leaves can contain toxic compounds. Also, avoid growing microgreens from beans like kidney beans, as they require cooking to be safe for consumption. Always research the specific seed variety before growing it as a microgreen to ensure it is safe to eat.
How do I store harvested microgreens?
Store harvested microgreens in the refrigerator in a sealed container lined with a paper towel. The paper towel will help absorb excess moisture and keep the microgreens fresh for longer. Microgreens typically last for about 5-7 days in the refrigerator.
Can I eat the roots of microgreens?
While the roots are technically edible, they are generally not consumed due to their texture and flavor. It’s best to snip the microgreens above the soil line, leaving the roots behind.
What are the nutritional benefits of microgreens?
Microgreens are packed with vitamins, minerals, and antioxidants. Studies have shown that they can contain significantly higher levels of nutrients than their mature counterparts. They are a great source of vitamins A, C, E, and K, as well as minerals like potassium, iron, and zinc. Adding microgreens to your diet can help boost your immune system, improve your digestion, and protect against chronic diseases.


Leave a Comment