
Indoor Mint Growing: Unlock the secrets to a fragrant, fresh, and flourishing mint garden right inside your home! Have you ever craved a refreshing mojito or a soothing cup of mint tea, only to realize you’re out of fresh mint? I know I have! That’s where the magic of growing your own mint indoors comes in.
Mint, with its vibrant history stretching back to ancient Egypt and Rome, has been cherished for centuries, not just for its culinary uses but also for its medicinal properties and delightful aroma. Imagine having that same fresh, invigorating scent wafting through your kitchen, all year round.
But let’s be honest, sometimes gardening feels intimidating, especially indoors. That’s why I’m so excited to share these simple, effective DIY tricks and hacks that will transform even the most novice gardener into an indoor mint-growing pro. We’ll cover everything from choosing the right container and soil to mastering the art of watering and pruning. With these tips, you’ll not only enjoy a constant supply of fresh mint but also add a touch of green serenity to your living space. Let’s get started and discover the joy of indoor mint growing together!
Growing Mint Indoors: A Beginner’s Guide to Fresh Flavor All Year Round
Okay, so you want fresh mint at your fingertips, no matter the season? I get it! Nothing beats a sprig of homegrown mint in your tea, mojito, or even just to brighten up a dish. Growing mint indoors is surprisingly easy, and I’m here to walk you through every step. Let’s get started!
Choosing Your Mint Variety
First things first, let’s talk mint types. There are tons of varieties out there, each with its own unique flavor profile. Here are a few popular choices for indoor growing:
* Peppermint: The classic, strong mint flavor perfect for teas and desserts.
* Spearmint: A milder, sweeter mint often used in chewing gum and sauces.
* Chocolate Mint: Yes, you read that right! It has a subtle chocolatey aroma and flavor.
* Apple Mint: A fruity, slightly fuzzy mint that’s great in salads and drinks.
I personally love having a mix of peppermint and spearmint on hand, but feel free to experiment and find your favorites!
Gathering Your Supplies
Before we dive into planting, let’s make sure you have everything you need. Here’s your shopping list:
* Mint Seeds or Cuttings: You can start from seeds, but I find cuttings to be much faster and easier. Ask a friend with a mint plant for a few cuttings, or buy some from a local nursery.
* Potting Mix: Use a well-draining potting mix specifically designed for containers. Avoid using garden soil, as it can compact and suffocate the roots.
* Pot with Drainage Holes: Choose a pot that’s at least 6 inches in diameter and has drainage holes at the bottom. Good drainage is crucial to prevent root rot.
* Watering Can or Spray Bottle: For gentle watering.
* Grow Light (Optional): If you don’t have a sunny windowsill, a grow light will help your mint thrive.
* Small Gardening Shovel or Trowel: For planting.
* Rooting Hormone (Optional): If you’re using cuttings, rooting hormone can help them develop roots faster.
Planting Your Mint
Now for the fun part! Let’s get your mint planted.
Starting from Cuttings
This is my preferred method because it’s quicker and you’ll have a harvestable plant sooner.
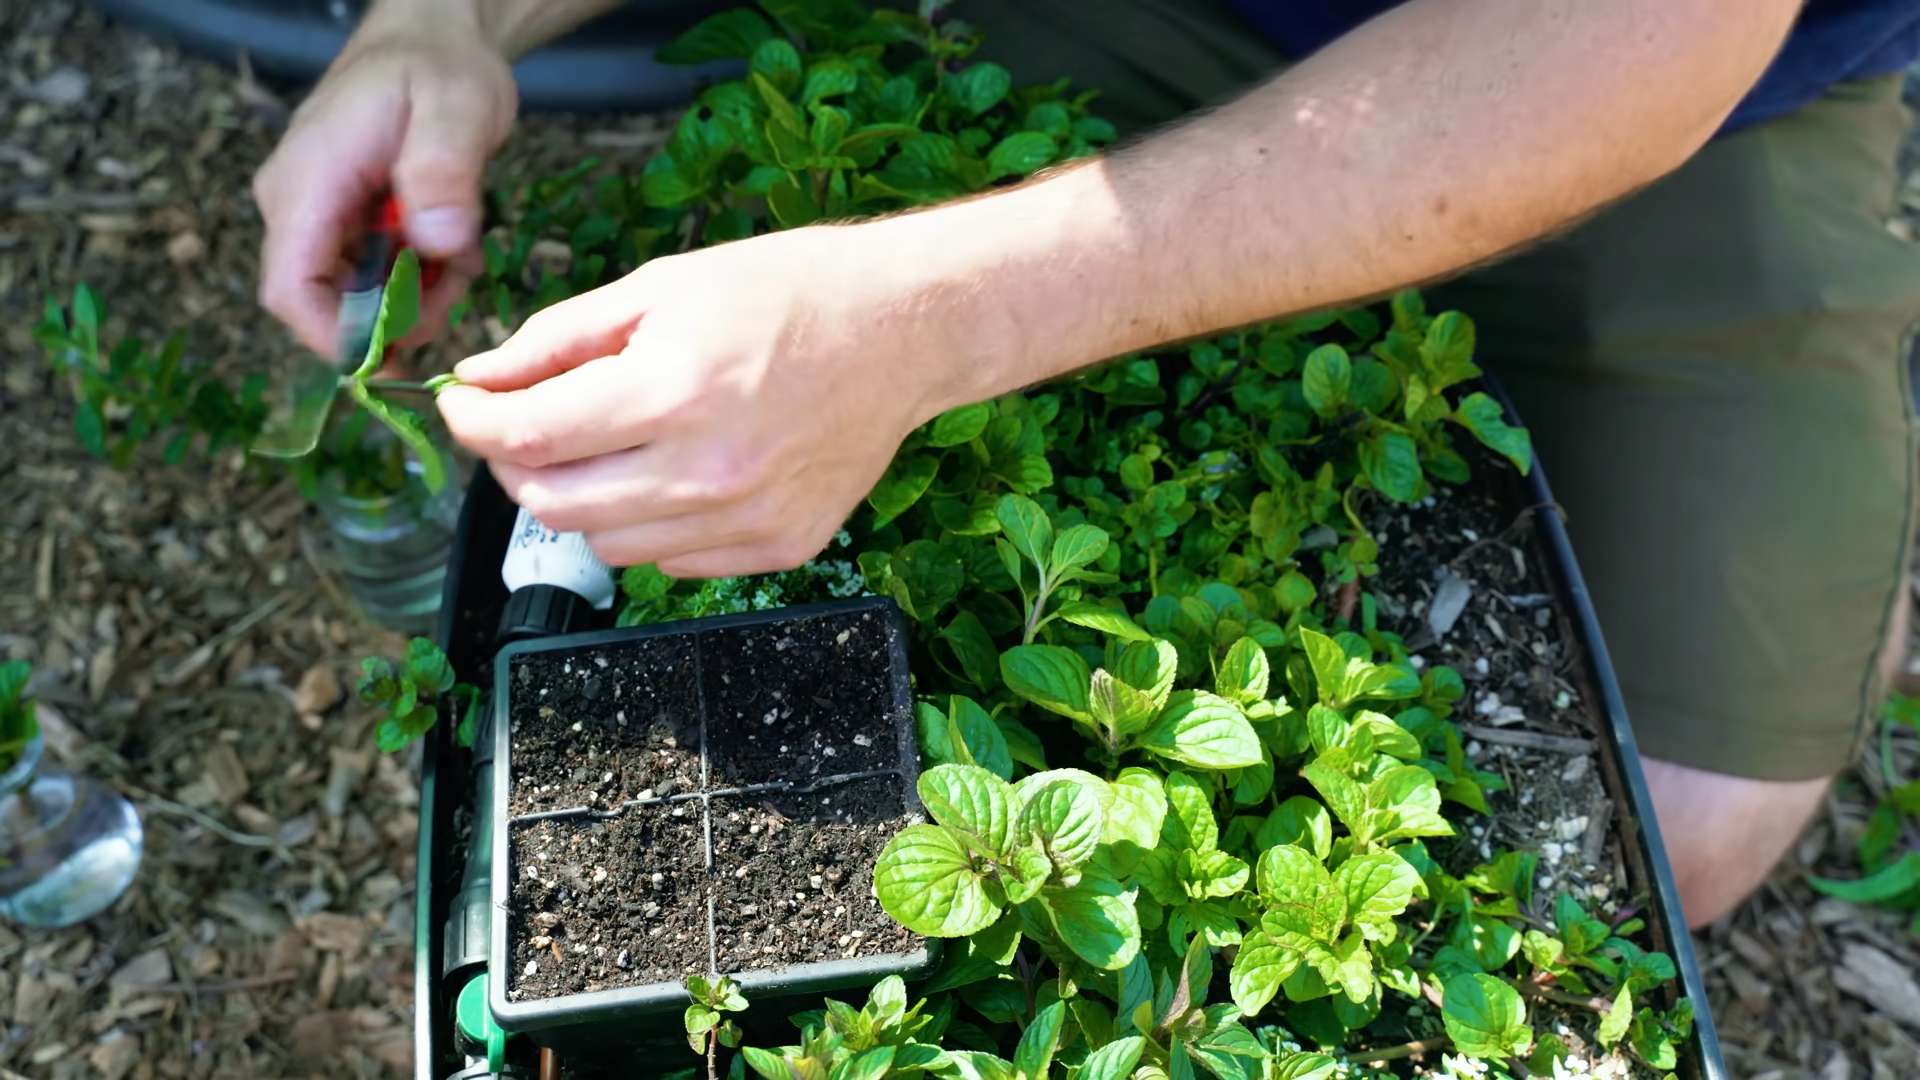
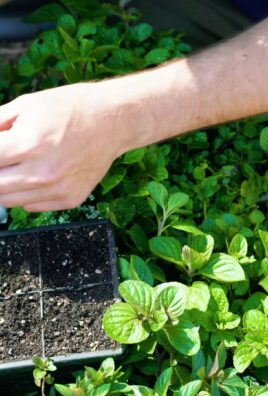
1. Prepare the Cuttings: Take cuttings that are about 4-6 inches long from a healthy mint plant. Remove the leaves from the bottom 2 inches of the stem.
2. Apply Rooting Hormone (Optional): Dip the cut ends of the stems into rooting hormone powder or liquid. This will encourage root growth.
3. Plant the Cuttings: Fill your pot with potting mix, leaving about an inch of space at the top. Make small holes in the soil and gently insert the cuttings, spacing them about 2 inches apart.
4. Water Thoroughly: Water the soil until it’s evenly moist but not soggy.
5. Create a Humid Environment: Cover the pot with a clear plastic bag or dome to create a humid environment. This will help the cuttings root.
6. Place in a Bright Location: Put the pot in a bright, indirect light location. Avoid direct sunlight, which can scorch the cuttings.
7. Monitor and Water: Check the soil moisture daily and water as needed to keep it moist. Remove the plastic bag or dome for a few hours each day to allow for air circulation.
8. Wait for Roots to Develop: In about 2-4 weeks, the cuttings should develop roots. You’ll know they’re rooted when you see new growth.
Starting from Seeds
Starting from seeds takes a bit longer, but it’s still a rewarding experience.
1. Sow the Seeds: Fill your pot with potting mix. Sprinkle the mint seeds evenly over the surface of the soil.
2. Cover Lightly: Gently press the seeds into the soil, but don’t bury them too deep. Mint seeds need light to germinate.
3. Water Gently: Water the soil gently using a spray bottle to avoid disturbing the seeds.
4. Cover with Plastic Wrap: Cover the pot with plastic wrap to create a humid environment.
5. Place in a Warm Location: Put the pot in a warm location with bright, indirect light.
6. Monitor and Water: Check the soil moisture daily and water as needed to keep it moist.
7. Wait for Germination: Mint seeds typically germinate in 10-14 days.
8. Remove Plastic Wrap: Once the seedlings emerge, remove the plastic wrap.
9. Thin the Seedlings: Once the seedlings have a few sets of true leaves, thin them out, leaving only the strongest plants. Space them about 2 inches apart.
Caring for Your Indoor Mint
Now that your mint is planted, it’s time to learn how to care for it.
Light
Mint thrives in bright, indirect light. A sunny windowsill is ideal, but if you don’t have one, you can use a grow light. Aim for at least 6 hours of light per day. If your mint starts to look leggy (tall and spindly), it’s probably not getting enough light.
Watering
Water your mint regularly, keeping the soil evenly moist but not soggy. Overwatering can lead to root rot, so make sure the pot has good drainage. I usually water mine every 2-3 days, but it depends on the temperature and humidity in my home. A good way to check is to stick your finger about an inch into the soil. If it feels dry, it’s time to water.
Temperature
Mint prefers temperatures between 65-75°F (18-24°C). Avoid placing your mint near drafts or heat sources.
Humidity
Mint likes humidity, so if your home is dry, you can increase the humidity around your plant by:
* Misting: Mist the leaves with water regularly.
* Humidity Tray: Place the pot on a tray filled with pebbles and water. Make sure the bottom of the pot isn’t sitting directly in the water.
* Grouping Plants: Grouping plants together can create a more humid microclimate.
Fertilizing
Feed your mint with a balanced liquid fertilizer every 2-4 weeks during the growing season (spring and summer). Follow the instructions on the fertilizer label.
Pruning
Pruning is essential for keeping your mint plant healthy and productive. Regularly pinch off the top leaves to encourage bushier growth. You can also prune back the stems to about half their length if they become too long or leggy. Don’t be afraid to harvest your mint! The more you harvest, the more it will grow.
Harvesting Your Mint
Harvesting mint is easy! Simply snip off the stems or leaves as needed. The best time to harvest is in the morning, after the dew has dried. You can use fresh mint immediately, or you can dry it for later use.
Drying Mint
To dry mint, tie the stems together in small bundles and hang them upside down in a cool, dry, and well-ventilated place. You can also dry the leaves in a dehydrator or oven on low heat. Once the leaves are completely dry, store them in an airtight container.
Dealing with Pests and Diseases
Mint is generally pest-resistant, but it can occasionally be affected by aphids, spider mites, or whiteflies. If you notice any pests, you can try washing them off with a strong stream of water or using insecticidal soap.
Root rot is the most common disease that affects mint. To prevent root rot, make sure your pot has good drainage and avoid overwatering.
Troubleshooting
* Yellowing Leaves: This could be a sign of overwatering, underwatering, or nutrient deficiency. Check the soil moisture and adjust your watering accordingly. If the soil is dry, water thoroughly. If the soil is soggy, let it dry out before watering again. You may also need to fertilize your plant.
* Leggy Growth: This is usually a sign of insufficient light. Move your plant to a brighter location or use a grow light.
* Brown Leaf Tips: This could be caused by dry air or fertilizer burn. Increase the humidity around your plant and avoid over-fertilizing.
* Slow Growth: This could be caused by a number of factors, including insufficient light, water, or nutrients. Make sure your plant is getting enough light, water, and fertilizer.
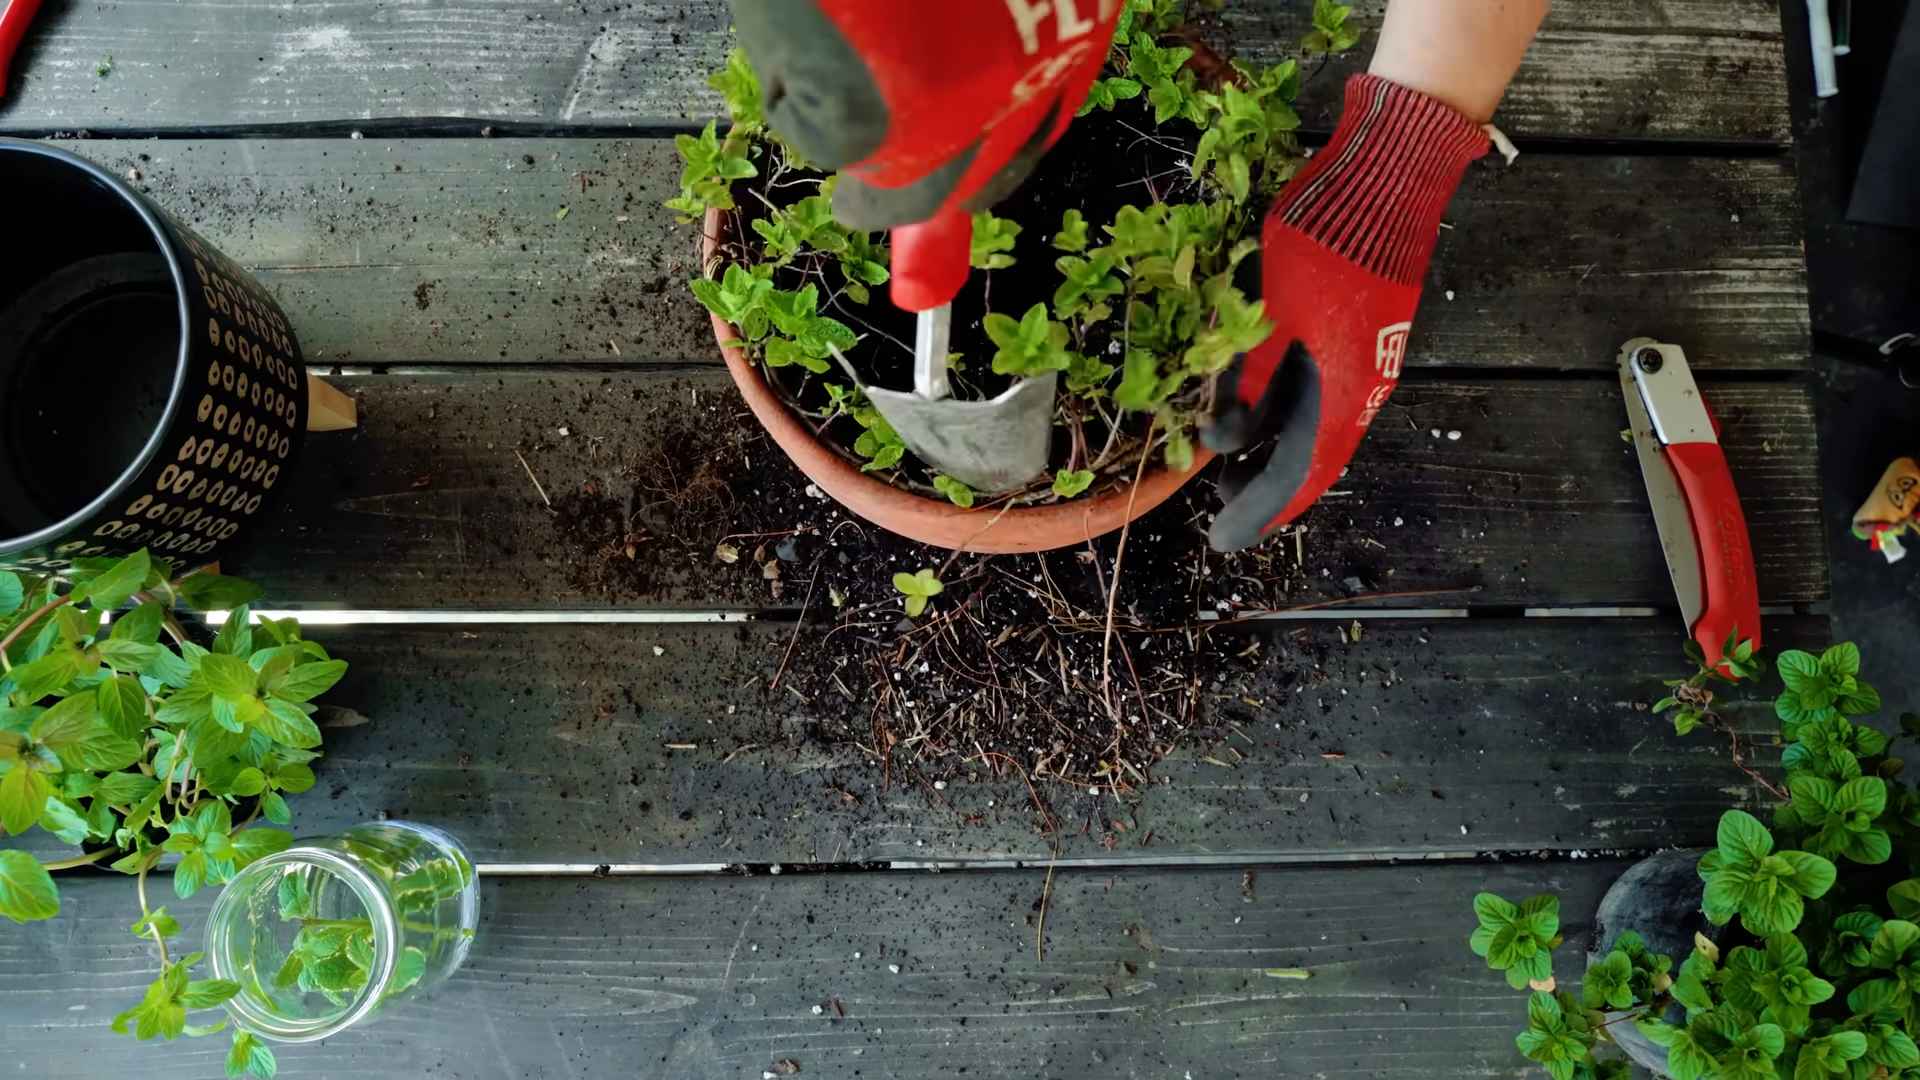
Repotting Your Mint
Mint is a fast-growing plant, so you may need to repot it every year or two. Choose a pot that’s slightly larger than the current one and use fresh potting mix. Repotting is best done in the spring.
Enjoying Your Homegrown Mint
Conclusion
So, there you have it! Mastering indoor mint growing is not only achievable but also incredibly rewarding. Forget those wilted, sad-looking bunches from the grocery store. Imagine stepping into your kitchen and snipping fresh, vibrant mint leaves whenever you need them. The aroma alone is enough to brighten any day, and the flavor boost it adds to your drinks, dishes, and desserts is simply unparalleled.
This DIY approach to growing mint indoors is a game-changer for several reasons. First, it puts you in complete control. You choose the soil, the light, and the watering schedule, ensuring your mint thrives in an environment perfectly tailored to its needs. Second, it’s incredibly cost-effective. A single packet of mint seeds or a small starter plant can provide you with a continuous supply of fresh mint for months, even years, to come. Think of all the money you’ll save on store-bought herbs! Third, it’s a fantastic way to connect with nature, even if you live in an apartment or don’t have access to a garden. Nurturing a living plant and watching it grow is a deeply satisfying experience.
But the best part? It’s incredibly versatile. Feel free to experiment with different varieties of mint. Peppermint, spearmint, chocolate mint, even orange mint – the possibilities are endless! Each variety offers a unique flavor profile, allowing you to create a diverse herb garden right on your windowsill. You can also try different containers, from simple terracotta pots to repurposed jars and even vertical planters. Get creative and find a setup that suits your style and space.
Consider using a self-watering planter to simplify your watering routine, especially if you tend to forget. Or, if you’re feeling ambitious, try propagating your mint from cuttings to expand your indoor garden even further. You can even dry your excess mint leaves to create your own homemade tea blends or potpourri.
We’re confident that once you try this DIY method for indoor mint growing, you’ll be hooked. It’s easy, affordable, and incredibly rewarding. So, grab your supplies, follow our simple steps, and get ready to enjoy the freshest, most flavorful mint you’ve ever tasted.
Don’t just take our word for it, though. We encourage you to give it a try and share your experience with us! Post photos of your indoor mint gardens on social media using #IndoorMintMagic and let us know what varieties you’re growing and what delicious creations you’re using them in. We can’t wait to see what you come up with! Let’s create a community of indoor mint enthusiasts and spread the joy of fresh, homegrown herbs. Happy growing!
Frequently Asked Questions (FAQ)
What kind of soil is best for growing mint indoors?
Mint thrives in well-draining soil that is rich in organic matter. A good potting mix specifically formulated for herbs is an excellent choice. You can also create your own mix by combining equal parts of potting soil, perlite (or vermiculite for drainage), and compost (for nutrients). Avoid using garden soil, as it can be too heavy and may contain pests or diseases. The key is to ensure the soil retains moisture without becoming waterlogged.
How much sunlight does indoor mint need?
Mint needs at least 4-6 hours of sunlight per day to thrive. A south-facing window is ideal, but an east- or west-facing window can also work. If you don’t have access to enough natural light, you can supplement with a grow light. Position the grow light about 6-12 inches above the plant and keep it on for 12-14 hours per day. Signs that your mint isn’t getting enough light include leggy growth (long stems with few leaves) and pale leaves.
How often should I water my indoor mint plant?
Water your mint plant when the top inch of soil feels dry to the touch. Water thoroughly until water drains out of the bottom of the pot. Be careful not to overwater, as this can lead to root rot. Mint prefers consistently moist soil, but it doesn’t like to sit in standing water. During the warmer months, you may need to water more frequently than during the cooler months. Check the soil moisture regularly and adjust your watering schedule accordingly.
Why are the leaves on my mint plant turning yellow?
Yellowing leaves can be a sign of several problems, including overwatering, underwatering, nutrient deficiency, or pest infestation. Check the soil moisture to ensure you’re not overwatering or underwatering. If the soil is consistently wet, allow it to dry out slightly before watering again. If the soil is dry, water thoroughly. If you suspect a nutrient deficiency, try fertilizing your plant with a balanced liquid fertilizer diluted to half strength. Inspect the leaves for signs of pests, such as aphids or spider mites. If you find pests, treat your plant with an insecticidal soap or neem oil.
How do I harvest mint leaves from my indoor plant?
Harvest mint leaves by snipping them off with scissors or pinching them off with your fingers. The best time to harvest is in the morning, after the dew has dried. Avoid harvesting more than one-third of the plant at a time, as this can stress the plant. Regular harvesting encourages the plant to produce more leaves, so don’t be afraid to snip away! You can use the fresh mint leaves immediately or store them in the refrigerator for a few days.
Can I grow different varieties of mint together in the same pot?
While it’s tempting to grow multiple varieties of mint together, it’s generally not recommended. Mint is a vigorous grower and can quickly spread and overtake other plants. Different varieties of mint can also cross-pollinate, resulting in unpredictable flavors and characteristics. If you want to grow multiple varieties of mint, it’s best to keep them in separate pots. This will prevent them from competing for resources and ensure that each variety retains its unique flavor.
How do I propagate mint from cuttings?
Propagating mint from cuttings is a simple and effective way to expand your indoor mint garden. To take a cutting, snip off a 4-6 inch stem from a healthy mint plant. Remove the leaves from the bottom inch of the stem. Place the cutting in a glass of water, making sure that the bottom inch of the stem is submerged. Place the glass in a bright, indirect light location. Change the water every few days. After a week or two, roots will begin to form. Once the roots are about an inch long, you can plant the cutting in a pot filled with well-draining potting mix. Water thoroughly and keep the soil moist until the plant is established.
My indoor mint plant is attracting pests. What should I do?
Pests such as aphids, spider mites, and whiteflies can sometimes infest indoor mint plants. To prevent pest infestations, inspect your plants regularly and keep them clean. If you find pests, treat your plant with an insecticidal soap or neem oil. These are natural and effective ways to control pests without harming your plant. You can also try wiping the leaves with a damp cloth to remove pests manually. Make sure to isolate the infested plant from other plants to prevent the pests from spreading. Good air circulation can also help to deter pests.
How do I overwinter my indoor mint plant?
Mint is a perennial plant, meaning it can live for several years. However, it may go dormant during the winter months. To overwinter your indoor mint plant, reduce watering and fertilizing. Place the plant in a cool, bright location. You may notice that the plant stops growing or even loses some of its leaves. This is normal. In the spring, when the weather warms up, you can start watering and fertilizing again. You may also want to repot the plant with fresh potting mix.
Is indoor mint growing really worth the effort?
Absolutely! While it requires some attention, the benefits of indoor mint growing far outweigh the effort. Having fresh mint readily available for teas, cocktails, cooking, and even aromatherapy is a luxury that’s surprisingly easy to achieve. Plus, the vibrant green foliage adds a touch of life and freshness to your indoor space. The satisfaction of nurturing a plant from seed or cutting to a thriving herb is incredibly rewarding. And let’s not forget the cost savings compared to constantly buying mint from the store. So, yes, indoor mint growing is definitely worth the effort!
Leave a Comment