
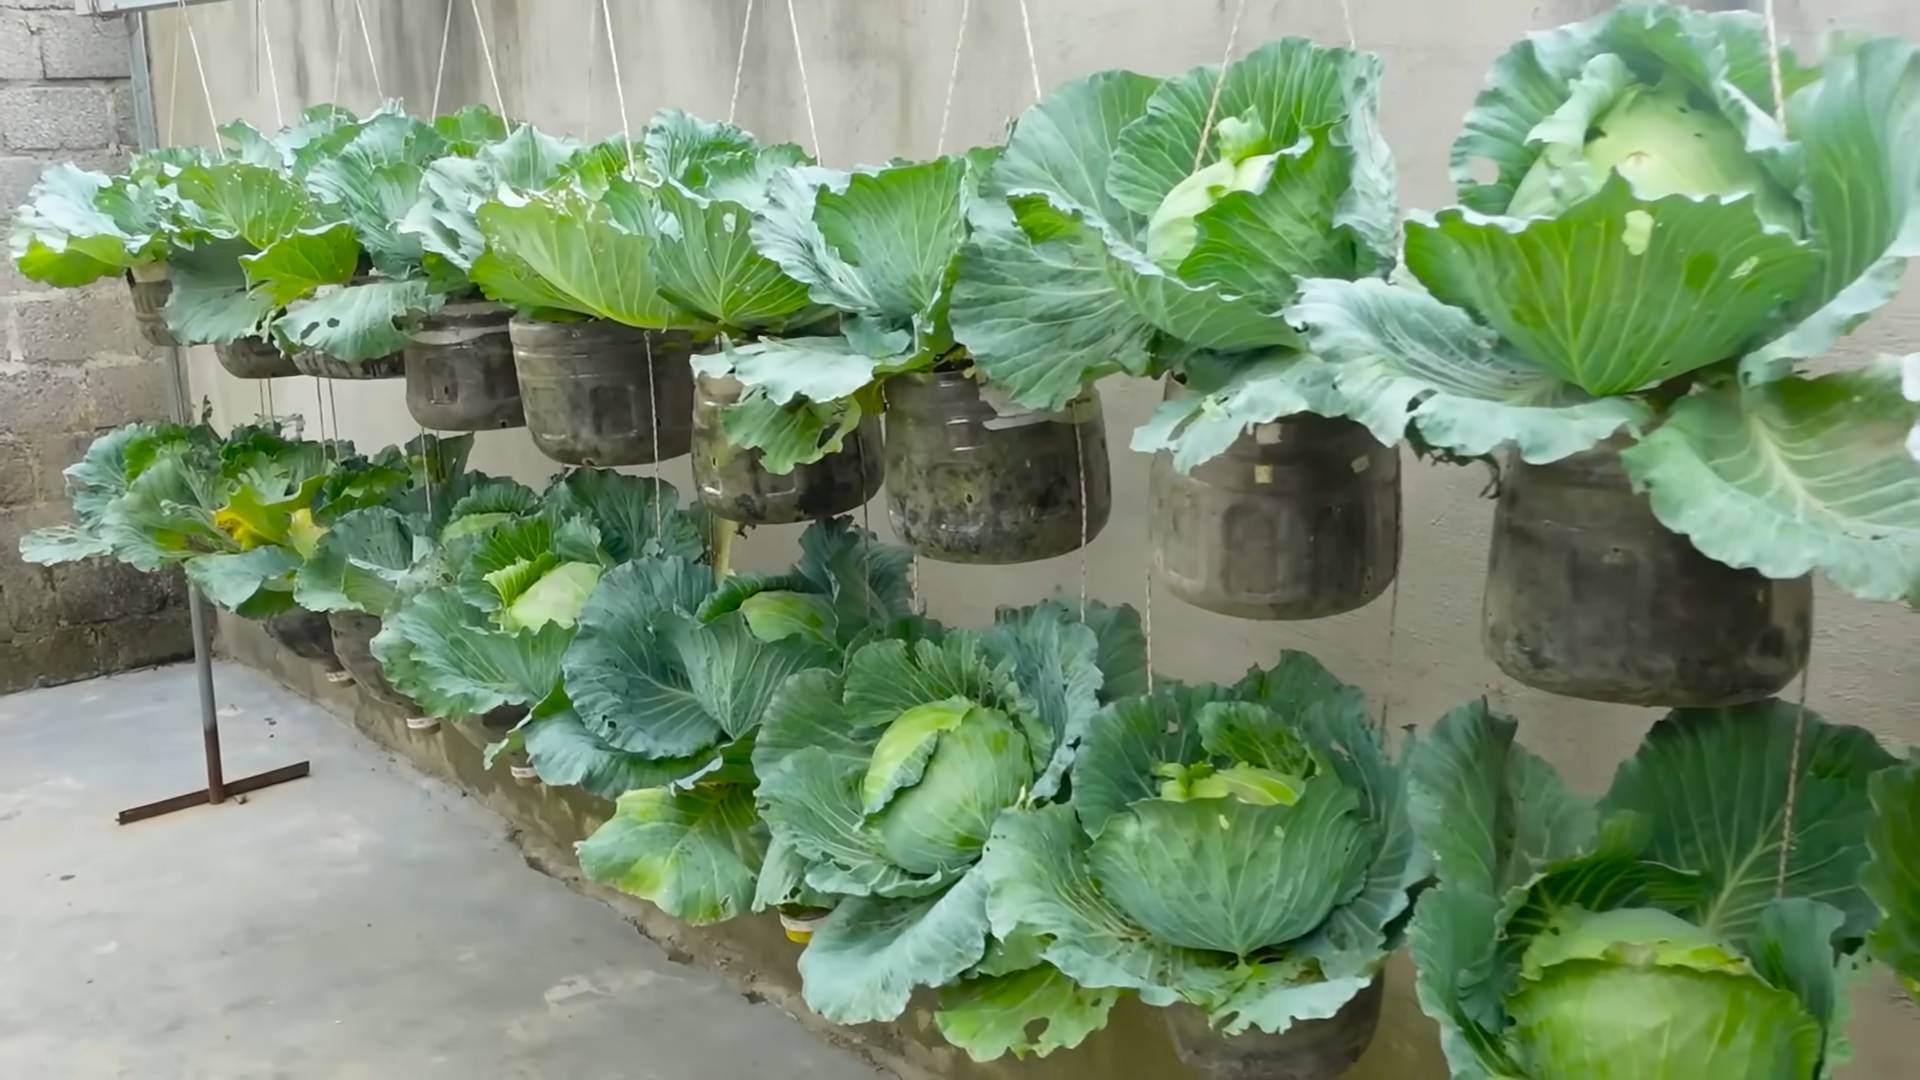
Growing Cabbage in Bottles? Sounds a little crazy, right? But trust me, this ingenious DIY trick is about to revolutionize your small-space gardening game! Forget sprawling garden beds – we’re taking cabbage cultivation vertical and miniature.
Cabbage, a staple in cuisines worldwide, has a rich history dating back to ancient times. From its humble beginnings as a wild leafy green, it has evolved into the diverse array of varieties we enjoy today. While traditionally grown in fields, innovative gardeners are constantly seeking new ways to cultivate this nutritious vegetable, especially in urban environments where space is limited.
Let’s face it, not everyone has a sprawling backyard to dedicate to a vegetable garden. Apartment dwellers, balcony gardeners, and those with limited mobility often miss out on the joy of growing their own food. That’s where this growing cabbage in bottles hack comes in! It’s a game-changer for anyone looking to maximize their yield in a minimal footprint. Imagine harvesting fresh, crisp cabbage heads from recycled plastic bottles – it’s sustainable, space-saving, and surprisingly simple. I’m excited to show you how!
Growing Cabbage in Bottles: A Fun and Space-Saving DIY Project
Hey there, fellow gardening enthusiasts! Are you short on space but still dreaming of fresh, homegrown cabbage? Well, I’ve got a fantastic solution for you: growing cabbage in bottles! It’s a surprisingly effective and visually appealing way to cultivate these leafy greens, even if you only have a balcony or a small patio. I’ve tried this myself, and I’m excited to share my experience with you. Let’s dive in!
What You’ll Need
Before we get started, let’s gather all the necessary materials. This will make the process smoother and more enjoyable.
* Large Plastic Bottles: Think 2-liter soda bottles, water bottles, or even larger juice containers. The bigger, the better, as it gives the cabbage roots more room to grow. I prefer clear or translucent bottles so I can monitor the soil moisture.
* Potting Mix: A good quality potting mix is crucial for healthy cabbage growth. Avoid using garden soil directly, as it can be too dense and may contain pests or diseases. I recommend a mix that’s well-draining and rich in organic matter.
* Cabbage Seeds or Seedlings: You can start from seeds or purchase young seedlings from a local nursery. Starting from seeds gives you more control over the variety, but seedlings offer a head start. I usually go with seedlings for faster results.
* Scissors or a Utility Knife: For cutting the plastic bottles. Be careful!
* Drill or Nail: To create drainage holes in the bottom of the bottles.
* Watering Can or Spray Bottle: For watering your cabbage plants.
* Fertilizer (Optional): A balanced liquid fertilizer can help boost growth, especially during the early stages. I use a diluted solution every few weeks.
* Gloves (Optional): To protect your hands from the soil.
* Small Stones or Gravel (Optional): To improve drainage at the bottom of the bottles.
Preparing the Bottles
This is a crucial step to ensure your cabbage has a comfortable home.
1. Clean the Bottles: Thoroughly wash the plastic bottles with soap and water to remove any residue. Rinse them well and let them dry completely. This prevents any unwanted contaminants from affecting your plants.
2. Cut the Bottles: There are a couple of ways to cut the bottles, depending on the size and shape.
* Option 1 (Horizontal Cut): For larger bottles, I like to cut them horizontally, about two-thirds of the way up from the bottom. This creates a deeper container. You can discard the top portion or use it as a mini-greenhouse cover in the early stages.
* Option 2 (Vertical Cut): For smaller bottles, you can cut them vertically, creating two halves. This is a good option if you want to grow multiple smaller cabbage plants.
3. Create Drainage Holes: This is super important! Use a drill or a nail to create several drainage holes in the bottom of each bottle. This prevents waterlogging, which can lead to root rot. I usually make about 4-5 holes, depending on the size of the bottle.
4. Add Drainage Layer (Optional): To further improve drainage, you can add a layer of small stones or gravel to the bottom of each bottle before adding the potting mix. This helps prevent the soil from clogging the drainage holes.
Planting the Cabbage
Now for the fun part – getting those cabbage plants into their new homes!
1. Fill with Potting Mix: Fill the prepared bottles with potting mix, leaving about an inch of space at the top. Gently pat down the soil to remove any air pockets.
2. Plant the Seeds or Seedlings:
* From Seeds: Sow the cabbage seeds according to the package instructions. Usually, this involves planting them about ¼ inch deep and spacing them a few inches apart. Once the seedlings emerge and have a few true leaves, thin them out, leaving only the strongest plant in each bottle.
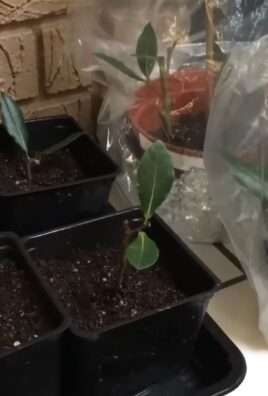
* From Seedlings: Gently remove the seedlings from their containers. Loosen the roots slightly and place each seedling in the center of a bottle. Make sure the top of the root ball is level with the soil surface.
3. Water Thoroughly: After planting, water the cabbage plants thoroughly until the water drains out of the bottom of the bottles. This helps settle the soil and encourages root growth.
Caring for Your Cabbage Plants
Consistent care is key to a bountiful harvest.
1. Sunlight: Cabbage needs at least 6 hours of sunlight per day. Place your bottles in a sunny location, such as a balcony, patio, or windowsill. If you don’t have enough natural light, you can supplement with grow lights. I’ve found that rotating the bottles every few days helps ensure even growth.
2. Watering: Water your cabbage plants regularly, especially during hot and dry weather. The soil should be consistently moist but not waterlogged. Check the soil moisture by sticking your finger into the soil. If the top inch feels dry, it’s time to water. I usually water in the morning to allow the foliage to dry before nightfall, which helps prevent fungal diseases.
3. Fertilizing: Cabbage is a heavy feeder, so regular fertilization is important. Use a balanced liquid fertilizer, diluted to half strength, every 2-3 weeks. I prefer organic fertilizers, such as compost tea or fish emulsion. Avoid over-fertilizing, as this can lead to excessive foliage growth and reduced head formation.
4. Pest and Disease Control: Keep an eye out for common cabbage pests, such as aphids, cabbage worms, and slugs. You can handpick pests off the plants or use organic pest control methods, such as insecticidal soap or neem oil. To prevent diseases, ensure good air circulation and avoid overwatering. I also like to inspect my plants regularly for any signs of trouble.
5. Support (Optional): As the cabbage heads grow larger, they may become top-heavy and require support. You can use stakes or cages to prevent the plants from falling over. I’ve used bamboo stakes and twine to create a simple support system.
Harvesting Your Cabbage
The moment you’ve been waiting for!
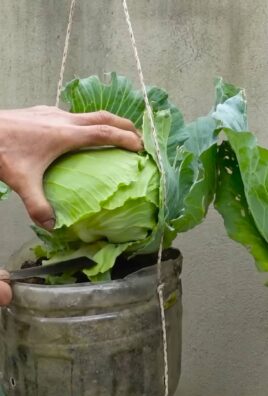
1. Timing: Cabbage is typically ready to harvest in 60-100 days, depending on the variety. The heads should be firm and compact.
2. Harvesting: To harvest, use a sharp knife to cut the cabbage head from the stem, leaving a few outer leaves intact.
3. Enjoy! Now you can enjoy your homegrown cabbage in salads, slaws, soups, or any other dish you like.
Tips and Tricks for Success
Here are a few extra tips I’ve learned along the way:
* Choose the Right Variety: Some cabbage varieties are better suited for container gardening than others. Look for compact varieties that don’t require a lot of space.
* Start Early: Start your cabbage seeds indoors a few weeks before the last frost to get a head start on the growing season.
* Succession Planting: Plant new cabbage seeds or seedlings every few weeks to ensure a continuous harvest throughout the season.
* Companion Planting: Plant cabbage alongside companion plants, such as marigolds, dill, or rosemary, to deter pests and attract beneficial insects.
* Recycle and Reuse: Don’t throw away your old plastic bottles! Use them to grow more cabbage or other vegetables.
Growing cabbage in bottles is a rewarding and sustainable way to enjoy fresh, homegrown produce, even in limited spaces. With a little bit of effort and attention, you can have a thriving cabbage garden right on your balcony or patio. Happy gardening!

Conclusion
So, there you have it! Growing cabbage in bottles might sound unconventional, but it’s a game-changer for urban gardeners, those with limited space, or anyone looking for a fun and rewarding gardening project. This method offers a surprising number of benefits, from protecting your precious cabbage seedlings from pests and diseases to maximizing your yield in a small area. It’s a testament to the fact that you don’t need acres of land to enjoy fresh, homegrown vegetables.
This DIY trick is a must-try because it’s incredibly space-efficient. Imagine being able to grow several heads of cabbage on a balcony, patio, or even a sunny windowsill! It also provides a controlled environment, shielding your plants from harsh weather conditions and minimizing the risk of soilborne diseases. Plus, let’s be honest, it’s just plain cool! There’s something incredibly satisfying about nurturing a plant from seed to harvest in a recycled bottle.
But the best part? It’s adaptable! Feel free to experiment with different types of cabbage. Red cabbage, savoy cabbage, or even smaller varieties like bok choy can thrive in this setup. You can also adjust the size of the bottle to accommodate larger or smaller plants. Consider adding companion plants like marigolds or basil around the base of the bottles to deter pests naturally. Another variation is to try different growing mediums. While a standard potting mix works well, you could also experiment with coco coir or a soilless mix for improved drainage.
Don’t be afraid to get creative with your bottle selection, too. While clear plastic bottles are ideal for allowing sunlight to reach the soil, you can paint the outside of the bottles (except for the bottom portion) to add a pop of color to your garden. Just make sure the paint is non-toxic and won’t leach harmful chemicals into the soil.
We wholeheartedly encourage you to give this DIY cabbage growing method a try. It’s a fantastic way to reduce waste, connect with nature, and enjoy the delicious taste of homegrown cabbage. The process of growing cabbage in bottles is not only rewarding but also educational, especially for children. It teaches them about plant life cycles, resourcefulness, and the importance of sustainable practices.
Once you’ve harvested your first bottle-grown cabbage, we’d love to hear about your experience! Share your photos, tips, and any variations you’ve tried in the comments below. Let’s build a community of bottle-cabbage growers and inspire others to embrace this innovative gardening technique. Happy growing!
Frequently Asked Questions (FAQ)
1. What type of bottles are best for growing cabbage?
The ideal bottles are clear plastic bottles, such as those used for water, soda, or juice. The size will depend on the variety of cabbage you’re growing. For smaller varieties, 2-liter bottles may suffice, while larger varieties might require 3-liter or even larger bottles. Make sure the bottles are clean and free of any residue before using them. Avoid using bottles that have contained harsh chemicals or pesticides. The transparency of the bottle is crucial for allowing sunlight to reach the soil and roots.
2. How do I prepare the bottles for planting?
First, thoroughly clean the bottles with soap and water to remove any residue. Then, cut off the top portion of the bottle, leaving enough space for the cabbage plant to grow. Drill drainage holes in the bottom of the bottle to prevent waterlogging. You can also add a layer of gravel or small stones at the bottom for improved drainage. Some gardeners also choose to paint the outside of the bottles (except for the bottom) to protect the roots from excessive sunlight and to add a decorative touch.
3. What type of soil should I use?
A well-draining potting mix is essential for growing cabbage in bottles. You can use a commercially available potting mix or create your own by combining equal parts of garden soil, compost, and perlite or vermiculite. The soil should be rich in organic matter and have good drainage to prevent root rot. Avoid using heavy clay soil, as it can become waterlogged and suffocate the roots.
4. How often should I water the cabbage plants?
Water the cabbage plants regularly, keeping the soil consistently moist but not waterlogged. The frequency of watering will depend on the weather conditions and the type of soil you’re using. Check the soil moisture level regularly by sticking your finger into the soil. If the top inch of soil feels dry, it’s time to water. Water deeply, allowing the water to drain out of the drainage holes. Avoid overhead watering, as it can lead to fungal diseases.
5. How much sunlight do cabbage plants need?
Cabbage plants need at least 6 hours of direct sunlight per day to thrive. Place the bottles in a sunny location, such as a south-facing balcony or patio. If you’re growing the cabbage indoors, use grow lights to supplement natural sunlight. Rotate the bottles regularly to ensure that all sides of the plant receive adequate sunlight.
6. What kind of fertilizer should I use?
Cabbage plants are heavy feeders and require regular fertilization. Use a balanced fertilizer, such as 10-10-10, or a fertilizer specifically formulated for vegetables. Follow the instructions on the fertilizer package for application rates. You can also use organic fertilizers, such as compost tea or fish emulsion. Fertilize the cabbage plants every 2-3 weeks during the growing season.
7. How do I protect the cabbage plants from pests and diseases?
Growing cabbage in bottles can help to minimize the risk of pests and diseases, but it’s still important to take precautions. Inspect the plants regularly for signs of pests, such as aphids, cabbage worms, or slugs. Handpick any pests you find or use organic pest control methods, such as insecticidal soap or neem oil. To prevent fungal diseases, ensure good air circulation around the plants and avoid overhead watering. You can also use a fungicide if necessary.
8. How long does it take to grow cabbage in bottles?
The time it takes to grow cabbage in bottles will depend on the variety of cabbage you’re growing and the growing conditions. Generally, it takes about 60-100 days from planting to harvest. Check the seed packet or plant label for specific information on the maturity date of your chosen variety.
9. How do I know when the cabbage is ready to harvest?
The cabbage is ready to harvest when the head is firm and compact. The size of the head will vary depending on the variety. To harvest, cut the head off at the base of the plant with a sharp knife. Leave the roots in the bottle, as they can decompose and provide nutrients for future plantings.
10. Can I reuse the bottles for growing other plants?
Yes, you can reuse the bottles for growing other plants. Simply clean the bottles thoroughly and disinfect them with a bleach solution before using them again. You can grow a variety of vegetables, herbs, and flowers in bottles. Consider growing companion plants, such as marigolds or basil, alongside your cabbage to deter pests and attract beneficial insects. Remember that growing cabbage in bottles is just the beginning; the possibilities are endless!
Leave a Comment