
Grow Big Melons at Home – sounds like a dream, right? I know, I know, visions of juicy, perfectly ripe melons bursting with flavor might seem like something only professional farmers can achieve. But trust me, with a few clever tricks and a little DIY magic, you can absolutely cultivate impressive melons right in your own backyard!
Melons have a rich history, dating back thousands of years to Africa and Asia. They were prized by ancient civilizations for their sweetness and hydrating properties. Think about it – a refreshing slice of watermelon on a hot summer day is a timeless pleasure! But beyond just taste, growing your own melons connects you to that history, to the earth, and to the simple joy of nurturing something from seed to table.
So, why do you need these DIY tricks? Well, let’s be honest, growing melons can be a bit tricky. They’re thirsty plants, they need plenty of sunshine, and they’re susceptible to pests and diseases. But don’t let that scare you! I’m here to share some easy-to-follow hacks that will help you overcome these challenges and grow big melons at home, even if you’re a beginner gardener. These tips will help you maximize your yield, protect your plants, and ultimately, enjoy the satisfaction of harvesting your own delicious, homegrown melons. Let’s get started!
Growing Giant Melons: My Secret DIY Soil Recipe and Training Techniques
Hey fellow gardeners! I’m so excited to share my secrets for growing unbelievably large melons. Forget those grocery store watermelons that taste like… well, water. We’re talking prize-winning, jaw-dropping, “did-you-see-that-melon?!” kind of melons. It’s all about the soil, the training, and a little bit of TLC. Let’s dive in!
Preparing the Ultimate Melon Soil
The foundation of any giant melon is, without a doubt, the soil. Melons are heavy feeders, meaning they need a constant supply of nutrients to fuel their growth. This isn’t your average garden soil; we’re creating a super-charged, melon-loving environment.
Key Ingredients for Melon Magic:
* Compost: The heart and soul of our mix. Use well-rotted compost, preferably homemade. It’s packed with beneficial microbes and slow-release nutrients.
* Aged Manure: Adds essential nitrogen and improves soil structure. Make sure it’s well-aged to avoid burning the roots.
* Peat Moss (or Coco Coir): Improves water retention and aeration. Coco coir is a sustainable alternative to peat moss.
* Perlite: Enhances drainage and prevents soil compaction.
* Bone Meal: A fantastic source of phosphorus, crucial for root development and fruit production.
* Epsom Salts: Provides magnesium, which helps with chlorophyll production and nutrient uptake.
* Greensand: A natural source of potassium and trace minerals.
* Azomite: A rock dust containing a wide range of trace minerals. Think of it as a multivitamin for your soil!
Step-by-Step Soil Mixing Guide:
1. Gather Your Supplies: Before you start, make sure you have all your ingredients ready. A large tarp or wheelbarrow will be helpful for mixing.
2. The Base Mix: In your tarp or wheelbarrow, combine equal parts compost, aged manure, and peat moss (or coco coir). I usually go for about 1/3 of each. Mix thoroughly until everything is evenly distributed.
3. Adding the Drainage: Now, add perlite. I use about 1/4 the amount of the base mix. This is crucial for preventing waterlogging, which melons absolutely hate. Mix it in well.
4. The Nutrient Boost: This is where the magic happens! Add bone meal, Epsom salts, greensand, and azomite. For every cubic foot of the base mix, I add about 1 cup of bone meal, 1/2 cup of Epsom salts, 1 cup of greensand, and 1/2 cup of azomite. Mix, mix, mix!
5. Testing the Soil: Before planting, it’s a good idea to test the soil pH. Melons prefer a slightly acidic to neutral pH (around 6.0-7.0). You can use a soil testing kit from your local garden center. If the pH is too high, add some sulfur. If it’s too low, add some lime.
6. Let it Cook: Once everything is mixed, let the soil “cook” for a week or two. This allows the nutrients to meld together and the microbes to get to work. Keep the soil moist but not soggy.
Planting Your Melon Seedlings
Now that we have our super soil, it’s time to plant our melon seedlings. I always start my melon seeds indoors about 4-6 weeks before the last expected frost.
Planting Tips:
* Choose the Right Variety: Not all melons are created equal. Look for varieties known for their large size, such as ‘Carolina Cross’, ‘Big Max’, or ‘Kiku’.
* Harden Off Seedlings: Before transplanting your seedlings outdoors, gradually acclimate them to the outdoor conditions. This process, called hardening off, involves exposing them to increasing amounts of sunlight and wind over a period of a week or two.
* Prepare the Planting Site: Dig a hole that’s twice as wide and as deep as the seedling’s root ball. Fill the hole with your super soil.
* Plant Carefully: Gently remove the seedling from its container and place it in the hole. Make sure the top of the root ball is level with the surrounding soil. Backfill with more super soil and water thoroughly.
* Spacing: Give your melon plants plenty of room to grow. I recommend spacing them at least 4-6 feet apart.
* Mulch: Apply a layer of mulch around the plants to help retain moisture, suppress weeds, and regulate soil temperature. Straw or wood chips work well.
Melon Training: The Art of the Vine
Melon training is crucial for maximizing fruit size and quality. It involves pruning the vines and directing their growth to encourage the plant to focus its energy on developing a few large melons rather than many small ones.
Why Train Melons?
* Larger Fruits: By limiting the number of fruits on the vine, you’re allowing the plant to concentrate its resources on the remaining melons, resulting in larger, more flavorful fruits.
* Improved Air Circulation: Pruning the vines improves air circulation, which helps to prevent fungal diseases.
* Easier Harvesting: Training the vines makes it easier to access and harvest the melons.
Training Techniques:
1. The Main Vine: Let the main vine grow freely until it reaches about 6-8 feet long.
2. Pruning Side Shoots: Once the main vine is established, start pruning the side shoots (also called lateral vines). These are the smaller vines that grow out from the main vine. Remove all side shoots that don’t have female flowers (the ones with a small melon behind the flower).
3. Pollination: Once you see female flowers, you’ll need to pollinate them. You can do this by hand using a small paintbrush to transfer pollen from the male flowers to the female flowers. Or, you can rely on bees and other pollinators to do the job for you.
4. Fruit Selection: After the female flowers are pollinated and the melons start to develop, select the best one or two melons on each vine. Remove any other melons that are developing. This will ensure that the plant focuses its energy on the chosen fruits.
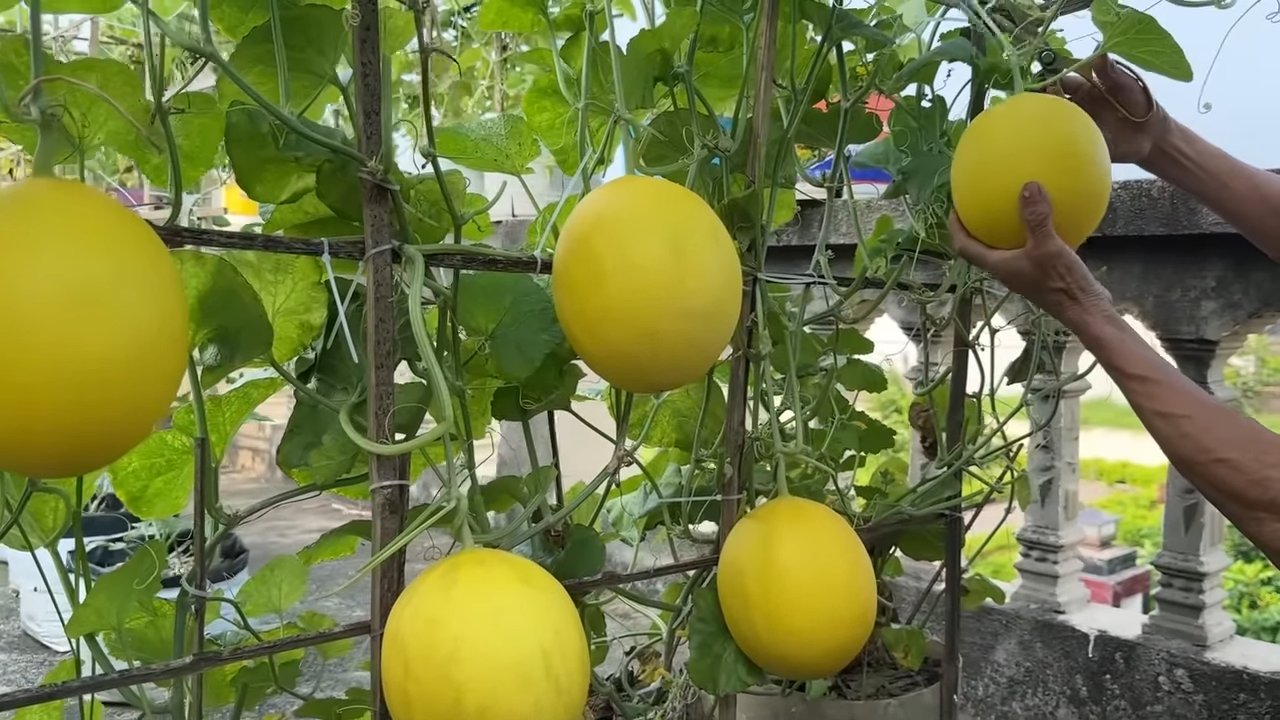
5. Supporting the Melons: As the melons grow larger, they may need support to prevent them from breaking off the vine. You can use slings made from old t-shirts or pantyhose to support the melons.
6. Continued Pruning: Continue to prune any new side shoots that develop throughout the growing season.
Watering and Feeding
Melons need consistent watering and feeding to thrive.
Watering:
* Deep Watering: Water deeply and infrequently, allowing the soil to dry out slightly between waterings. This encourages deep root growth.
* Avoid Overhead Watering: Water at the base of the plant to avoid wetting the foliage, which can lead to fungal diseases.
* Monitor Soil Moisture: Check the soil moisture regularly, especially during hot, dry weather.
Feeding:
* Side-Dressing: Side-dress your melon plants with compost tea or a balanced fertilizer every 2-3 weeks.
* Foliar Feeding: You can also foliar feed your melon plants with a diluted seaweed extract or fish emulsion. This provides a quick boost of nutrients.
* Calcium: Melons need plenty of calcium to prevent blossom-end rot. You can add calcium to the soil by incorporating crushed eggshells or bone meal.
Pest and Disease Control
Melons can be susceptible to various pests and diseases.
Common Pests:
* Squash Bugs: These pests can suck the sap from the leaves and stems, weakening the plant. Handpick them off the plants or use insecticidal soap.
* Cucumber Beetles: These beetles can transmit diseases and damage the foliage. Use row covers to protect young plants or apply neem oil.
* Aphids: These small insects can suck the sap from the leaves, causing them to curl and distort. Spray them with insecticidal soap or release ladybugs.
Common Diseases:
* Powdery Mildew: This fungal disease causes a white, powdery coating on the leaves. Improve air circulation and apply a fungicide.
* Downy Mildew: This fungal disease causes yellow spots on the leaves. Improve air circulation and apply a fungicide.
* Fusarium Wilt: This soilborne disease causes the plant to wilt and die. Plant resistant varieties and practice crop rotation.
Harvesting Your Giant Melons
The moment we’ve all been waiting for! Knowing when to harvest your giant melons is crucial for getting the best flavor and texture.
Signs of Ripeness:
* Thump Test: A ripe melon will sound hollow when you thump it.
* Ground Spot:
Conclusion
So, there you have it! Growing big melons at home doesn’t have to be a pipe dream. By implementing this simple yet effective DIY trick, you’re setting yourself up for a harvest of juicy, flavorful melons that will be the envy of the neighborhood. We’ve walked you through the process, highlighting the key steps and providing insights into why this method works so well.
This isn’t just about bigger melons; it’s about maximizing the potential of your garden and enjoying the fruits (literally!) of your labor. Think about the satisfaction of biting into a perfectly ripe, homegrown melon, knowing that you played a direct role in its creation. It’s a rewarding experience that connects you to the natural world and provides a delicious, healthy treat.
But why is this DIY trick a must-try? Because it addresses several critical factors that often limit melon growth. It improves drainage, ensuring that your melon roots aren’t sitting in soggy soil, which can lead to rot and disease. It provides a concentrated dose of nutrients right where the plant needs them most, fueling rapid growth and development. And it helps to regulate soil temperature, creating a more stable and favorable environment for your melons to thrive.
Consider these variations to tailor the trick to your specific needs and preferences:
* **Compost Tea Boost:** Instead of plain water, use a diluted compost tea to water your melon plants. This will provide an extra boost of beneficial microbes and nutrients.
* **Mulch Magic:** Apply a layer of organic mulch around your melon plants to help retain moisture, suppress weeds, and regulate soil temperature. Straw, wood chips, or shredded leaves are all excellent choices.
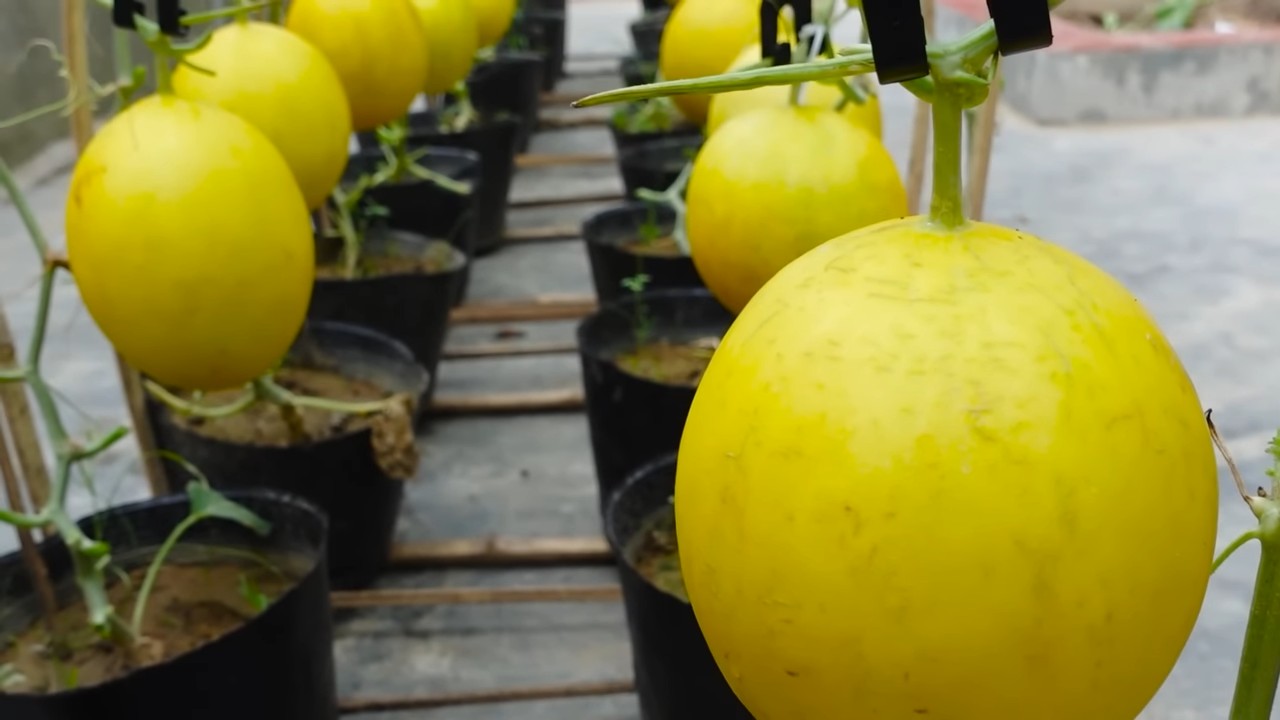
* **Vertical Support:** If you’re growing smaller melon varieties, consider using a trellis or other vertical support to save space and improve air circulation. This can also help to prevent fruit rot.
* **Companion Planting:** Plant beneficial companion plants near your melons to attract pollinators and deter pests. Marigolds, basil, and nasturtiums are all great options.
* Experiment with different melon varieties! Some melons are naturally larger than others, so choose varieties that are known for their size and flavor.
Ultimately, the best way to discover the full potential of this DIY trick is to try it yourself. Don’t be afraid to experiment and adapt the method to suit your specific growing conditions and preferences. We’re confident that you’ll be amazed by the results.
We’re eager to hear about your experiences! Share your photos, tips, and stories in the comments section below. Let’s create a community of melon growers who are passionate about maximizing their harvests and enjoying the delicious rewards of their labor. Remember, growing big melons at home is within your reach – all it takes is a little know-how and a willingness to get your hands dirty. So, grab your gardening gloves, gather your supplies, and get ready to grow some truly impressive melons! Let us know how this DIY trick helped you achieve your melon growing goals.
Frequently Asked Questions (FAQ)
What type of melons does this DIY trick work best for?
This trick is generally effective for most melon varieties, including watermelons, cantaloupes, honeydews, and even smaller melons like Galia or Charentais. However, the results may vary depending on the specific variety and your local growing conditions. Larger melon varieties, like some watermelons, will naturally benefit more from the extra support and nutrients provided by this method. Consider the mature size of the melon variety you’re growing and adjust the size of the support structure accordingly.
How often should I apply this DIY trick to my melon plants?
Ideally, you should apply this trick when the melon plant is young and actively growing, typically around the time when the first flowers appear. Repeat the application every 2-3 weeks throughout the growing season to provide a consistent supply of nutrients and support. Monitor your plants closely and adjust the frequency based on their growth rate and overall health. If you notice any signs of nutrient deficiency, such as yellowing leaves, you may need to increase the frequency of application.
Can I use this DIY trick in containers or raised beds?
Yes, this trick can be adapted for use in containers or raised beds. However, you may need to adjust the size of the support structure and the amount of materials used to accommodate the smaller growing space. Ensure that your container or raised bed has adequate drainage to prevent waterlogging. You may also need to water more frequently, as containers and raised beds tend to dry out faster than in-ground gardens.
What if I don’t have access to all the materials listed in the instructions?
Don’t worry if you can’t find all the exact materials listed. The key is to use readily available resources to create a supportive and nutrient-rich environment for your melon plants. For example, if you don’t have access to specific fertilizers, you can use compost or well-rotted manure as an alternative. If you don’t have access to specific support materials, you can use repurposed items like old tires, buckets, or even sturdy branches. The most important thing is to be creative and resourceful.
How do I know when my melons are ripe and ready to harvest?
Determining when a melon is ripe can be tricky, but there are several telltale signs to look for. For watermelons, look for a dull, rather than shiny, rind and a yellow or cream-colored spot on the underside where the melon rested on the ground. You should also be able to thump the melon and hear a deep, hollow sound. For cantaloupes, look for a sweet aroma and a slight give when you press on the stem end. The stem should also slip easily from the vine when the melon is ripe. For honeydews, look for a creamy yellow color and a slightly waxy feel. The melon should also feel heavy for its size.
Is this DIY trick safe for organic gardening?
Yes, this trick can be easily adapted for organic gardening. Simply use organic fertilizers and soil amendments. Avoid using synthetic pesticides or herbicides, and instead opt for natural pest control methods, such as companion planting or introducing beneficial insects. By using organic materials and practices, you can ensure that your melons are healthy, delicious, and free from harmful chemicals.
What are some common problems that can affect melon growth, and how can I prevent them?
Some common problems that can affect melon growth include pests, diseases, and nutrient deficiencies. To prevent pests, consider using row covers or netting to protect your plants. You can also attract beneficial insects to your garden by planting flowers that provide nectar and pollen. To prevent diseases, ensure that your plants have good air circulation and avoid overwatering. You can also use organic fungicides to protect your plants from fungal diseases. To prevent nutrient deficiencies, amend your soil with compost or other organic matter and fertilize regularly with a balanced fertilizer.
Can I use this trick for other types of vining plants, such as cucumbers or pumpkins?
While this trick is specifically designed for melons, it can also be adapted for use with other types of vining plants, such as cucumbers or pumpkins. However, you may need to adjust the size of the support structure and the amount of materials used to accommodate the specific needs of each plant. For example, pumpkins tend to be heavier than melons, so you may need to use a stronger support structure. Cucumbers, on the other hand, may benefit from a smaller, more lightweight support structure.

Leave a Comment