
DIY Hard Floor Cleaner: Tired of spending a fortune on store-bought cleaners that promise the world but leave your hard floors streaky and dull? I know the feeling! It’s frustrating to work hard cleaning, only to be disappointed with the results. But what if I told you that the secret to sparkling, gleaming floors is probably already hiding in your pantry?
For generations, resourceful homemakers have relied on simple, natural ingredients to keep their homes clean. Think about it – before the age of commercial cleaning products, vinegar, baking soda, and essential oils were the go-to solutions for everything from scrubbing floors to disinfecting surfaces. This tradition of using what you have on hand is not only budget-friendly but also often gentler on your floors and the environment.
That’s why I’m so excited to share my favorite DIY hard floor cleaner recipes and hacks with you! In this article, we’ll dive into easy-to-make solutions that are effective, affordable, and customizable to your specific flooring type. Whether you have hardwood, tile, laminate, or vinyl, I’ll show you how to create a cleaner that will leave your floors looking their absolute best. Plus, you’ll avoid harsh chemicals and save money – it’s a win-win! So, ditch the expensive store-bought stuff and let’s get cleaning with these simple, yet effective, DIY solutions.
DIY Hard Floor Cleaner: Sparkling Floors on a Budget!
Hey there, fellow DIY enthusiasts! Are you tired of spending a fortune on commercial floor cleaners that are often packed with harsh chemicals? I know I was! That’s why I decided to create my own hard floor cleaner, and let me tell you, the results are amazing. Plus, it’s super affordable and uses ingredients you probably already have in your pantry. This guide will walk you through everything you need to know to get your hard floors sparkling clean without breaking the bank or exposing your family to unnecessary chemicals.
What You’ll Need
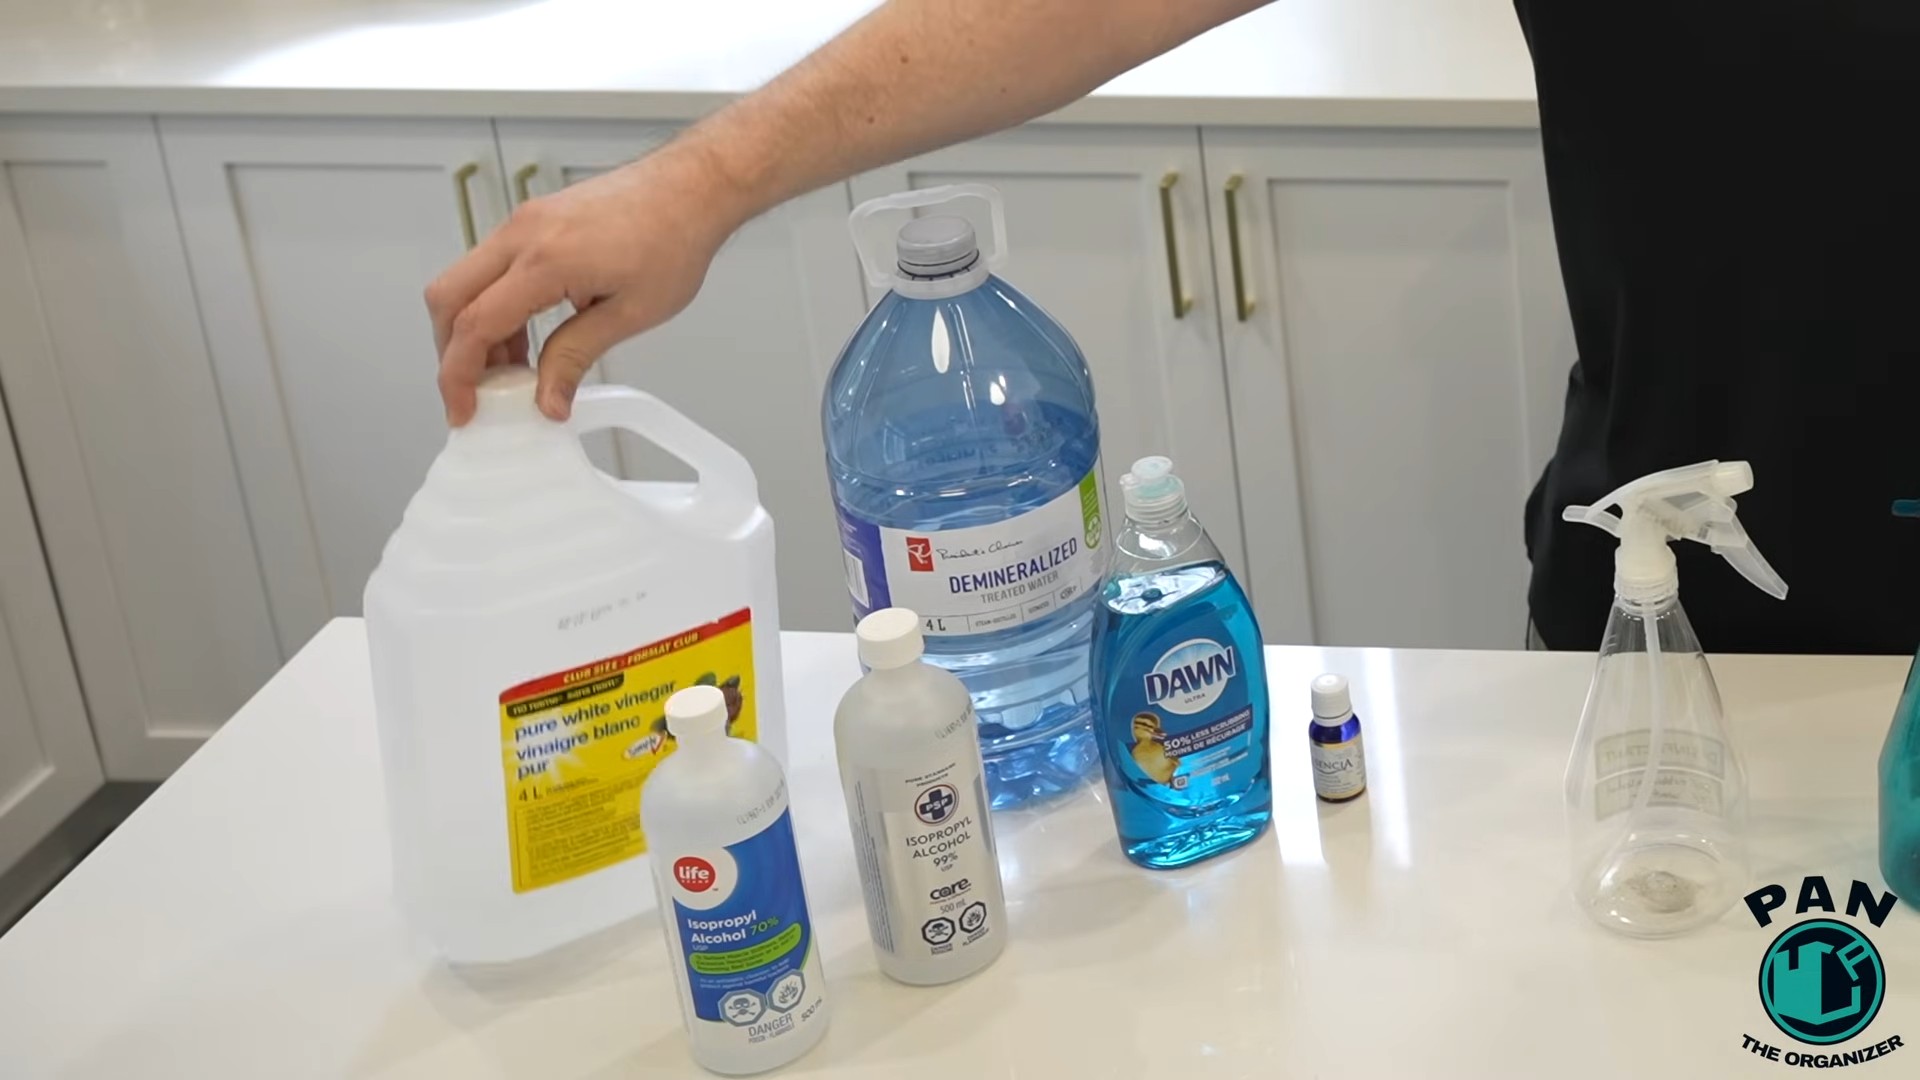
Before we dive in, let’s gather our supplies. This is a pretty straightforward project, so the list is short and sweet:
* White Vinegar: This is our star ingredient! Vinegar is a natural disinfectant and deodorizer.
* Hot Water: Hot water helps to dissolve dirt and grime more effectively.
* Dish Soap (Optional): A small amount of dish soap can help cut through grease and stubborn stains. I recommend using a natural, plant-based dish soap for a gentler clean.
* Essential Oils (Optional): For a fresh, clean scent, add a few drops of your favorite essential oils. Lemon, lavender, and tea tree oil are all great choices. Tea tree oil also has antibacterial properties.
* Spray Bottle or Bucket: Depending on your preferred cleaning method, you’ll need either a spray bottle or a bucket.
* Mop or Microfiber Cloths: Choose your weapon! A mop is great for larger areas, while microfiber cloths are perfect for spot cleaning and smaller spaces.
* Measuring Cups and Spoons: For accurate measurements, grab your measuring cups and spoons.
Choosing the Right Recipe for Your Floor Type
It’s important to note that not all hard floors are created equal. What works wonders on tile might damage hardwood. So, before you start mixing, let’s figure out the best recipe for your specific floor type.
* For Tile, Laminate, and Vinyl Floors: These floors are generally pretty durable and can handle a slightly stronger cleaning solution.
* For Hardwood Floors: Hardwood floors require a gentler touch. Too much water or harsh chemicals can damage the finish.
The Recipes
Okay, let’s get to the good stuff! Here are the recipes I use for different types of hard floors:
Recipe 1: All-Purpose Hard Floor Cleaner (Tile, Laminate, Vinyl)
This recipe is my go-to for most of my hard floors. It’s effective, affordable, and leaves my floors sparkling clean.
* 1/2 cup white vinegar
* 1 gallon hot water
* 1 teaspoon dish soap (optional)
* 10-15 drops essential oils (optional)
Recipe 2: Gentle Hardwood Floor Cleaner
This recipe is specifically designed for hardwood floors. It uses a higher water-to-vinegar ratio to protect the finish.
* 1/4 cup white vinegar
* 1 gallon hot water
* 5-10 drops essential oils (optional)
Step-by-Step Instructions: Cleaning Your Floors
Now that you have your recipe and supplies, let’s get cleaning! Here’s a step-by-step guide to help you achieve sparkling clean floors:
1. Prepare the Floor: Before you start mopping, it’s important to prepare the floor. Sweep or vacuum thoroughly to remove any loose dirt, dust, and debris. This will prevent you from just pushing the dirt around while you mop. I find that a good vacuuming makes a huge difference in the final result.
2. Mix the Cleaning Solution: In your bucket or spray bottle, combine the ingredients according to the recipe you’ve chosen. Make sure the vinegar and dish soap (if using) are fully dissolved in the hot water. If you’re using essential oils, add them last.
3. Test in an Inconspicuous Area: Before you clean the entire floor, it’s always a good idea to test the cleaning solution in a small, inconspicuous area. This will help you ensure that the solution doesn’t damage or discolor your floor. Apply a small amount of the solution to the area and let it sit for a few minutes. Then, wipe it away with a clean cloth. If there are no adverse effects, you’re good to go!
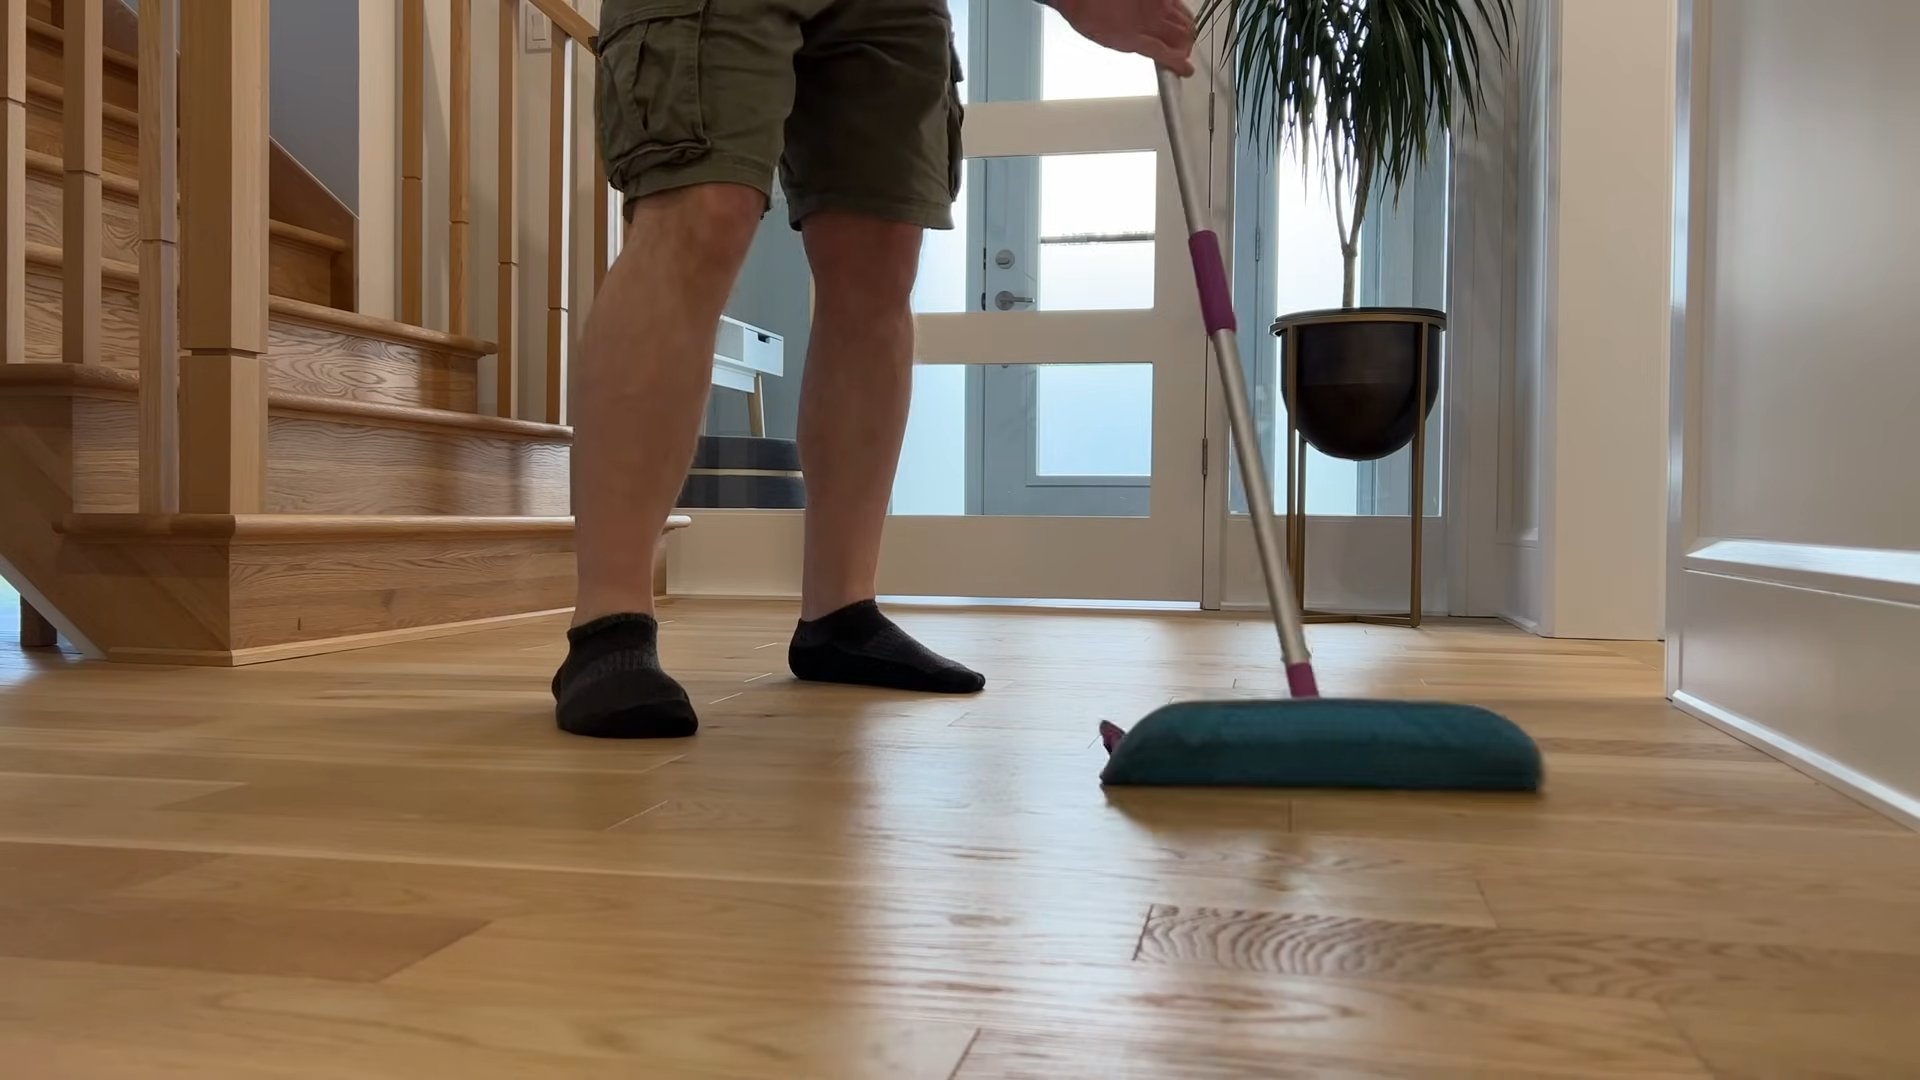
4. Mop or Spray the Floor: Now it’s time to clean the floor! If you’re using a mop, dip it into the cleaning solution and wring out the excess water. You want the mop to be damp, not soaking wet. If you’re using a spray bottle, spray the cleaning solution onto the floor in small sections.
5. Wipe the Floor: Using your mop or microfiber cloth, wipe the floor in overlapping strokes. Be sure to cover the entire surface. If you encounter any stubborn stains, you can apply a little extra pressure or let the cleaning solution sit on the stain for a few minutes before wiping it away.
6. Rinse (Optional): For tile, laminate, and vinyl floors, rinsing is usually not necessary. However, if you’re using a lot of dish soap or if you notice a residue on your floor, you can rinse it with clean water. Simply mop the floor with clean water and a clean mop or cloth. For hardwood floors, rinsing is generally not recommended, as excessive water can damage the finish.
7. Dry the Floor: Allow the floor to air dry completely. You can speed up the drying process by opening windows or using a fan. Avoid walking on the floor until it’s completely dry to prevent streaks and footprints.
Tips and Tricks for Sparkling Floors
Here are a few extra tips and tricks to help you achieve the best possible results:
* Use Distilled Water: If you have hard water, consider using distilled water in your cleaning solution. Hard water can leave mineral deposits on your floor, which can make it look dull and cloudy.
* Change Your Mop Head or Cloths Frequently: As you clean, your mop head or cloths will become dirty. Be sure to change them frequently to avoid spreading dirt and grime around.
* Don’t Over-Saturate the Floor: Especially with hardwood floors, it’s important not to over-saturate the floor with water. Too much water can seep into the wood and cause damage.
* Spot Clean Regularly: To keep your floors looking their best, spot clean spills and messes as soon as they happen. This will prevent stains from setting in and make your regular cleaning routine easier.
* Vacuum Regularly: Regular vacuuming is essential for keeping your floors clean. Vacuum at least once a week, or more often if you have pets or children.
* Consider a Steam Mop: For a deeper clean, you might consider using a steam mop. Steam mops use hot steam to sanitize and clean floors without the need for harsh chemicals. However, be sure to check the manufacturer’s instructions to ensure that your floor type is compatible with steam cleaning.
* Dealing with Stubborn Stains: For really stubborn stains, you can try making a paste of baking soda and water. Apply the paste to the stain, let it sit for a few minutes, and then scrub gently with a soft cloth. Rinse with clean water and dry.
* Vinegar Smell: Some people are sensitive to the smell of vinegar. Don’t worry, the vinegar smell will dissipate quickly after the floor dries. Adding essential oils can also help to mask the vinegar smell.
* Preventative Measures: Place mats at entrances to trap dirt and debris before they get tracked onto your floors. Use furniture pads under furniture legs to prevent scratches.
Troubleshooting
Sometimes, even with the best intentions, things don’t go exactly as planned. Here are a few common problems you might encounter and how to fix them:
* Streaky Floors: Streaky floors can be caused by using too much cleaning solution, not wringing out the mop properly, or using dirty water. To fix streaky floors, try rinsing the floor with clean water and drying it with a clean microfiber cloth.
* Dull Floors: Dull floors can be caused by using hard water, using too much dish soap, or not cleaning the floor thoroughly enough. To fix dull floors, try using distilled water in your cleaning solution, reducing the amount of dish soap you use, and making sure you’re vacuuming and mopping regularly.
* Sticky Floors: Sticky floors are usually caused by using too much dish soap. To fix sticky floors, rinse the floor with clean water and dry it with a clean microfiber cloth.
* Cloudy Floors: Cloudy floors can be caused by mineral deposits from hard water. To fix cloudy floors, try using distilled water in your cleaning solution. You can also try using a vinegar and water solution to remove the mineral deposits.
Safety First!
While this DIY cleaner is much gentler than commercial options, it’s still important to take a few safety precautions:
* Keep out of reach of children and pets. Even though the ingredients are natural, they can still be harmful if ingested.
Conclusion
So, there you have it! Creating your own DIY hard floor cleaner is not only incredibly simple and cost-effective, but it also allows you to control exactly what ingredients are coming into contact with your floors and your family. Ditch the harsh chemicals and embrace a natural, effective cleaning solution that will leave your hard floors sparkling and your conscience clear.
Why is this a must-try? Because it’s a win-win-win! You save money by using ingredients you likely already have in your pantry. You protect your family and pets from potentially harmful chemicals found in commercial cleaners. And you contribute to a more sustainable lifestyle by reducing plastic waste and reliance on mass-produced products.
But the beauty of this DIY approach lies in its adaptability. Feel free to experiment with different essential oils to find your favorite scent. Lavender, lemon, tea tree, and eucalyptus are all fantastic options, each offering their own unique aroma and potential benefits. For instance, tea tree oil is known for its antibacterial properties, making it a great addition to your cleaner if you’re concerned about germs.
If you have particularly stubborn stains, consider adding a tablespoon of baking soda to your mixture. Baking soda is a natural abrasive that can help lift dirt and grime without scratching your floors. Just be sure to test it in an inconspicuous area first to ensure it doesn’t damage the finish.
For those with sealed wood floors, be extra cautious with the amount of water you use. Too much water can seep into the wood and cause damage. A slightly damp mop is all you need. You can also add a tablespoon of white vinegar to the mixture, which helps to cut through grease and grime and leaves a streak-free shine. Again, always test in an inconspicuous area first.
Don’t be afraid to adjust the recipe to suit your specific needs and preferences. The key is to start with a basic formula and then tweak it until you find the perfect combination for your floors.
We are confident that once you try this DIY hard floor cleaner, you’ll never go back to store-bought cleaners again. It’s a simple, effective, and eco-friendly way to keep your floors looking their best.
So, what are you waiting for? Gather your ingredients, mix up a batch, and get ready to experience the satisfaction of cleaning your floors with a homemade solution. We encourage you to try this DIY trick and see the difference for yourself.
And most importantly, we want to hear about your experience! Share your results, your variations, and any tips or tricks you discover along the way in the comments below. Let’s build a community of DIY cleaning enthusiasts and help each other create healthier, happier homes. Let us know what essential oil blends you loved the most, or if you found a particular ratio of ingredients that worked wonders on your specific type of flooring. Your feedback is invaluable and will help others discover the best way to clean their hard floors naturally.
FAQ
What types of hard floors can I use this DIY cleaner on?
This DIY hard floor cleaner is generally safe for most sealed hard floors, including tile, linoleum, vinyl, and sealed hardwood. However, it’s crucial to test the cleaner in an inconspicuous area first to ensure it doesn’t damage the finish. Avoid using it on unsealed wood, cork, or marble, as these materials are more porous and can be damaged by water and acidic ingredients like vinegar. Always check your flooring manufacturer’s recommendations before using any cleaning product.
Can I use this cleaner on laminate floors?
Yes, you can use this DIY hard floor cleaner on laminate floors, but with caution. Laminate floors are susceptible to water damage, so it’s essential to use a very damp mop and avoid soaking the floor. Make sure to wring out the mop thoroughly before cleaning and dry any excess water immediately. A vinegar-based cleaner can be effective for laminate, but again, test in an inconspicuous area first.
What essential oils are best to use in this DIY cleaner?
The best essential oils for your DIY hard floor cleaner depend on your personal preferences and desired benefits. Some popular choices include:
* **Lemon:** Provides a fresh, clean scent and has degreasing properties.
* **Lavender:** Offers a calming aroma and has antibacterial properties.
* **Tea Tree:** Known for its antiseptic and antifungal properties.
* **Eucalyptus:** Has a refreshing scent and can help to disinfect surfaces.
* **Peppermint:** Provides a invigorating scent and can help to repel insects.
* **Orange:** Offers a cheerful aroma and has degreasing properties.
Experiment with different combinations to find your favorite scent. Remember to use pure essential oils and add them sparingly, as they can be quite potent.
How often should I use this DIY hard floor cleaner?
The frequency of cleaning depends on the amount of traffic your floors receive. For high-traffic areas, you may need to clean them once or twice a week. For less-used areas, once a month may be sufficient. Regular sweeping or vacuuming is also important to remove loose dirt and debris before mopping.
Can I use this cleaner on pet stains?
While this DIY hard floor cleaner can help to remove some pet stains, it may not be effective for all types of stains, especially older or more stubborn ones. For pet stains, it’s best to use a specialized pet stain remover or a solution of equal parts white vinegar and water. Always test in an inconspicuous area first.
How do I store the leftover DIY hard floor cleaner?
Store any leftover DIY hard floor cleaner in a labeled spray bottle or container in a cool, dark place. It’s best to use the cleaner within a few weeks, as the essential oils may lose their potency over time.
Is this DIY cleaner safe for pets and children?
Yes, this DIY hard floor cleaner is generally safe for pets and children, as it uses natural ingredients. However, it’s still important to keep the cleaner out of reach of children and pets, and to avoid allowing them to ingest it. If you are using essential oils, be sure to research their safety for pets, as some essential oils can be toxic to animals.
What if I don’t have essential oils? Can I still make this cleaner?
Yes, you can still make this DIY hard floor cleaner without essential oils. Simply omit them from the recipe. The vinegar and water will still provide effective cleaning power. You can also add a squeeze of lemon juice for a fresh scent.
My floors are streaky after using this cleaner. What am I doing wrong?
Streaky floors can be caused by using too much cleaner, not wringing out the mop properly, or using hard water. Try using less cleaner, wringing out the mop more thoroughly, and using distilled water instead of tap water. You can also try adding a tablespoon of rubbing alcohol to the mixture, which can help to prevent streaks.
Can I add dish soap to this DIY cleaner?
While you can add a small amount of dish soap to this DIY hard floor cleaner, it’s generally not recommended. Dish soap can leave a residue on your floors, which can attract dirt and make them look dull. If you do use dish soap, use only a tiny amount (a few drops) and rinse the floors thoroughly with clean water afterward.

Leave a Comment