
Abundant Melon Harvest Tips are what every home gardener dreams of, right? Imagine biting into a juicy, sweet melon you nurtured from a tiny seed, knowing you played a vital role in its deliciousness. Forget those bland, store-bought melons – we’re talking about homegrown perfection! But let’s be honest, achieving that abundant harvest can feel like a gamble. You might be wondering, “How do I get more melons from my plants?” or “Why are my melons so small?”
Melons have been cultivated for thousands of years, with evidence suggesting their presence in ancient Egypt and beyond. They’ve been a symbol of abundance and sweetness across cultures, often featured in art and mythology. Today, the joy of growing your own melons connects us to that rich history, allowing us to participate in a tradition that spans millennia.
That’s where these DIY tricks and hacks come in! I’m going to share some simple yet effective strategies to help you maximize your melon yield. We’ll cover everything from soil preparation and watering techniques to pollination tips and pest control. These aren’t complicated, time-consuming tasks; they’re practical solutions that any gardener, regardless of experience, can implement. So, get ready to transform your melon patch and enjoy an abundant melon harvest this season. Let’s dive in and unlock the secrets to melon-growing success!
Abundant Melon Harvest: From Seed to Sweetness – My DIY Guide
Hey fellow gardeners! I’m so excited to share my tried-and-true methods for achieving a truly abundant melon harvest. I’ve spent years experimenting, tweaking, and learning from both successes and (let’s be honest) a few melon-growing mishaps. This guide is packed with everything I’ve learned, broken down into easy-to-follow steps. Get ready for a summer overflowing with juicy, delicious melons!
Choosing the Right Melon Variety
Before we even think about planting, let’s talk varieties. Not all melons are created equal, and choosing the right one for your climate and growing conditions is crucial.
* Consider your climate: Some melons thrive in long, hot summers, while others are better suited for shorter growing seasons. Look for varieties specifically recommended for your region.
* Think about space: Watermelons, in particular, can be space hogs! If you have a smaller garden, consider bush varieties or smaller melon types like cantaloupe or honeydew.
* Disease resistance: Choosing disease-resistant varieties can save you a lot of headaches (and melon losses!) down the road. Look for varieties labeled as resistant to common melon diseases like powdery mildew and fusarium wilt.
* Personal preference: Ultimately, you want to grow melons you’ll actually enjoy eating! Experiment with different types to find your favorites. I personally love Sugar Baby watermelons for their sweetness and manageable size, and Hale’s Best cantaloupes for their classic flavor.
Starting Your Melon Seeds (or Buying Transplants)
You have two main options here: starting your own seeds indoors or buying transplants from a nursery. I usually start my seeds indoors to get a head start on the growing season, especially since I live in an area with a relatively short summer.
* Starting Seeds Indoors:
* When to start: About 4-6 weeks before your last expected frost.
* What you’ll need: Seed starting trays or pots, seed starting mix, a heat mat (optional but helpful), and a grow light.
* How to do it:
1. Fill your seed starting trays or pots with seed starting mix.
2. Moisten the mix thoroughly.
3. Plant 2-3 seeds per cell or pot, about ½ inch deep.
4. Gently cover the seeds with soil.
5. Place the trays or pots on a heat mat (if using) and under a grow light.
6. Keep the soil consistently moist but not soggy.
7. Once the seedlings emerge, thin them to one plant per cell or pot.
8. Harden off the seedlings before transplanting them outdoors. This means gradually exposing them to outdoor conditions over a period of 7-10 days.
* Buying Transplants:
* Choose healthy plants: Look for plants that are sturdy, green, and free from pests or diseases.
* Avoid root-bound plants: Gently check the roots to make sure they’re not circling tightly around the inside of the pot.
* Harden off transplants: Even if the nursery has already hardened them off, it’s a good idea to give them a few days to acclimate to your garden before planting.
Preparing Your Melon Patch
Melons are heavy feeders, so preparing your soil properly is essential for a bountiful harvest.
* Choose a sunny location: Melons need at least 6-8 hours of direct sunlight per day.
* Improve the soil: Melons prefer well-drained soil that is rich in organic matter. Amend your soil with compost, aged manure, or other organic materials. I usually add a generous amount of compost to my melon patch in the fall and again in the spring.
* Check the pH: Melons prefer a soil pH of 6.0-6.8. You can test your soil pH with a soil testing kit and amend it accordingly.
* Consider raised beds: Raised beds can improve drainage and warm up the soil more quickly in the spring, which is especially beneficial in cooler climates.
* Spacing: Give your melon plants plenty of room to spread out. Watermelons typically need 4-6 feet between plants, while cantaloupes and honeydews need 2-3 feet. Check the specific recommendations for your chosen variety.
Planting Your Melons
Now comes the fun part – getting those melons in the ground!
1. Wait for warm weather: Melons are very sensitive to frost. Don’t plant them outdoors until the soil has warmed up to at least 60°F (15°C).
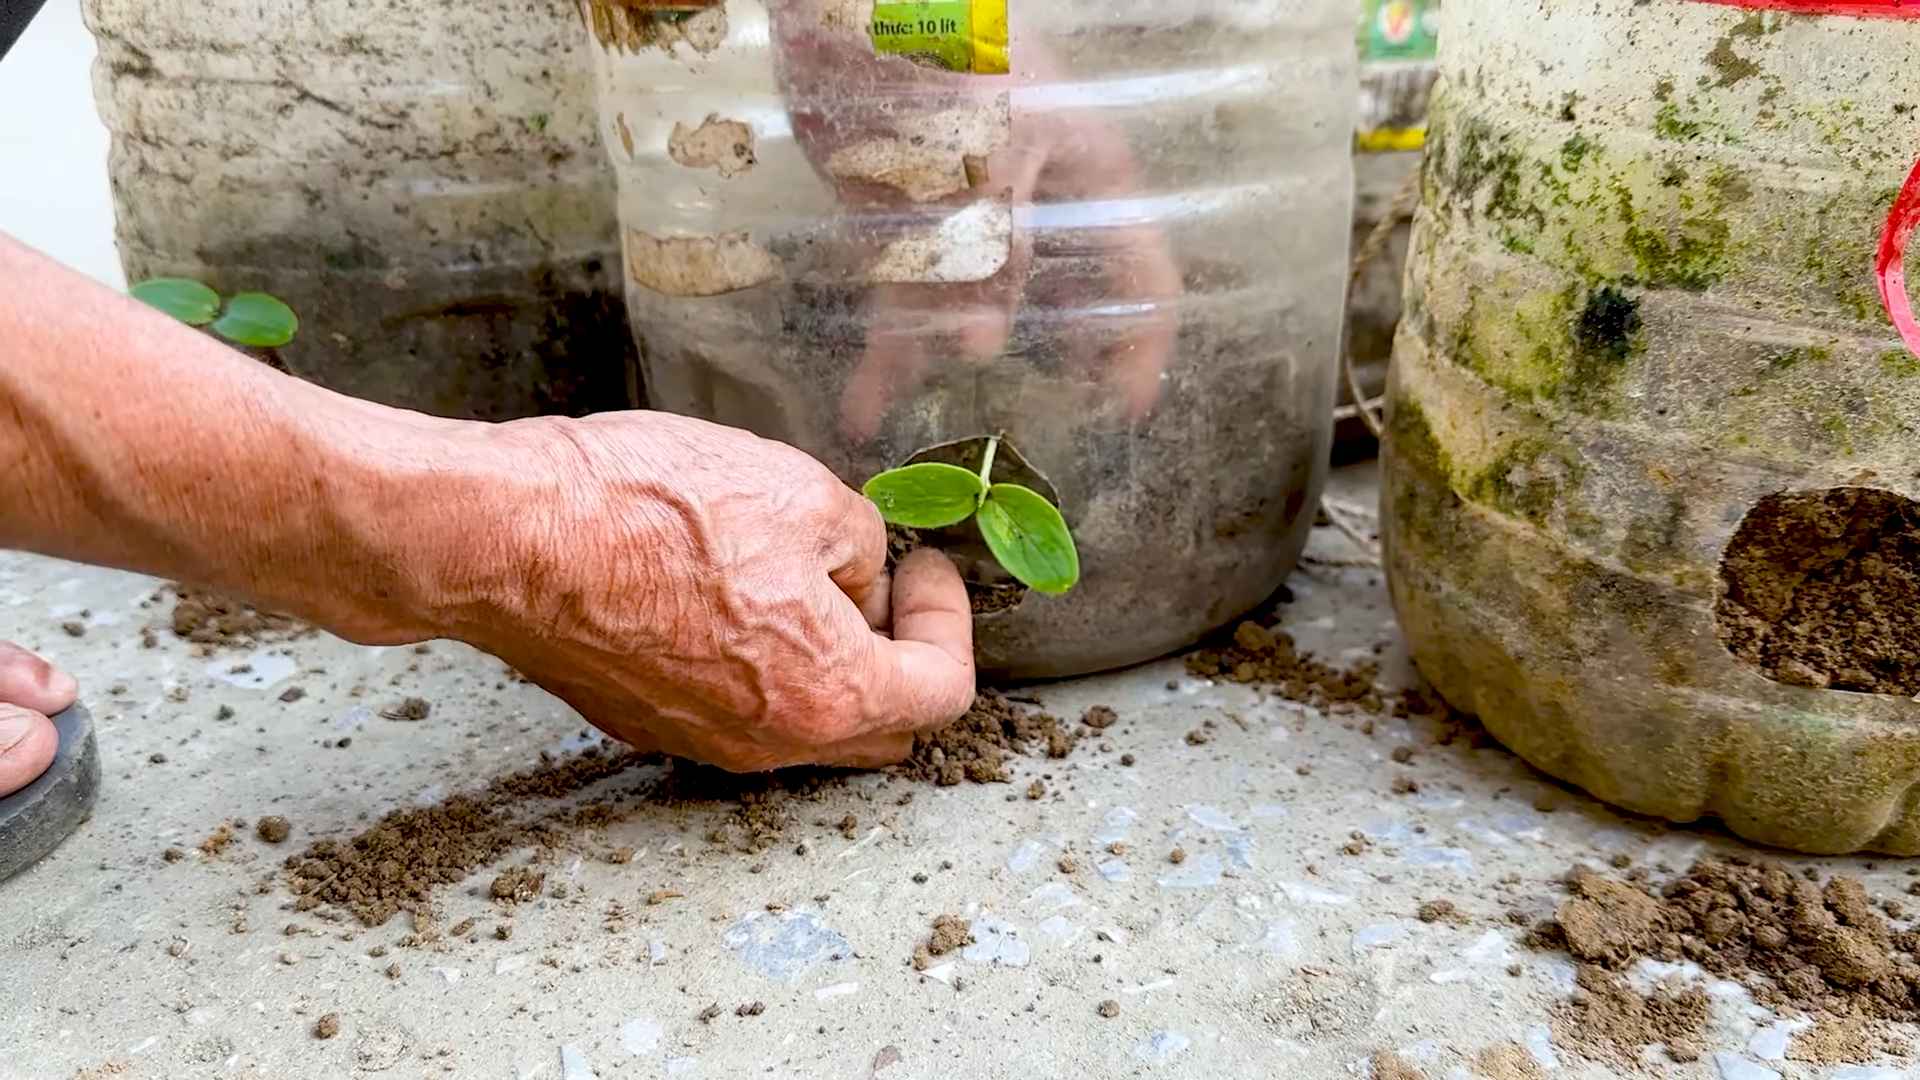
2. Dig a hole: Dig a hole that is slightly larger than the root ball of your transplant.
3. Gently remove the plant from the pot: Be careful not to damage the roots.
4. Place the plant in the hole: Make sure the top of the root ball is level with the surrounding soil.
5. Fill in the hole with soil: Gently firm the soil around the plant.
6. Water thoroughly: Water the newly planted melons well.
7. Mulch: Apply a layer of mulch around the plants to help retain moisture, suppress weeds, and regulate soil temperature. I like to use straw or shredded leaves.
Caring for Your Melon Plants
Consistent care is key to a successful melon harvest.
* Watering: Melons need consistent watering, especially during hot, dry weather. Water deeply and regularly, aiming for about 1-2 inches of water per week. Avoid overhead watering, which can promote fungal diseases. Drip irrigation is ideal.
* Fertilizing: Feed your melon plants regularly with a balanced fertilizer. I like to use a fertilizer that is high in phosphorus and potassium, which are important for fruit development. Follow the instructions on the fertilizer package. I usually fertilize every 2-3 weeks.
* Weeding: Keep your melon patch free of weeds, which can compete with the plants for nutrients and water.
* Pest and disease control: Monitor your melon plants regularly for pests and diseases. Common melon pests include aphids, squash bugs, and cucumber beetles. Common melon diseases include powdery mildew, fusarium wilt, and anthracnose. Use appropriate pest and disease control measures as needed. I prefer to use organic methods whenever possible, such as insecticidal soap for aphids and copper fungicide for fungal diseases.
* Pollination: Melons need to be pollinated in order to produce fruit. If you’re not seeing any fruit set, you may need to hand-pollinate the flowers. To hand-pollinate, use a small paintbrush to transfer pollen from the male flowers to the female flowers. Female flowers have a small, immature melon at the base.
* Pruning (Optional): Some gardeners prune their melon plants to encourage fruit production. I sometimes prune away some of the excess foliage to improve air circulation and sunlight penetration.
Supporting Your Melons
As your melons grow, they may need some support to prevent them from rotting on the ground or breaking the vines.
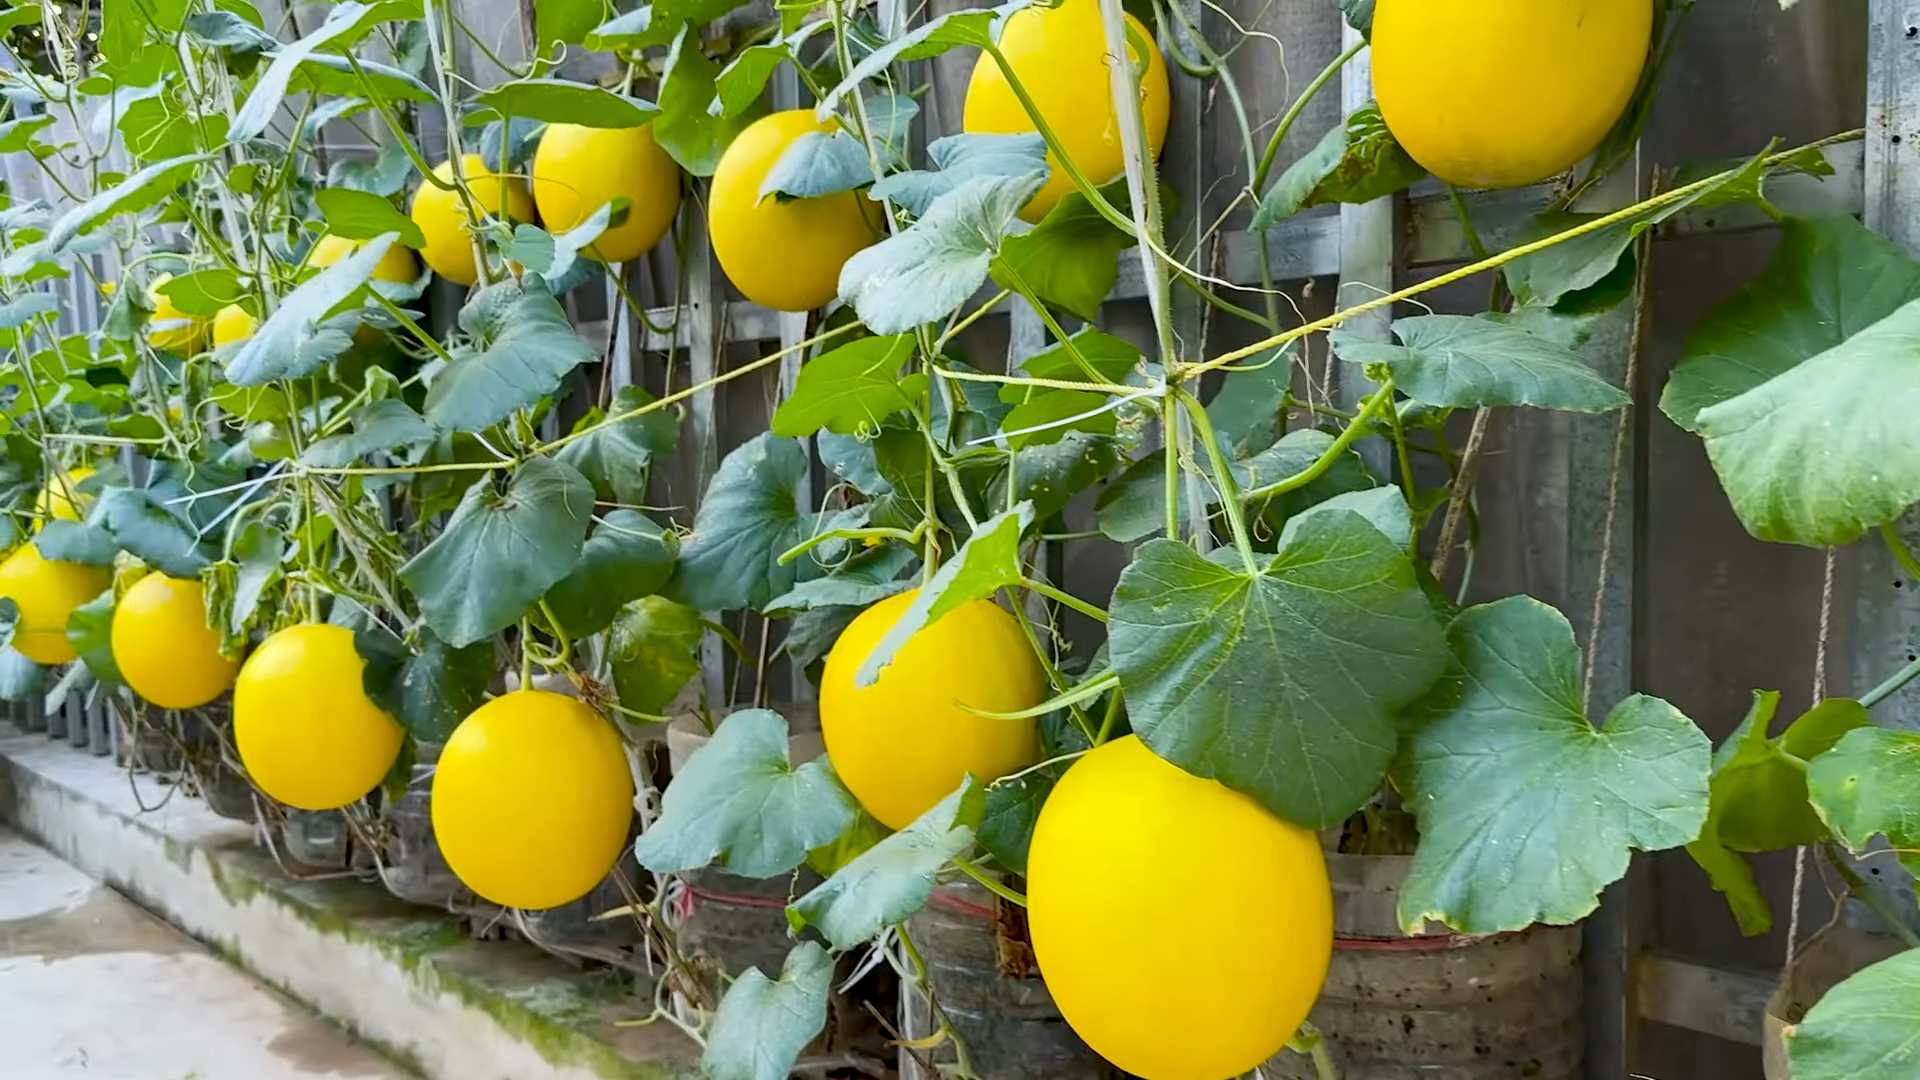
* Use a trellis: For smaller melon varieties like cantaloupe and honeydew, you can train them to grow on a trellis. This will save space and improve air circulation.
* Use melon cradles: For larger melons like watermelons, you can use melon cradles to support the fruit and keep it off the ground. You can buy melon cradles or make your own out of wood or fabric. I’ve even used old plastic containers with holes drilled in them!
* Place straw underneath the melons: If you don’t want to use cradles, you can simply place a layer of straw underneath the melons to keep them off the ground.
Harvesting Your Melons
Knowing when to harvest your melons is crucial for getting the best flavor and sweetness.
* Watermelons:
* Thumping: A ripe watermelon will sound hollow when you thump it.
* Tendril: The tendril closest to the melon should be brown and dry.
* Ground spot: The ground spot (the area where the melon rested on the ground) should be yellow or cream-colored.
* Days to maturity: Check the seed packet for the expected days to maturity and start checking for ripeness around that time.
* Cantaloupes:
* Aroma: A ripe cantaloupe will have a sweet, musky aroma.
* Stem slip: The stem should easily slip away from the melon when it’s ripe.
* Color: The skin should be a golden-tan color.
* Honeydews:
* Aroma: A ripe honeydew will have a slightly sweet aroma.
* Color: The skin should be a creamy yellow color.
*
Conclusion
So, there you have it! Transforming your abundant melon harvest into delicious, long-lasting treats is not only achievable but also incredibly rewarding. This DIY trick for preserving your melons, whether it’s watermelon, cantaloupe, or honeydew, is a game-changer for anyone facing a glut of these summer fruits. No longer will you have to watch your precious melons spoil before you can enjoy them all.
This method, focusing on creating flavorful melon preserves, offers a fantastic way to extend the shelf life of your harvest and enjoy the taste of summer throughout the year. Think of it: a bright, sunny spoonful of homemade melon jam on a cold winter morning, or a vibrant melon chutney adding a unique twist to your holiday cheese board. The possibilities are endless!
But why is this DIY trick a must-try? Firstly, it’s incredibly cost-effective. You’re utilizing what you already have – an abundance of melons – and turning them into something valuable. Secondly, it’s a sustainable way to reduce food waste. Instead of throwing away overripe or excess melons, you’re transforming them into delicious preserves. Thirdly, it allows you to control the ingredients. You can adjust the sweetness, add your favorite spices, and ensure that your preserves are free from artificial additives and preservatives.
This is more than just a recipe; it’s a way to connect with your harvest and celebrate the flavors of the season.
Looking for variations? Consider adding a touch of ginger or chili flakes to your melon chutney for a spicy kick. Experiment with different citrus fruits, like lime or grapefruit, to add a tangy twist to your melon jam. For a truly unique flavor profile, try combining different types of melons in your preserves. Watermelon and cantaloupe, for example, create a beautiful color and a complex flavor. You can also incorporate herbs like mint or basil for a refreshing twist.
Don’t be afraid to get creative and personalize your preserves to your liking. The beauty of DIY is that you have complete control over the final product.
We wholeheartedly encourage you to try this DIY trick for preserving your abundant melon harvest. It’s a simple, satisfying, and delicious way to make the most of your summer bounty. Once you’ve tried it, we’d love to hear about your experience! Share your photos, tips, and variations in the comments below. Let’s build a community of melon-preserving enthusiasts and inspire each other to make the most of our harvests. Happy preserving!
FAQ
Frequently Asked Questions About Preserving Your Melon Harvest
Q: What types of melons work best for making preserves?
A: While this method works well with most melons, some varieties are particularly well-suited for preserving. Watermelon, with its high water content, benefits greatly from being transformed into jam or chutney. Cantaloupe and honeydew, with their sweeter flavor profiles, also make excellent preserves. Experiment with different combinations to find your favorite blend! Overripe melons, that are still safe to eat, are perfect for this as the cooking process will take care of any texture issues.
Q: How long will homemade melon preserves last?
A: When properly processed and stored, homemade melon preserves can last for up to a year in a cool, dark place. It’s crucial to follow proper canning procedures to ensure the safety and longevity of your preserves. Always check for a proper seal before storing your jars. Once opened, refrigerate your preserves and consume them within a few weeks.
Q: What is the best way to sterilize my jars and lids?
A: There are several ways to sterilize your jars and lids. One common method is to boil them in a large pot of water for 10 minutes. Alternatively, you can wash them in a dishwasher on the hottest setting. Make sure the jars are still hot when you fill them with the hot melon preserve mixture. Sterilizing your equipment is crucial for preventing spoilage and ensuring the safety of your preserves.
Q: Can I reduce the amount of sugar in the recipe?
A: While you can reduce the amount of sugar, keep in mind that sugar acts as a preservative in jams and chutneys. Reducing the sugar content may affect the shelf life and texture of your preserves. If you choose to reduce the sugar, consider using a pectin specifically designed for low-sugar recipes. You can also add a small amount of lemon juice to help with preservation.
Q: What can I do if my melon jam doesn’t set properly?
A: If your melon jam doesn’t set properly, there are a few things you can try. First, you can try re-cooking the jam with a little more pectin. Alternatively, you can add a small amount of lemon juice, which can help to activate the pectin. Make sure you are using a candy thermometer to ensure that the jam reaches the proper setting temperature (usually around 220°F or 104°C).
Q: Can I use frozen melon for this recipe?
A: Yes, you can use frozen melon for this recipe. However, keep in mind that frozen melon may release more water during the cooking process, so you may need to adjust the cooking time accordingly. Thaw the melon completely before using it in the recipe.
Q: What are some creative ways to use my homemade melon preserves?
A: The possibilities are endless! Use your melon jam as a spread for toast, bagels, or scones. Add it to yogurt or oatmeal for a burst of flavor. Use melon chutney as a condiment for grilled meats, cheeses, or sandwiches. You can even use it as a glaze for roasted vegetables. Get creative and experiment with different ways to incorporate your homemade melon preserves into your meals.
Q: Is it safe to can melon preserves at home? I’ve heard melon is low in acid.
A: Yes, it is safe to can melon preserves at home, but it’s crucial to follow a tested and reliable recipe that includes added acid, such as lemon juice or vinegar. Melons are indeed low in acid, which means they don’t naturally have the acidity needed to prevent the growth of harmful bacteria during canning. The added acid ensures a safe pH level for long-term storage. Always use a water bath canner for melon preserves, and follow the processing times specified in your recipe. Never attempt to can melon preserves using a pressure canner unless the recipe specifically calls for it.
Q: Can I add spices to my melon preserves? What spices go well with melon?
A: Absolutely! Adding spices is a fantastic way to customize your melon preserves and create unique flavor profiles. Some spices that pair particularly well with melon include:
* **Ginger:** Adds a warm, spicy kick that complements the sweetness of the melon.
* **Cinnamon:** Provides a comforting, aromatic flavor that works well with both sweet and savory melon preserves.
* **Nutmeg:** Offers a subtle, nutty flavor that enhances the overall complexity of the preserves.
* **Cardamom:** Adds a fragrant, slightly citrusy note that pairs beautifully with melon.
* **Chili flakes:** For a spicy kick, a pinch of chili flakes can add a surprising and delicious twist to melon chutney.
* **Mint:** Fresh mint, added towards the end of cooking, can provide a refreshing and cooling element.
Experiment with different combinations of spices to find your perfect blend. Start with small amounts and adjust to your taste.
Q: What is pectin, and why is it used in jam making?
A: Pectin is a naturally occurring substance found in fruits, particularly in the skins and cores of apples and citrus fruits. It acts as a gelling agent, helping jams and jellies to thicken and set properly. When heated with sugar and acid, pectin forms a network that traps liquid and creates the characteristic texture of jam. Some fruits, like melons, are naturally low in pectin, which is why it’s often necessary to add commercial pectin to melon jam recipes. You can find pectin in powdered or liquid form at most grocery stores.
Q: What kind of sugar is best to use for melon preserves?
A: Granulated sugar is the most commonly used type of sugar for making melon preserves. It dissolves easily and provides a clean, sweet flavor. You can also use other types of sugar, such as cane sugar or beet sugar, with similar results. Avoid using brown sugar, as it can alter the color and flavor of the preserves.
Q: I don’t have a water bath canner. Can I still make these preserves?
A: While a water bath canner is the safest and recommended method for preserving melon preserves for long-term storage, you can still make these preserves and store them in the refrigerator for up to a few weeks. Just skip the canning process and transfer the hot jam or chutney to sterilized jars, let them cool, and store them in the fridge. This method is suitable if you plan to consume the preserves relatively quickly.

Leave a Comment