
Acid Toilet Cleaner Uses: Unlocking the Power for a Sparkling Clean Bathroom!
Let’s face it, cleaning the toilet is nobody’s favorite chore. But what if I told you there’s a way to make it easier, faster, and more effective? For generations, people have struggled with stubborn stains, mineral buildup, and lingering odors in their toilets. From using simple vinegar solutions passed down through families to the modern chemical concoctions lining store shelves, the quest for a pristine toilet bowl has been a constant. But now, we’re diving deep into the world of acid toilet cleaner uses and DIY solutions that can transform your cleaning routine!
This isn’t just about a sparkling toilet; it’s about reclaiming your time and sanity. Imagine a bathroom that’s not only clean but also hygienic and inviting. With the right knowledge and a few simple ingredients, you can ditch the harsh chemicals and create your own powerful cleaning solutions. We’ll explore the science behind acid cleaners, the safe and effective ways to use them, and even some DIY recipes that will leave your toilet bowl gleaming. So, grab your gloves, and let’s get ready to unlock the secrets to a cleaner, fresher bathroom with the power of acid toilet cleaner uses!
Growing Potatoes in Water: A Fun and Easy DIY Project
Hey there, fellow plant enthusiasts! Ever thought about growing potatoes without soil? It sounds a bit crazy, right? But trust me, it’s totally doable and a super fun experiment, especially if you’re short on space or just looking for a unique gardening project. I’m going to walk you through the whole process, step-by-step, so you can enjoy your own little potato water garden.
What You’ll Need
Before we dive in, let’s gather our supplies. This is a pretty low-cost project, which is always a win!
* **Potatoes:** You’ll need seed potatoes or regular potatoes that have started to sprout “eyes.” Organic potatoes are often a better choice because they haven’t been treated with sprout inhibitors.
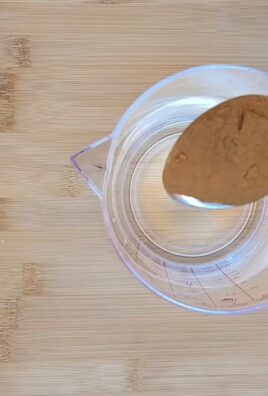
* **A Clear Container:** A glass jar, vase, or even a clear plastic container will work. The key is that it needs to be transparent so you can monitor the root growth. I recommend something at least 6-8 inches deep.
* **Water:** Tap water is fine, but letting it sit out for 24 hours to allow the chlorine to dissipate is even better.
* **Toothpicks or Skewers:** These will help suspend the potato in the water.
* **Optional: Liquid Fertilizer:** A balanced liquid fertilizer diluted to half strength can give your potato a boost, but it’s not strictly necessary.
* **Optional: Pebbles or Gravel:** A layer of pebbles at the bottom of the container can help with drainage and stability, especially if you’re using a larger potato.
Preparing Your Potatoes
Okay, let’s get those potatoes ready for their watery adventure!
1. **Choose Your Potato:** Select a potato that has several “eyes” or sprouts. These are the points where new stems and roots will emerge. If your potato is large, you can cut it into smaller pieces, ensuring each piece has at least two eyes. Let the cut pieces callous over for a day or two before placing them in water. This helps prevent rot.
2. **Callousing (If Cutting):** If you cut your potato, leave the pieces out in a cool, dry place for about 24-48 hours. This allows the cut surfaces to dry and form a protective layer, reducing the risk of fungal infections.
3. **Toothpick Insertion:** This is where the toothpicks or skewers come in. Carefully insert 3-4 toothpicks evenly spaced around the middle of the potato. The toothpicks should stick out enough to rest on the rim of your container, suspending the bottom half of the potato in the water. Be careful not to push the toothpicks too far in, as you don’t want to damage the eyes.
Setting Up Your Water Garden
Now for the fun part – creating the perfect environment for your potato to thrive!
1. **Prepare Your Container:** Clean your chosen container thoroughly with soap and water. Rinse it well to remove any soap residue.
2. **Add Pebbles (Optional):** If you’re using pebbles or gravel, add a layer to the bottom of the container. This isn’t essential, but it can help with drainage and prevent the potato from sitting directly on the bottom.
3. **Add Water:** Fill the container with water, leaving about an inch of space at the top.
4. **Position the Potato:** Carefully place the potato on top of the container, using the toothpicks to suspend it. The bottom half of the potato should be submerged in the water, while the top half remains exposed to air. Make sure the eyes are facing upwards or sideways.
Caring for Your Water Potato
Alright, your potato is all set up! Now it’s time to provide the right care to encourage growth.
1. **Location, Location, Location:** Place your potato in a bright location that receives indirect sunlight. Direct sunlight can overheat the water and damage the potato. A windowsill that gets morning sun or a spot near a bright window is ideal.
2. **Water Changes:** Change the water every 2-3 days to prevent algae growth and keep the water fresh. This is crucial for preventing rot and ensuring your potato gets the oxygen it needs.
3. **Fertilizing (Optional):** If you choose to fertilize, add a diluted liquid fertilizer to the water every 2-3 weeks. Follow the instructions on the fertilizer label, but use half the recommended strength. Over-fertilizing can harm your potato.
4. **Monitoring Growth:** Keep an eye on your potato. You should start to see roots emerging from the bottom and stems and leaves sprouting from the eyes within a week or two.
5. **Troubleshooting:**
* **Rotting:** If you notice any signs of rot (soft spots, discoloration, foul odor), remove the affected area immediately. You can try cutting away the rot and letting the potato callous over again before returning it to the water.
* **Algae Growth:** If algae start to grow in the water, clean the container thoroughly and change the water more frequently.
* **Lack of Growth:** If you don’t see any growth after a few weeks, try moving the potato to a warmer location or adding a diluted liquid fertilizer.
Transplanting (Optional)
While you can grow potatoes in water indefinitely, you’ll eventually get more potatoes if you transplant it into soil. Here’s how:
1. **When to Transplant:** Transplant your potato when the roots are well-developed and the stems have grown several inches tall.
2. **Prepare Your Pot:** Choose a large pot (at least 10 gallons) with drainage holes. Fill it with a well-draining potting mix.
3. **Carefully Remove the Potato:** Gently remove the potato from the water, being careful not to damage the roots.
4. **Plant the Potato:** Dig a hole in the potting mix and plant the potato, covering the roots and the bottom part of the stems with soil. Leave the top part of the stems exposed.
5. **Water Thoroughly:** Water the soil thoroughly after planting.
6. **Care After Transplanting:** Place the pot in a sunny location and water regularly, keeping the soil moist but not waterlogged. Fertilize every few weeks with a balanced liquid fertilizer.
Harvesting (If Transplanted)
If you transplanted your potato into soil, you can eventually harvest new potatoes!
1. **When to Harvest:** You can start harvesting “new potatoes” (small, tender potatoes) a few weeks after the plant flowers. For larger, mature potatoes, wait until the plant’s foliage starts to die back.
2. **Harvesting:** Gently dig around the base of the plant to uncover the potatoes. Be careful not to damage them with your shovel or trowel.
3. **Storing:** Store your harvested potatoes in a cool, dark, and dry place.
Enjoying Your Potato Plant
Whether you keep your potato in water or transplant it to soil, it’s a fascinating and rewarding project. You can enjoy watching the roots grow, the stems sprout, and maybe even harvest some delicious potatoes! Plus, it’s a great conversation starter. Who wouldn’t be impressed by a potato growing in a jar of water?
Remember to be patient and observant. Growing plants is all about learning and adapting. Don’t be afraid to experiment and see what works best for you. Happy growing!
Conclusion
So, there you have it! Mastering the art of creating your own acid toilet cleaner is not just about saving money; it’s about taking control of the cleanliness and hygiene of your bathroom with a powerful, effective solution you can customize. We’ve walked you through the process, highlighting the key ingredients and safety precautions, ensuring you can confidently tackle even the most stubborn toilet stains and build-up.
Why is this DIY approach a must-try? Because it empowers you. You know exactly what’s going into your cleaner, avoiding harsh, potentially harmful chemicals found in many commercial products. You can adjust the strength and ingredients to suit your specific needs and preferences. Plus, let’s be honest, there’s a certain satisfaction in creating something yourself that works so incredibly well.
But the benefits don’t stop there. Think about the environmental impact. By reducing your reliance on store-bought cleaners packaged in plastic, you’re contributing to a more sustainable lifestyle. And, depending on the ingredients you choose, you can even opt for more eco-friendly alternatives.
Variations and Suggestions:
* Scent Customization: Add a few drops of your favorite essential oil, like tea tree or eucalyptus, for a refreshing and antibacterial boost. Just be sure the essential oil is compatible with acidic environments.
* Boosting Power: For particularly tough stains, consider adding a small amount of borax to the mixture. Borax acts as a natural cleaning agent and can help to lift stubborn grime.
* Gentle Approach: If you’re concerned about the strength of the cleaner, start with a diluted solution and gradually increase the concentration until you achieve the desired results. Always test on an inconspicuous area first.
* Preventative Maintenance: Use your homemade acid toilet cleaner regularly, even when you don’t see visible stains, to prevent build-up and keep your toilet sparkling clean. A little preventative maintenance goes a long way.
* Coloring: If you want to add color to your cleaner, use a very small amount of food coloring. This is purely for aesthetic purposes and doesn’t affect the cleaning power.
We genuinely believe that this DIY acid toilet cleaner trick is a game-changer for anyone looking for a powerful, customizable, and potentially more eco-friendly way to keep their toilet clean. It’s time to ditch the expensive, chemical-laden store-bought cleaners and embrace the power of DIY.
So, what are you waiting for? Gather your ingredients, follow our instructions carefully, and prepare to be amazed by the results. We’re confident that you’ll be thrilled with the cleaning power and the satisfaction of knowing you created it yourself.
Don’t forget to share your experience with us! We’d love to hear about your results, any variations you tried, and any tips you have to share. Leave a comment below, tag us on social media, or send us an email. Let’s build a community of DIY cleaning enthusiasts and help each other create cleaner, healthier homes. We are excited to see how this DIY acid toilet cleaner transforms your cleaning routine!
FAQ
Frequently Asked Questions About DIY Acid Toilet Cleaner
Q: Is making my own acid toilet cleaner safe?
A: Safety is paramount when working with any cleaning solution, especially those containing acids. Always wear appropriate personal protective equipment (PPE), including gloves and eye protection, to prevent skin and eye irritation. Work in a well-ventilated area to avoid inhaling fumes. Never mix acid toilet cleaner with bleach, as this can create toxic chlorine gas. Store the cleaner in a clearly labeled container out of reach of children and pets. If you have any concerns about the safety of using acid toilet cleaner, consult a professional cleaning service.
Q: What kind of acid should I use for my DIY toilet cleaner?
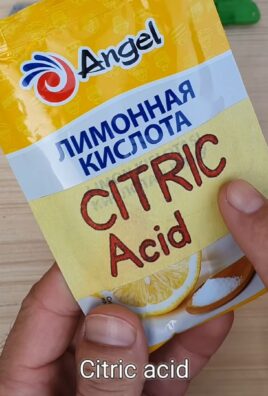
A: The most commonly used acid in DIY toilet cleaners is muriatic acid (hydrochloric acid), which is available at most hardware stores. However, it’s crucial to handle muriatic acid with extreme caution due to its corrosive nature. A milder alternative is citric acid, which is found in lemons and limes. While citric acid is less potent, it’s a safer option for those concerned about the risks associated with stronger acids. Vinegar, while acidic, is generally not strong enough to be considered an “acid toilet cleaner” in the same vein as muriatic or citric acid.
Q: Can I use this acid toilet cleaner on all types of toilets?
A: While acid toilet cleaner is generally safe for porcelain toilets, it’s not recommended for use on toilets with certain types of finishes or materials. For example, acid can damage or discolor some plastic or metal components. If you have a toilet with a non-standard finish or material, consult the manufacturer’s instructions or test the cleaner on an inconspicuous area first. It’s always better to err on the side of caution to avoid damaging your toilet.
Q: How often should I use acid toilet cleaner?
A: The frequency of use depends on the severity of the stains and build-up in your toilet. For heavily stained toilets, you may need to use acid toilet cleaner once a week initially. However, for regular maintenance, using it once a month or even less frequently may be sufficient. Overuse of acid toilet cleaner can potentially damage the toilet bowl over time, so it’s best to use it sparingly and only when necessary.
Q: What are some alternatives to acid toilet cleaner?
A: If you’re concerned about using acid toilet cleaner, there are several alternative cleaning methods you can try. Baking soda and vinegar can be used to create a fizzing action that helps to loosen stains. Borax is another natural cleaning agent that can be effective for removing grime. Commercial toilet bowl cleaners that don’t contain harsh acids are also available. Regular cleaning with a toilet brush and a mild detergent can also help to prevent build-up and reduce the need for more aggressive cleaning methods.
Q: How do I dispose of leftover acid toilet cleaner safely?
A: Never pour acid toilet cleaner down the drain, as it can damage your plumbing and harm the environment. Instead, dilute the leftover cleaner with a large amount of water and carefully pour it into the toilet bowl. Flush the toilet several times to ensure that the cleaner is completely flushed away. You can also contact your local waste management facility for information on proper disposal methods for hazardous materials.
Q: My homemade acid toilet cleaner didn’t work. What did I do wrong?
A: Several factors could contribute to the cleaner not working as expected. First, ensure that you used the correct type and concentration of acid. If you used citric acid, it may require a longer soaking time or a higher concentration to be effective. Second, make sure that the toilet bowl is dry before applying the cleaner, as water can dilute the acid and reduce its effectiveness. Third, allow the cleaner to sit in the toilet bowl for an adequate amount of time, typically 15-30 minutes, to allow the acid to break down the stains. Finally, scrub the toilet bowl thoroughly with a toilet brush after soaking to remove any loosened debris. If the stains are particularly stubborn, you may need to repeat the process or try a stronger acid.
Q: Can I add bleach to my homemade acid toilet cleaner?
A: Never, ever mix acid toilet cleaner with bleach. This combination creates chlorine gas, which is extremely toxic and can be fatal. Chlorine gas can cause severe respiratory irritation, coughing, shortness of breath, and even death. Always use acid toilet cleaner and bleach separately, and never mix them together under any circumstances. Your safety is our top priority.
Q: How do I store my homemade acid toilet cleaner?
A: Store your homemade acid toilet cleaner in a tightly sealed, clearly labeled container made of acid-resistant material, such as plastic. Keep the container in a cool, dry, and well-ventilated area, away from direct sunlight and heat. Store it out of reach of children and pets. Never store acid toilet cleaner in a container that was previously used for food or beverages, as this could lead to accidental ingestion.
Q: Can I use this cleaner to clean other things besides the toilet?
A: While the acid toilet cleaner is formulated for toilet bowls, it is not recommended for use on other surfaces without careful consideration. The acid can damage or discolor certain materials, such as metal, plastic, and painted surfaces. If you’re considering using it on another surface, test it on an inconspicuous area first to ensure that it doesn’t cause any damage. It’s generally best to use cleaning products specifically designed for the surface you’re cleaning.
Leave a Comment