
Bell pepper growing space hack: Ever dreamed of a vibrant garden overflowing with juicy bell peppers, but feel limited by your tiny balcony or cramped backyard? I totally get it! Many of us urban gardeners face the challenge of maximizing our limited space. But don’t let that stop you from enjoying the satisfaction of harvesting your own homegrown peppers.
For centuries, humans have cultivated gardens, adapting techniques to suit their environments. From the hanging gardens of Babylon to the ingenious terrace farming of the Incas, the spirit of resourceful gardening has always thrived. Now, it’s our turn to get creative!
This DIY article is your secret weapon to unlock the full potential of your small garden. We’re diving into a clever bell pepper growing space hack that will allow you to produce a bountiful harvest, even if you’re short on square footage. Imagine the delicious meals you can create with your own fresh, crisp bell peppers! No more expensive grocery store runs – just the pure joy of picking your own produce. Let’s get started and transform your limited space into a pepper paradise!

Maximize Your Bell Pepper Harvest: The Space-Saving DIY Hack!
Hey fellow gardeners! Are you dreaming of a bell pepper bonanza but limited by space? I totally get it! I used to think I needed a huge garden to grow a decent amount of peppers. But guess what? I discovered a super cool, space-saving hack that lets me grow tons of bell peppers, even in a small backyard. Let me share my secret with you! This DIY project focuses on vertical growing and efficient use of resources, ensuring you get the most out of your bell pepper plants.
What You’ll Need:
Before we dive in, let’s gather our supplies. This is a relatively inexpensive project, and you might already have some of these items lying around.
* Large Plastic Buckets (5-gallon or larger): The number of buckets depends on how many plants you want to grow. I recommend using food-grade buckets if possible.
* Drill with various sized drill bits: We’ll need this for drainage and creating support structures.
* Potting Mix: A high-quality potting mix is crucial for healthy pepper plants. Avoid using garden soil, as it can compact and hinder drainage.
* Bell Pepper Seedlings: You can start your own from seeds or purchase them from a local nursery. Choose varieties that are known to produce well in your climate.
* PVC Pipes (1/2 inch or 3/4 inch diameter): These will form the vertical support structure. The length will depend on how tall you want your structure to be. I usually go for about 4-5 feet.
* PVC Pipe Connectors (T-connectors and Elbow Connectors): These will help you assemble the PVC frame.
* Zip Ties: For securing the pepper plants to the PVC frame.
* Measuring Tape: For accurate measurements when cutting the PVC pipes.
* Saw (for cutting PVC pipes): A hand saw or PVC pipe cutter will work.
* Gloves: To protect your hands.
* Safety Glasses: Always protect your eyes when drilling or sawing.
* Optional: Landscape Fabric or Burlap: To line the inside of the buckets and help retain moisture.
* Optional: Tomato Cage Sections: If you want extra support for individual plants.
* Optional: Drip Irrigation System: For efficient watering.
Building the Vertical Support Structure
This is the heart of our space-saving hack. The vertical structure allows us to grow multiple pepper plants in a small footprint.
1. Measure and Cut the PVC Pipes:
* Decide on the desired height of your vertical structure. I usually aim for around 4-5 feet.
* Cut the PVC pipes into the following lengths:
* Four vertical support pipes (equal length, e.g., 4 feet each).
* Four horizontal base pipes (equal length, e.g., 1 foot each).
* Several shorter pipes (e.g., 6 inches each) to connect the vertical supports to the buckets. The number of these will depend on how many buckets you’re using.
* Use the measuring tape and saw to cut the pipes accurately.
2. Assemble the Base:
* Connect the four horizontal base pipes using the elbow connectors to form a square. This will be the base of your structure.
* Make sure the connections are secure.
3. Attach the Vertical Supports:
* Attach the four vertical support pipes to the corners of the base using T-connectors.
* Ensure the vertical supports are standing upright and are securely connected to the base.
4. Prepare the Bucket Connectors:
* Drill holes in the shorter PVC pipes (the 6-inch ones) to allow for zip ties to pass through. These will be used to attach the buckets to the vertical structure.
5. Attach the Buckets:
* Decide where you want to position the buckets on the vertical supports. I usually space them evenly.
* Use the zip ties to secure the buckets to the vertical support pipes, using the pre-drilled holes in the shorter PVC pipes. Make sure the buckets are firmly attached and won’t wobble.
Preparing the Buckets for Planting
Now that we have our vertical structure, let’s get the buckets ready for our bell pepper plants.
1. Drill Drainage Holes:
* Drill several drainage holes in the bottom of each bucket. This is crucial to prevent waterlogging, which can lead to root rot.
* I usually drill about 4-5 holes, each about 1/2 inch in diameter.
2. Optional: Line the Buckets:
* If you want to improve moisture retention, you can line the inside of the buckets with landscape fabric or burlap.
* Cut the fabric or burlap to fit the inside of the bucket, leaving some excess to fold over the top edge.
* This will help prevent the potting mix from drying out too quickly.
3. Fill the Buckets with Potting Mix:
* Fill each bucket with high-quality potting mix, leaving a few inches of space at the top.
* Gently compact the potting mix to remove any air pockets.
Planting the Bell Pepper Seedlings
The moment we’ve been waiting for! Let’s get those pepper plants into their new homes.
1. Dig Planting Holes:
* In each bucket, dig a hole large enough to accommodate the root ball of your bell pepper seedling.
2. Carefully Remove Seedlings from Containers:
* Gently remove the bell pepper seedlings from their containers, being careful not to damage the roots.
* If the roots are tightly bound, gently loosen them before planting.
3. Plant the
Hey fellow gardeners! Are you dreaming of a bell pepper bonanza but limited by space? I totally get it! I used to think I needed a huge garden to grow a decent amount of peppers. But guess what? I discovered a super cool, space-saving hack that lets me grow tons of bell peppers, even in a small backyard. Let me share my secret with you! This DIY project focuses on vertical growing and efficient use of resources, ensuring you get the most out of your bell pepper plants.
What You’ll Need:
Before we dive in, let’s gather our supplies. This is a relatively inexpensive project, and you might already have some of these items lying around.
* Large Plastic Buckets (5-gallon or larger): The number of buckets depends on how many plants you want to grow. I recommend using food-grade buckets if possible.
* Drill with various sized drill bits: We’ll need this for drainage and creating support structures.
* Potting Mix: A high-quality potting mix is crucial for healthy pepper plants. Avoid using garden soil, as it can compact and hinder drainage.
* Bell Pepper Seedlings: You can start your own from seeds or purchase them from a local nursery. Choose varieties that are known to produce well in your climate.
* PVC Pipes (1/2 inch or 3/4 inch diameter): These will form the vertical support structure. The length will depend on how tall you want your structure to be. I usually go for about 4-5 feet.
* PVC Pipe Connectors (T-connectors and Elbow Connectors): These will help you assemble the PVC frame.
* Zip Ties: For securing the pepper plants to the PVC frame.
* Measuring Tape: For accurate measurements when cutting the PVC pipes.
* Saw (for cutting PVC pipes): A hand saw or PVC pipe cutter will work.
* Gloves: To protect your hands.
* Safety Glasses: Always protect your eyes when drilling or sawing.
* Optional: Landscape Fabric or Burlap: To line the inside of the buckets and help retain moisture.
* Optional: Tomato Cage Sections: If you want extra support for individual plants.
* Optional: Drip Irrigation System: For efficient watering.
Building the Vertical Support Structure
This is the heart of our space-saving hack. The vertical structure allows us to grow multiple pepper plants in a small footprint.
1. Measure and Cut the PVC Pipes:
* Decide on the desired height of your vertical structure. I usually aim for around 4-5 feet.
* Cut the PVC pipes into the following lengths:
* Four vertical support pipes (equal length, e.g., 4 feet each).
* Four horizontal base pipes (equal length, e.g., 1 foot each).
* Several shorter pipes (e.g., 6 inches each) to connect the vertical supports to the buckets. The number of these will depend on how many buckets you’re using.
* Use the measuring tape and saw to cut the pipes accurately.
2. Assemble the Base:
* Connect the four horizontal base pipes using the elbow connectors to form a square. This will be the base of your structure.
* Make sure the connections are secure.
3. Attach the Vertical Supports:
* Attach the four vertical support pipes to the corners of the base using T-connectors.
* Ensure the vertical supports are standing upright and are securely connected to the base.
4. Prepare the Bucket Connectors:
* Drill holes in the shorter PVC pipes (the 6-inch ones) to allow for zip ties to pass through. These will be used to attach the buckets to the vertical structure.
5. Attach the Buckets:
* Decide where you want to position the buckets on the vertical supports. I usually space them evenly.
* Use the zip ties to secure the buckets to the vertical support pipes, using the pre-drilled holes in the shorter PVC pipes. Make sure the buckets are firmly attached and won’t wobble.
Preparing the Buckets for Planting
Now that we have our vertical structure, let’s get the buckets ready for our bell pepper plants.
1. Drill Drainage Holes:
* Drill several drainage holes in the bottom of each bucket. This is crucial to prevent waterlogging, which can lead to root rot.
* I usually drill about 4-5 holes, each about 1/2 inch in diameter.
2. Optional: Line the Buckets:
* If you want to improve moisture retention, you can line the inside of the buckets with landscape fabric or burlap.
* Cut the fabric or burlap to fit the inside of the bucket, leaving some excess to fold over the top edge.
* This will help prevent the potting mix from drying out too quickly.
3. Fill the Buckets with Potting Mix:
* Fill each bucket with high-quality potting mix, leaving a few inches of space at the top.
* Gently compact the potting mix to remove any air pockets.
Planting the Bell Pepper Seedlings
The moment we’ve been waiting for! Let’s get those pepper plants into their new homes.
1. Dig Planting Holes:
* In each bucket, dig a hole large enough to accommodate the root ball of your bell pepper seedling.
2. Carefully Remove Seedlings from Containers:
* Gently remove the bell pepper seedlings from their containers, being careful not to damage the roots.
* If the roots are tightly bound, gently loosen them before planting.
3. Plant the Seedlings:
* Place the seedling in the planting hole and backfill with potting mix.
* Make sure the top of the root ball is level with the surface of the potting mix.
4. Water Thoroughly:
* Water the newly planted seedlings thoroughly to help them settle in.
* Water until water drains out of the drainage holes at the bottom of the bucket.
Caring for Your Bell Pepper Plants
Now that your bell pepper plants are in their vertical garden, it’s important to provide them with the care they need to thrive.
1. Watering:
* Bell pepper plants need consistent moisture, but avoid overwatering.
* Water when the top inch of soil feels dry to the touch.
* Consider using a drip irrigation system for efficient watering.
2. Fertilizing:
* Bell pepper plants are heavy feeders and benefit from regular fertilization.
* Use a balanced fertilizer specifically formulated for vegetables.
* Follow the instructions on the fertilizer package. I like to use a slow-release fertilizer at planting time and then supplement with a liquid fertilizer every few weeks.
3. Sunlight:
* Bell pepper plants need at least 6-8 hours of sunlight per day.
* Choose a location that receives plenty of sunlight.
* If you live in a hot climate, provide some afternoon shade to prevent the plants from getting scorched.
4. Support:
* As the bell pepper plants grow, they may need additional support.
* Use zip ties to secure the stems to the PVC frame.
* You can also use tomato cage sections for extra support.
5. Pruning:
* Pruning can help improve air circulation and encourage fruit production.
* Remove any suckers (small shoots that grow from the base of the plant) and any yellowing or diseased leaves.
6. Pest and Disease Control:
* Keep an eye out for pests and diseases.
* Common pests include aphids, whiteflies, and spider mites.
* Common diseases include blossom-end rot and fungal infections.
* Use organic pest control methods whenever possible.
Harvesting Your Bell Peppers
The best part! Harvesting your delicious, homegrown bell peppers.
1. When to Harvest:
* Bell peppers are ready to harvest when they are fully colored and firm to the touch.
* The color will depend on the variety you are growing (green, red, yellow, orange, etc.).
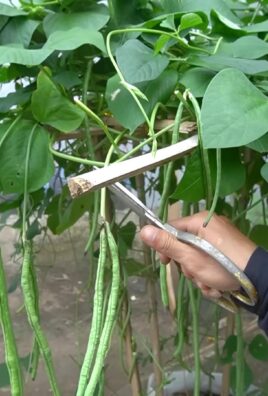
2. How to Harvest:
* Use a sharp knife or pruning shears to cut the bell pepper from the plant.
* Cut the stem close to the pepper.
3. Enjoy Your Harvest!
* Use your homegrown bell peppers in your favorite recipes.
* They are delicious in salads, stir-fries, soups, and stews.
* You can also freeze or can them for later use.
Tips and Tricks for Success
Here are a few

Conclusion
So, there you have it! This simple yet incredibly effective bell pepper growing space hack is more than just a clever trick; it’s a game-changer for anyone looking to maximize their yield, regardless of garden size. We’ve shown you how to transform a limited area into a thriving bell pepper paradise, and the benefits are undeniable. Imagine harvesting basketfuls of vibrant, crisp bell peppers from a space you previously thought couldn’t accommodate them. This isn’t just about saving space; it’s about optimizing your resources, reducing waste, and enjoying the satisfaction of a bountiful harvest.
Why is this a must-try? Because it’s accessible, affordable, and adaptable. You don’t need specialized equipment or years of gardening experience. With readily available materials and a little bit of effort, you can create a supportive structure that encourages vertical growth, improves air circulation, and allows your bell peppers to flourish. Think of the possibilities! You can finally grow that rainbow of bell peppers you’ve always dreamed of, even if you only have a small balcony or patio.
But don’t stop there! This bell pepper growing space hack is just the beginning. Experiment with different support structures. Try using bamboo stakes instead of tomato cages, or create a trellis system using repurposed materials. Consider companion planting to further enhance your bell pepper’s growth and deter pests. Basil, marigolds, and carrots are all excellent choices. You can also adjust the spacing between plants based on the specific variety of bell pepper you’re growing. Some varieties are more compact than others, so do your research and tailor your approach accordingly.
And speaking of varieties, this method works wonders for all types of bell peppers, from the classic green to the sweet red, yellow, and orange. You can even try growing miniature bell peppers for a fun and unique twist. The key is to provide consistent support and ensure adequate sunlight and water.
We are confident that this bell pepper growing space hack will revolutionize your gardening experience. It’s a simple solution to a common problem, and the results speak for themselves. But don’t just take our word for it. We encourage you to try it out for yourself and see the difference it makes.
Once you’ve implemented this bell pepper growing space hack, we want to hear about your experience! Share your photos, tips, and success stories in the comments below. Let’s create a community of gardeners who are passionate about maximizing their yields and enjoying the fruits (or vegetables!) of their labor. What challenges did you face? What modifications did you make? What varieties of bell peppers did you grow? Your insights will help other gardeners learn and grow, and together, we can create a more sustainable and productive food system.
So, grab your tools, gather your materials, and get ready to transform your garden. This bell pepper growing space hack is your ticket to a bountiful harvest, no matter how small your space may be. Happy gardening!
Frequently Asked Questions (FAQ)
Q: What type of support structure is best for this bell pepper growing space hack?
A: The best support structure depends on your personal preference and the resources you have available. Tomato cages are a popular and readily available option, providing a sturdy framework for your bell pepper plants to climb. However, you can also use bamboo stakes, trellises, or even repurposed materials like old ladders or fencing. The key is to choose a structure that is strong enough to support the weight of the plants and the developing peppers, and that allows for good air circulation. Consider the mature size of your bell pepper variety when selecting your support structure. Taller varieties will require taller supports.
Q: How far apart should I space my bell pepper plants when using this method?
A: While this method helps maximize space, you still need to provide adequate room for your bell pepper plants to grow. A good rule of thumb is to space them about 18-24 inches apart. This allows for sufficient airflow and prevents overcrowding, which can lead to disease and reduced yields. If you’re growing in containers, make sure each container is large enough to accommodate the mature size of the plant. A 5-gallon container is generally sufficient for a single bell pepper plant.
Q: How often should I water my bell pepper plants when using this method?
A: Bell pepper plants need consistent moisture, especially when they are actively growing and producing fruit. Water deeply and regularly, aiming to keep the soil consistently moist but not waterlogged. The frequency of watering will depend on factors such as the weather, the type of soil, and the size of the container. Check the soil moisture regularly by sticking your finger about an inch into the soil. If it feels dry, it’s time to water. During hot, dry weather, you may need to water daily.
Q: What type of fertilizer should I use for my bell pepper plants?
A: Bell pepper plants benefit from regular fertilization, especially during the flowering and fruiting stages. Use a balanced fertilizer with a ratio of N-P-K (nitrogen, phosphorus, potassium) that is appropriate for vegetable plants. Follow the instructions on the fertilizer packaging carefully, and avoid over-fertilizing, which can damage the plants. You can also supplement with organic fertilizers such as compost tea or fish emulsion.
Q: How do I protect my bell pepper plants from pests and diseases?
A: Prevention is key when it comes to pests and diseases. Start by choosing disease-resistant varieties of bell peppers. Ensure good air circulation by spacing your plants properly and pruning any overcrowded foliage. Regularly inspect your plants for signs of pests or diseases, such as aphids, whiteflies, or fungal infections. If you spot any problems, take action immediately. You can use organic pest control methods such as insecticidal soap or neem oil. For fungal diseases, try copper fungicide.
Q: Can I use this method for other types of vegetables besides bell peppers?
A: Absolutely! This method can be adapted for other vining or sprawling vegetables such as tomatoes, cucumbers, and even some types of squash. The key is to choose a support structure that is appropriate for the size and weight of the plant. For example, tomatoes may require sturdier supports than bell peppers. Experiment and see what works best for you and your garden.
Q: What if my bell pepper plants are not producing fruit?
A: There are several reasons why your bell pepper plants may not be producing fruit. One common cause is lack of pollination. Bell peppers are self-pollinating, but they often benefit from a little help, especially in enclosed spaces. You can hand-pollinate your plants by gently shaking the flowers or using a small paintbrush to transfer pollen from one flower to another. Other factors that can affect fruit production include insufficient sunlight, inadequate watering, and nutrient deficiencies. Make sure your plants are getting at least 6-8 hours of sunlight per day, are being watered regularly, and are being fertilized properly.
Q: How do I know when my bell peppers are ripe?
A: Bell peppers are typically ready to harvest when they have reached their mature size and color. The color will depend on the variety you are growing. Green bell peppers are often harvested when they are still green, but they will continue to ripen and turn red, yellow, or orange if left on the plant. The peppers should be firm and slightly glossy. To harvest, use a sharp knife or pruning shears to cut the pepper from the plant, leaving a short stem attached.
Q: Can I grow bell peppers indoors using this method?
A: Yes, you can grow bell peppers indoors using this method, but you will need to provide adequate light. Bell peppers need at least 6-8 hours of sunlight per day, so you may need to supplement with grow lights. Choose a sunny window or use a full-spectrum grow light to provide the necessary light. Make sure your container is large enough to accommodate the mature size of the plant, and use a well-draining potting mix.
Q: Is this bell pepper growing space hack suitable for beginners?
A: Absolutely! This method is very beginner-friendly. It requires minimal tools and materials, and the steps are easy to follow. Even if you’ve never grown bell peppers before, you can successfully implement this method and enjoy a bountiful harvest. Don’t be afraid to experiment and learn as you go. Gardening is a rewarding and enjoyable hobby, and this bell pepper growing space hack is a great way to get started.
Leave a Comment