
Fast Bag Closure DIY: Revolutionizing Your Home Garden
I’ve always loved gardening, but let’s be honest, the little things can sometimes feel like a huge hassle. One of those tiny annoyances? Dealing with those pesky open bags of seeds, fertilizer, or soil. That’s why I’m so excited to share my Fast Bag Closure DIY trick with you – a simple, ingenious solution that will save you time and frustration in the garden.
For years, I struggled with twist ties, rubber bands, and even clothespins, constantly battling messy spills and struggling to reseal bags effectively. It wasn’t until I stumbled upon this clever method that I realized how much easier gardening could be. This isn’t just about convenience; it’s about preserving the freshness and quality of your gardening supplies. Think about it: a properly sealed bag of seeds means higher germination rates, and a tightly closed bag of fertilizer prevents clumping and moisture loss. This Fast Bag Closure DIY isn’t just a hack; it’s an investment in your garden’s success.
Why You Need This Fast Bag Closure DIY
The history of gardening is rich with clever innovations, from the invention of the wheelbarrow to the development of modern hybrid seeds. This Fast Bag Closure DIY might seem small, but it’s in the spirit of that long tradition of finding creative solutions to everyday problems. It’s about making your gardening experience more efficient and enjoyable, allowing you to focus on what truly matters: nurturing your plants and enjoying the fruits (and vegetables!) of your labor. So, let’s dive in and learn how to make your gardening life a little bit easier, one perfectly sealed bag at a time!
Building a Custom Bookshelf from Reclaimed Wood
I love the look of reclaimed wood, and I’ve always wanted a unique bookshelf. So, I decided to build my own! This project took a bit of time, but the result is a beautiful, sturdy bookshelf that perfectly fits my space and style. Here’s how I did it:
Phase 1: Sourcing and Preparing the Wood
- Find your wood: This is the fun part! I scoured local salvage yards and even checked Craigslist for reclaimed wood. Look for planks that are relatively straight and free of major cracks or rot. I aimed for a mix of widths and textures for a more rustic look.
- Clean the wood: Once you’ve got your wood, give it a good cleaning. I used a wire brush to remove loose debris and then wiped it down with a damp cloth. For really stubborn dirt, a pressure washer can be helpful (but be gentle!).
- Cut the wood to size: This is where accurate measurements are crucial. I planned my bookshelf design beforehand, sketching out the dimensions of each shelf and the sides. Using a measuring tape and a saw (I used a circular saw, but a hand saw works too), I cut the wood to the exact lengths I needed. Remember to account for the thickness of the wood when calculating the overall dimensions.
- Sand the wood: This step is essential for a smooth finish and to prevent splinters. I started with a coarser grit sandpaper (around 80 grit) to remove any rough edges, then gradually moved to finer grits (120, then 220) for a super smooth surface. Wear a dust mask during sanding!
Phase 2: Assembling the Bookshelf
- Prepare the side supports: I chose to use two sturdy pieces of reclaimed wood for the sides of my bookshelf. These needed to be tall enough to accommodate all my shelves. I marked the locations for the shelf supports on the inside of each side piece, ensuring they were evenly spaced.
- Attach the shelf supports: I used wood screws and a drill to attach small blocks of wood (shelf supports) to the inside of the side pieces. These blocks will provide support for the shelves. Pre-drilling pilot holes prevents the wood from splitting. Make sure the shelf supports are level and securely fastened.
- Install the shelves: Carefully place each shelf onto the shelf supports. I used wood glue and additional screws to secure the shelves to the supports. Again, pre-drilling pilot holes is crucial to prevent splitting. Double-check that each shelf is level before moving on.
- Reinforce the structure (optional): For extra stability, especially if you plan on loading the shelves heavily, consider adding some bracing in the back. I used thin strips of wood, screwing them from the back of the side supports to the back of the shelves. This adds significant strength.
Phase 3: Finishing Touches
- Fill any gaps or holes: Use wood filler to fill any gaps or holes in the wood. Let it dry completely, then sand it smooth.
- Apply a stain or sealant: This step protects your bookshelf and enhances its appearance. I chose a dark walnut stain to bring out the natural beauty of the reclaimed wood. Follow the manufacturer’s instructions carefully. Apply several thin coats, allowing each coat to dry completely before applying the next. For extra protection, I finished with a clear sealant.
- Let it dry completely: Allow ample time for the stain and sealant to dry thoroughly before placing any books on the shelves. This could take several hours or even overnight, depending on the products you used.
- Inspect and adjust: Once everything is dry, give your bookshelf a final inspection. Make sure all the shelves are level and securely attached. Tighten any loose screws if necessary.
Phase 4: Adding Personal Touches (Optional)
- Consider adding hardware: You could add decorative metal brackets to the corners or even some unique drawer pulls to the shelves for a more personalized look. This is entirely optional, but it can add a nice touch.
- Incorporate lighting: For a dramatic effect, consider adding small LED strip lights underneath the shelves. This creates a warm glow and highlights your books.
- Customize the shelves: If you have particularly large or oddly shaped items you want to display, you can customize the shelf spacing to accommodate them. Just remember to adjust your measurements accordingly.
Important Considerations:
Safety First: Always wear safety glasses and a dust mask when using power tools and sanding. Be careful when handling sharp tools.
Measure Twice, Cut Once: Accurate measurements are crucial for a successful project. Take your time and double-check your measurements before cutting any wood.
Choose the Right Tools: Having the right tools makes the job easier and safer. Invest in good quality tools if you plan on doing more DIY projects in the future.
Enjoy the Process: Building something with your own hands is incredibly rewarding. Take your time, enjoy the process, and don’t be afraid to experiment!
Troubleshooting:
Uneven Shelves: If your shelves are uneven, check the shelf supports to ensure they are level and securely attached. You might need to adjust the supports or add shims to level the shelves.
Loose Screws: If screws become loose, tighten them with a screwdriver. If the holes are stripped, you may need to use wood glue and longer screws.
Cracks or Splits: If you encounter cracks or splits in the wood, you can use wood filler to repair them. Sand the filler smooth once it’s dry.
Conclusion
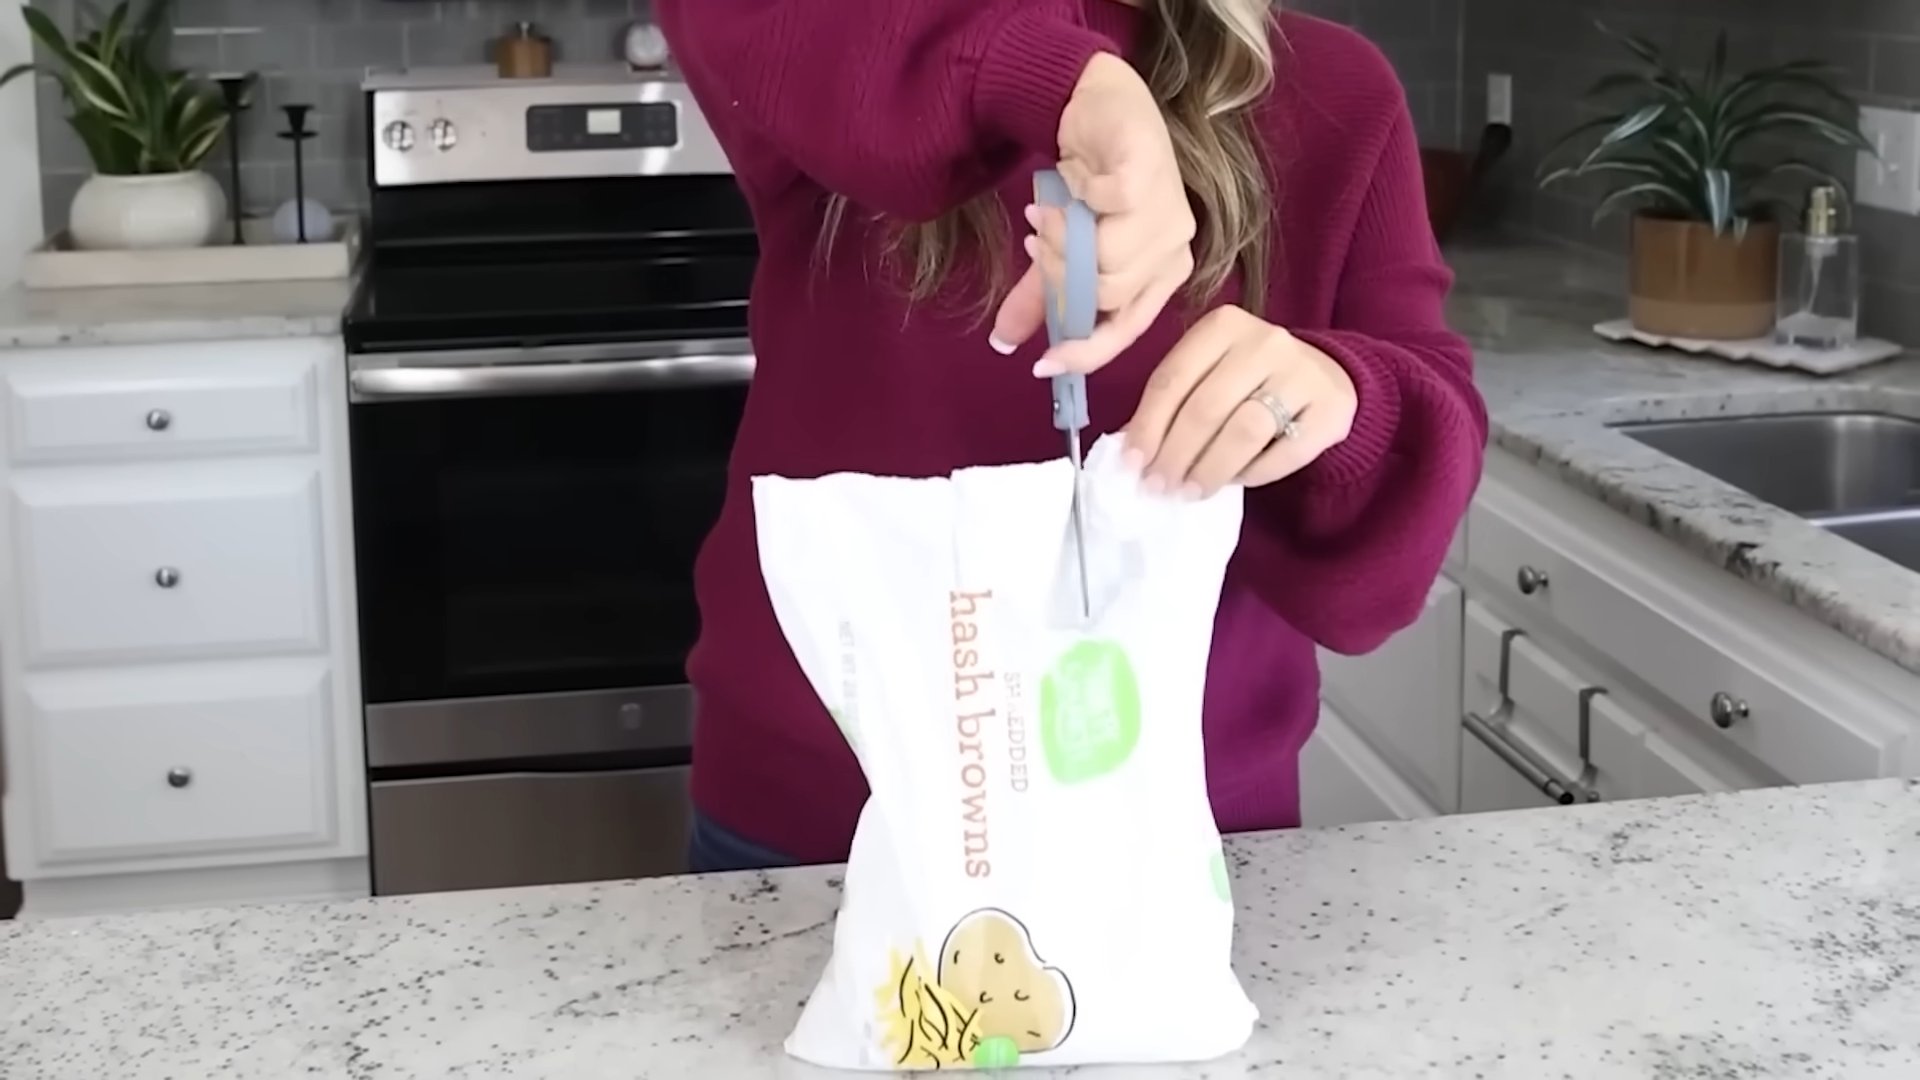
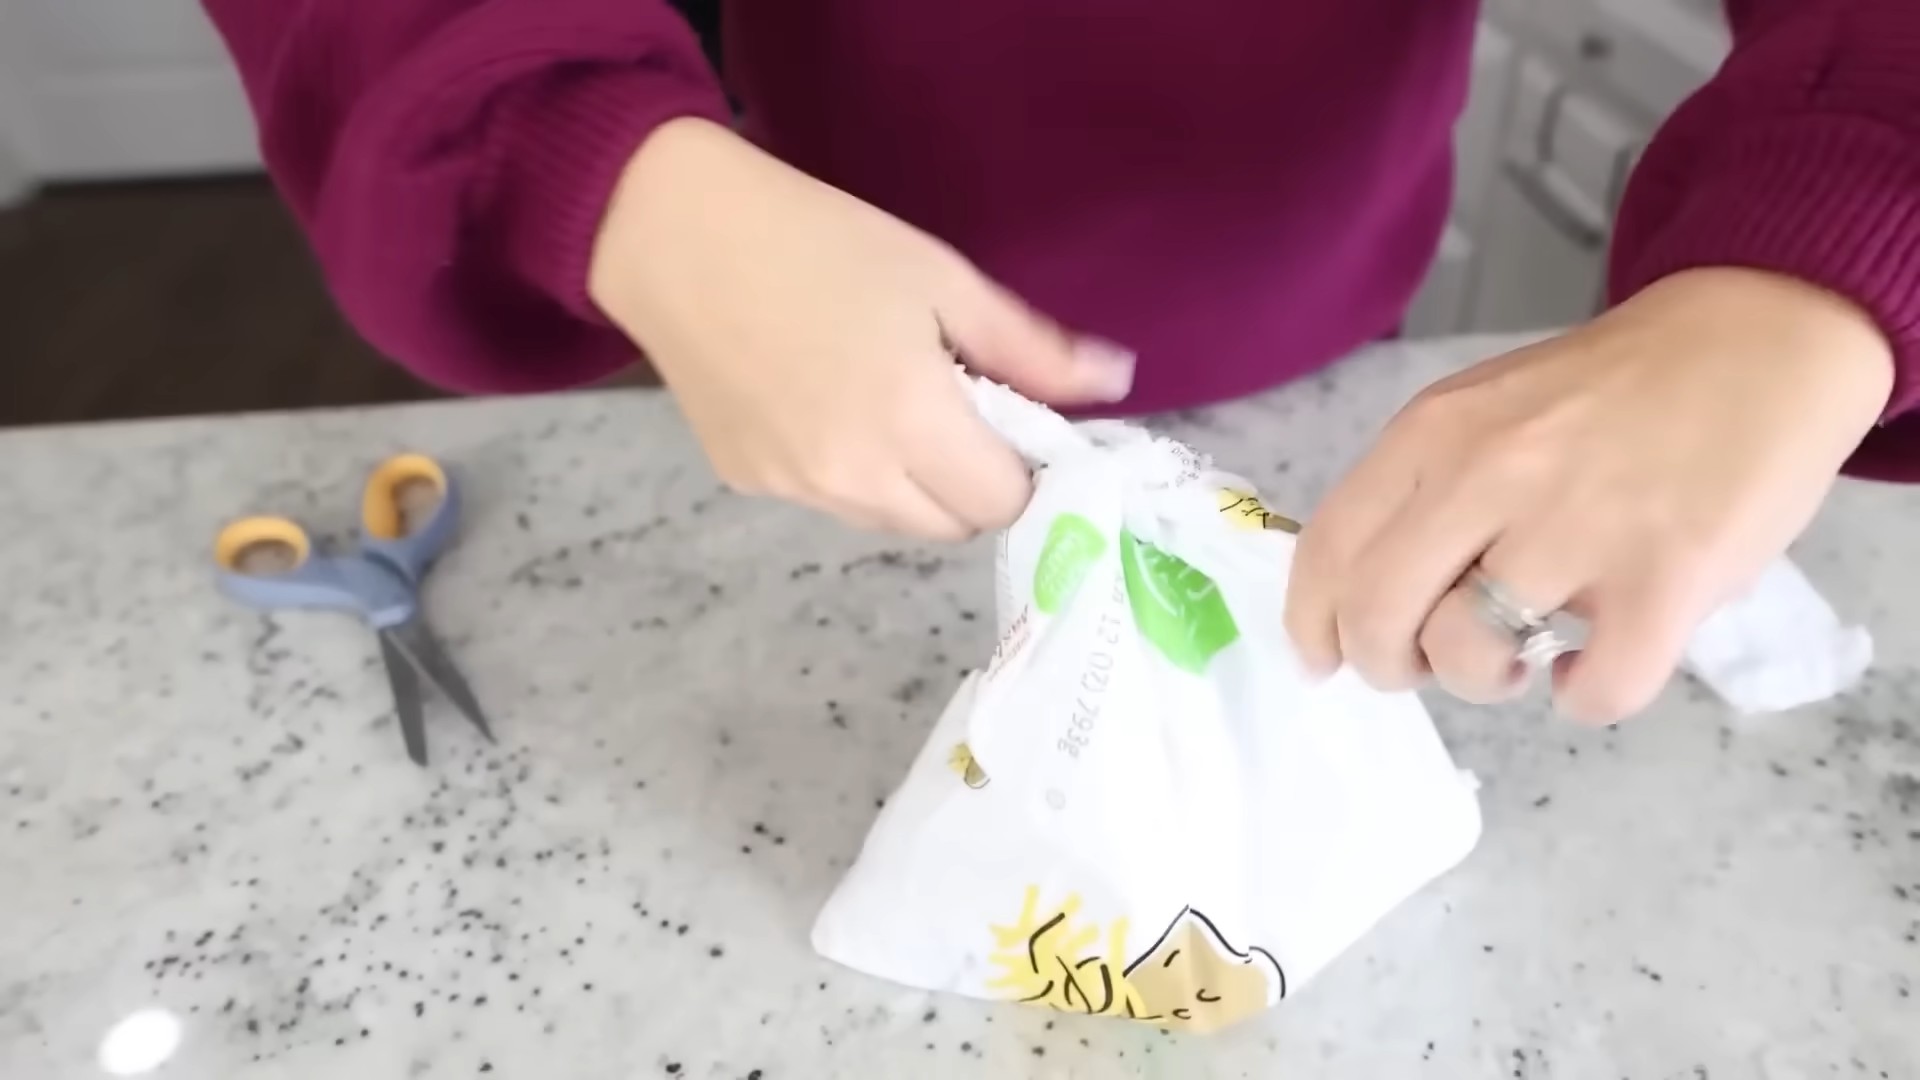
So there you have it – a simple, effective, and surprisingly satisfying solution to a common problem: the perpetually open bag. This Fast Bag Closure DIY trick isn’t just about convenience; it’s about reducing waste and making your life a little easier. By repurposing everyday materials, you’re not only saving money but also contributing to a more sustainable lifestyle. The satisfying “click” of the closure each time you use it is a small reward for your ingenuity, a testament to the power of simple DIY solutions. Forget struggling with twist ties, rubber bands, or those flimsy clips that always seem to break at the worst possible moment. This method offers a secure, reusable, and incredibly practical alternative. It’s a game-changer for storing snacks, leftovers, pet food, or anything that needs a reliable seal.
The beauty of this Fast Bag Closure DIY lies in its adaptability. Feel free to experiment with different types of buttons and elastic. Perhaps you have some pretty decorative buttons lying around that could add a touch of personality to your bag closures. Consider using thicker elastic for heavier bags or thinner elastic for lighter ones. The possibilities are endless! You could even coordinate the colors of your buttons and elastic to match your kitchen décor or the contents of the bag itself. For a truly personalized touch, try adding a small label to each bag, indicating its contents. This will make it even easier to find what you need quickly and efficiently.
We encourage you to try this Fast Bag Closure DIY project today. It’s a quick and easy project that yields significant results. Share your creations with us on social media! We’d love to see your unique variations and hear about your experiences. Tag us in your photos and use the hashtag #FastBagClosureDIY so we can celebrate your success with you. Let’s build a community of resourceful individuals who are embracing simple solutions to everyday problems. This isn’t just about closing bags; it’s about embracing creativity, sustainability, and the satisfaction of a job well done. Don’t hesitate – give it a try and experience the difference!
Beyond the immediate convenience, this DIY project offers a fantastic opportunity to teach children about resourcefulness and upcycling. Involving them in the process can be a fun and educational experience, fostering creativity and problem-solving skills. It’s a great way to spend quality time together while contributing to a more sustainable household.
Frequently Asked Questions
What types of bags does this work best with?
This Fast Bag Closure DIY method works best with bags that have a relatively flat top and are made of a material that can be easily pierced by a needle. Plastic freezer bags, sandwich bags, and even some types of reusable food storage bags are ideal candidates. Avoid bags that are too thin or flimsy, as they may tear easily.
What kind of buttons and elastic should I use?
You can use almost any type of button and elastic for this project. However, we recommend using buttons that are relatively flat and not too bulky. For the elastic, choose a type that is strong and stretchy enough to hold the bag closed securely. Avoid using elastic that is too thin or too thick, as this could affect the effectiveness of the closure.
How durable is this closure method?
With proper care, this Fast Bag Closure DIY method can be surprisingly durable. The strength of the closure depends on the quality of the button and elastic you use. Avoid overstretching the elastic, and handle the bags gently to prevent damage. With careful use, these closures can last for many uses.
Can I use this method on bags with zippers?
While this method is primarily designed for bags without zippers, you could potentially adapt it for bags with partially functional zippers. If the zipper is only slightly damaged, you could use the button and elastic to supplement the zipper and provide a more secure closure. However, for bags with completely broken zippers, this method may not be suitable.
What if I don’t have a sewing machine?
You don’t need a sewing machine for this project! The holes for the elastic can be easily created using a needle and thread, or even a hole punch if the bag material allows it. This makes it a very accessible DIY project for everyone, regardless of their sewing skills.
Can I wash the bags after applying the closure?
Yes, you can generally wash the bags after applying the Fast Bag Closure DIY, but it’s best to hand wash them gently to prevent damage to the closure. Avoid using harsh detergents or abrasive cleaning tools. Always allow the bags to air dry completely before using them again.
What if I run out of buttons or elastic?
Buttons and elastic are readily available at most craft stores, fabric stores, and even online retailers. You can find a wide variety of colors, sizes, and styles to match your preferences and the bags you’re using. Consider buying in bulk to save money and have plenty on hand for future projects.
Are there any safety precautions I should take?
The primary safety precaution is to be careful when using needles and scissors. Always supervise children when they are participating in this project. Ensure that the buttons and elastic are securely attached to prevent them from becoming loose and posing a choking hazard, especially if using the bags to store food for children.


Leave a Comment