
Coconut shell lettuce garden: Ever dreamt of snipping fresh, crisp lettuce right from your own backyard, or even your balcony? I know I have! But what if I told you that dream could be realized in the most charming and eco-friendly way possible? Forget those bulky planters and expensive gardening setups. We’re diving into the wonderful world of upcycling and creating a miniature lettuce paradise using something you might normally toss away: coconut shells!
For centuries, coconuts have been a vital resource in tropical cultures, providing food, drink, and materials for shelter and crafts. Now, we’re adding “garden container” to that impressive list! This isn’t just about growing lettuce; it’s about embracing sustainability and adding a touch of rustic beauty to your living space.
Why should you try this DIY trick? Well, for starters, it’s incredibly budget-friendly. Plus, it’s a fantastic way to reduce waste and give those coconut shells a new lease on life. But more importantly, a coconut shell lettuce garden is perfect for small spaces, making fresh, homegrown greens accessible to everyone, regardless of whether you have a sprawling garden or just a sunny windowsill. Imagine the satisfaction of harvesting your own salad ingredients, knowing you created the perfect little ecosystem for them to thrive. Let’s get started and transform those humble coconut shells into thriving lettuce havens!
DIY Coconut Shell Lettuce Garden: From Waste to Wonderful!
Hey there, fellow gardening enthusiasts! Ever looked at a leftover coconut shell and thought, “Hmm, there’s gotta be something cool I can do with this?” Well, today’s your lucky day! We’re diving headfirst into a super fun and eco-friendly project: turning those discarded coconut shells into adorable, miniature lettuce gardens. Not only is this a fantastic way to recycle, but it also adds a unique, tropical touch to your home or garden. Let’s get started!
What You’ll Need
Before we get our hands dirty, let’s gather our supplies. Don’t worry, you probably have most of these lying around already!
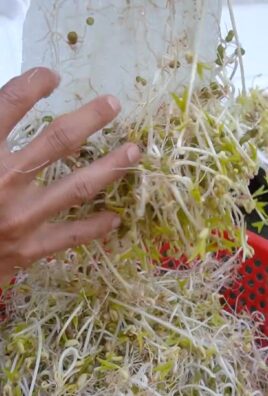
* Coconut Shells: Obviously! Cleaned and dried. The more, the merrier!
* Potting Soil: Choose a good quality potting mix that drains well.
* Lettuce Seeds: Pick your favorite varieties! Romaine, butterhead, loose-leaf – the choice is yours.
* Drill (Optional): For drainage holes. If you don’t have one, we’ll explore alternative methods.
* Small Pebbles or Gravel: For drainage at the bottom of the shell.
* Sandpaper (Optional): To smooth out any rough edges on the shell.
* Watering Can or Spray Bottle: For gentle watering.
* Gloves (Optional): To keep your hands clean.
* Small Trowel or Spoon: For scooping soil.
* Decorations (Optional): Paint, markers, twine – get creative!
Preparing the Coconut Shells
Okay, so you’ve got your coconut shells. Now, let’s get them ready for their new life as lettuce homes!
1. Cleaning the Shells: If you’re starting with fresh coconut shells, make sure they’re thoroughly cleaned. Remove any remaining coconut flesh and fibers. A good scrub with soap and water will do the trick. Let them dry completely.
2. Sanding (Optional): If the edges of the shell are rough or sharp, use sandpaper to smooth them out. This will make them safer to handle and give them a more polished look. I usually skip this step, but if you have kids helping, it’s a good idea.
3. Creating Drainage: This is crucial! Lettuce needs well-draining soil to thrive.
* Drilling Method: If you have a drill, carefully drill 3-4 small holes in the bottom of each shell. Use a drill bit appropriate for the shell material. Be cautious and wear safety glasses!
* No-Drill Method: If you don’t have a drill, don’t worry! You can create drainage by layering small pebbles or gravel at the bottom of the shell. This will allow excess water to drain away from the roots. This is the method I usually use because I’m a bit clumsy with power tools!
4. Decorating (Optional): Now for the fun part! If you want to personalize your coconut shell planters, this is the time to do it. You can paint them with bright colors, draw designs with markers, or wrap them with twine for a rustic look. Just make sure any paint or materials you use are non-toxic and safe for plants. I love using acrylic paints because they’re durable and come in a huge range of colors.
Planting Your Lettuce Seeds
Alright, our coconut shells are prepped and ready to go. Let’s get those lettuce seeds in the ground!
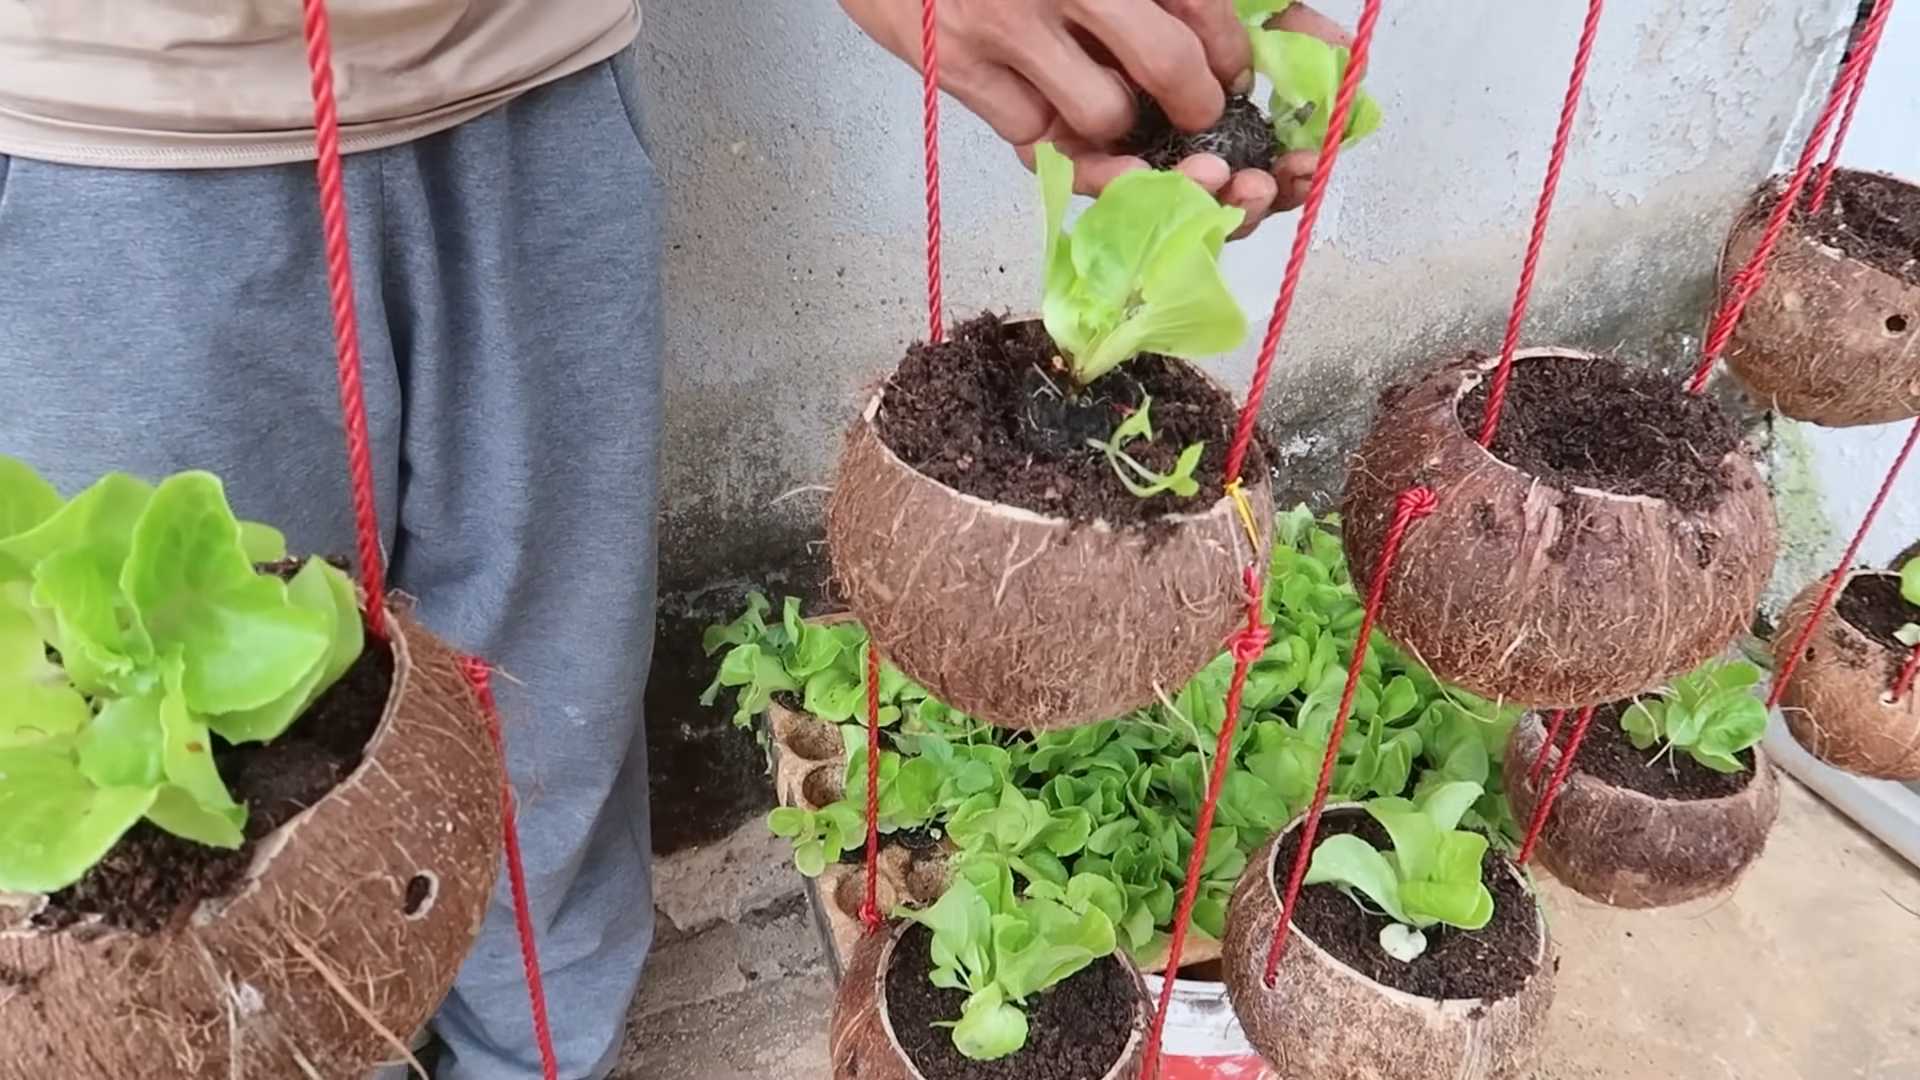
1. Adding Drainage Layer: If you opted for the no-drill method, add a layer of small pebbles or gravel to the bottom of each shell. This layer should be about 1-2 inches thick.
2. Filling with Potting Soil: Now, fill the coconut shells with potting soil, leaving about an inch of space at the top. Gently pat the soil down to remove any air pockets.
3. Sowing the Seeds: Sprinkle the lettuce seeds evenly over the surface of the soil. Don’t overcrowd them! A few seeds per shell is plenty.
4. Covering the Seeds: Lightly cover the seeds with a thin layer of potting soil. Just a sprinkle will do.
5. Watering: Gently water the soil using a watering can or spray bottle. Be careful not to wash the seeds away. The soil should be moist but not soggy.
Caring for Your Lettuce Garden
Congratulations! You’ve planted your coconut shell lettuce garden. Now, let’s make sure those little seedlings thrive.
1. Location: Place your coconut shell planters in a location that receives at least 6 hours of sunlight per day. A sunny windowsill or a bright spot in your garden is ideal.
2. Watering: Keep the soil consistently moist, but not waterlogged. Water when the top inch of soil feels dry to the touch. Avoid overwatering, as this can lead to root rot. I usually check the soil moisture every day and water as needed.
3. Thinning (If Necessary): Once the seedlings emerge, you may need to thin them out if they’re too crowded. This will give the remaining plants more room to grow. Simply snip off the weaker seedlings at the base with scissors.
4. Fertilizing (Optional): If you want to give your lettuce a boost, you can fertilize it with a diluted liquid fertilizer every few weeks. Follow the instructions on the fertilizer package. I personally prefer using organic fertilizers like compost tea.
5. Pest Control: Keep an eye out for pests like aphids or slugs. If you spot any, you can try removing them by hand or using an organic pest control spray.
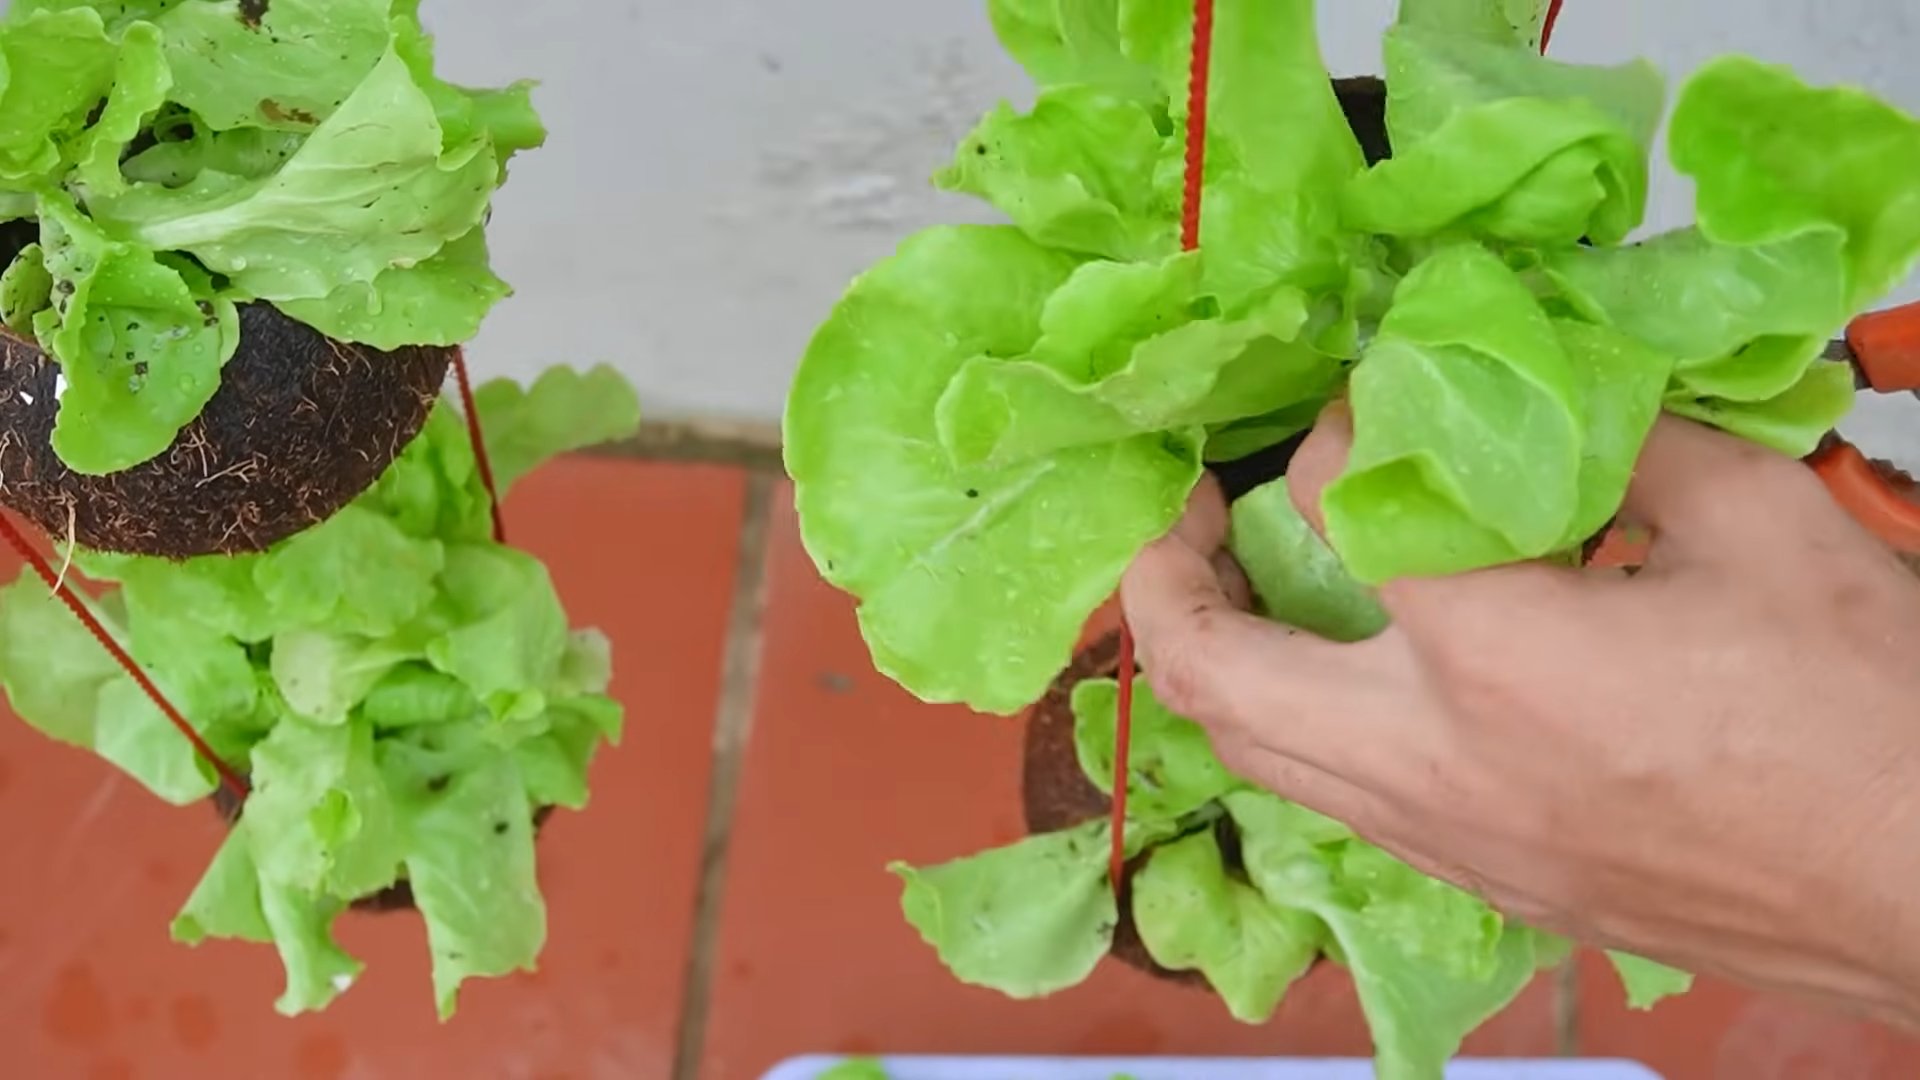
6. Harvesting: You can start harvesting your lettuce leaves once they’re big enough to eat. Simply snip off the outer leaves with scissors, leaving the inner leaves to continue growing. This is called “cut-and-come-again” harvesting, and it allows you to enjoy fresh lettuce for weeks!
Troubleshooting
Sometimes, things don’t go exactly as planned. Here are a few common problems you might encounter and how to fix them:
* Seeds Not Germinating: Make sure the soil is moist and the seeds are getting enough sunlight. Also, check the expiration date on your seed packet. Old seeds may not germinate well.
* Seedlings Leggy and Weak: This usually means the seedlings aren’t getting enough light. Move them to a brighter location.
* Leaves Turning Yellow: This could be a sign of overwatering or nutrient deficiency. Adjust your watering schedule and consider fertilizing.
* Pests: Identify the pest and take appropriate action. Organic pest control methods are always the best option.
Extra Tips and Tricks
* Succession Planting: To ensure a continuous supply of lettuce, sow new seeds every few weeks.
* Companion Planting: Plant your lettuce alongside other beneficial plants like marigolds or basil. These plants can help deter pests and improve the flavor of your lettuce.
* Vertical Gardening: If you’re short on space, you can create a vertical lettuce garden by hanging your coconut shell planters from a wall or fence.
* Gift Giving: These coconut shell lettuce gardens make adorable and thoughtful gifts for friends and family.
Choosing the Right Lettuce Variety
Not all lettuce varieties are created equal, especially when growing in small containers. Here’s a quick rundown of some of my favorite varieties for coconut shell gardens:
* Butterhead Lettuce (e.g., Buttercrunch, Tom Thumb): These are compact and form loose heads, making them perfect for small spaces. They have a mild, buttery flavor.
* Loose-Leaf Lettuce (e.g., Black Seeded Simpson, Red Sails): These varieties don’t form heads and are easy to harvest leaf by leaf. They come in a variety of colors and textures.
* Romaine Lettuce (e.g., Little Gem): While romaine typically gets larger, some dwarf varieties like Little Gem are well-suited for container gardening. They have a crisp texture and a slightly bitter flavor.
* Mesclun Mix: This is a blend of different lettuce varieties and other leafy greens, offering a variety of flavors and textures in one package. It’s a great option if you want a diverse salad mix.
When choosing your lettuce variety, consider your personal preferences and the amount of space you have available.
Understanding Soil and Nutrients
The type of soil you use is crucial for the success of your lettuce garden. Lettuce needs well-draining soil that is rich in organic matter.
* Potting Mix: A good quality potting mix is the best option for container gardening. It’s lightweight, drains well, and contains essential nutrients.
* Compost: Adding compost to your potting mix will improve its fertility and drainage. Compost is a great source of organic matter and beneficial microbes.
* Fertilizers: While potting mix and compost provide some nutrients, you may need to supplement with fertilizers,
Conclusion
So, there you have it! Transforming discarded coconut shells into charming and functional lettuce gardens is more than just a fun DIY project; it’s a sustainable, space-saving, and aesthetically pleasing way to grow your own fresh greens. We’ve shown you how to repurpose something that would otherwise end up in the trash into a thriving little ecosystem, bringing a touch of tropical charm to your balcony, patio, or even windowsill.
Why is this a must-try? Because it’s incredibly rewarding. There’s something deeply satisfying about nurturing life from something seemingly useless. You’re not just growing lettuce; you’re participating in a cycle of renewal and reducing waste. Plus, imagine the bragging rights when you serve a salad made with lettuce you grew yourself, in a coconut shell no less!
But the beauty of this project lies in its adaptability. Feel free to experiment with different types of lettuce. Romaine, butter lettuce, and even loose-leaf varieties will thrive in these miniature gardens. You can also add companion plants like basil or chives to deter pests and enhance the flavor of your lettuce. Consider painting the coconut shells with vibrant colors or adding decorative elements like twine or beads to personalize your creations. For drainage, you can use small pebbles or broken pottery shards at the bottom of the shell before adding the soil. If you live in a particularly dry climate, consider lining the inside of the shell with a thin layer of coconut coir to help retain moisture.
Don’t be afraid to get creative! This is your chance to express your personality and create a unique and sustainable garden that reflects your style.
We are confident that you’ll find this DIY coconut shell lettuce garden project to be both enjoyable and beneficial. It’s a fantastic way to connect with nature, reduce your environmental footprint, and enjoy fresh, homegrown lettuce whenever you desire.
Now, it’s your turn! Gather your coconut shells, grab your gardening tools, and embark on this exciting adventure. We encourage you to try this DIY trick and share your experiences with us. Post photos of your creations on social media using #CoconutShellLettuceGarden and let us see your unique take on this sustainable gardening project. We can’t wait to see what you come up with! Happy gardening!
Frequently Asked Questions (FAQ)
What kind of soil should I use for my coconut shell lettuce garden?
The best soil for your coconut shell lettuce garden is a well-draining potting mix. Avoid using garden soil, as it can become compacted in containers and hinder drainage. A mix specifically formulated for container gardening will provide the necessary nutrients and aeration for healthy lettuce growth. You can also amend your potting mix with compost or worm castings to further enrich the soil and improve its water retention.
How often should I water my coconut shell lettuce garden?
Watering frequency depends on several factors, including the climate, the type of lettuce you’re growing, and the size of your coconut shell. Generally, you should water your lettuce garden when the top inch of soil feels dry to the touch. Avoid overwatering, as this can lead to root rot. Check the soil moisture regularly, especially during hot or dry weather. A good rule of thumb is to water deeply but infrequently, allowing the soil to dry out slightly between waterings.
How much sunlight does my coconut shell lettuce garden need?
Lettuce thrives in partial shade to full sun, depending on your climate. In hotter climates, provide afternoon shade to prevent the leaves from wilting or burning. In cooler climates, full sun is generally fine. Aim for at least 4-6 hours of sunlight per day for optimal growth. If you’re growing your lettuce indoors, you may need to supplement with grow lights to ensure adequate light exposure.
How do I prevent pests from attacking my lettuce?
Several natural methods can help prevent pests from attacking your lettuce. Companion planting with herbs like basil, chives, or mint can deter many common pests. Regularly inspect your lettuce plants for signs of infestation, such as aphids, slugs, or snails. Handpicking pests or using a gentle spray of water can help control minor infestations. You can also use organic pest control products like neem oil or insecticidal soap, following the instructions carefully.
How long does it take for lettuce to grow in a coconut shell?
The time it takes for lettuce to grow in a coconut shell depends on the variety of lettuce you’re growing and the growing conditions. Generally, you can expect to harvest your first lettuce leaves within 30-60 days of planting. Loose-leaf varieties tend to mature faster than head lettuce. Regular harvesting of outer leaves will encourage continued growth and extend the harvest period.
Can I grow other plants besides lettuce in coconut shells?
Yes, you can grow other plants besides lettuce in coconut shells, as long as they have shallow root systems and don’t require a lot of space. Herbs like basil, chives, parsley, and mint are excellent choices. You can also grow small flowering plants like pansies or violas. Consider the size of the coconut shell and the mature size of the plant when selecting what to grow.
How do I prepare the coconut shell for planting?
Before planting, ensure the coconut shell is clean and free of any remaining coconut meat. Drill drainage holes in the bottom of the shell to prevent waterlogging. You can also sand the edges of the shell to make them smoother and safer to handle. Consider lining the inside of the shell with coconut coir or landscape fabric to help retain moisture and prevent soil from washing out.
How do I fertilize my coconut shell lettuce garden?
Lettuce benefits from regular fertilization to promote healthy growth. You can use a balanced liquid fertilizer diluted to half strength every 2-3 weeks. Alternatively, you can amend your potting mix with slow-release fertilizer granules at planting time. Avoid over-fertilizing, as this can lead to leggy growth and bitter-tasting leaves.
What do I do with the coconut shell lettuce garden in the winter?
If you live in a climate with cold winters, you can bring your coconut shell lettuce garden indoors to continue growing. Place it in a sunny location or supplement with grow lights. Alternatively, you can overwinter your lettuce plants by covering them with a layer of mulch to protect them from frost. In the spring, you can transplant them back outdoors.
Is a DIY coconut shell lettuce garden sustainable?
Yes, a DIY coconut shell lettuce garden is a very sustainable project. It repurposes waste material (coconut shells) into a useful and productive garden container. Growing your own lettuce reduces your reliance on commercially grown produce, which often involves transportation and packaging that contribute to environmental pollution. It also allows you to control the growing conditions and avoid the use of harmful pesticides and herbicides.
Leave a Comment