
Coffee and dish soap uses in the garden might sound like an odd combination, but trust me, it’s a game-changer! For centuries, gardeners have been experimenting with natural remedies to keep their plants thriving. Think of it as a modern twist on age-old wisdom, blending household staples for a greener, healthier garden. I remember my grandmother always using coffee grounds in her rose bushes, and now, we’re taking that ingenuity to the next level.
Let’s face it, nobody wants to spend a fortune on expensive pesticides and fertilizers. We all crave a lush, vibrant garden without breaking the bank or harming the environment. That’s where these clever DIY tricks come in. Using coffee and dish soap uses, you can tackle common garden pests, boost soil health, and even give your plants a little extra shine. This article will unveil simple, effective ways to harness the power of these everyday items, transforming your garden into a thriving oasis. Get ready to roll up your sleeves and discover the magic!
Growing Peanuts at Home: A Beginner’s Guide
Okay, peanut lovers, listen up! Ever thought about growing your own peanuts? It’s surprisingly easy and incredibly rewarding. Imagine popping open a fresh, homegrown peanut – the taste is just unbeatable. I’m going to walk you through everything you need to know to cultivate your own little peanut patch, right in your backyard (or even in containers!).
What You’ll Need
Before we dive in, let’s gather our supplies. Here’s a checklist of everything you’ll need to get started:
* Peanut Seeds (Raw, Unshelled): This is the most crucial part! Make sure you get raw, unshelled peanuts from a reputable source. Roasted or salted peanuts won’t sprout. Look for varieties specifically labeled for planting, like ‘Virginia,’ ‘Spanish,’ or ‘Valencia.’
* Well-Draining Soil: Peanuts thrive in loose, sandy loam soil. Good drainage is essential to prevent root rot.
* Large Containers (Optional): If you’re short on space or have poor soil, large containers (at least 18 inches deep and wide) will work perfectly.
* Compost or Aged Manure: To enrich the soil and provide essential nutrients.
* Gardening Gloves: To keep your hands clean and protected.
* Trowel or Shovel: For planting and digging.
* Watering Can or Hose: For regular watering.
* Optional: A nitrogen-fixing inoculant specifically for peanuts. This can help boost nitrogen levels in the soil.
* Optional: Row covers to protect young plants from pests or late frosts.
Choosing the Right Variety
The type of peanut you choose will influence the size of the plant, the yield, and the time it takes to mature. Here’s a quick rundown of some popular varieties:
* Virginia Peanuts: These are the large, elongated peanuts often used for roasting and ballpark peanuts. They take about 120-150 days to mature.
* Spanish Peanuts: Smaller, rounder peanuts with a reddish skin. They have a higher oil content and are often used for peanut butter. They mature in about 110-120 days.
* Valencia Peanuts: These peanuts typically have three or more kernels per shell and are known for their sweet flavor. They mature in about 90-110 days.
* Runner Peanuts: These are mainly grown commercially for peanut butter. They have a uniform size and shape and mature in about 120-130 days.
Consider your local climate and growing season when choosing a variety. Shorter-season varieties like Valencia are a good choice if you have a shorter growing season.
Getting Started: Planting Your Peanuts
Now for the fun part – planting! Here’s how to get your peanut plants off to a great start:
1. Prepare the Soil: Whether you’re planting in the ground or in containers, start by preparing the soil. Loosen the soil to a depth of at least 12 inches. Mix in plenty of compost or aged manure to improve drainage and fertility. If you’re using containers, choose a well-draining potting mix.
2. Soak the Seeds (Optional): Soaking the peanut seeds in water for a few hours before planting can help speed up germination. Don’t soak them for more than 12 hours, or they might rot.
3. Planting Time: Peanuts are warm-weather crops, so wait until the soil temperature reaches at least 65°F (18°C) before planting. This is usually a few weeks after the last frost.
4. Planting Depth and Spacing: Plant the peanut seeds about 1-2 inches deep and 6-8 inches apart in rows that are 2-3 feet apart. If you’re planting in containers, plant 2-3 seeds per container.
5. Water Thoroughly: After planting, water the soil thoroughly to help the seeds settle in.
Caring for Your Peanut Plants
Once your peanut plants are in the ground, it’s important to provide them with the right care to ensure a bountiful harvest.
1. Watering: Peanuts need consistent moisture, especially during flowering and pod development. Water deeply whenever the top inch of soil feels dry. Avoid overwatering, as this can lead to root rot.
2. Weeding: Keep the area around your peanut plants free of weeds. Weeds compete with the peanuts for nutrients and water.
3. Fertilizing: Peanuts are legumes, which means they can fix nitrogen from the air. However, they still benefit from a balanced fertilizer. Apply a fertilizer with a low nitrogen content (e.g., 5-10-10) a few weeks after planting. Avoid over-fertilizing with nitrogen, as this can lead to excessive foliage growth and fewer peanuts.
4. Hilling: This is a crucial step for peanut production. As the peanut plants grow, they will produce “pegs” – small stems that grow downward from the flowers and enter the soil. These pegs are where the peanuts develop. To encourage pegging, hill the soil around the base of the plants every few weeks. This provides the pegs with loose soil to penetrate.
5. Pest and Disease Control: Peanuts are generally resistant to pests and diseases, but they can be susceptible to certain problems, such as aphids, spider mites, and leaf spot. Inspect your plants regularly for signs of pests or diseases. If you find any problems, treat them promptly with an appropriate insecticide or fungicide. Organic options are always preferable.
Harvesting Your Peanuts
The moment we’ve all been waiting for! Knowing when to harvest is key to getting the best flavor and yield.
1. Timing is Everything: Peanuts are typically ready to harvest in the fall, about 120-150 days after planting, depending on the variety. A good indicator is when the leaves start to turn yellow and the plants begin to look a bit tired.
2. Digging Up the Plants: Use a garden fork or shovel to carefully dig up the entire plant, being careful not to damage the peanuts.
3. Shaking Off the Soil: Gently shake off as much soil as possible from the roots and peanuts.
4. Curing the Peanuts: This is an important step to ensure the peanuts are properly dried and stored. Hang the entire plant upside down in a well-ventilated area for 2-4 weeks. You can also spread the peanuts out on a screen or tarp to dry.
5. Testing for Dryness: To test if the peanuts are dry enough, shell a few and check the kernels. They should be crisp and snap easily. The inside of the shell should also be dry.
6. Storing Your Peanuts: Once the peanuts are fully cured, you can store them in a cool, dry place in airtight containers. They can be stored in the shell for several months or shelled and stored in the freezer for even longer.
Troubleshooting Common Problems
Even with the best care, you might encounter a few challenges along the way. Here are some common problems and how to address them:
* Poor Germination: This could be due to several factors, such as cold soil, poor-quality seeds, or overwatering. Make sure the soil temperature is warm enough before planting, use fresh seeds from a reputable source, and avoid overwatering.
* Yellowing Leaves: This could be a sign of nutrient deficiency, especially nitrogen. Apply a balanced fertilizer with a low nitrogen content.
* Lack of Peanuts: This could be due to poor pollination, insufficient pegging, or over-fertilizing with nitrogen. Make sure to hill the soil around the base of the plants to encourage pegging.
* Root Rot: This is caused by overwatering or poorly draining soil. Make sure the soil is well-draining and avoid overwatering.
Growing Peanuts in Containers: A Special Note
If you’re growing peanuts in containers, here are a few extra tips to keep in mind:
* Choose the Right Container: Use a large container that is at least 18 inches deep and wide.
* Use a Well-Draining Potting Mix: Avoid using garden soil in containers, as it can become compacted and poorly draining.
* Water Regularly: Containers tend to dry out more quickly than the ground, so water regularly, especially during hot weather.
* Fertilize Regularly: Container-grown plants need regular fertilization, as the nutrients in the potting mix are quickly depleted.
Enjoying Your Homegrown Peanuts
Congratulations! You’ve successfully grown your own peanuts. Now it’s time to enjoy the fruits (or rather, the nuts) of your labor. Here are a few ideas:
* Roast them: Spread the peanuts out on a baking sheet and roast them in a preheated oven at 350°F (17
Conclusion
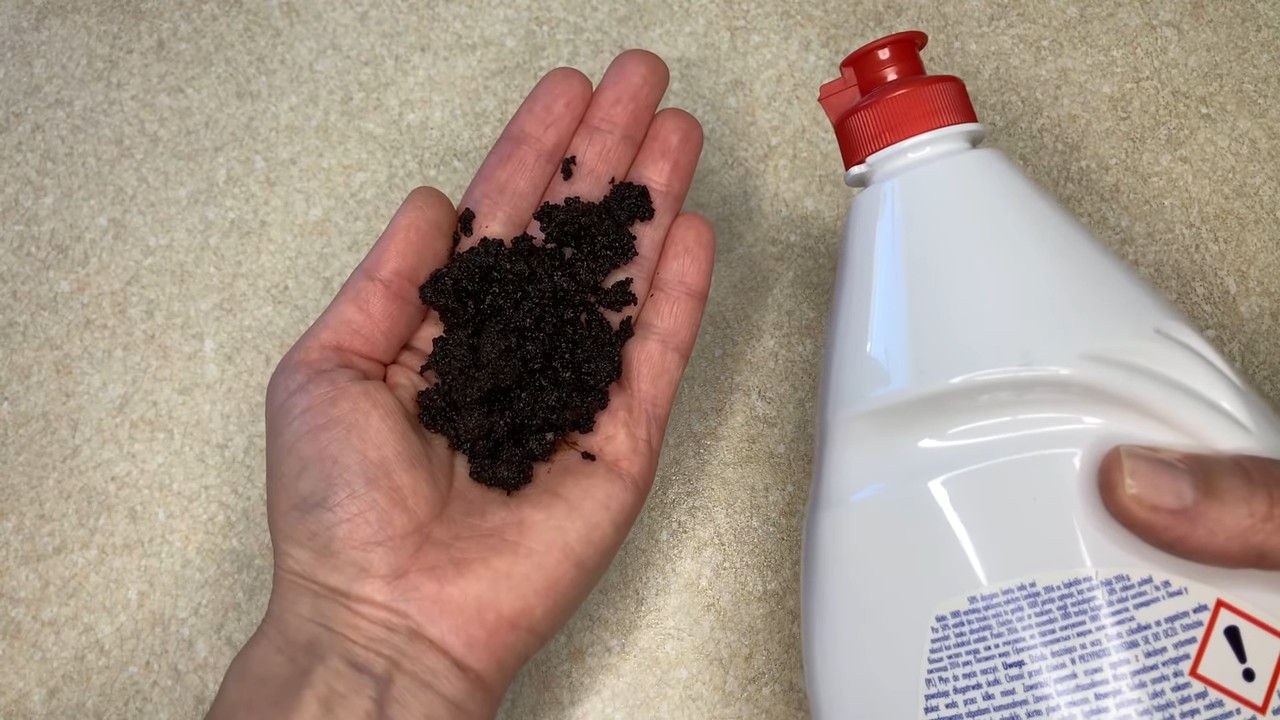
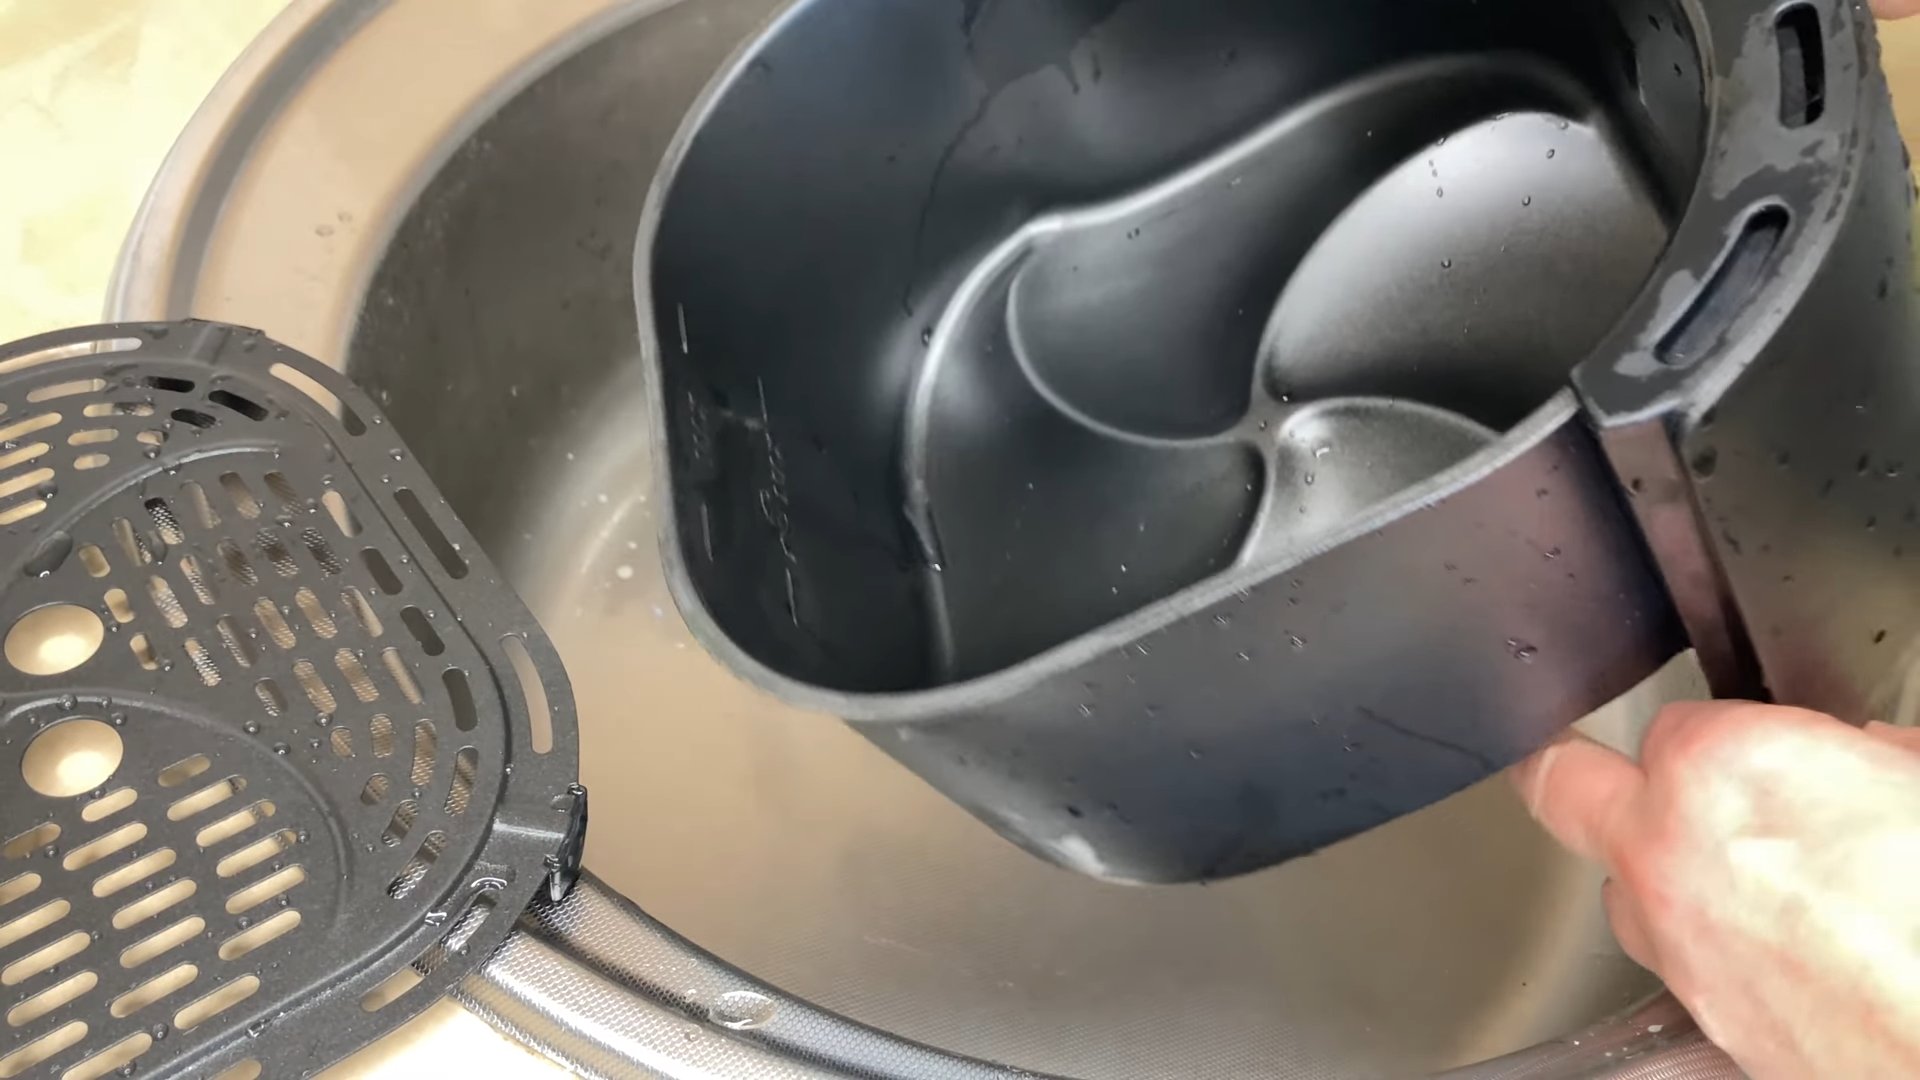
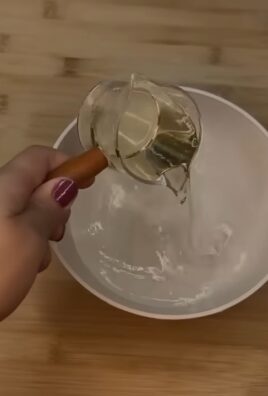
So, there you have it! This simple yet surprisingly effective DIY trick using coffee and dish soap is a game-changer for anyone looking to tackle stubborn grease, grime, and odors around the house. It’s more than just a cleaning hack; it’s a sustainable and budget-friendly alternative to harsh chemical cleaners that can often leave behind unpleasant residues and potentially harm the environment.
Why is this a must-try? Because it works! The abrasive nature of coffee grounds, combined with the degreasing power of dish soap, creates a dynamic duo that can cut through even the most persistent messes. Think about it: burnt food stuck to your pots and pans, greasy stovetops, grimy sinks, or even that lingering garlic smell on your hands – all these common household woes can be addressed with this simple solution. Plus, you’re repurposing used coffee grounds, reducing waste and giving them a second life. It’s a win-win!
But the beauty of this DIY trick lies in its versatility. Feel free to experiment with different types of dish soap to find your favorite combination. A citrus-scented soap can add an extra boost of freshness, while a natural, plant-based soap aligns perfectly with the eco-friendly ethos of this method. You can also adjust the ratio of coffee grounds to dish soap depending on the severity of the mess. For tougher stains, use a higher concentration of coffee grounds to provide more scrubbing power.
Consider these variations to tailor the trick to your specific needs:
* **For delicate surfaces:** Use finely ground coffee and a gentle dish soap to avoid scratching. Test on an inconspicuous area first.
* **For extra cleaning power:** Add a tablespoon of baking soda to the mixture for enhanced stain removal and deodorizing properties.
* **For a pleasant aroma:** Infuse the coffee grounds with a few drops of your favorite essential oil, such as lemon, lavender, or tea tree oil.
We wholeheartedly encourage you to give this DIY coffee and dish soap cleaning trick a try. It’s easy, affordable, and incredibly effective. You’ll be amazed at the results! But don’t just take our word for it. We want to hear about your experiences! Share your before-and-after photos, your favorite variations, and any tips or tricks you discover along the way. Let’s build a community of resourceful cleaners who are passionate about finding sustainable and effective solutions for a sparkling clean home.
Remember, the key to success with any DIY project is experimentation and adaptation. Don’t be afraid to tweak the recipe to suit your specific needs and preferences. And most importantly, have fun! Cleaning doesn’t have to be a chore. With a little creativity and resourcefulness, it can be a rewarding and even enjoyable experience. So, grab your coffee grounds, your dish soap, and get ready to transform your cleaning routine! We are confident that this **coffee and dish soap** combination will become a staple in your cleaning arsenal.
Frequently Asked Questions (FAQ)
1. What kind of coffee grounds should I use?
You can use any type of coffee grounds – regular, decaf, light roast, dark roast – it really doesn’t matter. The important thing is that they are used. Freshly brewed coffee grounds are ideal, as they still retain some of their abrasive properties. However, even grounds that have been sitting for a day or two will work just fine. Just make sure they are not moldy or excessively dry.
2. Can I use this on all surfaces?
While this DIY cleaning trick is generally safe for most surfaces, it’s always a good idea to test it on an inconspicuous area first, especially if you’re dealing with delicate materials like polished wood, painted surfaces, or certain types of plastic. The abrasiveness of the coffee grounds could potentially scratch or dull these surfaces. For more sensitive areas, use finely ground coffee and a gentle dish soap, and apply light pressure when scrubbing.
3. What kind of dish soap is best?
The best dish soap to use depends on your personal preferences and the type of mess you’re tackling. For general cleaning, any standard dish soap will work well. However, if you’re dealing with particularly greasy or oily messes, a dish soap specifically formulated for grease-cutting will be more effective. If you’re concerned about harsh chemicals, opt for a natural, plant-based dish soap. Citrus-scented dish soaps can also add a refreshing aroma to your cleaning routine.
4. How do I store the coffee and dish soap mixture?
It’s best to use the coffee and dish soap mixture immediately after preparing it. However, if you have leftovers, you can store them in an airtight container in the refrigerator for up to a week. Be sure to label the container clearly to avoid any confusion. Before using the stored mixture, give it a good stir to ensure that the coffee grounds and dish soap are evenly distributed.
5. Will the coffee grounds stain my surfaces?
In most cases, the coffee grounds will not stain your surfaces, especially if you rinse them thoroughly after scrubbing. However, if you’re concerned about staining, particularly on light-colored surfaces, you can use a lighter roast coffee or test the mixture on an inconspicuous area first. You can also add a small amount of baking soda to the mixture, which can help to prevent staining.
6. Can I use this to clean my coffee maker?
While you can use coffee grounds to clean certain parts of your coffee maker, such as the carafe or the filter basket, it’s not recommended to use the coffee and dish soap mixture to clean the internal components of the machine. The dish soap could leave behind a residue that could affect the taste of your coffee. Instead, use a descaling solution specifically designed for coffee makers.
7. Is this safe for septic systems?
The safety of using coffee grounds in septic systems is a topic of debate. While small amounts of coffee grounds are generally considered safe, large quantities could potentially clog the system over time. If you have a septic system, it’s best to use the coffee and dish soap mixture sparingly and to avoid pouring large amounts of coffee grounds down the drain. You can also consider composting your coffee grounds instead.
8. What other uses are there for coffee grounds?
Besides cleaning, coffee grounds have a variety of other uses around the house and garden. They can be used as a natural fertilizer for plants, as a slug and snail repellent, as a deodorizer for refrigerators and freezers, and as an exfoliant for skin. You can even use them to dye fabrics or create unique art projects.
9. What if I don’t have coffee grounds? Can I use something else?
While coffee grounds are the key ingredient in this DIY cleaning trick, you can try using other abrasive materials as a substitute. Baking soda is a good alternative, as it’s gentle yet effective at scrubbing away grime. You can also try using salt or sugar, but be sure to use them sparingly, as they can be more abrasive than coffee grounds.
10. How often should I use this cleaning method?
The frequency of using this cleaning method depends on your individual needs and the level of mess you’re dealing with. For general cleaning, you can use it once or twice a week. For tougher stains or messes, you may need to use it more frequently. Just be sure to monitor your surfaces for any signs of damage or wear and adjust your cleaning routine accordingly.
Leave a Comment