
Sweet Potato Home Harvest: Imagine pulling vibrant, orange treasures from your very own backyard! There’s something incredibly satisfying about growing your own food, and sweet potatoes are surprisingly easy and rewarding to cultivate at home. For centuries, sweet potatoes have been a staple in diets around the world, originating in Central and South America and spreading globally thanks to their adaptability and nutritional value. They represent sustenance, resilience, and a connection to the earth.
But let’s be honest, the idea of a bountiful sweet potato home harvest can seem daunting. Where do you even begin? That’s where this DIY guide comes in! I’m here to share simple, effective tricks and hacks that will transform your garden (or even a container on your balcony!) into a sweet potato paradise.
In today’s world, where we’re increasingly conscious of where our food comes from and the impact of our choices, growing your own sweet potatoes is more relevant than ever. You’ll not only enjoy delicious, organically grown produce, but you’ll also reduce your carbon footprint and gain a deeper appreciation for the natural world. Plus, who doesn’t love the bragging rights that come with serving a dish made entirely from your own garden? Let’s get digging!
DIY Cleaning Products: Natural Solutions for a Sparkling Home
Hey there, fellow cleaning enthusiasts! I’m so excited to share some of my favorite DIY cleaning product recipes with you. I’ve been making my own cleaners for years, and honestly, I’ll never go back to store-bought stuff. Not only are these recipes super effective, but they’re also much gentler on the environment, save you money, and let you control exactly what ingredients you’re bringing into your home. Let’s get started!
All-Purpose Cleaner
This is my go-to cleaner for pretty much everything – countertops, sinks, appliances, you name it! It’s simple, effective, and smells amazing.
What you’ll need:
* Spray bottle
* 1 cup white vinegar
* 1 cup water
* 10-20 drops of your favorite essential oil (I love lemon, lavender, or tea tree)
Step-by-step instructions:
1. Combine ingredients: In your spray bottle, pour in the white vinegar and water.
2. Add essential oils: Add your chosen essential oils. The essential oils not only add a pleasant scent but also have antibacterial and antiviral properties.
3. Shake well: Secure the spray nozzle and shake the bottle well to combine all the ingredients.
4. Use and enjoy: Spray the cleaner onto the surface you want to clean, let it sit for a minute or two, and then wipe it clean with a damp cloth.
Important Note: Don’t use vinegar-based cleaners on natural stone surfaces like marble or granite, as the acidity can damage them.
Glass Cleaner
Say goodbye to streaks with this super simple glass cleaner! It’s perfect for windows, mirrors, and glass shower doors.
What you’ll need:
* Spray bottle
* 1/4 cup white vinegar
* 2 cups water
* 2 tablespoons rubbing alcohol (isopropyl alcohol)
* Optional: a few drops of blue food coloring (just for fun!)
Step-by-step instructions:
1. Combine ingredients: In your spray bottle, combine the white vinegar, water, and rubbing alcohol.
2. Add food coloring (optional): If you want to add a little color, add a few drops of blue food coloring.
3. Shake well: Secure the spray nozzle and shake the bottle well to combine all the ingredients.
4. Spray and wipe: Spray the cleaner onto the glass surface and wipe it clean with a microfiber cloth. Microfiber cloths are key for streak-free results!
Toilet Bowl Cleaner
This toilet bowl cleaner is a powerful and natural way to keep your toilet sparkling clean.
What you’ll need:
* 1/2 cup baking soda
* 1 cup white vinegar
* 10-15 drops of tea tree essential oil (optional, for extra disinfecting power)
Step-by-step instructions:
1. Sprinkle baking soda: Sprinkle the baking soda into the toilet bowl, making sure to coat the sides as much as possible.
2. Pour in vinegar: Slowly pour the white vinegar over the baking soda. It will fizz – that’s normal!
3. Add essential oil (optional): Add the tea tree essential oil, if using.
4. Let it sit: Let the mixture sit for at least 15-20 minutes, or even longer for tougher stains.
5. Scrub and flush: Scrub the toilet bowl with a toilet brush and then flush.
Drain Cleaner
Forget harsh chemicals! This drain cleaner uses the power of baking soda and vinegar to unclog drains naturally.
What you’ll need:
* 1/2 cup baking soda
* 1 cup white vinegar
* Boiling water
Step-by-step instructions:
1. Pour baking soda: Pour the baking soda down the drain.
2. Pour in vinegar: Pour the white vinegar down the drain after the baking soda.
3. Let it fizz: Let the mixture fizz for about 30 minutes. This reaction helps to break down the clog.
4. Flush with boiling water: After 30 minutes, carefully pour a pot of boiling water down the drain.
Important Note: If the drain is still clogged after this process, you may need to repeat it or try a different method.
Furniture Polish
This DIY furniture polish will leave your wood furniture looking shiny and new.
What you’ll need:
* Spray bottle
* 1/4 cup olive oil
* 1/4 cup white vinegar or lemon juice
* Optional: a few drops of essential oil (like orange or cedarwood)
Step-by-step instructions:
1. Combine ingredients: In your spray bottle, combine the olive oil, white vinegar (or lemon juice), and essential oil (if using).
2. Shake well: Secure the spray nozzle and shake the bottle well to combine all the ingredients.
3. Spray and polish: Spray a small amount of the polish onto a soft cloth and then rub it into the wood furniture in a circular motion.
4. Buff: Use a clean, dry cloth to buff the furniture to a shine.
Important Note: Always test the polish on an inconspicuous area of the furniture first to make sure it doesn’t damage the finish.
Laundry Detergent
Making your own laundry detergent is surprisingly easy and can save you a ton of money!
What you’ll need (for powder detergent):
* 1 cup washing soda (sodium carbonate)
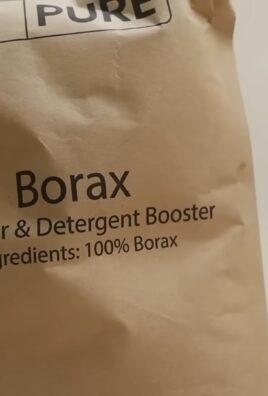
* 1 cup borax (sodium borate)
* 1 bar of castile soap (like Dr. Bronner’s), grated
What you’ll need (for liquid detergent):
* 1 cup washing soda (sodium carbonate)
* 1/2 cup borax (sodium borate)
* 1 bar of castile soap (like Dr. Bronner’s), grated
* 4 cups of water
Making Powder Laundry Detergent
1. Grate the soap: Grate the castile soap using a cheese grater or food processor.
2. Combine ingredients: In a large bowl, combine the grated castile soap, washing soda, and borax.
3. Mix well: Mix all the ingredients together thoroughly.
4. Store: Store the detergent in an airtight container.
5. Use: Use 1-2 tablespoons per load of laundry.
Making Liquid Laundry Detergent
1. Grate the soap: Grate the castile soap using a cheese grater or food processor.
2. Dissolve the soap: In a saucepan, combine the grated castile soap and 4 cups of water. Heat over medium heat, stirring constantly, until the soap is completely dissolved.
3. Combine ingredients: Remove from heat and stir in the washing soda and borax until dissolved.
4. Cool and thicken: Let the mixture cool completely. It will thicken as it cools.
5. Store: Store the detergent in an airtight container or jar.
6. Use: Use 1/4 cup per load of laundry.
Important Note: Washing soda and borax can be irritating to the skin, so it’s a good idea to wear gloves when handling them.
Oven Cleaner
Cleaning the oven is nobody’s favorite chore, but this DIY oven cleaner makes it a little easier and a lot less toxic.
What you’ll need:
* 1/2 cup baking soda
* Water
* Spray bottle
* White vinegar
Step-by-step instructions:
1. Make a paste: In a bowl, mix the baking soda with enough water to form a thick paste.
2. Coat the oven: Spread the paste all over the inside of your oven, avoiding the heating elements.
3. Let it sit: Let the paste sit for at least 12 hours, or even overnight.
4. Scrub: After the paste has sat, use a damp cloth or sponge to scrub the oven. The baking soda should help to loosen the grime.
5. Spray with vinegar: Spray any remaining baking soda residue with white vinegar. This will cause it to fizz and make it easier to wipe away.
6. Wipe clean: Wipe the oven clean with a damp cloth.
Disinfecting Wipes
These DIY disinfecting wipes are perfect for quick cleanups and disinfecting surfaces.
What you’ll need:
* Roll of paper towels (cut in half)
* Airtight container (like a plastic container with a lid)
* 1 cup water
* 1/4 cup white vinegar
* 10-15 drops of tea tree essential oil (or other disinfecting essential oil)
Conclusion
So, there you have it! Transforming your kitchen scraps into a thriving sweet potato harvest is not only incredibly rewarding but also surprisingly simple. We’ve walked you through the process, from sprouting slips to nurturing your plants, and hopefully, dispelled any myths about the difficulty of growing your own food.
Why is this DIY trick a must-try? Because it’s sustainable, cost-effective, and deeply satisfying. Imagine the pride of serving a meal featuring sweet potatoes you nurtured from a discarded root! Beyond the personal satisfaction, you’re reducing food waste, minimizing your carbon footprint, and gaining a deeper appreciation for the natural world. Plus, homegrown sweet potatoes often boast a richer, more complex flavor than their store-bought counterparts.
But the adventure doesn’t stop here. Feel free to experiment with different varieties of sweet potatoes. Try growing them in containers if you’re short on garden space. You can even get creative with your growing medium, exploring options like raised beds or hydroponics. Consider companion planting – marigolds, for example, can help deter pests. And don’t be afraid to adjust the watering schedule based on your local climate and soil conditions.
This sweet potato home harvest method is truly a game-changer for anyone looking to connect with their food source.
We wholeheartedly encourage you to give this DIY project a try. It’s a fantastic way to engage children in gardening, teach them about the life cycle of plants, and foster a love for healthy eating. Even if you’re a seasoned gardener, you might be surprised by the ease and abundance of this method.
Once you’ve embarked on your sweet potato growing journey, we’d love to hear about your experiences! Share your photos, tips, and challenges in the comments section below. Let’s build a community of sweet potato enthusiasts and inspire others to embrace the joy of homegrown goodness. Your success stories could be the encouragement someone else needs to start their own garden. So, grab a sweet potato, follow our guide, and get ready to reap the rewards of your labor. Happy growing!
Frequently Asked Questions (FAQ)
What kind of sweet potato works best for sprouting slips?
Any sweet potato you buy from the grocery store or farmer’s market can potentially sprout slips. However, organic sweet potatoes are often preferred because they are less likely to be treated with sprout inhibitors. Older sweet potatoes that have already started to show signs of sprouting are also excellent candidates. Beauregard, Jewel, and Garnet varieties are all popular choices for home gardeners. Experiment and see which variety thrives best in your local climate.
How long does it take for sweet potato slips to grow?
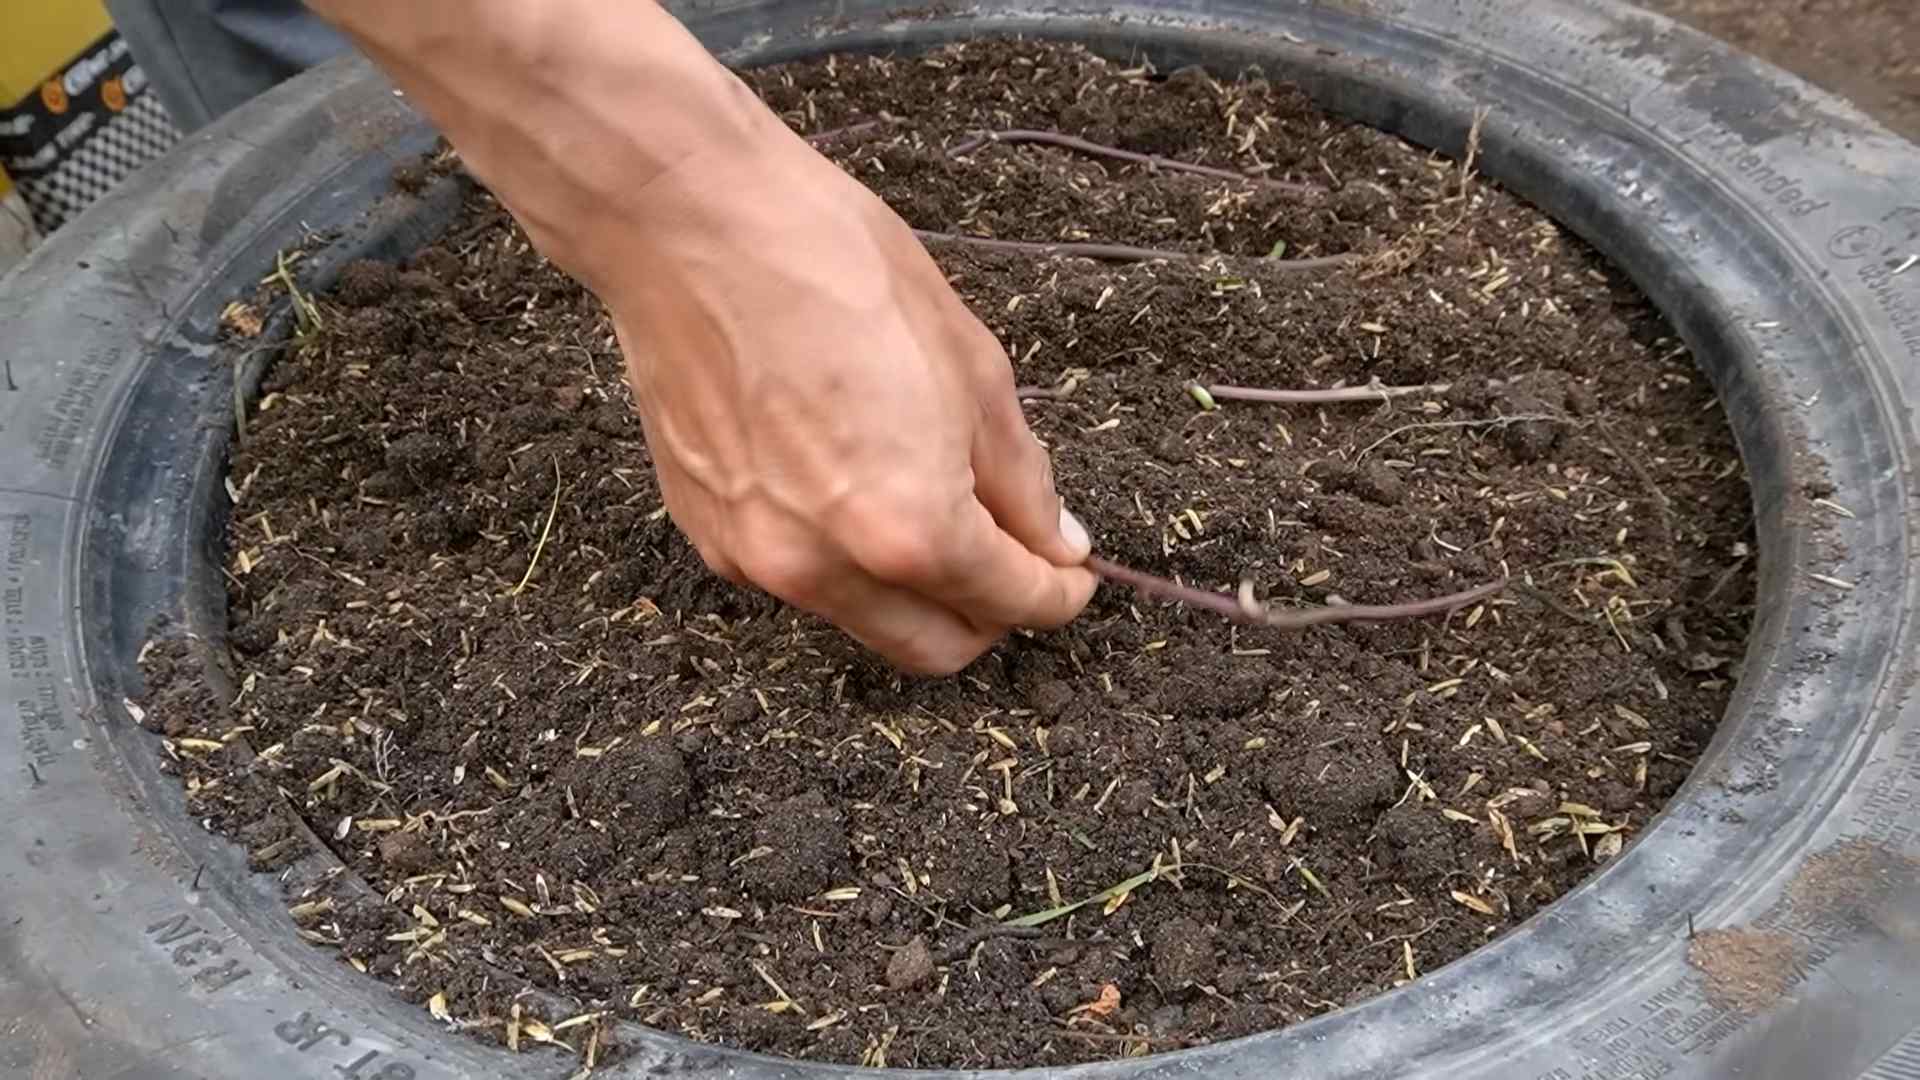
The time it takes for slips to grow varies depending on several factors, including temperature, humidity, and the variety of sweet potato. Generally, you can expect to see slips emerging within 2-4 weeks. Keep the sweet potato in a warm, bright location to encourage faster growth. Once the slips are 6-8 inches long, they are ready to be removed and planted.
How do I remove the slips from the sweet potato?
There are two main methods for removing slips. The first is to gently twist and pull the slip away from the sweet potato. If the slip doesn’t come off easily, you can use a sharp knife or scissors to cut it close to the potato. The second method involves placing the sweet potato in water and allowing the slips to develop roots before removing them. This can increase the success rate of transplanting.
Can I plant the entire sweet potato instead of just the slips?
While you can technically plant the entire sweet potato, it’s generally not recommended. Planting the whole potato can lead to a large, sprawling plant with fewer, smaller sweet potatoes. Growing slips allows you to control the number of plants and optimize their spacing for better yields. Additionally, planting the whole potato can attract pests and diseases.
What kind of soil is best for growing sweet potatoes?
Sweet potatoes prefer well-drained, sandy loam soil with a pH between 6.0 and 6.5. Avoid heavy clay soils, as they can restrict root growth and lead to misshapen sweet potatoes. Amend your soil with compost or other organic matter to improve drainage and fertility. Raised beds are an excellent option for growing sweet potatoes, especially in areas with poor soil drainage.
How often should I water my sweet potato plants?
Water sweet potato plants regularly, especially during dry periods. Aim to keep the soil consistently moist but not waterlogged. Overwatering can lead to root rot and other problems. A good rule of thumb is to water deeply once or twice a week, depending on the weather conditions. Mulching around the plants can help retain moisture and suppress weeds.
What are some common pests and diseases that affect sweet potatoes?
Common pests that can affect sweet potatoes include sweet potato weevils, flea beetles, and aphids. Diseases include stem rot, black rot, and scurf. Regularly inspect your plants for signs of pests or diseases. Use organic pest control methods, such as insecticidal soap or neem oil, to manage infestations. Practice crop rotation and choose disease-resistant varieties to prevent disease problems.
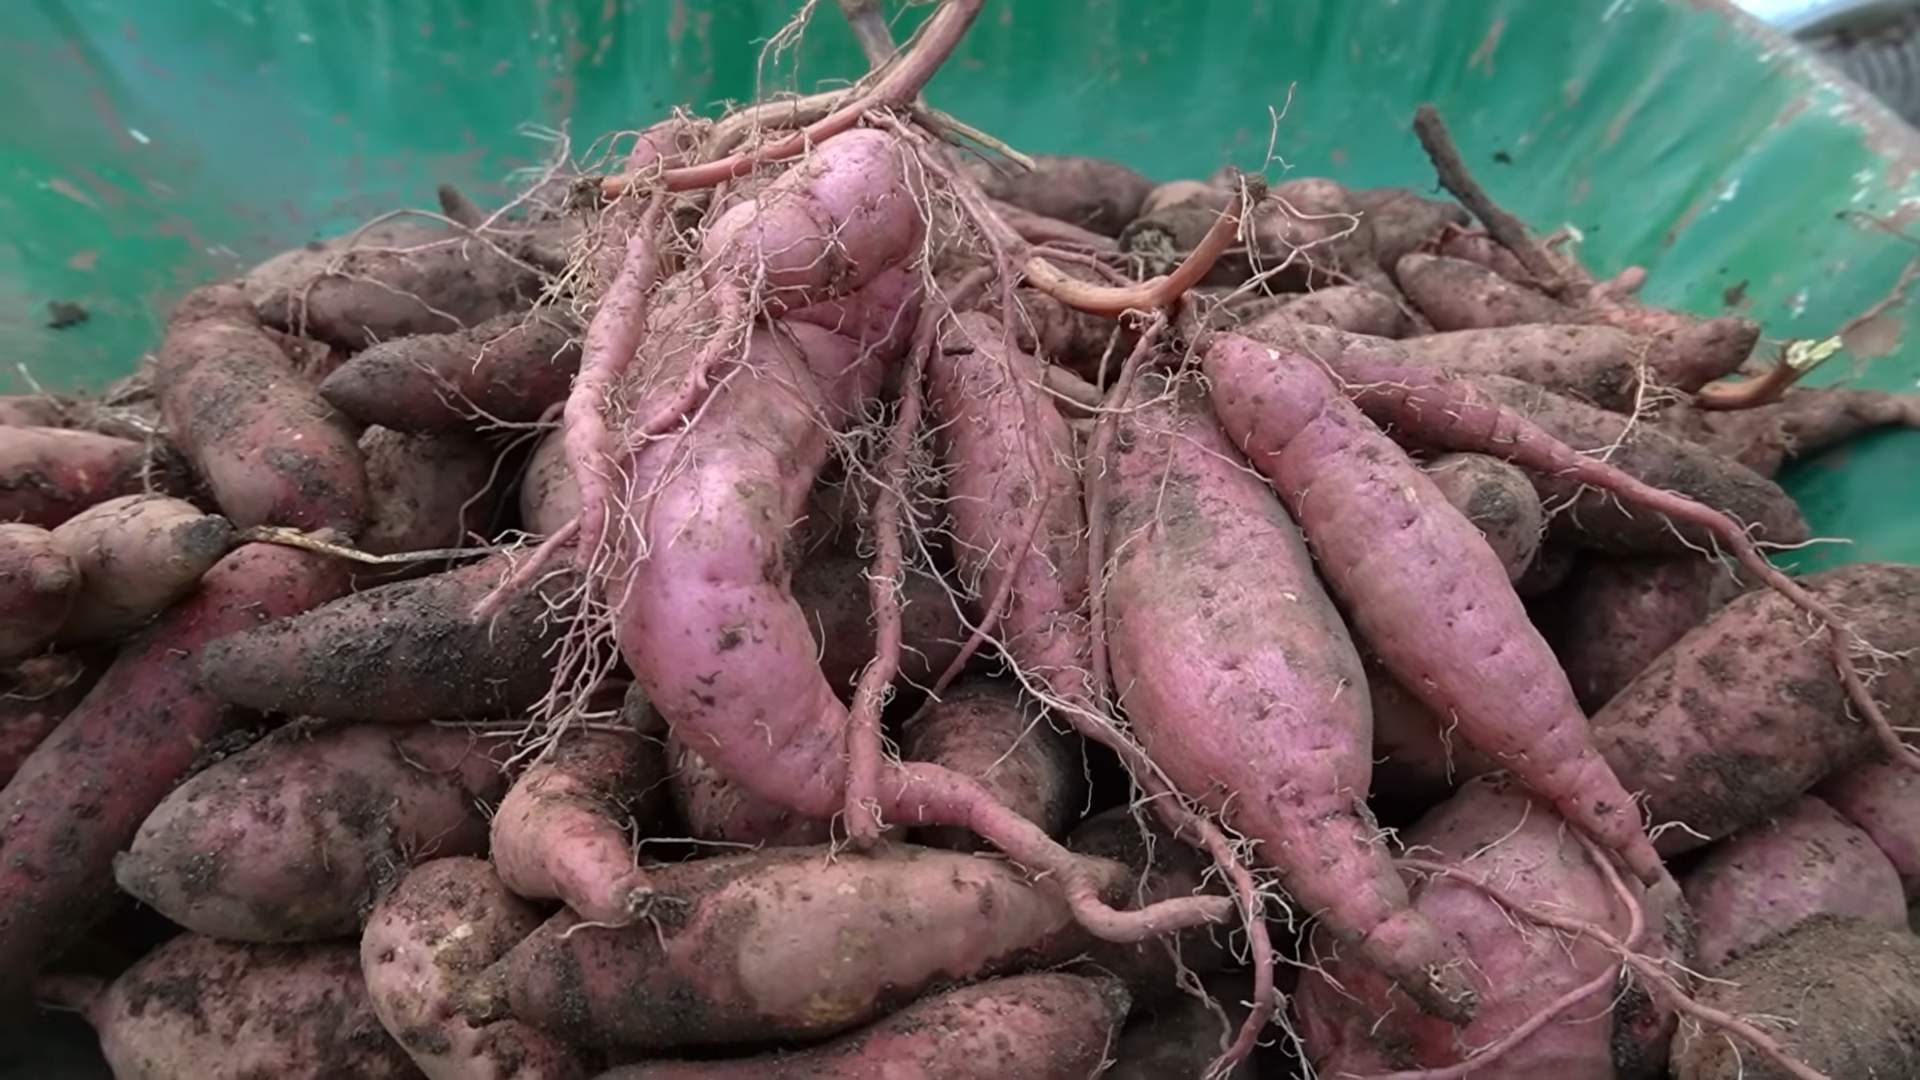
When is the best time to harvest sweet potatoes?
Sweet potatoes are typically ready to harvest in the fall, about 90-120 days after planting. The leaves will start to turn yellow and the vines will begin to die back. Before the first frost, carefully dig up the sweet potatoes, being careful not to damage them. Cure the sweet potatoes in a warm, humid place for 1-2 weeks to allow the skins to harden and the sugars to develop.
How do I cure sweet potatoes after harvesting?
Curing sweet potatoes is essential for improving their flavor and storage life. To cure them, place the harvested sweet potatoes in a warm (80-85°F), humid (80-90% humidity) location for 1-2 weeks. A well-ventilated shed or garage can work well. After curing, store the sweet potatoes in a cool, dry place (55-60°F) with good ventilation. Avoid storing them in the refrigerator, as this can cause them to develop a hard core.
Can I grow sweet potatoes in containers?
Yes, you can successfully grow sweet potatoes in containers. Choose a large container (at least 20 gallons) with good drainage. Fill the container with well-draining potting mix. Plant the slips about 4-6 inches deep and water them thoroughly. Place the container in a sunny location and water regularly. Container-grown sweet potatoes may not produce as large of a yield as those grown in the ground, but they can still provide a satisfying harvest.
What are some creative ways to use my homegrown sweet potatoes?
The possibilities are endless! Of course, you can roast, bake, or mash them. But consider sweet potato fries, sweet potato pie, sweet potato soup, or even sweet potato bread. You can also add diced sweet potatoes to stews, curries, or salads. Get creative and experiment with different flavors and spices. Don’t forget that the leaves are also edible and can be cooked like spinach.
Is it possible to get a second harvest from the same sweet potato?
While it’s possible to get a second round of slips from the same sweet potato, the yield will likely be lower than the first time. The sweet potato will have expended much of its energy in producing the initial slips. However, if you have a sweet potato that is still in good condition after the first harvest, you can certainly try to sprout more slips. Just repeat the process of placing it in water or soil and providing warmth and light.
Leave a Comment