
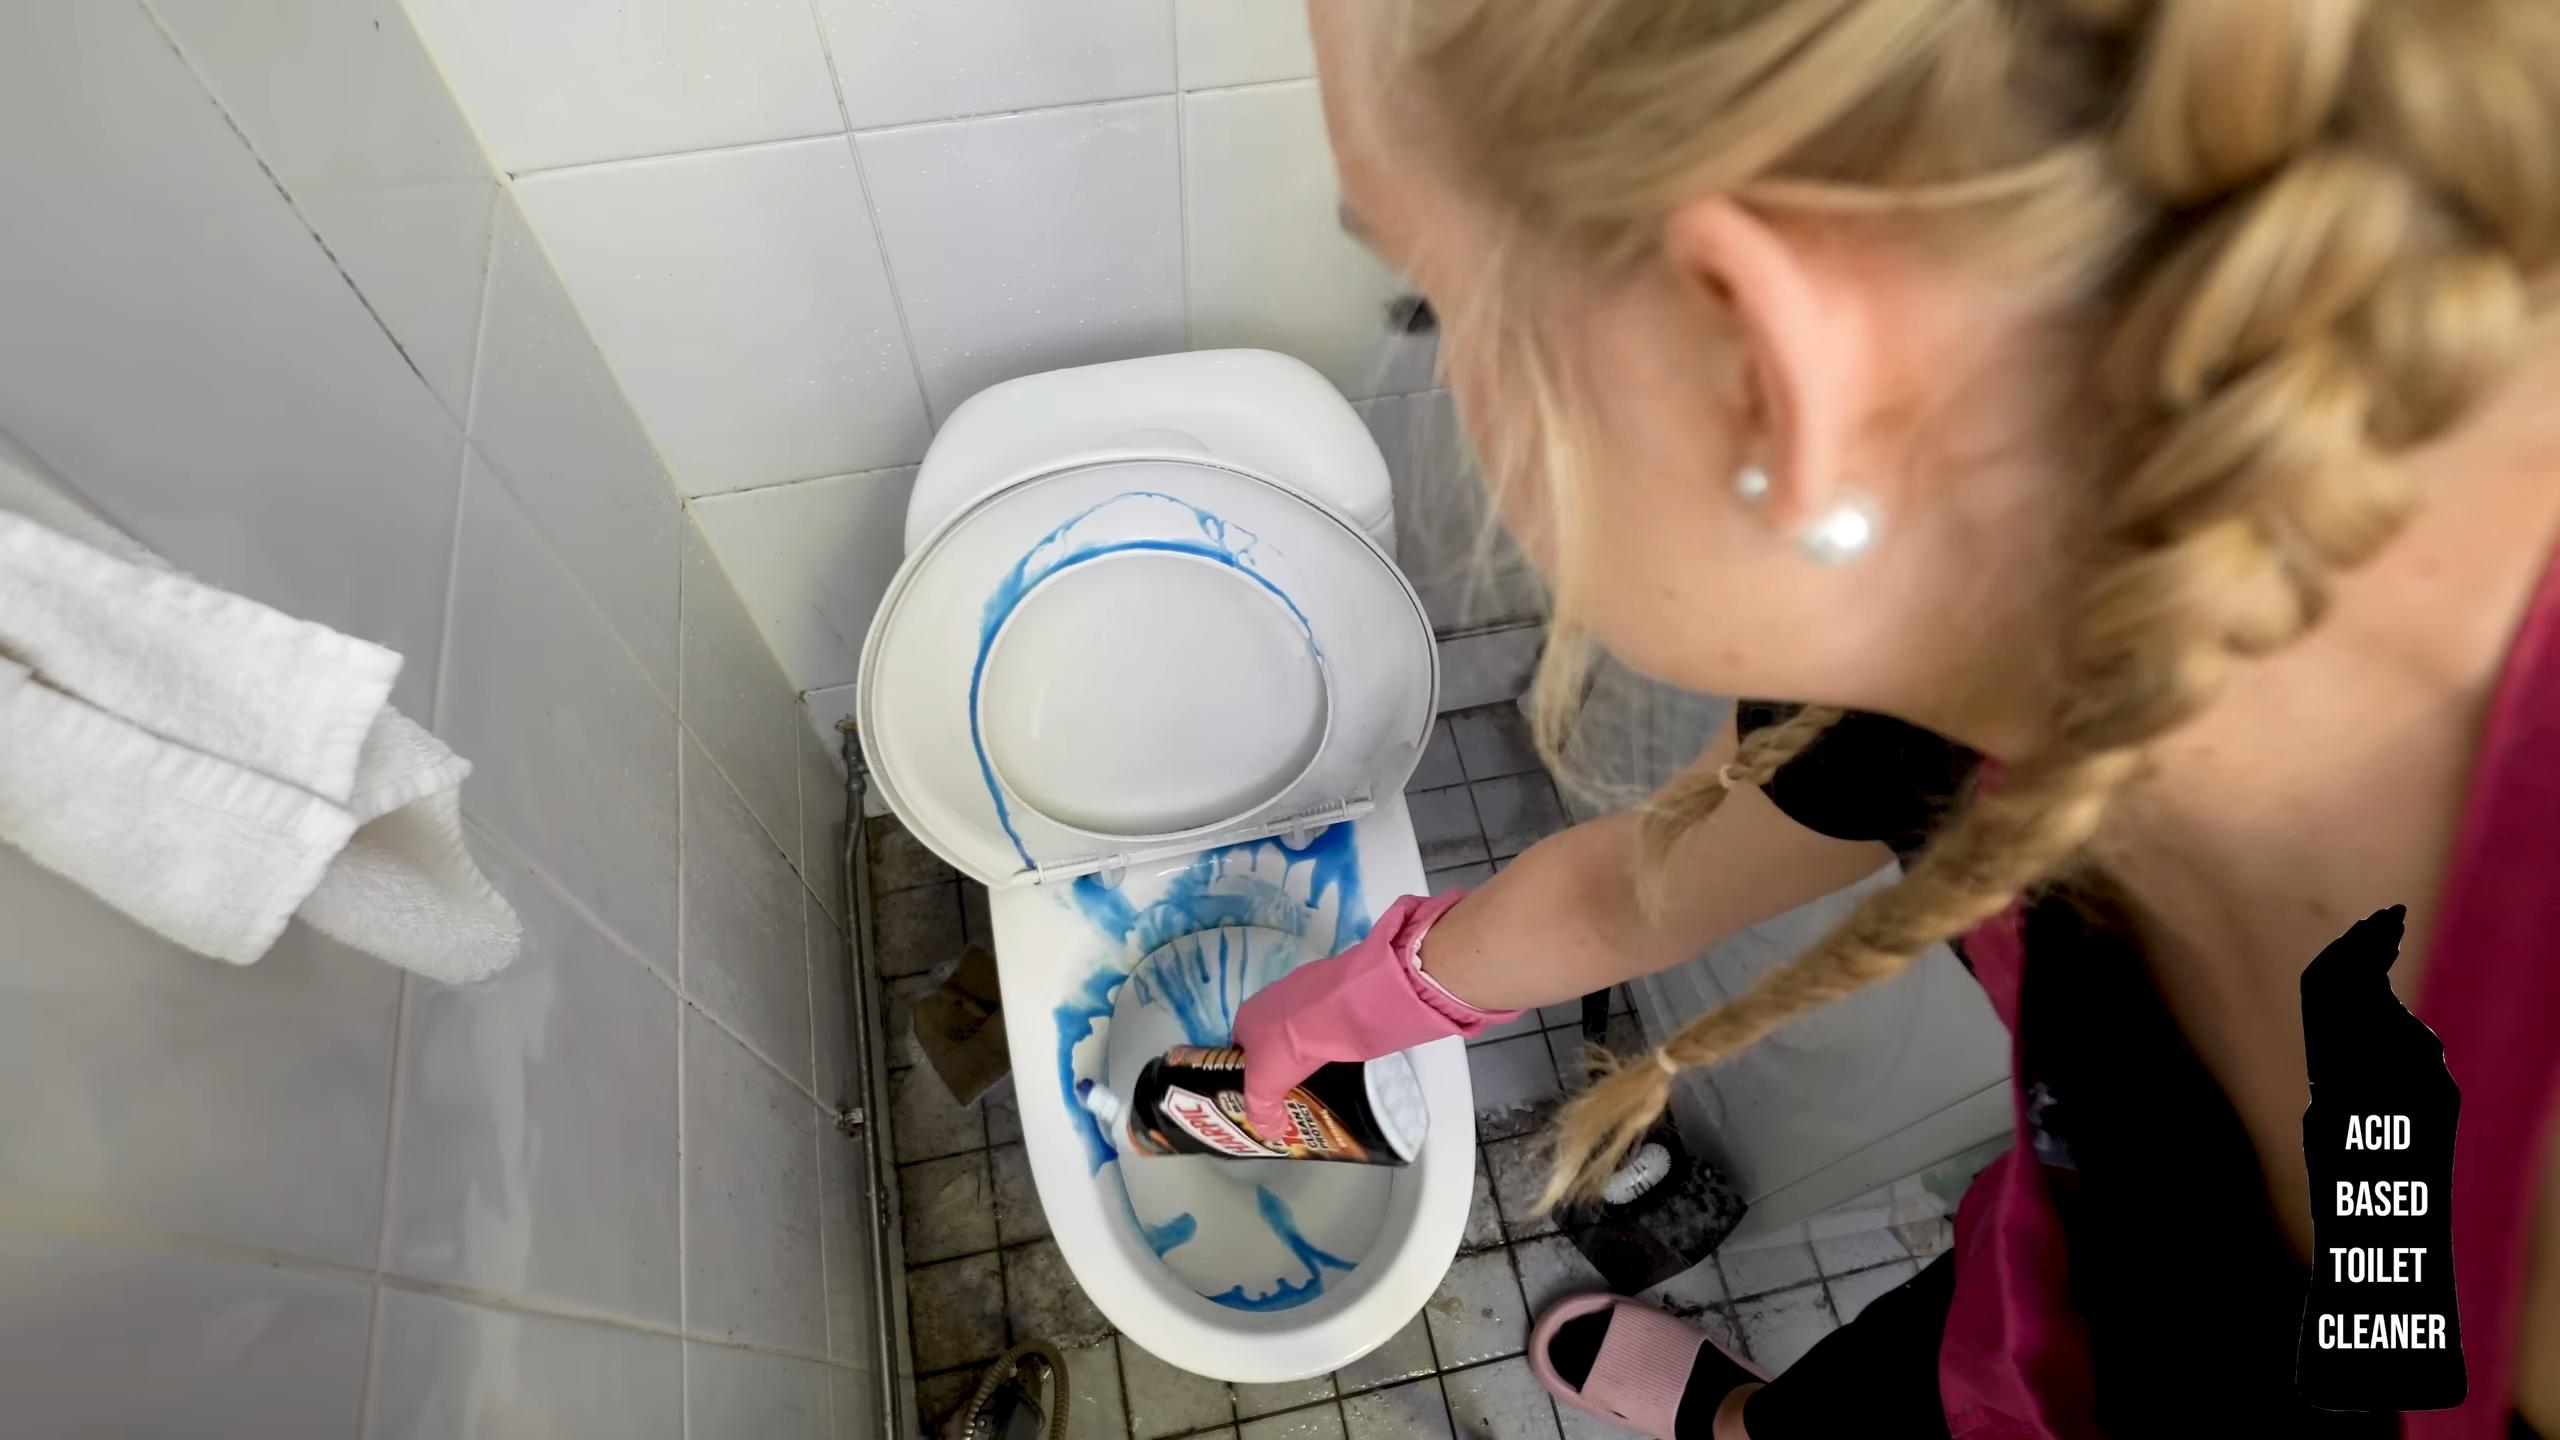
Toilet Cleaning Hacks: Let’s face it, nobody enjoys cleaning the toilet. It’s a chore we all dread, but a necessary one for a healthy and hygienic home. But what if I told you there were ways to make this dreaded task quicker, easier, and even…dare I say… less unpleasant?
For generations, keeping our homes clean has been a cornerstone of health and well-being. While modern cleaning products are readily available, resourceful individuals have always sought out clever, DIY solutions to tackle tough cleaning challenges. Think about it – our grandmothers probably had a whole arsenal of natural cleaning remedies passed down through their families! These methods often relied on simple, readily available ingredients, proving that you don’t need harsh chemicals to achieve sparkling results.
That’s where these toilet cleaning hacks come in! We’re diving deep into the world of DIY cleaning, uncovering some brilliant tricks that will save you time, money, and a whole lot of elbow grease. From tackling stubborn stains to banishing unpleasant odors, these hacks will transform your toilet cleaning routine. You’ll learn how to use everyday items you probably already have in your pantry to achieve a sparkling clean toilet bowl, leaving you with more time to enjoy the things you actually love. So, grab your gloves, and let’s get started on making toilet cleaning a breeze!
DIY Toilet Cleaning Hacks: Sparkling Clean Without Breaking the Bank!
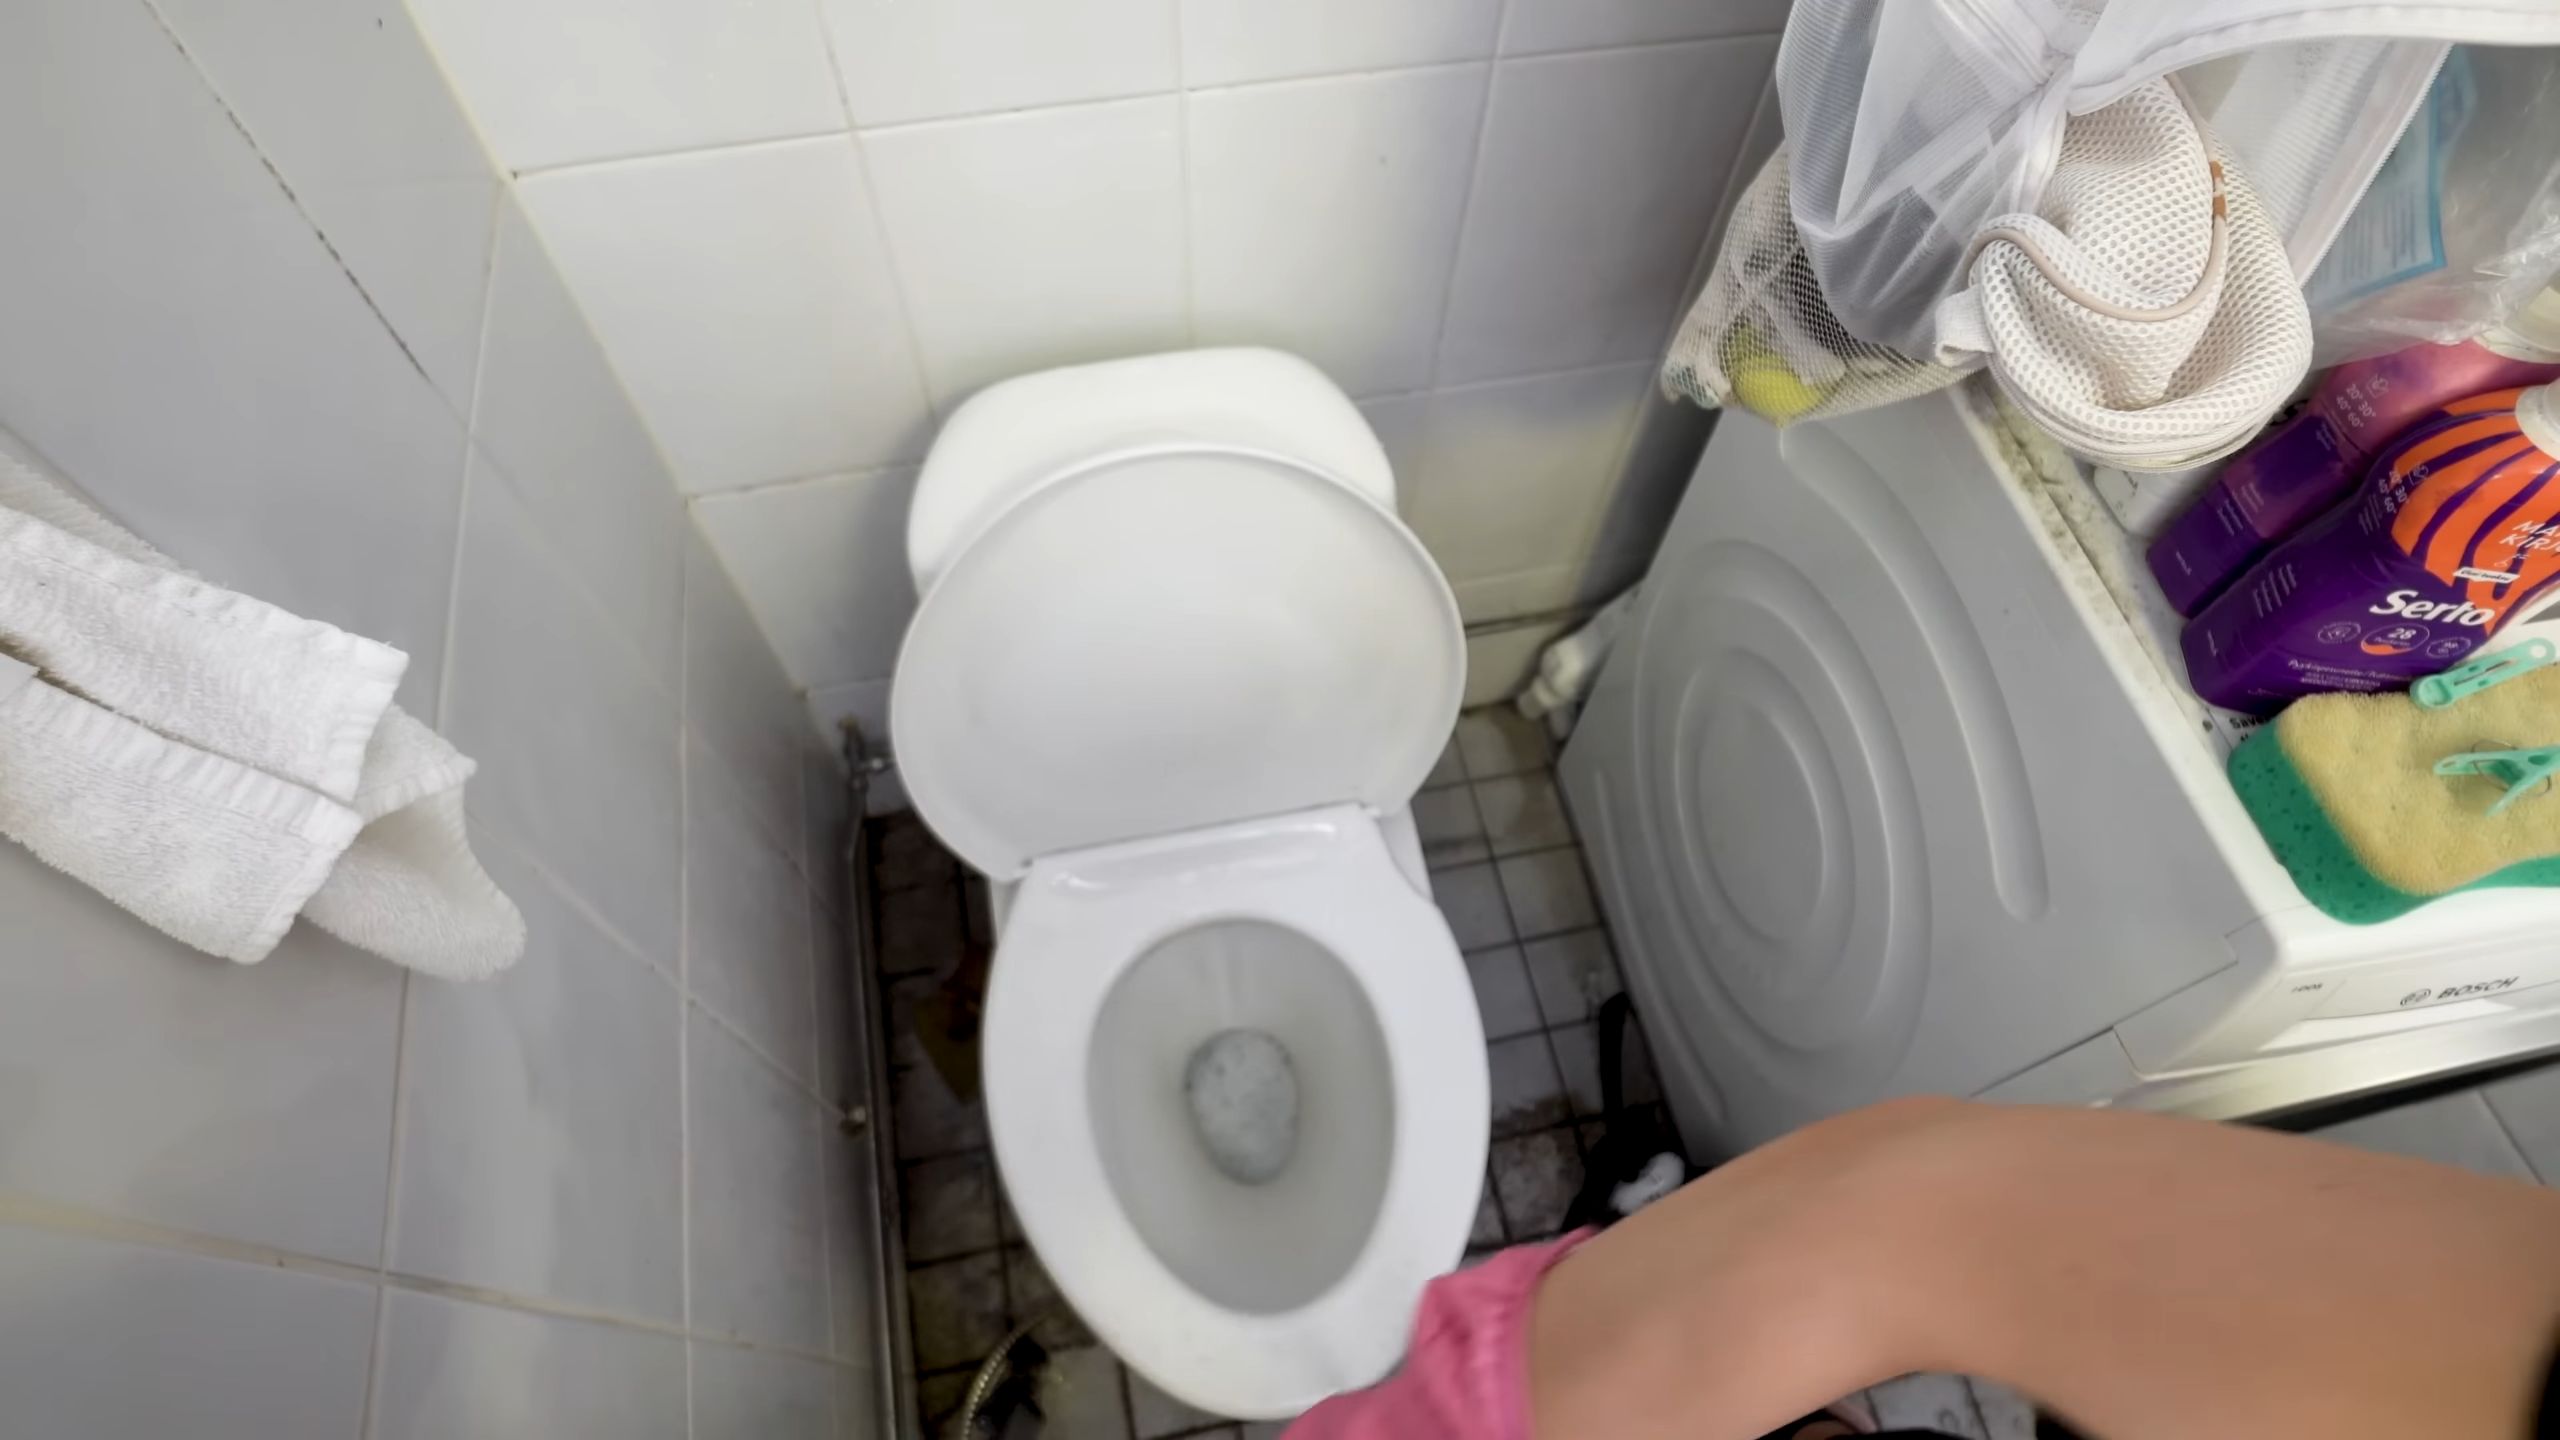
Okay, let’s face it, cleaning the toilet isn’t exactly anyone’s favorite chore. But a sparkling clean toilet bowl is a must-have for a hygienic and pleasant bathroom. Forget those expensive, chemical-laden cleaners! I’m going to share some amazing DIY toilet cleaning hacks that are not only effective but also budget-friendly and eco-conscious. Get ready to say goodbye to stubborn stains and hello to a fresh, clean throne!
Understanding the Enemy: Common Toilet Stains
Before we dive into the hacks, it’s helpful to understand what we’re up against. Different types of stains require different approaches. Here’s a quick rundown:
* Hard Water Stains: These are usually reddish-brown or yellowish deposits caused by mineral buildup from hard water. They’re often found at the waterline.
* Rust Stains: Similar in appearance to hard water stains, rust stains are caused by iron in the water supply or from corroding plumbing fixtures.
* Mold and Mildew: These appear as dark spots or streaks, often in damp areas like under the rim or around the base of the toilet.
* Organic Stains: These can be caused by urine, feces, or other organic matter.
Hack #1: The Power of Baking Soda and Vinegar
This is my go-to method for general toilet cleaning and stain removal. It’s simple, effective, and uses ingredients you probably already have in your pantry!
What you’ll need:
* 1 cup baking soda
* 2 cups white vinegar
* Toilet brush
* Spray bottle (optional, for vinegar)
Step-by-Step Instructions:
1. Prepare the Toilet: Flush the toilet to wet the bowl.
2. Apply Baking Soda: Pour one cup of baking soda into the toilet bowl, making sure to coat the sides as much as possible.
3. Add Vinegar: Slowly pour two cups of white vinegar into the bowl. You’ll notice a fizzing reaction – that’s the magic happening!
4. Let it Fizz: Allow the mixture to fizz and sit for at least 30 minutes. For tougher stains, let it sit for several hours or even overnight. The longer it sits, the better it works!
5. Scrub Thoroughly: After the soaking time, use your toilet brush to scrub the entire bowl, paying special attention to any stained areas. Make sure to get under the rim!
6. Flush and Admire: Flush the toilet to rinse away the baking soda and vinegar. You should see a noticeable difference in the cleanliness of your bowl. If stains persist, repeat the process or try one of the other hacks below.
7. Optional Vinegar Spray: For extra cleaning power, especially under the rim, fill a spray bottle with white vinegar and spray it directly onto the area before scrubbing.
Hack #2: Borax to the Rescue for Stubborn Stains
Borax, also known as sodium borate, is a natural mineral that’s a fantastic cleaning agent. It’s particularly effective against hard water stains and mold.
What you’ll need:
* 1/2 cup Borax
* Toilet brush
* Water
Step-by-Step Instructions:
1. Dry the Bowl (Important!): Turn off the water supply to the toilet (usually a valve behind the toilet) and flush the toilet to remove as much water as possible. This allows the Borax to directly contact the stains.
2. Apply Borax: Sprinkle about 1/2 cup of Borax directly onto the stains in the toilet bowl.
3. Let it Sit: Allow the Borax to sit for at least an hour, or preferably overnight for tough stains.
4. Scrub Vigorously: Turn the water supply back on. Use your toilet brush to scrub the bowl thoroughly, focusing on the areas where you applied the Borax.
5. Flush and Repeat (If Needed): Flush the toilet to rinse away the Borax. If the stains are still visible, repeat the process.
Hack #3: Coca-Cola: The Unexpected Toilet Cleaner
Yes, you read that right! Coca-Cola can actually help clean your toilet bowl. The phosphoric acid in Coke helps to break down stains and grime.
What you’ll need:
* 1 can (12 oz) Coca-Cola
* Toilet brush
Step-by-Step Instructions:
1. Pour the Coke: Pour the entire can of Coca-Cola around the rim of the toilet bowl, ensuring it coats the stained areas.
2. Let it Sit: Allow the Coke to sit for at least one hour, or even overnight for stubborn stains.
3. Scrub and Flush: Use your toilet brush to scrub the bowl thoroughly.
4. Flush: Flush the toilet to rinse away the Coke.
Hack #4: Lemon Juice for a Fresh Scent and Cleaning Boost
Lemon juice is a natural disinfectant and deodorizer. It can help to remove mild stains and leave your toilet smelling fresh.
What you’ll need:
* 1/2 cup lemon juice
* Toilet brush
Step-by-Step Instructions:
1. Pour Lemon Juice: Pour 1/2 cup of lemon juice into the toilet bowl.
2. Let it Sit: Allow the lemon juice to sit for at least 30 minutes.
3. Scrub and Flush: Use your toilet brush to scrub the bowl.
4. Flush: Flush the toilet to rinse away the lemon juice.
Hack #5: Pumice Stone: The Ultimate Stain Eraser (Use with Caution!)
A pumice stone is a natural volcanic rock that can be used to gently scrub away stubborn stains, especially hard water rings. Important: Use a pumice stone with extreme caution, as it can scratch porcelain if used improperly. Always wet the stone and the toilet bowl surface before scrubbing.
What you’ll need:
* Pumice stone
* Water
* Gloves
Step-by-Step Instructions:
1. Wet the Stone and Bowl: Thoroughly wet both the pumice stone and the area of the toilet bowl you want to clean. This is crucial to prevent scratching.
2. Gently Scrub: Gently rub the pumice stone over the stain in a back-and-forth motion. Apply light pressure and avoid scrubbing too hard.
3. Rinse Frequently: Rinse the pumice stone and the toilet bowl frequently with water to remove any debris.
4. Flush: Once the stain is removed, flush the toilet to rinse away any remaining residue.
5. Test in an Inconspicuous Area: Before using a pumice stone on the entire bowl, test it in a small, inconspicuous area to ensure it doesn’t scratch the porcelain.
Hack #6: Denture Tablets for a Sparkling Clean
Denture cleaning tablets contain ingredients that can help break down stains and kill bacteria in your toilet bowl.
What you’ll need:
* 2-3 denture cleaning tablets
Step-by-Step Instructions:
1. Drop in Tablets: Drop 2-3 denture cleaning tablets into the toilet bowl.
2. Let them Fizz: Allow the tablets to fizz and dissolve completely. This usually takes about 20-30 minutes.
3. Scrub and Flush: Use your toilet brush to scrub the bowl.
4. Flush: Flush the toilet to rinse away any remaining residue.
Preventative Measures: Keeping Your Toilet Clean Longer
Okay, so you’ve got a sparkling clean toilet. Now, how do you keep it that way? Here are a few preventative measures I swear by:
* Regular Cleaning: The key to preventing stubborn stains is regular cleaning. Aim to clean your toilet at least once a week.
* Flush After Every Use: This seems obvious, but it’s important to flush after every use to prevent stains from setting.
* Use a Toilet Bowl Cleaner Regularly: Even if you’re using DIY methods, consider using a commercial toilet bowl cleaner once in a while for extra cleaning power.
* Address Hard Water Issues: If you have hard water, consider installing a water softener to reduce mineral buildup.
* DIY Toilet Bowl Cleaning Bombs: Make your own toilet bowl cleaning bombs using baking soda, citric acid, and essential oils. These can be dropped into the toilet bowl to freshen and clean it between regular cleanings. There are tons of recipes online!
Important Safety Tips
* Never mix bleach with other cleaning products, especially ammonia. This can create toxic fumes.
* Wear gloves when cleaning the toilet to protect your hands.
* Ventilate the bathroom while cleaning.
* Keep cleaning products out of reach of children and pets.
I
Conclusion
So, there you have it! Ditching those harsh chemicals and embracing this simple, effective, and surprisingly satisfying DIY toilet cleaning hack is a game-changer for your bathroom routine. We’ve walked you through the steps, highlighted the benefits, and hopefully, inspired you to give it a try.
But why is this a must-try? Beyond the obvious cost savings and eco-friendliness, this method offers a level of control you simply don’t get with store-bought cleaners. You know exactly what’s going into your toilet bowl, avoiding potentially harmful ingredients and creating a healthier environment for your family. Plus, the satisfaction of creating something effective with readily available ingredients is surprisingly rewarding.
This DIY toilet cleaning hack isn’t just about cleaning; it’s about creating a healthier home and a more sustainable lifestyle.
Now, let’s talk variations. While the baking soda and vinegar combination is a powerhouse, feel free to experiment with essential oils for a personalized scent boost. A few drops of tea tree oil can add extra antibacterial power, while lavender or eucalyptus can create a spa-like atmosphere. Just be sure to use essential oils that are safe for use around pets and children.
Another variation involves using citric acid instead of vinegar. Citric acid is a natural disinfectant and descaler, making it a great alternative for those who prefer a less pungent odor. Simply substitute the vinegar with an equal amount of citric acid powder dissolved in water.
For tougher stains, consider adding a small amount of borax to the baking soda mixture. Borax is a natural mineral that acts as a powerful cleaning agent. However, it’s important to use it sparingly and with caution, as it can be irritating to the skin and eyes. Always wear gloves when handling borax.
We’ve also found that a pumice stone can be incredibly effective for removing stubborn hard water stains. Just be sure to wet the stone thoroughly before using it to avoid scratching the porcelain.
Ultimately, the best DIY toilet cleaning hack is the one that works best for you and your specific needs. Don’t be afraid to experiment and find the perfect combination of ingredients and techniques.
We are confident that once you experience the effectiveness and simplicity of this DIY approach, you’ll never go back to harsh chemical cleaners. It’s a win-win for your wallet, your health, and the environment.
So, what are you waiting for? Gather your ingredients, roll up your sleeves, and give this DIY toilet cleaning hack a try! We’re eager to hear about your experiences. Share your results, variations, and any tips you discover in the comments below. Let’s create a community of clean, green, and happy bathrooms!
Frequently Asked Questions (FAQs)
Q: Is this DIY toilet cleaning hack safe for all types of toilets?
A: Generally, yes, this DIY toilet cleaning hack is safe for most types of toilets, including porcelain, ceramic, and even some plastic models. However, it’s always a good idea to test a small, inconspicuous area first, especially if you have an older or more delicate toilet. Avoid using abrasive materials like steel wool, which can scratch the surface. If you have a septic system, the baking soda and vinegar combination is generally safe, as it doesn’t introduce harsh chemicals that can disrupt the system’s balance. However, it’s always best to consult with a septic system professional if you have any concerns.
Q: How often should I use this DIY toilet cleaning hack?
A: The frequency depends on your usage and how quickly your toilet tends to get dirty. For regular maintenance, cleaning once or twice a week is usually sufficient. If you have a busy household or notice stains appearing more frequently, you may need to clean more often. You can also use a daily toilet bowl cleaner tablet (DIY or store-bought) in between deep cleanings to help prevent buildup.
Q: Can I use this DIY toilet cleaning hack to clean other bathroom surfaces?
A: While the baking soda and vinegar combination is effective for cleaning toilets, it can also be used on other bathroom surfaces, such as sinks, showers, and tiles. However, be cautious when using it on natural stone surfaces like marble or granite, as the vinegar can etch the stone over time. Always test a small, inconspicuous area first. For general bathroom cleaning, you can create a diluted solution of baking soda and water or vinegar and water.
Q: What if the stains are really stubborn and this DIY toilet cleaning hack doesn’t work?
A: For particularly stubborn stains, you may need to try a few different approaches. First, try letting the baking soda and vinegar mixture sit for a longer period of time, even overnight. You can also try using a pumice stone to gently scrub the stains away. Be sure to wet the stone thoroughly before using it to avoid scratching the porcelain. As mentioned earlier, borax can also be added to the baking soda mixture for extra cleaning power. If all else fails, you may need to resort to a commercial toilet bowl cleaner, but try to choose one that is environmentally friendly and contains fewer harsh chemicals.
Q: Does the vinegar smell linger after cleaning?
A: The vinegar smell can be noticeable initially, but it typically dissipates quickly. Opening a window or turning on the bathroom fan can help to ventilate the area and speed up the process. You can also add a few drops of your favorite essential oil to the baking soda mixture to help mask the vinegar smell.
Q: Can I use lemon juice instead of vinegar?
A: Yes, lemon juice can be used as a substitute for vinegar. It has similar acidic properties and a pleasant citrus scent. However, lemon juice may not be as effective as vinegar for removing tough stains.
Q: Is it safe to mix baking soda and vinegar? I’ve heard it can create a dangerous reaction.
A: While baking soda and vinegar do react when mixed, the reaction is generally safe for cleaning purposes. The reaction produces carbon dioxide, which is a harmless gas. However, it’s important to avoid mixing large quantities of baking soda and vinegar in a closed container, as the pressure from the carbon dioxide can cause the container to explode. When using this DIY toilet cleaning hack, simply pour the vinegar into the toilet bowl after adding the baking soda, and the reaction will occur safely in the open air.
Q: Where can I find the ingredients for this DIY toilet cleaning hack?
A: The ingredients for this DIY toilet cleaning hack are readily available at most grocery stores and pharmacies. Baking soda and vinegar are common household staples. Essential oils can be found at health food stores, online retailers, and some grocery stores. Borax is typically located in the laundry aisle of grocery stores.
Q: What are the benefits of using a DIY toilet cleaner over commercial cleaners?
A: There are several benefits to using a DIY toilet cleaner over commercial cleaners:
* **Cost-effective:** DIY cleaners are typically much cheaper than commercial cleaners.
*
So, there you have it! Ditching those harsh chemicals and embracing this simple, effective, and surprisingly satisfying DIY toilet cleaning hack is a game-changer for your bathroom routine. We’ve walked you through the steps, highlighted the benefits, and hopefully, inspired you to give it a try.
But why is this a must-try? Beyond the obvious cost savings and eco-friendliness, this method offers a level of control you simply don’t get with store-bought cleaners. You know exactly what’s going into your toilet bowl, avoiding potentially harmful ingredients and creating a healthier environment for your family. Plus, the satisfaction of creating something effective with readily available ingredients is surprisingly rewarding.
This DIY toilet cleaning hack isn’t just about cleaning; it’s about creating a healthier home and a more sustainable lifestyle.
Now, let’s talk variations. While the baking soda and vinegar combination is a powerhouse, feel free to experiment with essential oils for a personalized scent boost. A few drops of tea tree oil can add extra antibacterial power, while lavender or eucalyptus can create a spa-like atmosphere. Just be sure to use essential oils that are safe for use around pets and children.
Another variation involves using citric acid instead of vinegar. Citric acid is a natural disinfectant and descaler, making it a great alternative for those who prefer a less pungent odor. Simply substitute the vinegar with an equal amount of citric acid powder dissolved in water.
For tougher stains, consider adding a small amount of borax to the baking soda mixture. Borax is a natural mineral that acts as a powerful cleaning agent. However, it’s important to use it sparingly and with caution, as it can be irritating to the skin and eyes. Always wear gloves when handling borax.
We’ve also found that a pumice stone can be incredibly effective for removing stubborn hard water stains. Just be sure to wet the stone thoroughly before using it to avoid scratching the porcelain.
Ultimately, the best DIY toilet cleaning hack is the one that works best for you and your specific needs. Don’t be afraid to experiment and find the perfect combination of ingredients and techniques.
We are confident that once you experience the effectiveness and simplicity of this DIY approach, you’ll never go back to harsh chemical cleaners. It’s a win-win for your wallet, your health, and the environment.
So, what are you waiting for? Gather your ingredients, roll up your sleeves, and give this DIY toilet cleaning hack a try! We’re eager to hear about your experiences. Share your results, variations, and any tips you discover in the comments below. Let’s create a community of clean, green, and happy bathrooms!
Frequently Asked Questions (FAQs)
Q: Is this DIY toilet cleaning hack safe for all types of toilets?
A: Generally, yes, this DIY toilet cleaning hack is safe for most types of toilets, including porcelain, ceramic, and even some plastic models. However, it’s always a good idea to test a small, inconspicuous area first, especially if you have an older or more delicate toilet. Avoid using abrasive materials like steel wool, which can scratch the surface. If you have a septic system, the baking soda and vinegar combination is generally safe, as it doesn’t introduce harsh chemicals that can disrupt the system’s balance. However, it’s always best to consult with a septic system professional if you have any concerns.
Q: How often should I use this DIY toilet cleaning hack?
A: The frequency depends on your usage and how quickly your toilet tends to get dirty. For regular maintenance, cleaning once or twice a week is usually sufficient. If you have a busy household or notice stains appearing more frequently, you may need to clean more often. You can also use a daily toilet bowl cleaner tablet (DIY or store-bought) in between deep cleanings to help prevent buildup.
Q: Can I use this DIY toilet cleaning hack to clean other bathroom surfaces?
A: While the baking soda and vinegar combination is effective for cleaning toilets, it can also be used on other bathroom surfaces, such as sinks, showers, and tiles. However, be cautious when using it on natural stone surfaces like marble or granite, as the vinegar can etch the stone over time. Always test a small, inconspicuous area first. For general bathroom cleaning, you can create a diluted solution of baking soda and water or vinegar and water.
Q: What if the stains are really stubborn and this DIY toilet cleaning hack doesn’t work?
A: For particularly stubborn stains, you may need to try a few different approaches. First, try letting the baking soda and vinegar mixture sit for a longer period of time, even overnight. You can also try using a pumice stone to gently scrub the stains away. Be sure to wet the stone thoroughly before using it to avoid scratching the porcelain. As mentioned earlier, borax can also be added to the baking soda mixture for extra cleaning power. If all else fails, you may need to resort to a commercial toilet bowl cleaner, but try to choose one that is environmentally friendly and contains fewer harsh chemicals.
Q: Does the vinegar smell linger after cleaning?
A: The vinegar smell can be noticeable initially, but it typically dissipates quickly. Opening a window or turning on the bathroom fan can help to ventilate the area and speed up the process. You can also add a few drops of your favorite essential oil to the baking soda mixture to help mask the vinegar smell.
Q: Can I use lemon juice instead of vinegar?
A: Yes, lemon juice can be used as a substitute for vinegar. It has similar acidic properties and a pleasant citrus scent. However, lemon juice may not be as effective as vinegar for removing tough stains.
Q: Is it safe to mix baking soda and vinegar? I’ve heard it can create a dangerous reaction.
A: While baking soda and vinegar do react when mixed, the reaction is generally safe for cleaning purposes. The reaction produces carbon dioxide, which is a harmless gas. However, it’s important to avoid mixing large quantities of baking soda and vinegar in a closed container, as the pressure from the carbon dioxide can cause the container to explode. When using this DIY toilet cleaning hack, simply pour the vinegar into the toilet bowl after adding the baking soda, and the reaction will occur safely in the open air.
Q: Where can I find the ingredients for this DIY toilet cleaning hack?
A: The ingredients for this DIY toilet cleaning hack are readily available at most grocery stores and pharmacies. Baking soda and vinegar are common household staples. Essential oils can be found at health food stores, online retailers, and some grocery stores. Borax is typically located in the laundry aisle of grocery stores.
Q: What are the benefits of using a DIY toilet cleaner over commercial cleaners?
A: There are several benefits to using a DIY toilet cleaner over commercial cleaners:
* **Cost-effective:** DIY cleaners are typically much cheaper than commercial cleaners.
* **Eco-friendly:** DIY cleaners use natural ingredients that are less harmful to the environment.
* **Healthier:** DIY cleaners avoid harsh chemicals that can be irritating to the skin, eyes, and respiratory system.
* **Customizable:** You can customize DIY cleaners to suit your specific needs and preferences.
* **Control over ingredients:** You know exactly what’s going into your toilet bowl, avoiding potentially harmful or unknown substances.
Q: Can I add bleach to this DIY toilet cleaning hack for extra cleaning power?
A: No, it is extremely dangerous to mix bleach with vinegar or baking soda. Mixing bleach with vinegar creates chlorine gas, which is highly toxic and can cause serious respiratory problems or even death. Mixing bleach with baking soda can create chloramine gas, which is also toxic. Always avoid mixing bleach with any other cleaning products.

Leave a Comment