
DIY Home Repair Projects can feel daunting, I know! But trust me, tackling those little fixes around the house yourself is incredibly empowering and can save you a ton of money. Think of it this way: instead of waiting weeks for a handyman and shelling out a fortune, you can be the hero of your own home, armed with a few simple tools and some know-how.
From fixing that leaky faucet to patching up a hole in the drywall, DIY home repair projects have been a part of homeownership for generations. Historically, self-sufficiency in home maintenance was a necessity, passed down through families. While we now have access to professionals, the spirit of “doing it yourself” remains strong, fueled by a desire for control, creativity, and cost savings.
Why do you need these DIY tricks and hacks? Because life happens! Things break, wear down, and need a little TLC. Ignoring these small issues can lead to bigger, more expensive problems down the road. Plus, mastering these skills gives you a sense of accomplishment and allows you to personalize your living space. So, let’s dive into some easy and effective DIY Home Repair Projects that will have you feeling like a pro in no time!
DIY Cleaning Hacks with CIF: Beyond the Bottle
Okay, let’s be honest, we all love a clean home, but sometimes those cleaning products can be a bit pricey, right? And let’s not even talk about the harsh chemicals! That’s why I’ve been experimenting with CIF cream cleaner, and I’ve discovered some amazing DIY hacks that go way beyond just cleaning the stovetop. I’m talking about extending its use to other areas of your home, saving you money and reducing the number of different cleaning products you need.
Hack #1: Reviving Dull Stainless Steel
Stainless steel appliances are gorgeous when they’re sparkling, but fingerprints and water spots can make them look dull and lifeless. Here’s how to bring back the shine using CIF:
What you’ll need:
* CIF cream cleaner
* A soft microfiber cloth
* A clean, damp cloth
* Optional: Stainless steel polish (for extra shine)
Step-by-step instructions:
1. Apply a small amount of CIF: Squeeze a small dab of CIF cream cleaner onto your microfiber cloth. Remember, a little goes a long way!
2. Gently rub the surface: Using the microfiber cloth, gently rub the CIF onto the stainless steel surface, following the grain of the metal. This is important to avoid scratching. Don’t apply too much pressure; let the CIF do the work.
3. Wipe away the residue: Use a clean, damp cloth to wipe away all traces of the CIF cream cleaner. Make sure you get everything off, or it can leave a streaky residue.
4. Dry and buff: Use a dry microfiber cloth to buff the stainless steel surface until it shines. You’ll be amazed at the difference!
5. Optional: Polish for extra shine: If you want an extra layer of protection and shine, apply a stainless steel polish according to the product’s instructions. This will help prevent future fingerprints and water spots.
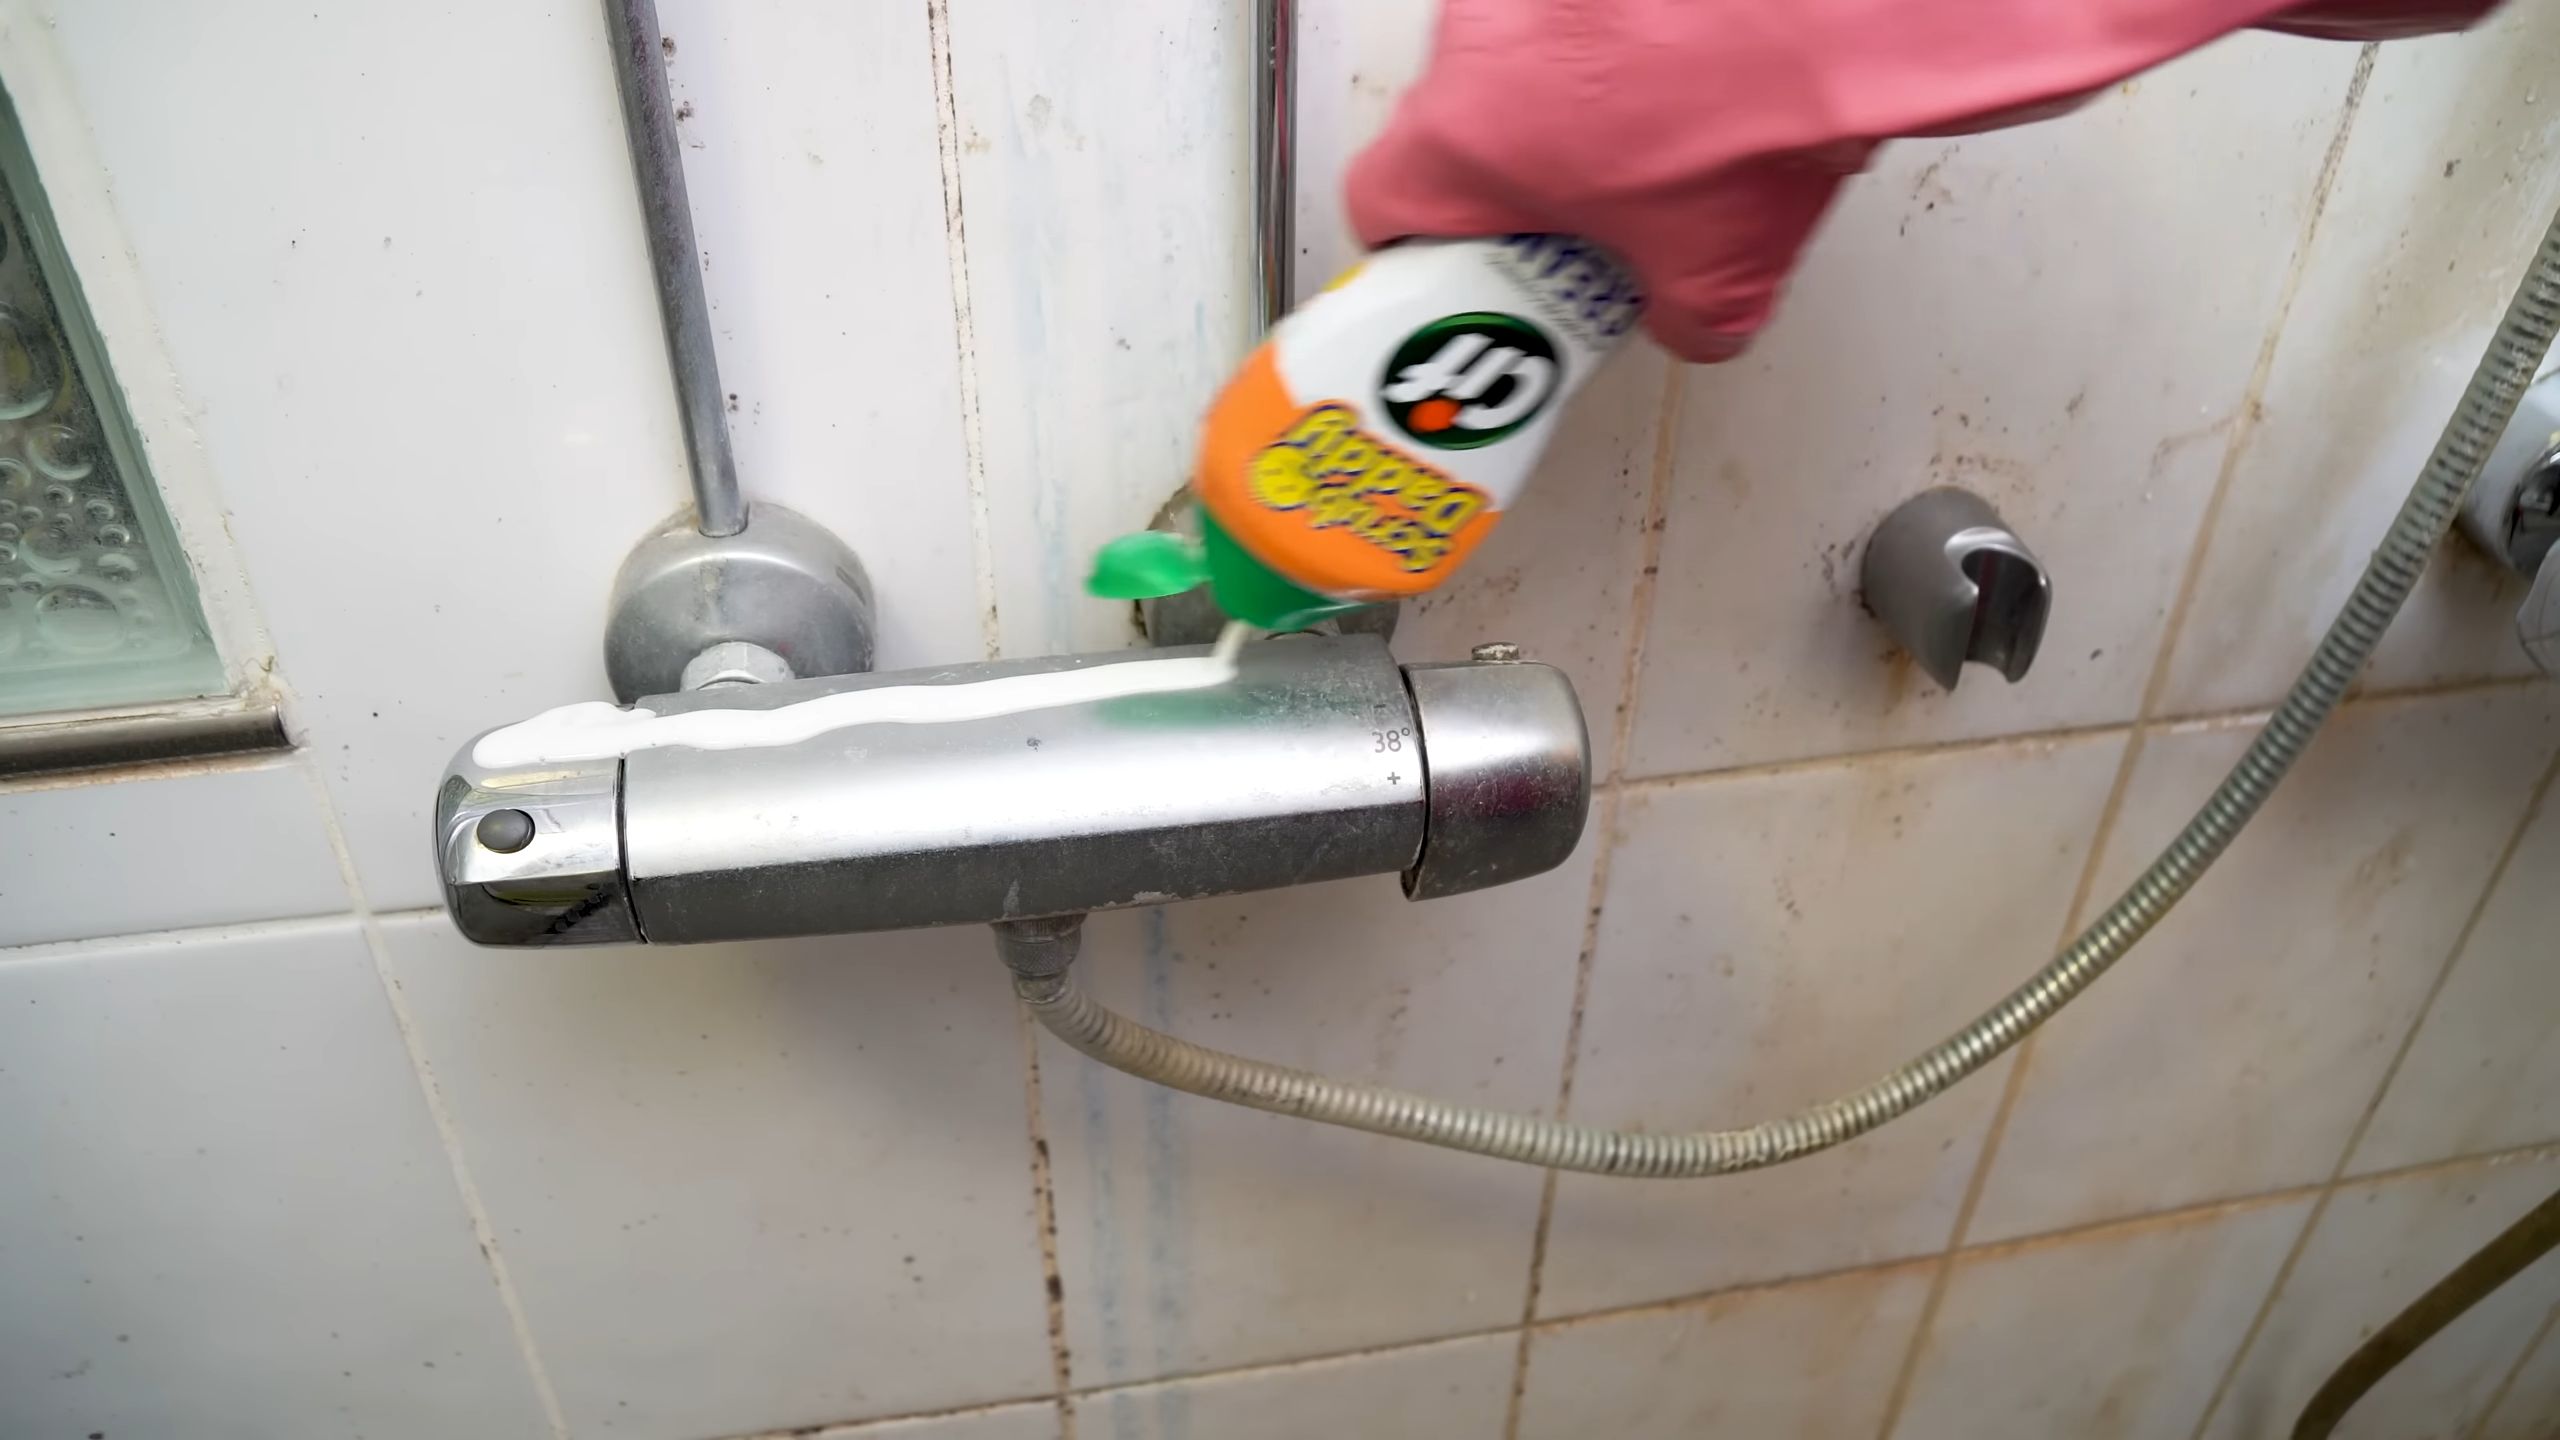
Hack #2: Cleaning Grout Like a Pro
Grout can be a real pain to clean. It’s porous, so it easily absorbs dirt and grime, and it’s often in hard-to-reach places. But don’t worry, CIF can help!
What you’ll need:
* CIF cream cleaner
* An old toothbrush or grout brush
* A small bowl of warm water
* A sponge or cloth
Step-by-step instructions:
1. Apply CIF to the grout: Apply a small amount of CIF cream cleaner directly onto the grout lines. You can use your finger or a small spatula to apply it precisely.
2. Scrub the grout: Using an old toothbrush or grout brush, scrub the grout lines vigorously. Focus on areas with heavy staining or discoloration. You’ll see the dirt starting to lift away.
3. Rinse with warm water: Dip a sponge or cloth into the warm water and use it to rinse away the CIF and loosened dirt. You may need to rinse several times to remove all the residue.
4. Dry the area: Use a clean, dry cloth to dry the grout and surrounding tiles. This will prevent water spots and help the grout stay clean longer.
5. Repeat if necessary: For stubborn stains, you may need to repeat the process. You can also let the CIF sit on the grout for a few minutes before scrubbing to give it more time to work.
Hack #3: Removing Stubborn Stains from Plastic
Plastic containers and surfaces can easily become stained with food, coffee, or other liquids. CIF can help remove these stubborn stains and restore your plastic items to their former glory.
What you’ll need:
* CIF cream cleaner
* A sponge or cloth
* Warm water
* Optional: A soft-bristled brush
Step-by-step instructions:
1. Apply CIF to the stain: Apply a small amount of CIF cream cleaner directly onto the stained area of the plastic.
2. Rub the stain: Using a sponge or cloth, gently rub the CIF into the stain. For tougher stains, you can use a soft-bristled brush to scrub the area.
3. Let it sit (optional): For very stubborn stains, you can let the CIF sit on the stain for a few minutes before scrubbing. This will give it more time to break down the stain.
4. Rinse thoroughly: Rinse the plastic item thoroughly with warm water to remove all traces of the CIF cream cleaner.
5. Dry the item: Dry the plastic item with a clean cloth. If the stain is still visible, repeat the process.
Hack #4: Cleaning Burnt Food from Pots and Pans
We’ve all been there – accidentally burning food in a pot or pan. It’s frustrating, and cleaning up the burnt mess can seem impossible. But don’t throw away your favorite cookware just yet! CIF can help you rescue it.
What you’ll need:
* CIF cream cleaner
* A non-abrasive sponge or cloth
* Warm water
* Optional: Baking soda
Step-by-step instructions:
1. Soak the pot or pan: Fill the burnt pot or pan with warm water and let it soak for at least 30 minutes. This will help loosen the burnt food. For extra cleaning power, you can add a tablespoon of baking soda to the water.
2. Apply CIF to the burnt areas: After soaking, drain the water and apply a generous amount of CIF cream cleaner to the burnt areas.
3. Gently scrub: Using a non-abrasive sponge or cloth, gently scrub the burnt food. Avoid using steel wool or abrasive scrubbers, as they can scratch the surface of your cookware.
4. Rinse thoroughly: Rinse the pot or pan thoroughly with warm water to remove all traces of the CIF cream cleaner and loosened burnt food.
5. Repeat if necessary: For heavily burnt pots and pans, you may need to repeat the process several times. You can also try letting the CIF sit on the burnt areas for a longer period of time before scrubbing.
6. Boil water (for stubborn cases): If the burnt food is still stuck, try boiling water in the pot or pan with a small amount of CIF. Let it simmer for a few minutes, then try scrubbing again.
Hack #5: Removing Scuff Marks from Walls
Scuff marks on walls are a common problem, especially in high-traffic areas. CIF can help you remove these marks without damaging the paint.
What you’ll need:
* CIF cream cleaner
* A soft, damp cloth
* Clean water
Step-by-step instructions:
1. Dampen the cloth: Dampen a soft cloth with clean water. Make sure the cloth is not too wet, as this can damage the paint.
2. Apply a small amount of CIF: Apply a small amount of CIF cream cleaner to the damp cloth.
3. Gently rub the scuff mark: Gently rub the scuff mark with the cloth, using a circular motion. Avoid applying too much pressure, as this can remove the paint.
4. Wipe away the residue: Use a clean, damp cloth to wipe away any remaining CIF cream cleaner.
5. Dry the area: Use a dry cloth to dry the area. If the scuff mark is still visible, repeat the process.
Hack #6: Cleaning White Shoes
White shoes can quickly become dirty and scuffed. CIF can help you restore them to their original brightness.
What you’ll need:
* CIF cream cleaner
* An old toothbrush or soft brush
* A damp cloth
* Clean water
Step-by-step instructions:
1. Remove loose dirt: Use a brush to remove any loose dirt or debris from the shoes.
2. Apply CIF to the shoes: Apply a small amount of CIF cream cleaner to the dirty areas of the shoes.
3. Scrub gently: Using an old toothbrush or soft brush, gently scrub the CIF into the shoes. Pay special attention to scuff marks and stains.
4. Wipe away the residue: Use a damp cloth to wipe away any remaining CIF cream cleaner.
5. Rinse with water: Rinse the shoes with clean water to remove any remaining residue.
6. Air dry: Allow the shoes to air dry completely. Avoid placing them in direct sunlight, as this can cause them to fade.
Important Considerations:
* Always test in an inconspicuous area first: Before using CIF on any surface, test it in a small, hidden area to make sure it doesn’t damage or discolor the material.
* Use sparingly: A little CIF goes a long way. Using too much can leave a residue that’s difficult to remove.
* Avoid abrasive surfaces: While CIF is a gentle abrasive cleaner, it’s

Conclusion
So, there you have it! Mastering these simple DIY home repair projects isn’t just about saving money; it’s about empowering yourself to take control of your living space and fostering a deeper connection with your home. We’ve covered some essential techniques, from patching drywall to silencing squeaky floors, all designed to be accessible to even the most novice DIYer.
Why is this a must-try? Because the satisfaction of fixing something yourself is unparalleled. It’s a confidence booster, a stress reliever, and a tangible accomplishment all rolled into one. Plus, think of the stories you’ll have to tell! Imagine the next time a friend complains about a running toilet – you can confidently say, “Oh, I fixed one of those last week! It’s easier than you think.”
But beyond the bragging rights, these DIY skills translate to real-world savings. Calling a professional for every minor repair can quickly add up. By tackling these projects yourself, you’re putting that money back in your pocket, allowing you to invest in other areas of your home or simply enjoy a little extra financial freedom.
Don’t be afraid to experiment and personalize these techniques. For example, when patching drywall, consider using a textured paint roller to blend the repair seamlessly with the existing wall texture. Or, if you’re dealing with a particularly stubborn squeaky floor, try using a shim to provide extra support beneath the floorboard. The possibilities are endless!
Remember, safety is paramount. Always wear appropriate safety gear, such as gloves and eye protection, and be sure to turn off power to any electrical circuits before working on them. If you’re unsure about any aspect of a repair, don’t hesitate to consult a professional. It’s always better to be safe than sorry.
We strongly encourage you to give these DIY home repair projects a try. Start with something small and manageable, like tightening a loose doorknob or caulking a leaky window. As you gain confidence and experience, you can gradually tackle more complex projects.
And most importantly, we want to hear about your experiences! Share your successes (and even your challenges) in the comments below. What DIY home repair projects have you tackled? What tips and tricks have you learned along the way? Your insights could be invaluable to other readers who are just starting out. Let’s build a community of empowered DIYers who are passionate about taking care of their homes. Embrace the world of DIY home repair projects and discover the satisfaction of creating a more comfortable, functional, and personalized living space.
Frequently Asked Questions (FAQs)
What tools do I absolutely need to get started with DIY home repair projects?
A basic toolkit is essential. At a minimum, you’ll need a hammer, screwdrivers (both Phillips head and flathead), a measuring tape, a level, pliers, a utility knife, and a wrench. A cordless drill is also a worthwhile investment, as it will make many tasks much easier. As you tackle more complex projects, you may need to add specialized tools to your collection, but these basics will get you started. Don’t forget safety glasses and work gloves!
I’m a complete beginner. Where should I start?
Start with small, low-stakes projects. Tightening loose screws on furniture, replacing a lightbulb, or caulking around a sink are all great options. These projects will help you get comfortable using basic tools and techniques without the pressure of potentially making a big mistake. Watch online tutorials and read articles to familiarize yourself with the process before you begin. Remember, patience is key!
How do I know when a repair is beyond my skill level and I should call a professional?
This is a crucial question! If a repair involves complex electrical work, plumbing that requires soldering or pipe cutting, or structural issues, it’s best to call a professional. Also, if you’re feeling overwhelmed or unsure about any aspect of a repair, don’t hesitate to seek expert help. It’s always better to err on the side of caution, especially when it comes to safety. Consider the potential consequences of a botched repair – could it cause further damage to your home or even pose a safety hazard? If so, it’s time to call in the pros.
What are some common mistakes that beginners make with DIY home repair projects?
One common mistake is not properly preparing the work area. This includes clearing clutter, protecting surfaces, and gathering all the necessary tools and materials before you begin. Another mistake is not taking the time to research the project thoroughly. Watch videos, read articles, and ask questions to ensure you understand the process before you start. Finally, many beginners underestimate the importance of safety. Always wear appropriate safety gear and follow safety guidelines carefully.
How can I find reliable information and tutorials for DIY home repair projects?
There are many excellent resources available online. YouTube is a great source of video tutorials, and websites like This Old House and Family Handyman offer a wealth of articles and guides. Be sure to choose reputable sources and read reviews before following any instructions. You can also find helpful information at your local library or hardware store. Don’t be afraid to ask questions! Hardware store employees are often knowledgeable and can offer valuable advice.
How can I save money on DIY home repair projects?
One way to save money is to buy tools and materials secondhand. Check out garage sales, flea markets, and online marketplaces for deals on used tools. You can also save money by repurposing materials. For example, you can use old lumber to build a simple shelf or repair a fence. Another tip is to plan your projects carefully and avoid making unnecessary purchases.
What are some essential safety precautions I should take when doing DIY home repair projects?
Always wear safety glasses to protect your eyes from flying debris. Wear work gloves to protect your hands from cuts and abrasions. If you’re working with power tools, wear hearing protection. If you’re working with chemicals, wear a respirator. Be sure to turn off power to any electrical circuits before working on them. And always follow the manufacturer’s instructions for any tools or materials you’re using.
How do I properly dispose of hazardous materials, such as paint and chemicals?
Never pour hazardous materials down the drain or into the trash. Contact your local waste management agency for information on how to properly dispose of these materials. Many communities have designated drop-off locations for hazardous waste.
What if I damage something while attempting a DIY repair?
Don’t panic! Everyone makes mistakes. The first step is to assess the damage and determine the best course of action. If the damage is minor, you may be able to repair it yourself. If the damage is more significant, you may need to call a professional. The important thing is to learn from your mistakes and not give up.
How can I build my confidence in tackling DIY home repair projects?
Start small, be patient, and celebrate your successes. Don’t be afraid to ask for help when you need it. And remember, every DIY project is a learning opportunity. The more you practice, the more confident you’ll become. Embrace the challenge and enjoy the satisfaction of creating a more comfortable and functional home.

Leave a Comment