
DIY kale bottle garden: Ever dreamt of fresh, homegrown kale gracing your salads and smoothies, even if you’re short on space or a seasoned gardener? I know I have! This simple, yet ingenious, DIY project unlocks the door to a thriving mini-garden, right in your home.
The concept of container gardening, a close relative to our bottle garden, has roots stretching back centuries. From the Hanging Gardens of Babylon to the humble window boxes of Victorian England, people have always found creative ways to cultivate plants in limited spaces. Today, with urban living on the rise, the need for innovative gardening solutions is greater than ever.
Let’s face it, buying organic kale from the store can be expensive, and sometimes, the quality just isn’t there. Plus, there’s something incredibly satisfying about nurturing your own food from seed to table. That’s where this DIY kale bottle garden comes in. It’s not just about saving money; it’s about connecting with nature, reducing your carbon footprint, and enjoying the freshest, most nutritious kale imaginable. I’m going to show you how to transform a simple plastic bottle into a flourishing kale haven, perfect for beginners and experienced gardeners alike. Get ready to unleash your inner green thumb!

DIY Upside-Down Kale Bottle Garden: A Thrifty and Space-Saving Project
Hey there, fellow gardening enthusiasts! Are you short on space but craving fresh, homegrown kale? Or maybe you just want a fun and unique gardening project? Well, you’ve come to the right place! I’m going to walk you through creating your very own upside-down kale bottle garden. It’s a fantastic way to grow kale vertically, saving precious garden real estate and adding a quirky touch to your balcony, patio, or even a sunny windowsill. Let’s get started!
What You’ll Need
Before we dive in, let’s gather our supplies. This project is super budget-friendly, relying heavily on recycled materials. Here’s what you’ll need:
* Plastic Bottles: The star of the show! You’ll need empty plastic bottles – 2-liter soda bottles or larger water bottles work best. The number of bottles depends on how many kale plants you want to grow. I usually aim for one plant per bottle.
* Kale Seedlings: You can start your kale from seed, but for this project, I recommend using seedlings. It’s faster and easier, especially if you’re a beginner. Look for healthy, vibrant seedlings at your local garden center.
* Potting Mix: Choose a good quality potting mix that drains well. Kale needs well-drained soil to thrive.
* Scissors or Utility Knife: For cutting the plastic bottles. Be careful!
* Drill or Nail and Hammer: To create drainage holes.
* Old Cloth or Coffee Filter: To prevent soil from falling out of the bottle neck.
* Twine or Rope: For hanging your bottle garden.
* Watering Can or Spray Bottle: For watering your kale.
* Gloves (Optional): To keep your hands clean.
Preparing the Bottles
Okay, let’s get our hands dirty! The first step is preparing the plastic bottles. This involves cutting, drilling, and adding a soil barrier.
1. Clean the Bottles: Thoroughly wash and dry the plastic bottles. Remove any labels or sticky residue. This ensures a clean environment for your kale.
2. Cut the Bottle: Using your scissors or utility knife, carefully cut the bottom off each bottle. You’ll want to cut it about 2-3 inches from the bottom. This creates the opening where your kale plant will grow. Be extremely cautious when using sharp tools! I always recommend wearing gloves for extra grip and protection.
3. Drill Drainage Holes: Now, we need to create drainage holes in the bottle cap. Use your drill or nail and hammer to make several small holes. These holes will allow excess water to drain out, preventing root rot. I usually make about 4-5 holes.
4. Add Soil Barrier: To prevent soil from falling out of the bottle neck, we’ll add a barrier. Cut a piece of old cloth or coffee filter slightly larger than the bottle cap. Place it over the cap on the inside of the bottle. This will allow water to drain but keep the soil in place.
Planting the Kale
With our bottles prepped, it’s time to plant our kale seedlings! This is the fun part where we bring our garden to life.
1. Turn the Bottle Upside Down: Carefully turn the bottle upside down so the cap is facing down.
2. Insert the Seedling: Gently insert the kale seedling through the cut opening in the bottom of the bottle. Be careful not to damage the roots. You might need to gently squeeze the bottle to widen the opening slightly.
3. Secure the Roots: Once the seedling is in place, carefully guide the roots through the bottle neck and out through the cap. This can be a bit tricky, but be patient. You might need to use a small stick or pencil to help guide the roots.
4. Add Potting Mix: Now, slowly add potting mix to the bottle, filling it up to the top. Gently tap the bottle to settle the soil and eliminate any air pockets.
5. Water Thoroughly: Once the bottle is filled with potting mix, water the kale seedling thoroughly. This will help the soil settle and provide the plant with essential moisture.
Hanging Your Kale Garden
Now that our kale is planted, it’s time to hang our bottle garden! This is where the vertical gardening magic happens.
1. Prepare the Hanging Mechanism: Cut a length of twine or rope long enough to hang your bottle garden from your desired location. You’ll need to create a loop around the bottle.
2. Secure the Twine: Carefully thread the twine around the bottle, just below the cut opening. Make sure the twine is secure and won’t slip. You can tie a knot or use a clip to secure it.
3. Hang the Bottle: Find a sunny location to hang your bottle garden. A balcony railing, patio overhang, or even a sturdy hook indoors will work. Make sure the location receives at least 6 hours of sunlight per day.
4. Repeat for Each Bottle: Repeat the planting and hanging process for each of your plastic bottles. You can hang them individually or create a cascading effect by hanging them at different heights.
Caring for Your Upside-Down Kale
Congratulations! You’ve successfully created your own upside-down kale bottle garden. Now, let’s talk about how to care for your kale so it thrives.
* Watering: Water your kale regularly, especially during hot weather. Check the soil moisture by sticking your finger into the soil. If it feels dry, it’s time to water. Water slowly and thoroughly, allowing the water to drain out of the drainage holes.
* Sunlight: Kale needs at least 6 hours of sunlight per day to grow well. Make sure your bottle garden is located in a sunny spot.
* Fertilizing: Feed your kale with a balanced liquid fertilizer every 2-3 weeks. This will provide the plant with essential nutrients and promote healthy growth.
* Pest Control: Keep an eye out for pests, such as aphids or cabbage worms. If you notice any pests, you can try spraying them with insecticidal soap or neem oil.
* Harvesting: You can start harvesting kale leaves once they are large enough to eat. Simply cut off the outer leaves, leaving the inner leaves to continue growing. This will encourage the plant to produce more leaves.
Troubleshooting
Even with the best care, you might encounter a few challenges along the way. Here are some common issues and how to address them:
* Yellowing Leaves: Yellowing leaves can indicate overwatering, underwatering, or nutrient deficiency. Check the soil moisture and adjust your watering schedule accordingly. If the soil is consistently moist, you might be overwatering. If the soil is dry, you might be underwatering. You can also try fertilizing your kale to provide it with essential nutrients.
* Slow Growth: Slow growth can be caused by insufficient sunlight, poor soil, or pest infestation. Make sure your kale is getting enough sunlight and that the soil is well-draining and nutrient-rich. Check for pests and treat them accordingly.
* Root Rot: Root rot is caused by overwatering and poor drainage. Make sure your bottle has adequate drainage holes and avoid overwatering. If you suspect root rot, you can try repotting the kale in fresh potting mix.
* Pest Infestation: Pest
Hey there, fellow gardening enthusiasts! Are you short on space but craving fresh, homegrown kale? Or maybe you just want a fun and unique gardening project? Well, you’ve come to the right place! I’m going to walk you through creating your very own upside-down kale bottle garden. It’s a fantastic way to grow kale vertically, saving precious garden real estate and adding a quirky touch to your balcony, patio, or even a sunny windowsill. Let’s get started!
What You’ll Need
Before we dive in, let’s gather our supplies. This project is super budget-friendly, relying heavily on recycled materials. Here’s what you’ll need:
* Plastic Bottles: The star of the show! You’ll need empty plastic bottles – 2-liter soda bottles or larger water bottles work best. The number of bottles depends on how many kale plants you want to grow. I usually aim for one plant per bottle.
* Kale Seedlings: You can start your kale from seed, but for this project, I recommend using seedlings. It’s faster and easier, especially if you’re a beginner. Look for healthy, vibrant seedlings at your local garden center.
* Potting Mix: Choose a good quality potting mix that drains well. Kale needs well-drained soil to thrive.
* Scissors or Utility Knife: For cutting the plastic bottles. Be careful!
* Drill or Nail and Hammer: To create drainage holes.
* Old Cloth or Coffee Filter: To prevent soil from falling out of the bottle neck.
* Twine or Rope: For hanging your bottle garden.
* Watering Can or Spray Bottle: For watering your kale.
* Gloves (Optional): To keep your hands clean.
Preparing the Bottles
Okay, let’s get our hands dirty! The first step is preparing the plastic bottles. This involves cutting, drilling, and adding a soil barrier.
1. Clean the Bottles: Thoroughly wash and dry the plastic bottles. Remove any labels or sticky residue. This ensures a clean environment for your kale.
2. Cut the Bottle: Using your scissors or utility knife, carefully cut the bottom off each bottle. You’ll want to cut it about 2-3 inches from the bottom. This creates the opening where your kale plant will grow. Be extremely cautious when using sharp tools! I always recommend wearing gloves for extra grip and protection.
3. Drill Drainage Holes: Now, we need to create drainage holes in the bottle cap. Use your drill or nail and hammer to make several small holes. These holes will allow excess water to drain out, preventing root rot. I usually make about 4-5 holes.
4. Add Soil Barrier: To prevent soil from falling out of the bottle neck, we’ll add a barrier. Cut a piece of old cloth or coffee filter slightly larger than the bottle cap. Place it over the cap on the inside of the bottle. This will allow water to drain but keep the soil in place.
Planting the Kale
With our bottles prepped, it’s time to plant our kale seedlings! This is the fun part where we bring our garden to life.
1. Turn the Bottle Upside Down: Carefully turn the bottle upside down so the cap is facing down.
2. Insert the Seedling: Gently insert the kale seedling through the cut opening in the bottom of the bottle. Be careful not to damage the roots. You might need to gently squeeze the bottle to widen the opening slightly.
3. Secure the Roots: Once the seedling is in place, carefully guide the roots through the bottle neck and out through the cap. This can be a bit tricky, but be patient. You might need to use a small stick or pencil to help guide the roots.
4. Add Potting Mix: Now, slowly add potting mix to the bottle, filling it up to the top. Gently tap the bottle to settle the soil and eliminate any air pockets.
5. Water Thoroughly: Once the bottle is filled with potting mix, water the kale seedling thoroughly. This will help the soil settle and provide the plant with essential moisture.
Hanging Your Kale Garden
Now that our kale is planted, it’s time to hang our bottle garden! This is where the vertical gardening magic happens.
1. Prepare the Hanging Mechanism: Cut a length of twine or rope long enough to hang your bottle garden from your desired location. You’ll need to create a loop around the bottle.
2. Secure the Twine: Carefully thread the twine around the bottle, just below the cut opening. Make sure the twine is secure and won’t slip. You can tie a knot or use a clip to secure it.
3. Hang the Bottle: Find a sunny location to hang your bottle garden. A balcony railing, patio overhang, or even a sturdy hook indoors will work. Make sure the location receives at least 6 hours of sunlight per day.
4. Repeat for Each Bottle: Repeat the planting and hanging process for each of your plastic bottles. You can hang them individually or create a cascading effect by hanging them at different heights.
Caring for Your Upside-Down Kale
Congratulations! You’ve successfully created your own upside-down kale bottle garden. Now, let’s talk about how to care for your kale so it thrives.
* Watering: Water your kale regularly, especially during hot weather. Check the soil moisture by sticking your finger into the soil. If it feels dry, it’s time to water. Water slowly and thoroughly, allowing the water to drain out of the drainage holes.
* Sunlight: Kale needs at least 6 hours of sunlight per day to grow well. Make sure your bottle garden is located in a sunny spot.
* Fertilizing: Feed your kale with a balanced liquid fertilizer every 2-3 weeks. This will provide the plant with essential nutrients and promote healthy growth.
* Pest Control: Keep an eye out for pests, such as aphids or cabbage worms. If you notice any pests, you can try spraying them with insecticidal soap or neem oil.
* Harvesting: You can start harvesting kale leaves once they are large enough to eat. Simply cut off the outer leaves, leaving the inner leaves to continue growing. This will encourage the plant to produce more leaves.
Troubleshooting
Even with the best care, you might encounter a few challenges along the way. Here are some common issues and how to address them:
* Yellowing Leaves: Yellowing leaves can indicate overwatering, underwatering, or nutrient deficiency. Check the soil moisture and adjust your watering schedule accordingly. If the soil is consistently moist, you might be overwatering. If the soil is dry, you might be underwatering. You can also try fertilizing your kale to provide it with essential nutrients.
* Slow Growth: Slow growth can be caused by insufficient sunlight, poor soil, or pest infestation. Make sure your kale is getting enough sunlight and that the soil is well-draining and nutrient-rich. Check for pests and treat them accordingly.
* Root Rot: Root rot is caused by overwatering and poor drainage. Make sure your bottle has adequate drainage holes and avoid overwatering. If you suspect root rot, you can try repotting the kale in fresh potting mix.
* Pest Infestation: Pests can damage your kale leaves and stunt its growth. Regularly inspect your kale for pests and treat them promptly with insecticidal soap or neem oil.
Extra Tips and Tricks
Here are a few extra tips and tricks to help you succeed with your upside-down kale bottle garden:
* Choose the Right Kale Variety: Some kale varieties are better suited for container gardening than others. Dwarf varieties, such as Dwarf Blue Curled Vates, are a good choice for this project.
* Rotate Your Bottles: To ensure even sunlight exposure, rotate your bottles regularly. This will prevent the kale from leaning towards the sun.
* Add Companion Plants: Consider adding companion plants to your bottle garden. Herbs like basil or thyme can help deter pests and attract beneficial insects.
* Recycle and Reuse: This project is all about sustainability! Recycle and reuse as many materials as possible.
* Get Creative: Don’t be afraid to get creative with your bottle garden! You can paint the bottles, add decorative elements, or create a unique hanging system.
I hope you enjoyed this DIY tutorial! Creating an upside-down kale bottle garden is a fun, rewarding, and sustainable way to grow your own fresh produce. With a little bit of effort and creativity, you can transform recycled plastic bottles into a thriving vertical garden. Happy gardening!

Conclusion
So, there you have it! Transforming a simple plastic bottle into a thriving kale bottle garden is not just a fun project; it’s a sustainable solution, a space-saving marvel, and a budget-friendly way to enjoy fresh, homegrown greens. We’ve walked you through the steps, from preparing your bottle to planting your kale seedlings, and hopefully, you’re feeling inspired to give it a try.
Why is this DIY trick a must-try? Because it empowers you to take control of your food source, even if you live in an apartment with limited outdoor space. It reduces plastic waste by giving discarded bottles a new purpose. And, let’s be honest, there’s something incredibly satisfying about nurturing a plant from seed to harvest, knowing you played a direct role in its growth. Plus, fresh kale is packed with nutrients, making it a healthy addition to your diet.
But the beauty of this project lies in its adaptability. Feel free to experiment with different varieties of kale. Curly kale, Lacinato kale (also known as dinosaur kale), and Red Russian kale all thrive in container gardens. You can also try companion planting. Consider adding herbs like thyme or rosemary to your bottle garden; they not only add flavor to your cooking but also help deter pests.
Another variation to consider is the watering system. While we’ve outlined a simple watering method, you could explore self-watering options by incorporating a wicking system using cotton rope or felt strips. This is especially useful if you tend to forget to water your plants regularly. You can also add a small amount of organic fertilizer to the soil to provide your kale with extra nutrients. Remember to choose a fertilizer specifically formulated for leafy greens.
Don’t be afraid to get creative with the aesthetics of your kale bottle garden. Paint the bottles with vibrant colors, decorate them with stencils, or even create a vertical garden by hanging multiple bottles together. The possibilities are endless!
We truly believe that this DIY kale bottle garden is a game-changer for anyone looking to embrace sustainable living and enjoy fresh, homegrown produce. It’s a simple, rewarding, and environmentally friendly project that everyone can enjoy.
So, what are you waiting for? Gather your supplies, follow our instructions, and embark on your own kale bottle garden adventure. We’re confident that you’ll be amazed by the results. And most importantly, we want to hear about your experience! Share your photos, tips, and challenges with us in the comments below. Let’s build a community of bottle garden enthusiasts and inspire others to grow their own food. We can’t wait to see your thriving kale bottle gardens!
Frequently Asked Questions (FAQ)
What type of plastic bottle is best for a kale bottle garden?
Ideally, you should use a food-grade plastic bottle, such as a water bottle or a soda bottle. Look for the recycling symbol with a number inside. Bottles labeled with #1 (PET or PETE) or #2 (HDPE) are generally considered safe for growing plants. Avoid using bottles that have contained harsh chemicals or cleaning products, as these may contaminate the soil and affect the kale’s growth. Make sure to thoroughly wash and rinse the bottle before using it.
How much sunlight does my kale bottle garden need?
Kale thrives in full sun, which means it needs at least 6 hours of direct sunlight per day. If you don’t have a sunny spot outdoors, you can supplement with grow lights. Place your kale bottle garden near a south-facing window for maximum sunlight exposure. If you notice the leaves are pale or leggy, it’s a sign that your kale isn’t getting enough light.
What kind of soil should I use for my kale bottle garden?
Use a well-draining potting mix specifically formulated for container gardening. Avoid using garden soil, as it can become compacted in containers and hinder drainage. A good potting mix will provide the necessary nutrients and aeration for your kale to thrive. You can also amend the potting mix with compost or other organic matter to improve its fertility.
How often should I water my kale bottle garden?
Water your kale bottle garden when the top inch of soil feels dry to the touch. Avoid overwatering, as this can lead to root rot. The frequency of watering will depend on the weather conditions and the size of your bottle. In hot, dry weather, you may need to water daily. In cooler, wetter weather, you may only need to water every few days. Make sure the bottle has drainage holes to prevent water from accumulating at the bottom.
How do I fertilize my kale bottle garden?
Kale is a heavy feeder, so it benefits from regular fertilization. Use a balanced, water-soluble fertilizer specifically formulated for leafy greens. Follow the instructions on the fertilizer package for application rates. You can also use organic fertilizers, such as compost tea or fish emulsion. Fertilize your kale every 2-3 weeks during the growing season.
How do I protect my kale bottle garden from pests?
Common pests that affect kale include aphids, cabbage worms, and flea beetles. Inspect your plants regularly for signs of infestation. You can control aphids by spraying them with a strong stream of water or by using insecticidal soap. Cabbage worms can be handpicked off the plants or controlled with Bacillus thuringiensis (Bt), a natural insecticide. Flea beetles can be deterred by covering the plants with row covers.
When can I harvest my kale from my bottle garden?
You can start harvesting kale leaves when they are about 4-6 inches long. Harvest the outer leaves first, leaving the inner leaves to continue growing. This will encourage the plant to produce more leaves. You can harvest kale throughout the growing season, even into the winter in mild climates.
Can I grow other vegetables in a bottle garden besides kale?
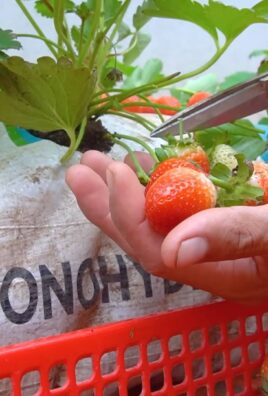
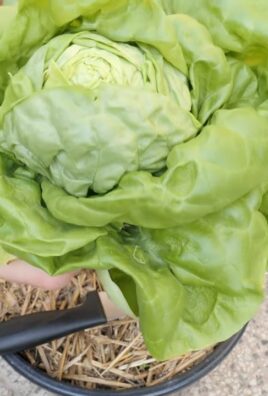
Yes, you can grow other vegetables in a bottle garden, such as lettuce, spinach, herbs, and even strawberries. Choose vegetables that have shallow root systems and don’t require a lot of space. Be sure to provide the appropriate growing conditions for each vegetable, such as sunlight, water, and nutrients.
How long will my kale bottle garden last?
With proper care, your kale bottle garden can last for several months. Kale is a biennial plant, which means it typically lives for two years. However, in most climates, it is grown as an annual. You can extend the life of your kale plant by providing it with adequate sunlight, water, and nutrients. You can also overwinter your kale plant by bringing it indoors during the cold months.
What do I do with the plastic bottle after the kale plant dies?
Once your kale plant has finished producing, you can recycle the plastic bottle or reuse it for another gardening project. You can also use the bottle to start seeds or propagate new plants. If the bottle is damaged or no longer usable, dispose of it properly according to your local recycling guidelines.
Leave a Comment