
Grow Lettuce in Small Spaces
I’ve always loved the idea of a vibrant garden bursting with fresh produce, but living in a small apartment, I initially thought it was an impossible dream. Then I discovered the amazing world of grow lettuce in small spaces techniques! This isn’t just about squeezing a few plants onto a balcony; it’s about maximizing yield and enjoying the satisfaction of homegrown greens, no matter how limited your outdoor space. This article is packed with clever DIY projects and simple hacks that will transform your tiny patio, windowsill, or even a sunny corner of your kitchen into a thriving lettuce patch.
Historically, growing your own food has been a cornerstone of many cultures, a connection to the land and a source of sustenance. While modern supermarkets offer convenience, there’s something incredibly rewarding about nurturing a plant from seed to salad. And let’s be honest, the taste of freshly picked lettuce simply can’t be beat!
Why should you bother with grow lettuce in small spaces techniques? Because fresh, homegrown lettuce is healthier, tastier, and more sustainable than anything you’ll find in the store. You control the growing process, avoiding pesticides and ensuring the highest quality ingredients for your meals. Plus, it’s a fantastic way to connect with nature, even if you’re surrounded by concrete. Whether you’re a seasoned gardener or a complete beginner, this guide is designed to empower you to create your own little lettuce paradise, no matter how small your space.
Get Ready to Grow!
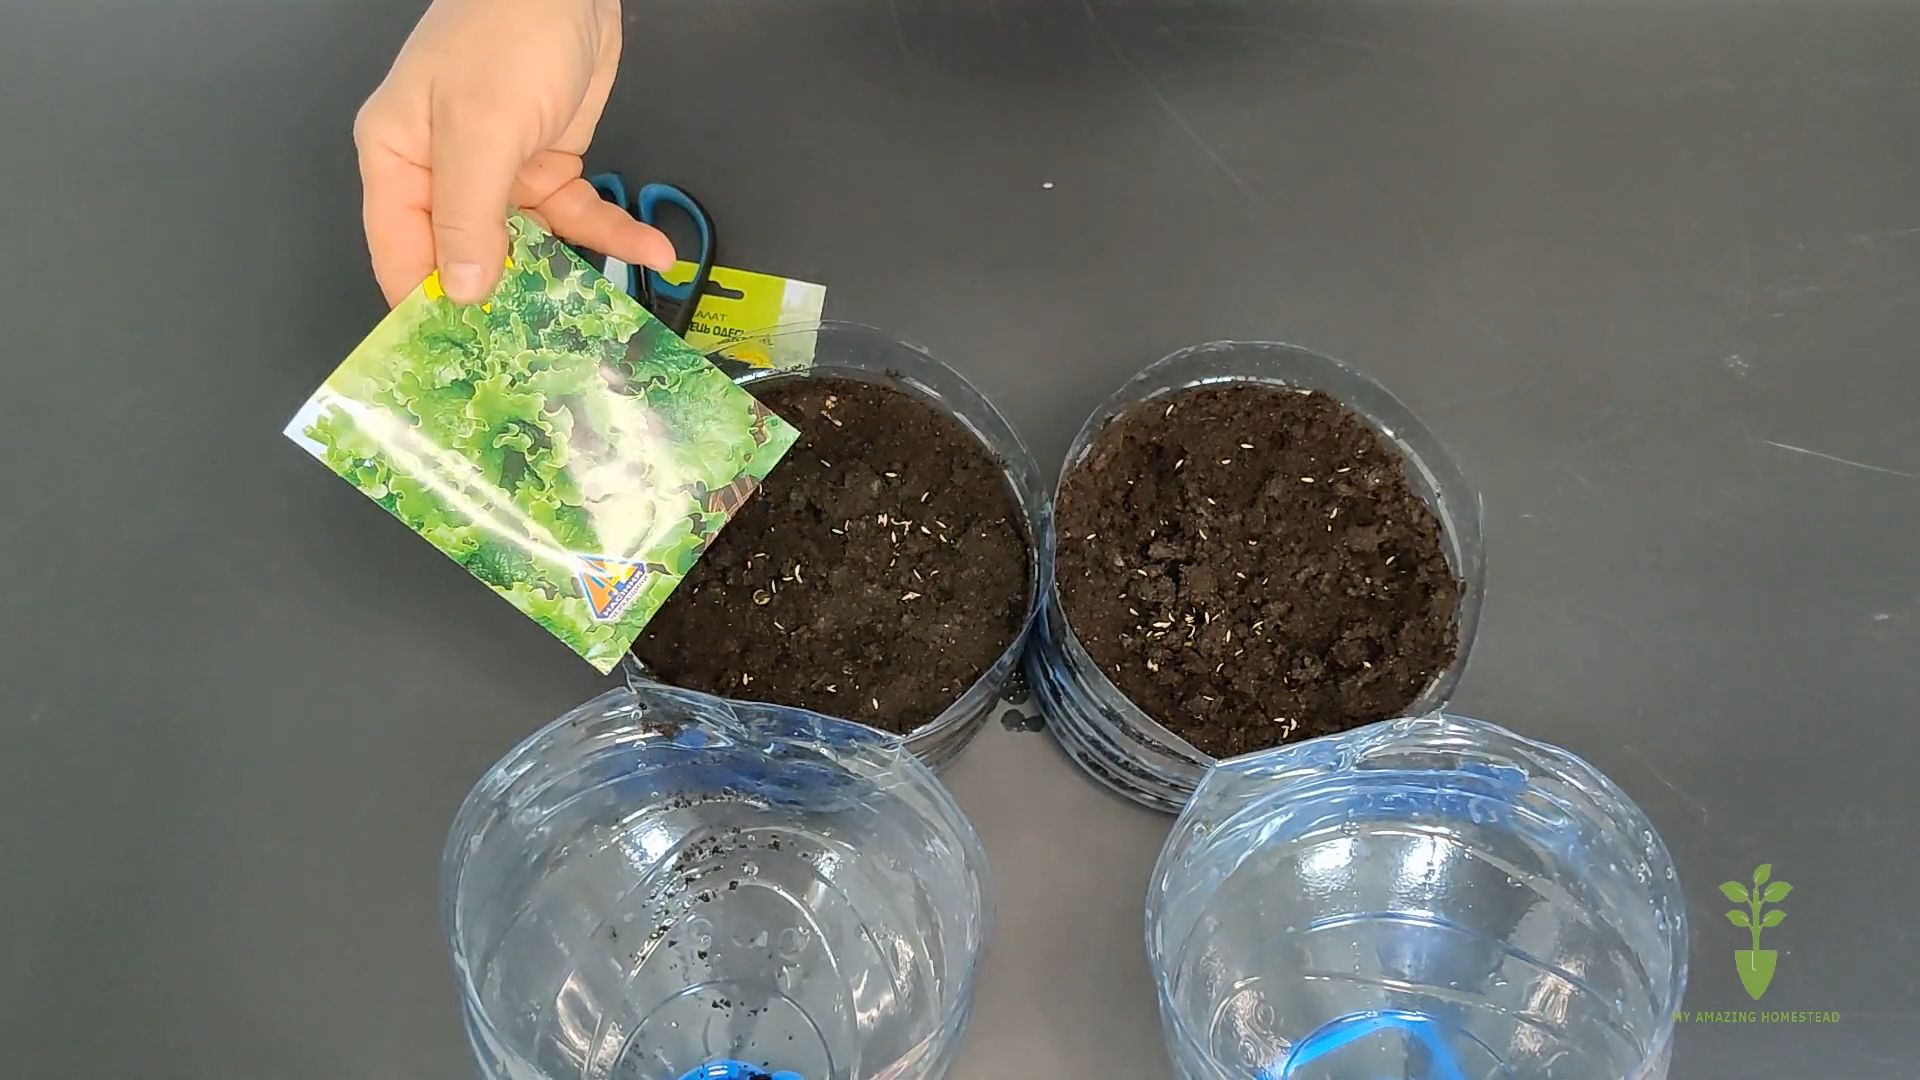
In the following sections, we’ll explore various creative methods for growing lettuce in small spaces, from repurposing everyday items into ingenious planters to mastering vertical gardening techniques. Prepare to be amazed by how much you can achieve with a little ingenuity and a passion for fresh, homegrown goodness! Let’s get started on your journey to grow lettuce in small spaces.
Harvesting Your Broccoli: A Step-by-Step Guide
I love homegrown broccoli! There’s nothing quite like the taste of fresh-picked florets. But knowing when and how to harvest them is key to getting the best yield. This guide will walk you through the process, ensuring you get delicious, tender broccoli every time.
Assessing Broccoli Maturity
- Look for tightly closed florets: The main head, or crown, should be firm and compact, with the florets tightly clustered together. Avoid harvesting if the florets are starting to open or yellow.
- Check the size: The crown should be approximately 2-3 inches in diameter. Smaller heads will be more tender, while larger ones might be tougher and less flavorful.
- Feel the stem: The stem should be thick and firm. A soft or wilted stem indicates the broccoli is past its prime.
- Consider the color: The color should be a deep, vibrant green. Any yellowing or browning is a sign that the broccoli is overripe.
Harvesting the Main Head
- Choose the right tool: A sharp knife or pruning shears are ideal. A dull blade can crush the stem, leading to bruising and faster spoilage.
- Cut below the head: Locate the point where the main head joins the stem. Using your knife or shears, make a clean cut about an inch below the head. This ensures you get the entire head and leave enough stem for the plant to potentially produce side shoots.
- Handle with care: Gently remove the harvested head and place it in a container or basket. Avoid rough handling to prevent bruising.
- Inspect the cut: After cutting, check the cut end of the stem. If it looks damaged or bruised, you might want to trim it a bit more to remove the affected area. This will help extend the shelf life of your broccoli.
Harvesting Side Shoots (Optional)
Many broccoli plants will produce smaller side shoots after the main head is harvested. These side shoots, while smaller, are still delicious and worth harvesting.
- Wait for development: Allow the plant to recover for about a week or two after harvesting the main head. The side shoots will begin to develop during this time.
- Identify mature side shoots: Look for side shoots that are firm, compact, and a deep green color. They will be smaller than the main head, typically 1-2 inches in diameter.
- Harvest individually: Use your knife or shears to cut each side shoot individually, just below the head, similar to how you harvested the main head.
- Continue harvesting: You can continue harvesting side shoots as they develop, often for several weeks after the initial harvest. The plant will eventually stop producing new shoots.
Post-Harvest Care
Proper post-harvest care is crucial for maintaining the quality and freshness of your broccoli.
- Immediate cooling: Place the harvested broccoli in a cool, dark place as soon as possible. Refrigeration is ideal.
- Proper storage: Store the broccoli in a plastic bag or container in the refrigerator. Avoid washing it before storing, as this can promote spoilage. Washing should be done just before use.
- Use within a few days: For optimal flavor and texture, use your harvested broccoli within 2-3 days of harvesting. While it can last longer in the refrigerator, the quality will gradually decline.
- Freezing for later use: If you have more broccoli than you can use fresh, you can freeze it for later use. Blanch the florets in boiling water for 2-3 minutes, then immediately plunge them into ice water to stop the cooking process. After draining, package the broccoli in freezer bags and freeze.
Troubleshooting Common Problems
Problem: Broccoli heads are loose and open
Solution:
You likely harvested the broccoli too late. Next time, harvest when the florets are tightly closed and the head is firm.
Problem: Broccoli heads are small and underdeveloped
Solution:
This could be due to insufficient sunlight, water, or nutrients. Ensure your broccoli plants receive adequate sunlight (at least 6 hours per day), water regularly, and fertilize as needed.
Problem: Broccoli heads are yellowing or browning
Solution:
This indicates the broccoli is overripe. Harvest your broccoli earlier next time, when the heads are a deep green and the florets are tightly closed. Also, check for pests or diseases that might be causing the discoloration.
Problem: Broccoli stems are tough and woody
Solution:
This is often a result of harvesting too late. Harvest when the stems are firm but not woody. You can also try harvesting smaller heads, which tend to be more tender.
Tips for Success
- Regular watering: Consistent watering is essential for healthy broccoli growth. Aim for about 1 inch of water per week, adjusting based on rainfall.
- Fertilizing: Feed your broccoli plants regularly with a balanced fertilizer to promote vigorous growth and abundant harvests.
- Pest and disease control: Monitor your plants regularly for pests and diseases. Take appropriate action if necessary to prevent damage.
- Succession planting: Consider planting broccoli in succession to ensure a continuous harvest throughout the growing season.
Conclusion
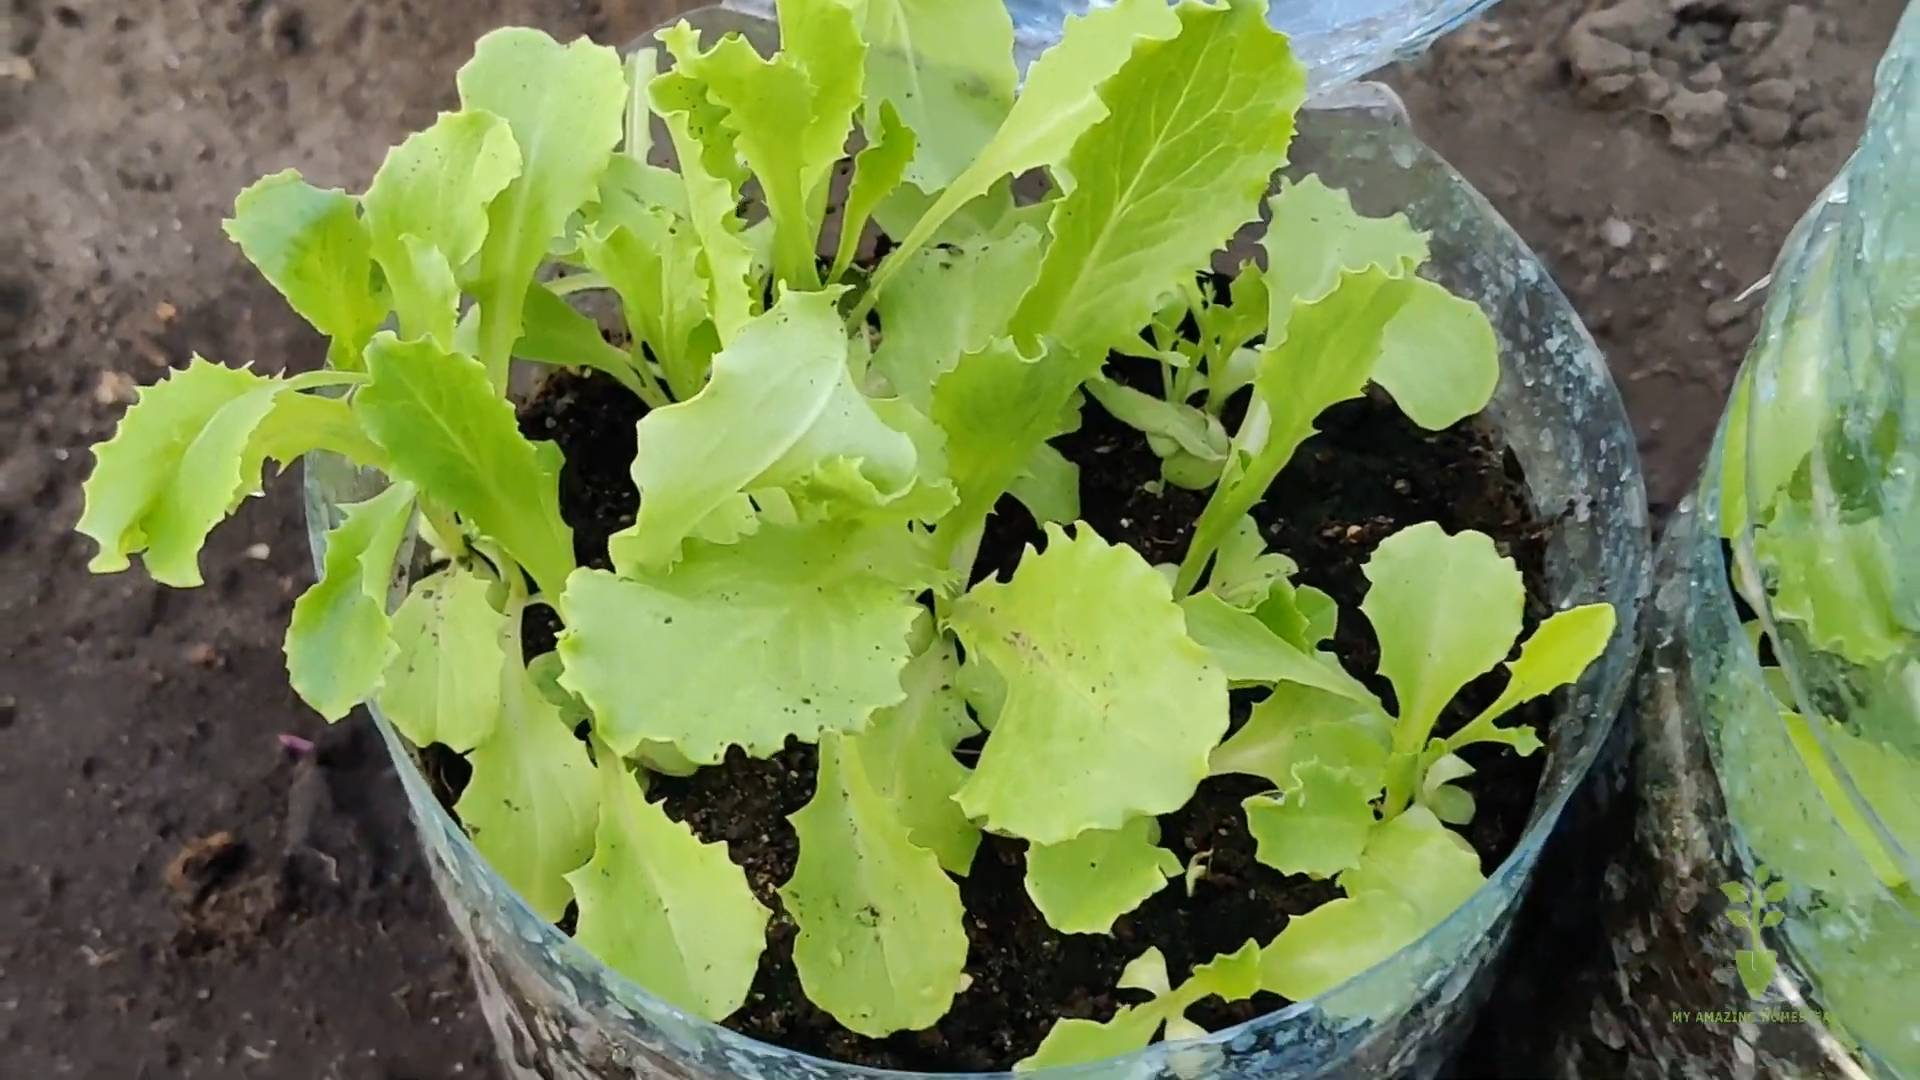
So there you have it – a simple, yet incredibly rewarding method for growing your own crisp, delicious lettuce, even if you’re severely limited on space. This grow lettuce small spaces technique isn’t just about saving money on grocery bills; it’s about connecting with nature, experiencing the satisfaction of nurturing life from seed to plate, and enjoying the unparalleled freshness of homegrown produce. The ease of setup, minimal maintenance, and rapid growth make this DIY project perfect for beginners and seasoned gardeners alike. You’ll be amazed at how quickly you can transform a small balcony, windowsill, or even a sunny corner of your kitchen into a thriving little lettuce farm.
Beyond the basic method outlined, the possibilities for customization are endless. Experiment with different lettuce varieties – from butterhead to romaine to red leaf – to discover your favorites. Consider using different containers; repurposed plastic bottles, terracotta pots, or even stacked trays can all work wonderfully. For even faster growth, explore using grow lights, especially during shorter winter days. Adding a layer of vermiculite or perlite to your soil mix can improve drainage and aeration, leading to healthier plants. And don’t be afraid to get creative with your setup! Vertical gardening systems, hanging planters, or even a simple tiered shelf can maximize your space and add a touch of aesthetic appeal to your mini-garden.
We strongly encourage you to try this grow lettuce small spaces method and experience the joy of harvesting your own fresh lettuce. It’s a rewarding project that connects you to the food you eat, reduces your environmental impact, and provides a constant supply of delicious, healthy greens. Share your experiences with us! Post pictures of your thriving lettuce patches on social media using #GrowLettuceSmallSpaces and tag us – we’d love to see your success stories and learn from your innovative approaches. Let’s build a community of urban gardeners, sharing tips and tricks to make growing our own food accessible to everyone, regardless of space limitations.
This simple technique empowers you to take control of your food source, ensuring you always have access to fresh, healthy lettuce. It’s a sustainable choice that benefits both you and the planet. So, what are you waiting for? Grab some seeds, find a sunny spot, and start growing!
Frequently Asked Questions
What type of lettuce is best for small space growing?
Many lettuce varieties thrive in containers. Loose-leaf lettuces, like red leaf or green leaf, are excellent choices because they don’t require as much space as head lettuces like romaine or butterhead. However, with careful planning and the right container size, you can successfully grow almost any type of lettuce in a small space.
How much sunlight does lettuce need?
Lettuce generally needs at least six hours of sunlight per day to grow well. However, some varieties tolerate partial shade, especially during the hottest parts of the day. If you’re growing lettuce indoors, a grow light can supplement natural sunlight, ensuring your plants receive adequate illumination.
How often should I water my lettuce?
The frequency of watering depends on several factors, including the type of container, the climate, and the soil type. As a general rule, keep the soil consistently moist but not waterlogged. Check the soil moisture regularly by sticking your finger a couple of inches into the soil. Water when the top inch feels dry. Overwatering can lead to root rot, while underwatering can stunt growth.
What kind of soil is best for growing lettuce?
Lettuce prefers well-draining, fertile soil. A good quality potting mix is ideal for container gardening. You can also amend your soil with compost or other organic matter to improve its fertility and water retention. Avoid using heavy clay soils, as they can retain too much water and lead to root problems.
Can I grow lettuce indoors year-round?
Yes, absolutely! With the help of grow lights, you can successfully grow lettuce indoors year-round, regardless of the weather outside. This allows you to enjoy fresh, homegrown lettuce even during the colder months.
What are the common problems when growing lettuce in small spaces?
Some common problems include pests (like aphids or slugs), diseases (like downy mildew), and nutrient deficiencies. Regularly inspect your plants for signs of pests or diseases and take appropriate action if necessary. Using a balanced fertilizer can help prevent nutrient deficiencies.
How long does it take to harvest lettuce?
The time it takes to harvest lettuce depends on the variety and growing conditions. Generally, loose-leaf lettuces are ready for harvest in about 4-6 weeks, while head lettuces may take 8-10 weeks. You can start harvesting outer leaves from loose-leaf varieties earlier, allowing the inner leaves to continue growing.
What should I do with my harvested lettuce?
Enjoy it immediately in salads, sandwiches, or as a side dish! You can also store harvested lettuce in the refrigerator for a few days in a plastic bag or container lined with paper towels to absorb excess moisture. For longer storage, consider freezing your lettuce.

Leave a Comment