
Fresh Parsley Kitchen Setup: Imagine stepping into your kitchen and snipping vibrant, fragrant parsley straight from your own little garden. No more wilted bunches from the grocery store! For centuries, growing herbs indoors has been a cherished tradition, connecting us to nature even within the confines of our homes. From ancient Roman window boxes overflowing with rosemary to medieval monastery gardens providing medicinal herbs, the practice of bringing the outdoors in has deep roots.
But let’s be honest, sometimes the idea of a thriving indoor herb garden feels more like a Pinterest dream than a reality. That’s where this DIY guide comes in! I’m going to share some simple, effective tricks to help you create your own successful fresh parsley kitchen setup. Whether you’re a seasoned gardener or a complete beginner, these tips will empower you to cultivate a flourishing parsley patch right on your windowsill.
Why parsley? Well, besides being a culinary staple, adding a pop of green to your kitchen, and being incredibly easy to grow, fresh parsley is packed with vitamins and antioxidants. Plus, having it readily available encourages you to use it more often, adding a burst of flavor and nutrition to your meals. So, let’s ditch the store-bought parsley and embark on this exciting journey to create your own thriving kitchen garden!
Grow Your Own Fresh Parsley Oasis in Your Kitchen!
Hey there, fellow foodies and green thumbs! Are you tired of buying those sad, wilted bunches of parsley from the grocery store? Do you dream of snipping fresh, vibrant parsley right from your kitchen whenever you need it? Well, dream no more! I’m going to show you how to create your very own indoor parsley garden, bringing a touch of freshness and flavor to your cooking all year round. It’s easier than you think, and trust me, the satisfaction of using homegrown herbs is totally worth it.
What You’ll Need: Your Parsley-Growing Arsenal
Before we dive in, let’s gather our supplies. Don’t worry, you probably have a lot of this stuff already!
* Parsley Seeds or Seedlings: You can start from seeds (more rewarding, but takes longer) or buy small parsley seedlings from your local garden center (instant gratification!). I personally prefer starting from seeds, it feels more like a true DIY project.
* A Pot with Drainage: Choose a pot that’s at least 6 inches deep and wide. Parsley needs room for its roots to grow. Make sure it has drainage holes at the bottom to prevent waterlogging.
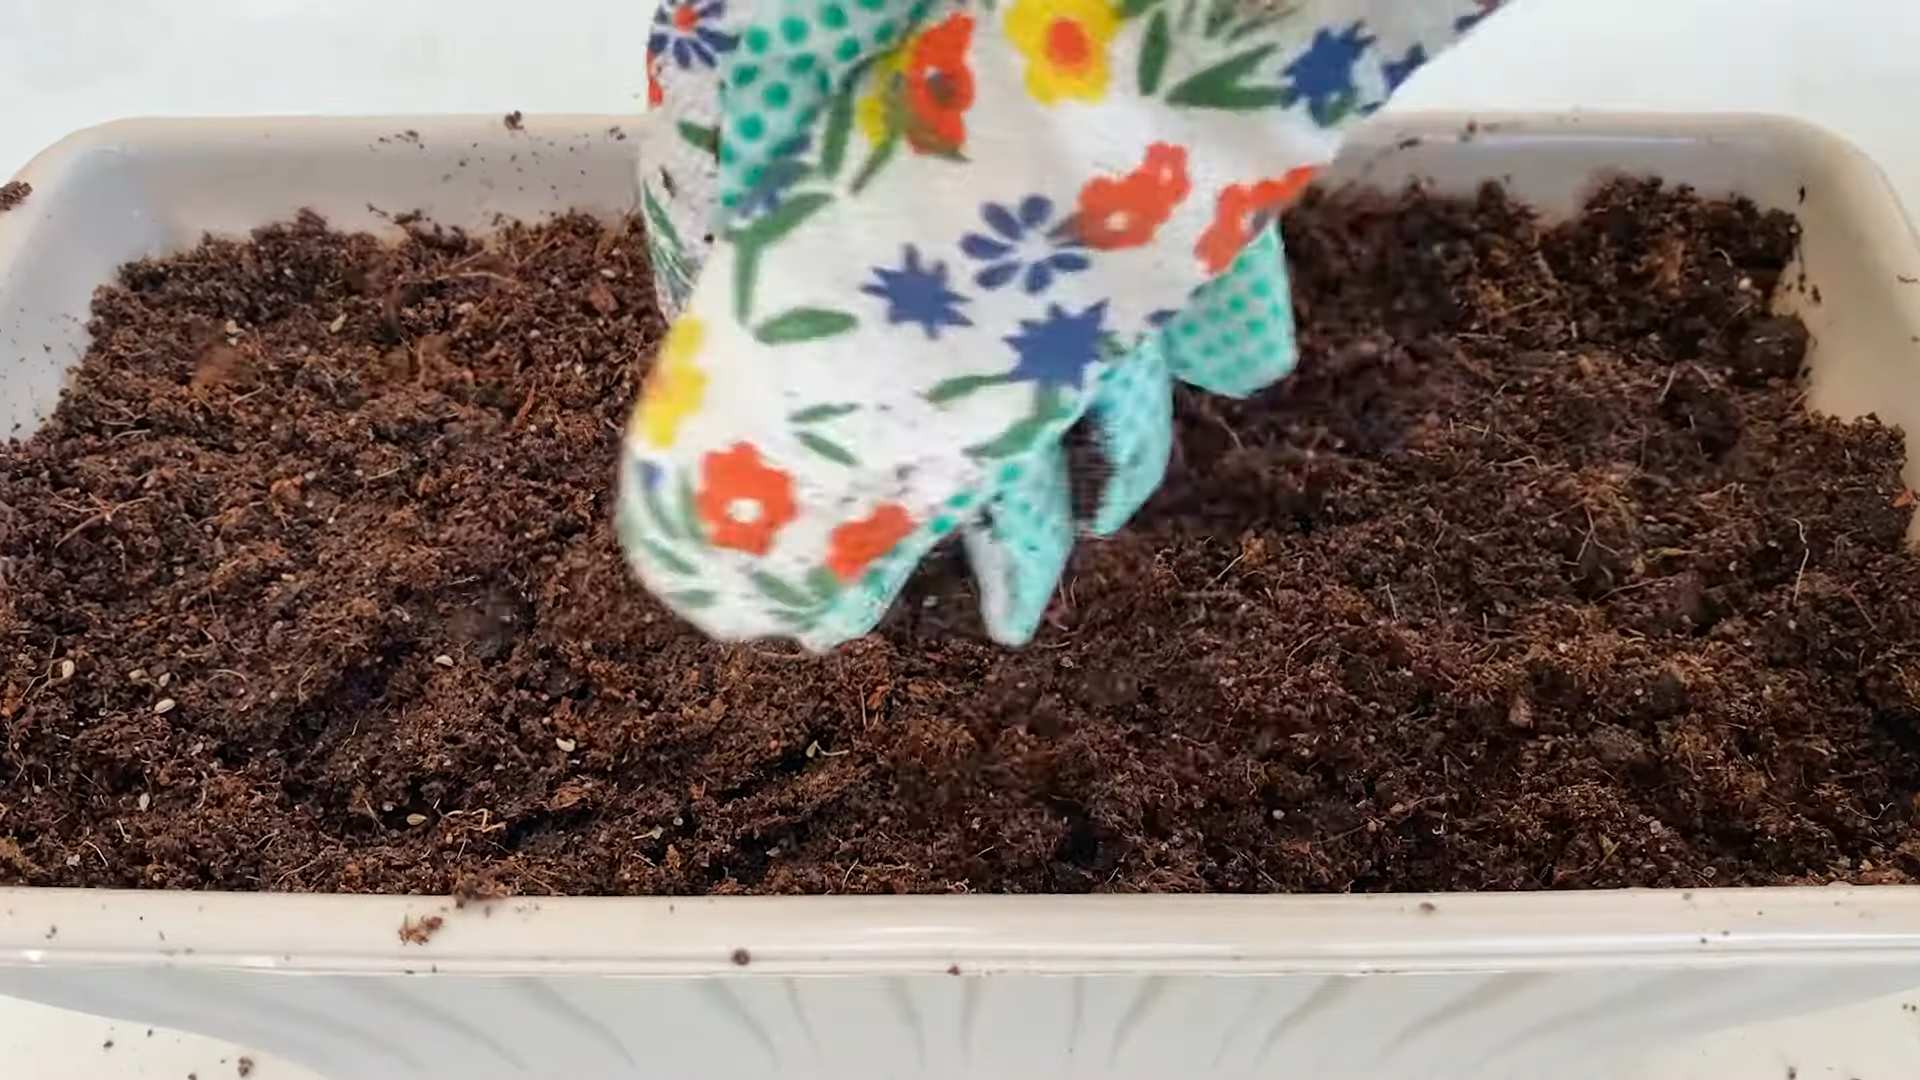
* High-Quality Potting Mix: Don’t skimp on the soil! Use a well-draining potting mix specifically formulated for containers. Avoid using garden soil, as it can compact and hinder drainage.
* A Sunny Spot: Parsley loves sunshine! Aim for a location that gets at least 6 hours of direct sunlight per day. A south-facing windowsill is ideal. If you don’t have enough natural light, consider using a grow light.
* Watering Can or Spray Bottle: For gentle watering.
* Optional: Seed Starting Tray and Dome: If you’re starting from seeds, these will help create a humid environment for germination.
* Optional: Plant Food (Liquid Fertilizer): To give your parsley a boost once it’s established.
* Small Gardening Trowel or Spoon: For handling soil and seedlings.
Getting Started: Planting Your Parsley Seeds or Seedlings
Okay, let’s get our hands dirty! This is the fun part.
Starting from Seeds: The Patient Gardener’s Approach
1. Prepare the Seed Starting Tray (Optional): If you’re using a seed starting tray, fill each cell with moist potting mix. Gently press the soil down to remove air pockets.
2. Sow the Seeds: Sprinkle 2-3 parsley seeds into each cell (or directly into your pot if you’re skipping the tray). Cover the seeds with a thin layer (about ¼ inch) of potting mix.
3. Water Gently: Use a spray bottle to mist the soil thoroughly. You want it to be moist but not soggy.
4. Cover with a Dome (Optional): Place the dome over the seed starting tray to create a humid environment. This will help the seeds germinate faster.
5. Find a Warm Spot: Place the tray in a warm location (around 70-75°F). A heat mat can be helpful if your home is cool.
6. Be Patient: Parsley seeds can take up to 3 weeks to germinate, so don’t get discouraged if you don’t see sprouts right away. Keep the soil consistently moist.
7. Thin the Seedlings (If Necessary): Once the seedlings have emerged and have a few sets of true leaves, thin them out so that only one strong seedling remains in each cell.
8. Transplant to the Pot: Once the seedlings are a few inches tall, carefully transplant them into your prepared pot. Dig a small hole, gently remove the seedling from the tray, and place it in the hole. Backfill with potting mix and water gently.
Planting Seedlings: The Quick and Easy Method
1. Prepare the Pot: Fill your pot with potting mix, leaving about an inch of space at the top.
2. Create a Hole: Dig a hole in the center of the pot that’s large enough to accommodate the root ball of the seedling.
3. Remove the Seedling: Gently remove the parsley seedling from its container. You may need to squeeze the sides of the container to loosen the roots.
4. Place the Seedling: Place the seedling in the hole, making sure the top of the root ball is level with the surrounding soil.
5. Backfill and Water: Backfill the hole with potting mix and gently press down to secure the seedling. Water thoroughly.
Caring for Your Parsley: Keeping it Happy and Healthy
Now that your parsley is planted, it’s time to nurture it and watch it thrive!
1. Watering: Parsley likes consistently moist soil, but it doesn’t like to be waterlogged. Water when the top inch of soil feels dry to the touch. Avoid overwatering, as this can lead to root rot. I usually check the soil moisture every other day.
2. Sunlight: As mentioned earlier, parsley needs at least 6 hours of direct sunlight per day. If you don’t have enough natural light, supplement with a grow light.
3. Fertilizing (Optional): If you want to give your parsley a boost, you can fertilize it every few weeks with a diluted liquid fertilizer. Follow the instructions on the fertilizer label. I usually use a balanced fertilizer diluted to half strength.
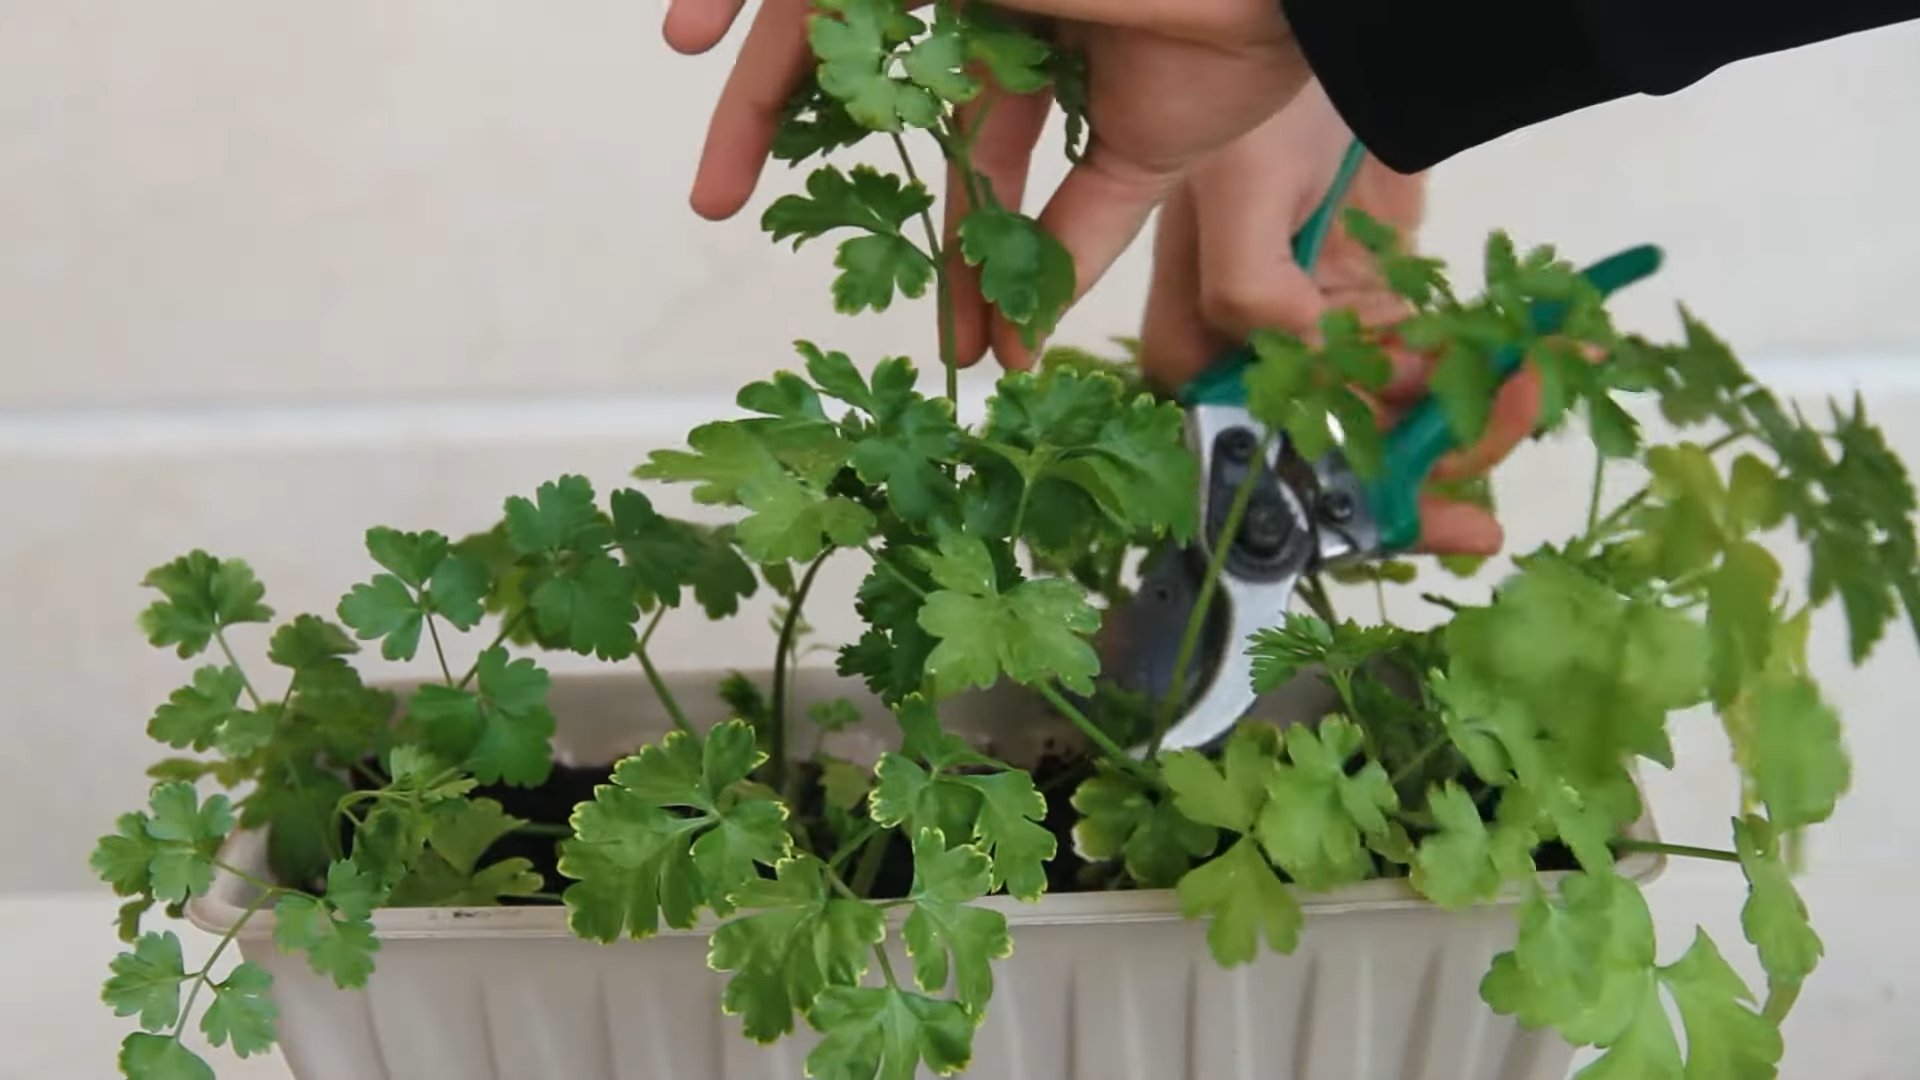
4. Pruning: Regular pruning is essential for keeping your parsley plant healthy and productive. Snip off the outer leaves as needed, leaving the inner leaves to continue growing. This will encourage the plant to produce more leaves.
5. Pest Control: Keep an eye out for pests like aphids or spider mites. If you spot any, you can try washing them off with a strong stream of water or using an insecticidal soap.
6. Overwintering: Parsley is a biennial plant, meaning it typically lives for two years. In colder climates, you may need to bring your parsley plant indoors during the winter months to protect it from frost.
Harvesting Your Parsley: The Best Part!
Finally, the moment you’ve been waiting for – harvesting your fresh, homegrown parsley!
1. When to Harvest: You can start harvesting parsley once the plant has several sets of leaves and is at least 6 inches tall.
2. How to Harvest: Use scissors or pruning shears to snip off the outer leaves near the base of the plant. Avoid cutting off the entire plant, as this will prevent it from growing back.
3. Harvest Regularly: The more you harvest, the more your parsley plant will produce. So don’t be shy!
4. Storing Parsley: Freshly harvested parsley is best used immediately. However, you can store it in the refrigerator for a few days. Wrap the parsley in a damp paper towel and place it in a plastic bag. You can also freeze parsley for longer storage. Chop the parsley and place it in ice cube trays with water or olive oil. Once frozen, transfer the cubes to a freezer bag.
Troubleshooting: Common Parsley Problems and Solutions
Even with the best care, you might encounter a few challenges along the way. Here are some common problems and how to fix them:
* Yellowing Leaves: This could be a sign of overwatering, underwatering, or nutrient deficiency. Check the soil moisture and adjust your watering accordingly. If the soil is dry, water more frequently. If the soil is soggy, allow it to dry out before watering again. You can also try fertilizing your parsley with a balanced fertilizer.
* Leggy Growth: This is usually caused by insufficient sunlight. Move your parsley plant to a sunnier location or supplement with a grow light.
* Slow Growth: This could be due to a variety of factors, including poor soil, insufficient sunlight, or lack of nutrients. Make sure you’re using a high-quality potting mix, providing adequate sunlight, and fertilizing your parsley regularly.
* Pests: As mentioned earlier, keep an eye out for pests like aphids or spider mites. Wash them off with water or use an insecticidal soap.
Enjoy Your Fresh Parsley!
And there you have it! You’ve successfully created your own indoor parsley garden. Now you can enjoy the delicious flavor and aroma of fresh parsley in all your favorite dishes. Imagine adding it to your pasta sauces, soups, salads, and more! It’s a simple way to elevate your cooking and bring a touch of nature into your home. Happy gardening!
Conclusion
So, there you have it! Transforming your kitchen into a haven of fresh, vibrant flavor is easier than you might think. This simple DIY trick for keeping your fresh parsley perky and ready to use is a game-changer, especially if you’re tired of throwing away wilted herbs. It’s not just about saving money (though that’s a definite perk!), it’s about elevating your cooking experience and ensuring you always have the best ingredients at your fingertips.
Think about it: no more last-minute grocery store runs for a sprig of parsley. No more settling for dried herbs when you crave that bright, herbaceous punch. This method empowers you to have fresh parsley available whenever inspiration strikes, whether you’re whipping up a batch of chimichurri, garnishing a creamy pasta dish, or adding a final flourish to a hearty soup.
But the beauty of this DIY trick lies in its adaptability. While we’ve focused on parsley, the same principle applies to other delicate herbs like cilantro, dill, and even chives. Experiment with different storage containers – perhaps a tall mason jar or a repurposed glass vase. You could even try adding a small piece of charcoal to the water to help absorb any impurities and further extend the parsley’s lifespan.
Consider the environment in your refrigerator, too. Some refrigerators have crisper drawers with humidity controls. Adjusting these settings can significantly impact how long your herbs stay fresh. If your refrigerator tends to be dry, you might want to loosely cover the parsley with a plastic bag after placing it in water to help retain moisture.
Don’t be afraid to get creative! Maybe you’ll discover a unique variation that works even better for you. The key is to find a system that fits your lifestyle and kitchen setup.
We wholeheartedly encourage you to give this DIY trick a try. It’s a small investment of time that yields significant rewards in terms of flavor, convenience, and reduced food waste. Once you experience the joy of always having fresh parsley on hand, you’ll wonder how you ever lived without it.
And most importantly, we want to hear about your experience! Did you try this method? Did you discover any helpful variations? Share your tips, tricks, and photos in the comments below. Let’s build a community of parsley-loving cooks who are passionate about maximizing freshness and minimizing waste. Your insights could help others discover the magic of this simple yet effective DIY trick. Let us know how this fresh parsley kitchen setup works for you!
Frequently Asked Questions (FAQ)
Why does this DIY trick work better than just storing parsley in the refrigerator?
Storing parsley directly in the refrigerator, even in the crisper drawer, often leads to wilting and spoilage due to dehydration. The cold, dry air of the refrigerator draws moisture out of the parsley leaves, causing them to become limp and lifeless. This DIY trick combats dehydration by providing the parsley with a constant source of moisture through the water in the container. The water acts as a reservoir, replenishing the moisture lost to the surrounding environment and keeping the parsley hydrated and vibrant for a longer period. Think of it like giving your parsley a little drink whenever it needs it. Furthermore, standing the parsley upright in water mimics its natural growing environment, helping to maintain its structure and prevent it from becoming crushed or bruised.
How long will parsley stay fresh using this method?
Typically, parsley stored using this DIY trick can stay fresh for up to two weeks, and sometimes even longer, depending on the initial freshness of the parsley and the conditions in your refrigerator. However, it’s essential to monitor the parsley regularly and change the water every few days. Look for signs of wilting, yellowing, or browning, which indicate that the parsley is starting to deteriorate. If you notice any of these signs, it’s best to discard the parsley. Factors like the temperature of your refrigerator and the humidity levels can also affect the parsley’s lifespan. Keeping your refrigerator at a consistent temperature and maintaining adequate humidity can help extend the freshness of your herbs.
What kind of container is best for storing parsley?
The best container for storing parsley is one that is tall enough to accommodate the stems without bending them and wide enough to allow for good air circulation. A glass jar, a mason jar, or even a repurposed vase works well. The container should also be clean and free of any residue that could contaminate the parsley. Avoid using containers that are too small, as this can restrict airflow and cause the parsley to become overcrowded, leading to faster spoilage. Clear containers are ideal because they allow you to easily monitor the water level and the condition of the parsley. If you’re using an opaque container, be sure to check the water level regularly to ensure that the stems are always submerged.
Is it necessary to trim the stems of the parsley before storing it?
Yes, trimming the stems of the parsley before storing it is highly recommended. Trimming the stems helps to remove any damaged or decaying portions, which can contaminate the water and accelerate the spoilage process. Use a sharp knife or kitchen shears to trim the stems at a slight angle, which helps to increase the surface area for water absorption. Removing any leaves that will be submerged in the water is also crucial, as these leaves will quickly rot and foul the water. By trimming the stems and removing submerged leaves, you’ll create a cleaner and more hygienic environment for your parsley, which will help to extend its freshness.
Can I use this method for other herbs besides parsley?
Absolutely! This DIY trick works well for a variety of delicate herbs, including cilantro, dill, mint, and chives. The key is to choose herbs that have similar storage requirements and to adjust the storage conditions accordingly. For example, herbs with thicker stems, like rosemary or thyme, may not benefit as much from this method, as they are less prone to dehydration. When storing multiple types of herbs together, be sure to separate them to prevent cross-contamination and to ensure that each herb receives adequate airflow. Experiment with different herbs and storage containers to find the combination that works best for you.
What if my parsley still wilts even when stored in water?
If your parsley is still wilting despite being stored in water, there are a few potential reasons. First, the parsley may have already been past its prime when you purchased it. Look for parsley that is vibrant green and has firm, upright stems. Avoid parsley that is wilted, yellowed, or has brown spots. Second, the water in the container may be contaminated. Be sure to change the water every few days and to clean the container thoroughly to prevent the growth of bacteria or mold. Third, the temperature in your refrigerator may be too warm. Ensure that your refrigerator is set to the correct temperature (around 35-40°F or 2-4°C) to help slow down the spoilage process. Finally, consider the humidity levels in your refrigerator. If your refrigerator is too dry, try loosely covering the parsley with a plastic bag to help retain moisture.
Can I freeze parsley to preserve it for longer?
Yes, freezing parsley is a great way to preserve it for longer periods. However, freezing can alter the texture of the parsley, making it less suitable for garnishing or using fresh. To freeze parsley, wash it thoroughly and pat it dry. Then, chop the parsley into small pieces and place it in an airtight container or freezer bag. You can also freeze parsley in ice cube trays by filling each cube with chopped parsley and water or olive oil. Once frozen, transfer the parsley cubes to a freezer bag for longer storage. Frozen parsley is best used in cooked dishes, such as soups, stews, and sauces, where the texture is less noticeable.
Does the type of water I use matter?
While tap water is generally fine, using filtered water can help extend the freshness of your parsley. Filtered water is free of chlorine and other impurities that can accelerate spoilage. If you have hard water, using filtered water is especially beneficial, as the minerals in hard water can also contribute to the deterioration of the parsley. You can also use distilled water, but it’s not necessary unless you have particularly poor water quality. The most important thing is to ensure that the water is clean and fresh.


Leave a Comment