
Gourd Bag Growing Beginners, listen up! Have you ever dreamt of harvesting your own unique, handcrafted gourd bags, but felt intimidated by the process? I get it! The world of gourd cultivation can seem daunting, especially when you’re just starting out. But fear not, because this DIY guide is your secret weapon to unlocking the magic of growing your own gourd bags, even if you have zero experience.
For centuries, gourds have been more than just plants; they’ve been integral to various cultures, serving as everything from water containers and musical instruments to art canvases and, yes, even bags! Think of the intricate designs adorning ancient gourd vessels – a testament to human ingenuity and our deep connection with nature. Today, we’re reviving this tradition with a modern twist, focusing on creating beautiful and functional gourd bags.
Why should you embark on this gourd-growing adventure? Because in a world of mass-produced items, creating something with your own hands is incredibly rewarding. Imagine the satisfaction of carrying a unique bag you nurtured from seed to finished product! Plus, gourd bag growing beginners will find this project surprisingly therapeutic and a fantastic way to connect with nature. This guide will break down the entire process into easy-to-follow steps, ensuring your success from seed selection to curing and crafting. So, let’s get our hands dirty and transform those tiny seeds into stunning gourd bags!
Growing Your Own Gourd Bag: A Beginner’s Guide
Okay, so you want to grow your own gourd bag? Awesome! It’s a super rewarding project, and you end up with a unique, handcrafted item. I’m going to walk you through everything you need to know, from seed to finished bag. Don’t worry if you’ve never grown anything before; I’ll keep it simple and straightforward.
Choosing Your Gourd Variety
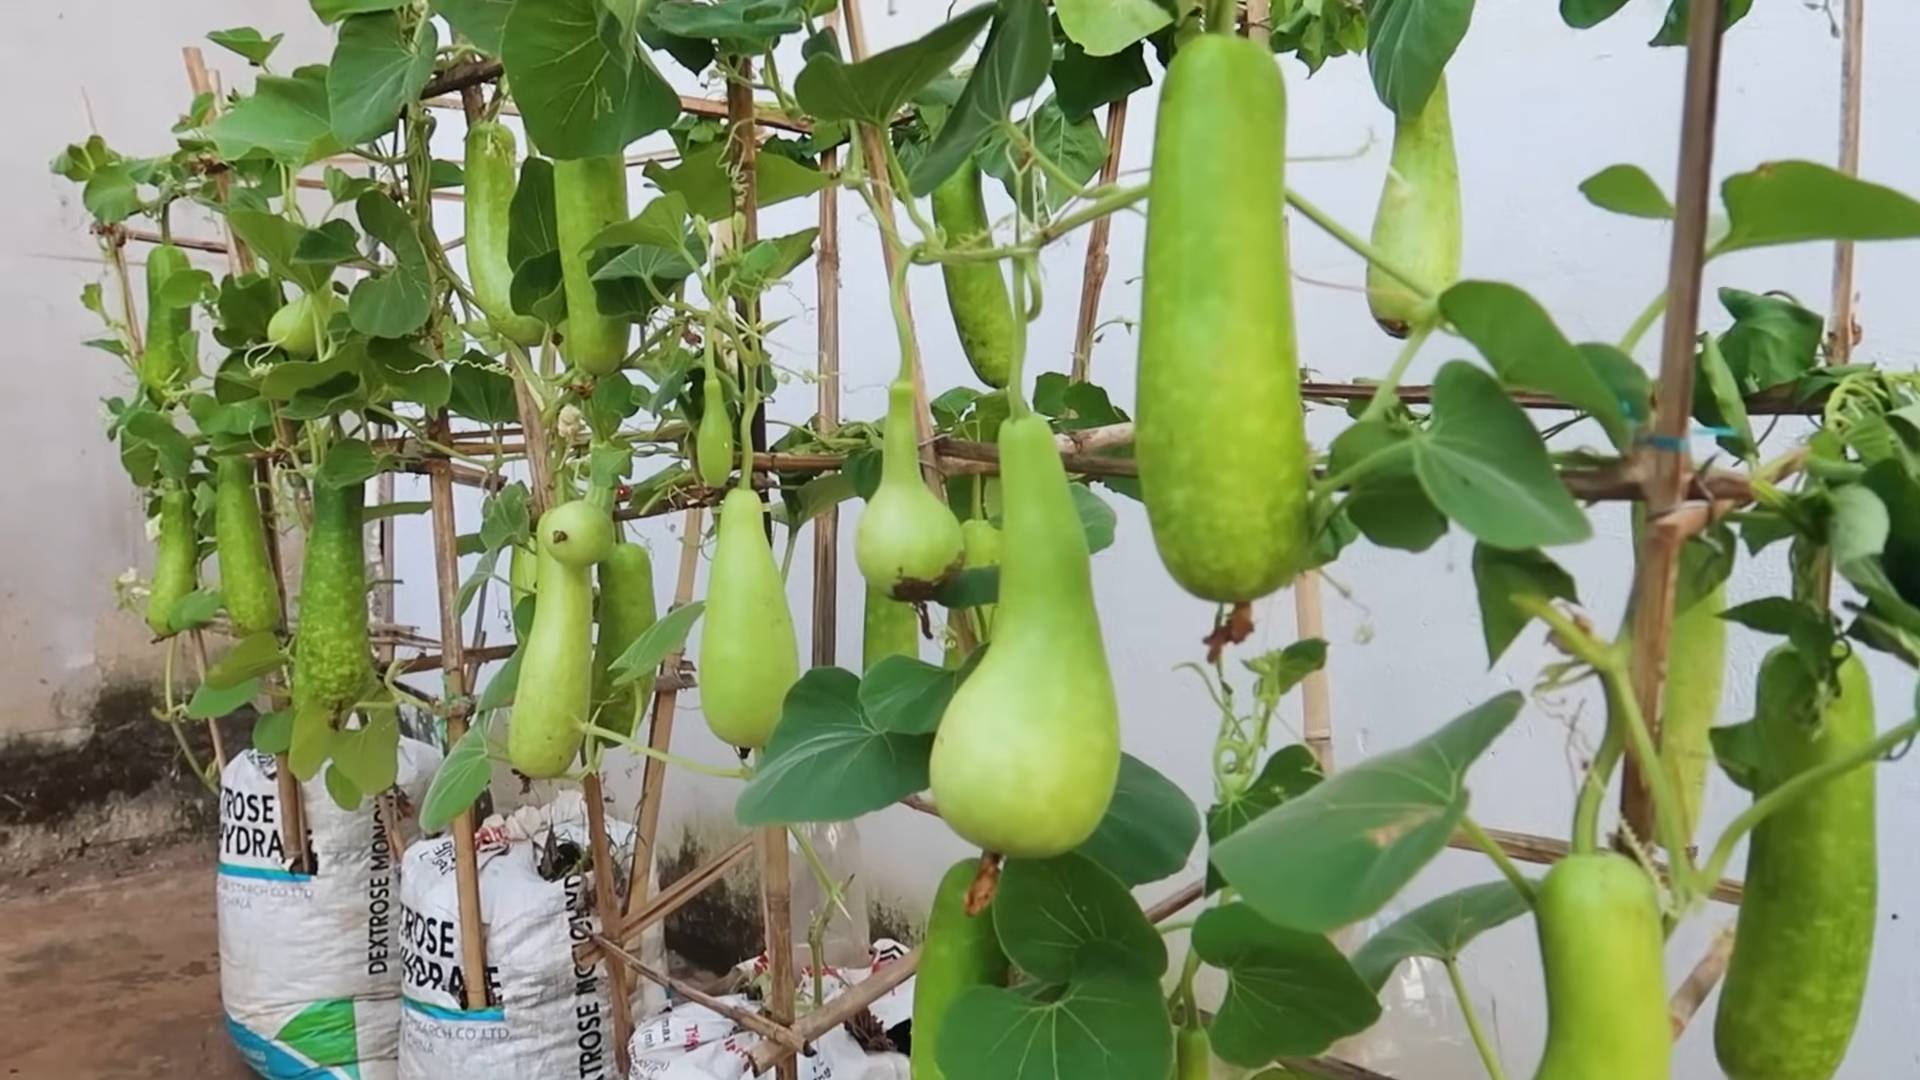
First things first, you need to pick the right gourd! Not all gourds are created equal when it comes to bag-making. You’ll want a hard-shelled gourd that’s large enough to create a decent-sized bag. Here are a few good options:
* Bottle Gourds (Lagenaria siceraria): These are probably the most popular choice. They come in various shapes and sizes, from long and slender to round and bulbous. Look for varieties specifically labeled for crafting or bag-making.
* Kettle Gourds: These are rounder and wider than bottle gourds, making them great for larger bags.
* Bushel Gourds: These are HUGE! Only choose these if you’re planning on making a really big bag.
Important Tip: Make sure the variety you choose is suitable for your climate. Check the seed packet or online descriptions for information on growing zones and days to maturity.
Getting Started: Planting Your Gourd Seeds
Okay, let’s get those seeds in the ground! Gourds need a long growing season, so you’ll want to start them indoors a few weeks before the last expected frost.
1. Soaking the Seeds: Before planting, soak your gourd seeds in warm water for 24-48 hours. This helps soften the hard outer shell and encourages germination. I usually put them in a small bowl on the windowsill.
2. Preparing Your Seed Starting Mix: Use a good quality seed starting mix. Don’t use garden soil; it’s too heavy and can compact, preventing the seedlings from emerging.
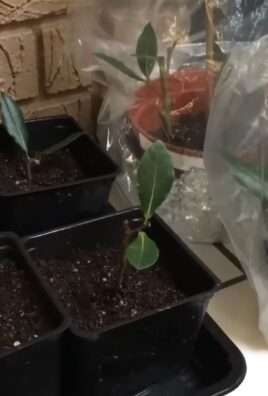
3. Planting the Seeds: Fill small pots (about 3-4 inches in diameter) with the seed starting mix. Plant one or two seeds per pot, about ½ inch deep.
4. Watering: Gently water the soil until it’s moist but not soggy.
5. Providing Warmth and Light: Gourds need warmth to germinate. A heat mat can be helpful, but a warm spot in your house will also work. They also need plenty of light. Place the pots under grow lights or in a sunny window.
6. Waiting for Germination: Be patient! Gourd seeds can take anywhere from 7 to 21 days to germinate, depending on the variety and conditions. Keep the soil consistently moist but not waterlogged.
Transplanting Your Gourd Seedlings
Once your seedlings have developed a few sets of true leaves (the leaves that look like miniature versions of the adult plant’s leaves), it’s time to transplant them outdoors.
1. Hardening Off: Before transplanting, you need to “harden off” your seedlings. This means gradually acclimating them to outdoor conditions. Start by placing them outside in a sheltered spot for an hour or two each day, gradually increasing the amount of time they spend outdoors over the course of a week.
2. Choosing a Location: Gourds need full sun (at least 6-8 hours of direct sunlight per day) and well-drained soil. They also need plenty of space to grow, as the vines can get quite long.
3. Preparing the Soil: Amend the soil with compost or well-rotted manure to improve drainage and fertility.
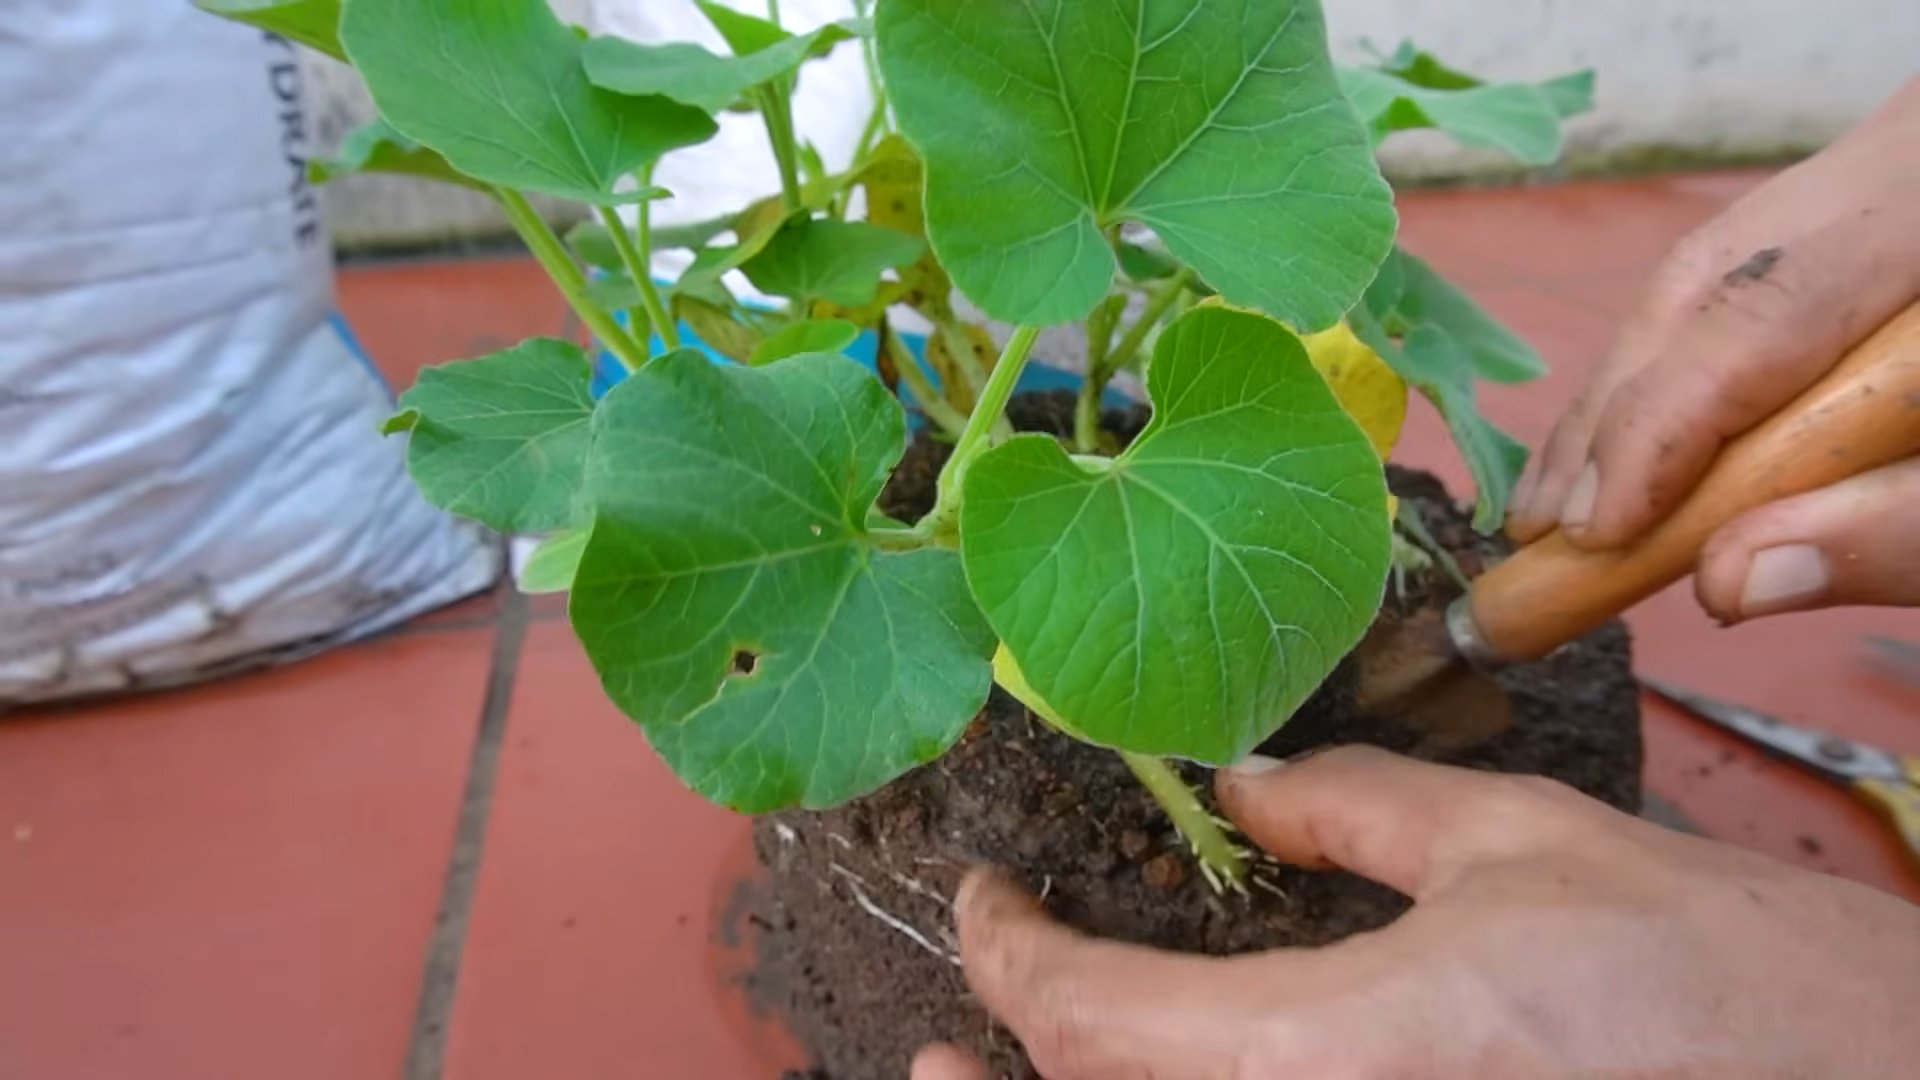
4. Transplanting: Dig a hole that’s slightly larger than the root ball of the seedling. Gently remove the seedling from the pot and place it in the hole. Backfill with soil and water thoroughly. Space the plants at least 3-4 feet apart.
5. Providing Support: Gourd vines need support to climb. You can use a trellis, fence, or even a sturdy tree branch. I’ve had success with building a simple A-frame trellis out of wood.
Caring for Your Growing Gourds
Now that your gourds are planted, it’s time to keep them happy and healthy!
1. Watering: Water deeply and regularly, especially during dry spells. Gourds need consistent moisture to thrive.
2. Fertilizing: Fertilize your gourd plants every few weeks with a balanced fertilizer. Follow the instructions on the fertilizer package.
3. Weeding: Keep the area around your gourd plants free of weeds. Weeds compete with the gourds for water and nutrients.
4. Pest Control: Keep an eye out for pests like squash bugs and vine borers. Hand-picking pests is often the most effective method of control. You can also use insecticidal soap or other organic pest control methods.
5. Pollination: Gourds have separate male and female flowers. The female flowers need to be pollinated in order to produce fruit. If you’re not seeing many gourds developing, you may need to hand-pollinate the flowers. To do this, use a small paintbrush to transfer pollen from the male flowers to the female flowers.
Harvesting Your Gourds
The moment you’ve been waiting for! Knowing when to harvest your gourds is crucial for ensuring they’ll cure properly.
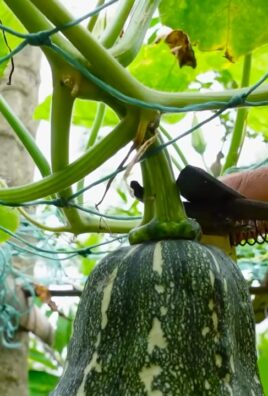
1. Timing: Harvest your gourds in the fall, after the vines have died back and the gourds have turned a hard, tan color. The stem connecting the gourd to the vine should be dry and brown.
2. Testing for Maturity: Give the gourd a gentle tap. If it sounds hollow, it’s ready to harvest.
3. Harvesting: Use pruning shears or a sharp knife to cut the gourd from the vine, leaving a few inches of stem attached.
4. Handling: Handle the gourds carefully to avoid bruising or damaging the skin.
Curing Your Gourds
Curing is essential for preserving your gourds and preventing them from rotting. This process can take several weeks or even months.
1. Cleaning: Gently wash the gourds with soapy water to remove any dirt or debris.
2. Drying: Place the gourds in a well-ventilated area, such as a garage or shed. They should be elevated off the ground to allow air to circulate around them. I use old pallets for this.
3. Monitoring: Check the gourds regularly for signs of rot or mold. If you see any, remove the affected gourd immediately to prevent it from spreading to the others.
4. Patience: Curing can take several weeks or even months, depending on the size and thickness of the gourd. The gourds are fully cured when they are lightweight and the seeds rattle inside.
Making Your Gourd Bag
Alright, the fun part! Now that your gourd is cured, you can finally turn it into a beautiful bag.
1. Planning Your Design: Before you start cutting, take some time to plan your design. Think about the shape and size of the opening, the placement of the handle, and any decorative elements you want to add.
2. Cutting the Opening: Use a saw (a jigsaw or coping saw works well) to cut the opening for your bag. Be careful not to cut too deep or you’ll weaken the structure of the gourd. I usually start with a small pilot hole and then gradually enlarge it.
3. Removing the Pulp and Seeds: Once you’ve cut the opening, use a spoon or scraper to remove the pulp and seeds from inside the gourd. This can be a messy process, so be sure to wear gloves and work in a well-ventilated area.
4. Cleaning the Interior: Thoroughly clean the inside of the gourd with soapy water and a scrub brush. Rinse well and allow it to dry completely.
5. Sanding: Sand the exterior of the gourd to smooth out any rough spots or imperfections. Use a fine-grit sandpaper for the best results.
6. Adding a Handle: There are many different ways to add a handle to your gourd bag. You can use rope, leather, wood, or even metal. Attach the handle securely using glue, screws, or rivets. I like using leather straps for a rustic look.
7. Decorating: Now it’s time to get creative! You can decorate your gourd bag with paint, wood burning, carving, beads, or any other materials you like. Let your imagination run wild!
8. Sealing (Optional): If you want to protect your gourd bag from moisture and wear, you can seal it with a clear coat of varnish or polyurethane.
Tips and Tricks for Success
Here are a few extra tips to help you grow and craft the perfect gourd bag:
* Start with good quality seeds. Buy your seeds from a reputable source.
* Provide plenty of water and nutrients. Gourds are heavy feeders and need consistent
Conclusion
So, there you have it! Transforming ordinary gourds into functional and beautiful bags is not only achievable for beginners but also incredibly rewarding. This DIY gourd bag growing project offers a unique blend of gardening, crafting, and sustainable living, making it a must-try for anyone looking to add a personal touch to their accessories and embrace a more eco-conscious lifestyle.
Why is this a must-try? Because it’s more than just creating a bag; it’s about nurturing a plant from seed to finished product, understanding the natural world, and expressing your creativity in a tangible way. Imagine the satisfaction of carrying a bag you literally grew yourself! It’s a conversation starter, a testament to your resourcefulness, and a beautiful, functional piece of art.
But the fun doesn’t stop there. The beauty of this DIY project lies in its versatility. Feel free to experiment with different gourd varieties to achieve different shapes and sizes. Bottle gourds are ideal for creating classic handbag shapes, while dipper gourds can be transformed into charming shoulder bags. Consider painting your finished gourd bag with vibrant colors, adding intricate carvings, or embellishing it with beads, shells, or leather accents. The possibilities are truly endless. You can even try different curing methods to achieve different finishes, from a smooth, polished surface to a more rustic, textured look.
For a more personalized touch, consider lining the inside of your gourd bag with fabric to protect your belongings and add a pop of color. You can also add pockets or dividers to keep your essentials organized. Experiment with different handle materials, such as rope, leather, or even repurposed belts, to create a unique and comfortable carrying experience.
Don’t be afraid to embrace imperfections. Each gourd is unique, and its natural variations will add character and charm to your finished bag. Remember, the goal is not to create a perfectly symmetrical or flawless product, but to celebrate the beauty of nature and the joy of handmade craftsmanship.
We strongly encourage you to embark on this exciting DIY gourd bag growing adventure. It’s a fantastic way to connect with nature, unleash your creativity, and create a truly one-of-a-kind accessory. And most importantly, don’t forget to share your experiences with us! We’d love to see your creations and hear about your journey. Post photos of your gourd bags on social media using #DIYGourdBag and inspire others to try this amazing project. Let’s create a community of gourd bag enthusiasts and celebrate the beauty of handmade, sustainable living.
Frequently Asked Questions (FAQ)
1. What type of gourds are best for making bags?
The best gourds for making bags are hard-shelled gourds, specifically bottle gourds (Lagenaria siceraria) and dipper gourds. Bottle gourds offer a variety of shapes suitable for handbags, while dipper gourds are excellent for creating shoulder bags or smaller pouches. Avoid ornamental gourds, as they typically have thinner shells and are not as durable. Consider the size and shape you desire for your bag when selecting your gourd variety.
2. How long does it take to grow a gourd large enough for a bag?
The growing time for gourds varies depending on the variety, climate, and growing conditions. Generally, it takes about 100-130 days from planting to harvest. Start seeds indoors 6-8 weeks before the last expected frost. Once the weather warms up and the soil temperature reaches at least 60°F (15°C), transplant the seedlings outdoors. Provide ample sunlight, water, and nutrients for optimal growth. The gourds should be left on the vine until they are fully mature and the stems begin to dry out.
3. What is the curing process, and why is it important?
The curing process is essential for drying and hardening the gourd shell, making it durable and resistant to rot. After harvesting, wash the gourds with soapy water and dry them thoroughly. Place them in a well-ventilated, dry, and dark location, such as a shed or garage. Avoid direct sunlight, as it can cause the gourds to crack. The curing process can take several weeks to several months, depending on the size and thickness of the gourd. You’ll know the gourd is cured when it feels lightweight and the seeds rattle inside.
4. How do I clean the inside of the gourd after it’s cured?
Once the gourd is cured, you’ll need to clean out the pulp and seeds from the inside. Use a saw or knife to carefully cut a hole in the gourd, large enough to insert your hand or tools. Scrape out the pulp and seeds using a spoon, scraper, or wire brush. You can also use a long-handled tool to reach the bottom of the gourd. Once the inside is clean, rinse it with water and allow it to dry completely.
5. What tools do I need to make a gourd bag?
The tools you’ll need for making a gourd bag include:
* A saw or knife for cutting the gourd
* A spoon, scraper, or wire brush for cleaning the inside
* Sandpaper for smoothing the surface
* Drill for making holes for handles or embellishments
* Paint, stain, or varnish for finishing
* Handle materials (rope, leather, etc.)
* Embellishments (beads, shells, etc.)
* Optional: Fabric for lining the inside
6. How do I prevent my gourd bag from cracking?
To prevent your gourd bag from cracking, ensure that the gourd is properly cured before you start working with it. Avoid exposing the cured gourd to extreme temperature changes or direct sunlight. Apply a sealant or varnish to the surface to protect it from moisture and prevent cracking. Handle the gourd bag with care and avoid dropping it or subjecting it to excessive pressure.
7. Can I paint or decorate my gourd bag?
Absolutely! Painting and decorating your gourd bag is a great way to personalize it and add your own unique touch. Use acrylic paints, stains, or varnishes to create different effects. You can also add carvings, beads, shells, or other embellishments to enhance the design. Before painting, sand the surface of the gourd to create a smooth base. Apply multiple coats of paint or varnish for a durable and long-lasting finish.
8. How do I attach handles to my gourd bag?
There are several ways to attach handles to your gourd bag. You can drill holes in the gourd and thread rope, leather, or other handle materials through them. You can also use metal rings or D-rings to attach the handles. Secure the handles with knots, glue, or stitching. Make sure the handles are strong and durable enough to support the weight of the bag and its contents.
9. How do I care for my finished gourd bag?
To care for your finished gourd bag, avoid exposing it to excessive moisture or direct sunlight. Clean it with a soft, damp cloth. If the bag gets wet, allow it to dry completely before storing it. Store the bag in a cool, dry place. With proper care, your gourd bag will last for many years.
10. Is growing a gourd bag project suitable for children?
Growing gourds can be a fun and educational activity for children, but the curing and crafting process requires adult supervision. Children can help with planting the seeds, watering the plants, and decorating the finished bags. However, cutting, drilling, and using sharp tools should be done by adults. This project can teach children about nature, gardening, and creativity, while also promoting sustainable living.
Leave a Comment