
Grow Arugula Indoors? Absolutely! Imagine fresh, peppery arugula gracing your salads and sandwiches, even when the snow is falling outside. No more sad, wilted greens from the grocery store – just vibrant, flavorful arugula harvested right from your windowsill. For centuries, people have cultivated herbs and vegetables indoors, from the ancient Romans with their rudimentary greenhouses to modern apartment dwellers maximizing their small spaces. This isn’t just a trend; it’s a return to a more sustainable and connected way of eating.
But let’s be honest, sometimes indoor gardening feels more like a science experiment gone wrong than a bountiful harvest. That’s where these DIY tricks and hacks come in! I’m going to share my tried-and-true methods for successfully growing arugula indoors, even if you don’t have a green thumb. We’ll cover everything from choosing the right container and soil to providing adequate light and preventing common problems.
Why do you need these tricks? Because fresh arugula elevates any dish, and knowing you grew it yourself? That’s a feeling you can’t buy in a store. Plus, growing your own food is a fantastic way to reduce your carbon footprint and connect with nature, even in the heart of the city. So, let’s get started and learn how to grow arugula indoors like a pro!
Grow Your Own Arugula Indoors: A Spicy Salad Adventure!
Hey there, fellow plant enthusiasts! Ever crave that peppery, zesty bite of fresh arugula but don’t want to brave the grocery store? Or maybe you just want a constant supply of salad greens right at your fingertips? Well, you’re in luck! I’m going to walk you through how to grow your own arugula indoors, and trust me, it’s easier than you think. Get ready for a delicious and rewarding DIY project!
What You’ll Need: The Arugula Arsenal
Before we dive in, let’s gather our supplies. Here’s what you’ll need to create your indoor arugula oasis:
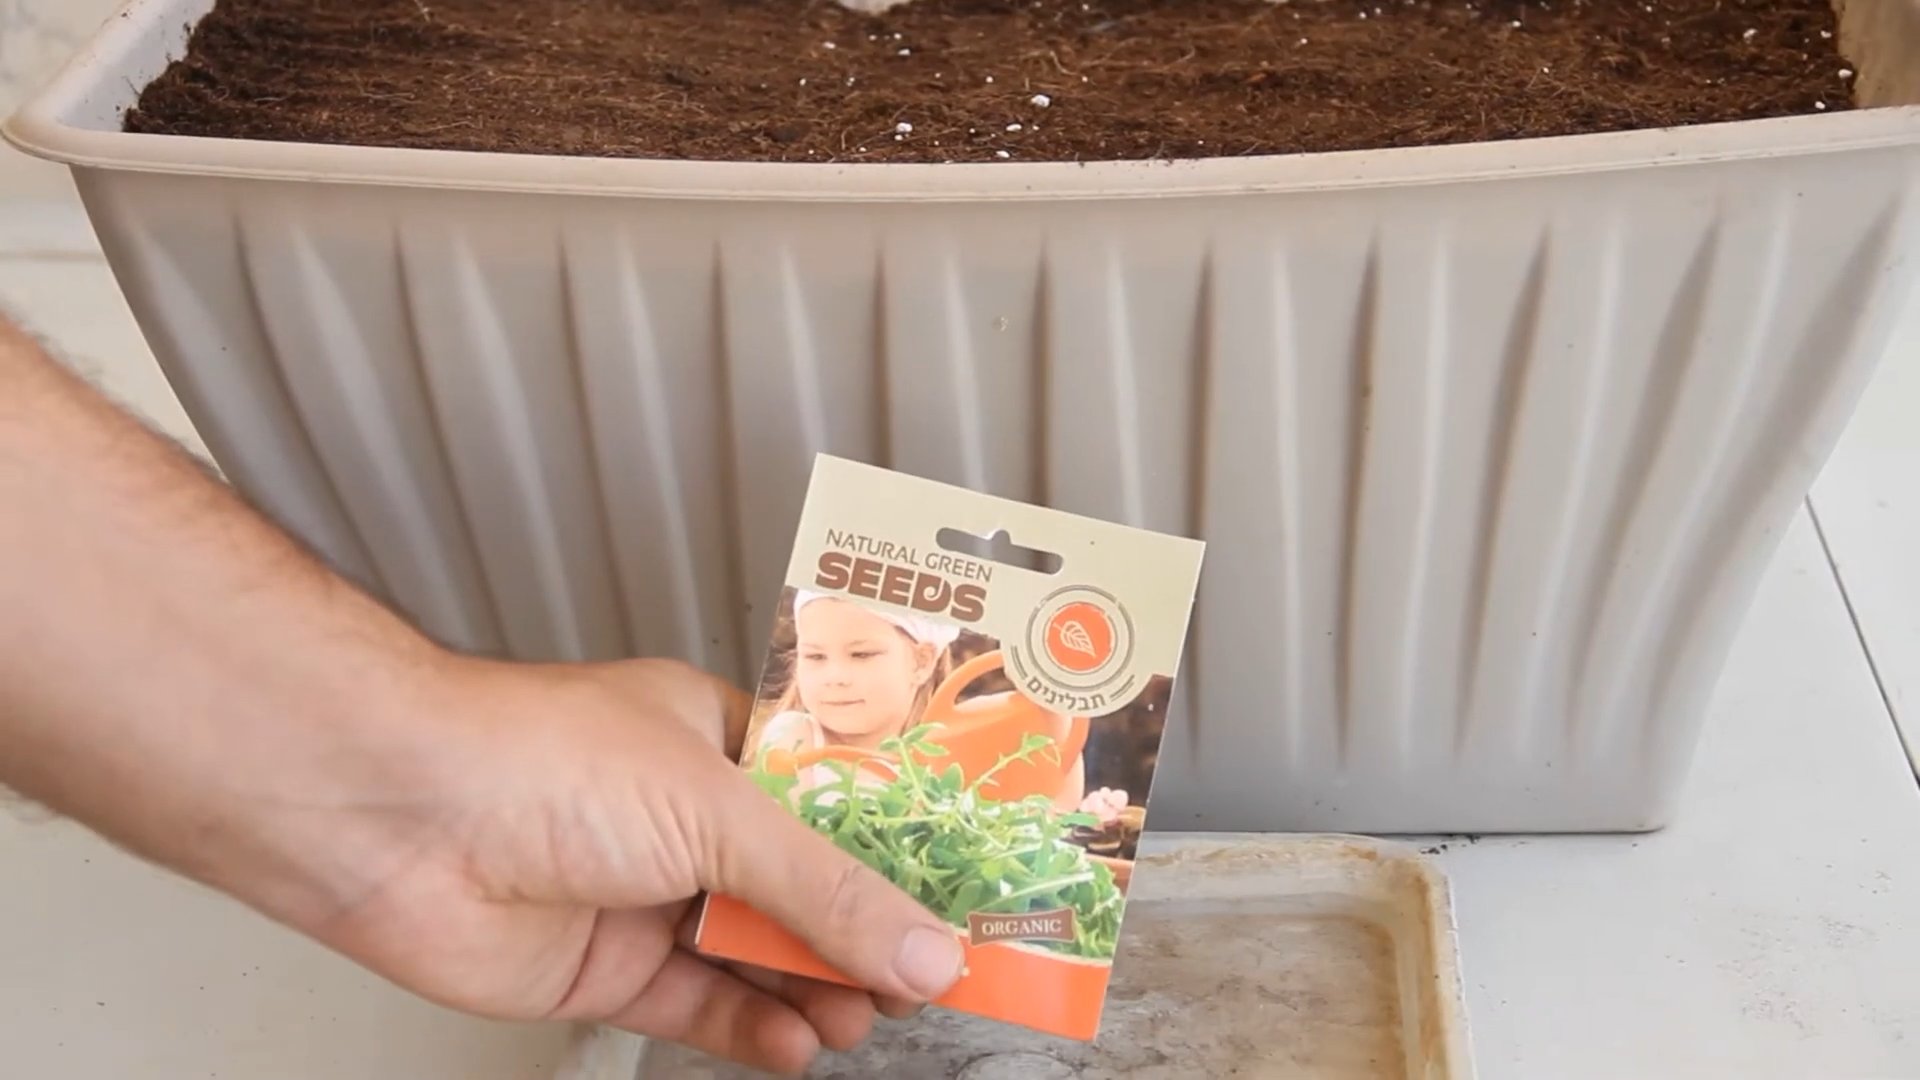
* Arugula Seeds: Obviously! Look for organic seeds if possible. You can find these at most garden centers or online.
* Container: Choose a container that’s at least 6 inches deep. A rectangular planter, a large pot, or even a repurposed container will work. Just make sure it has drainage holes!
* Potting Mix: Use a high-quality potting mix specifically designed for containers. Avoid using garden soil, as it can compact and not drain well indoors.
* Grow Lights (Optional, but Recommended): While arugula can grow near a sunny window, grow lights will ensure consistent growth and prevent leggy plants. LED grow lights are energy-efficient and work great.
* Spray Bottle: For gentle watering.
* Small Shovel or Trowel: For planting.
* Watering Can or Pitcher: For watering larger areas.
* Seed Starting Tray (Optional): If you want to start your seeds indoors before transplanting.
Getting Started: Planting Your Arugula Seeds
Okay, now for the fun part! Let’s get those seeds in the soil.
1. Prepare Your Container: Fill your chosen container with potting mix, leaving about an inch of space at the top. Gently pat down the soil to create a level surface.
2. Sow the Seeds: Arugula seeds are tiny, so be careful not to overcrowd them. Sprinkle the seeds evenly over the surface of the soil. Aim for about 1/4 inch spacing between seeds. You can also sow them in rows if you prefer.
3. Cover the Seeds: Lightly cover the seeds with a thin layer of potting mix, about 1/4 inch deep.
4. Water Gently: Use your spray bottle to gently mist the soil. You want to moisten the soil without disturbing the seeds. Avoid overwatering, as this can lead to rot.
5. Provide Light: Place your container in a location that receives at least 6 hours of sunlight per day. A south-facing window is ideal. If you’re using grow lights, position them a few inches above the soil surface and keep them on for 12-14 hours per day.
Nurturing Your Arugula: Care and Maintenance
Now that your arugula is planted, it’s time to provide the care it needs to thrive.
1. Watering: Keep the soil consistently moist, but not soggy. Water when the top inch of soil feels dry to the touch. Use your spray bottle or watering can to water gently, avoiding splashing the leaves.
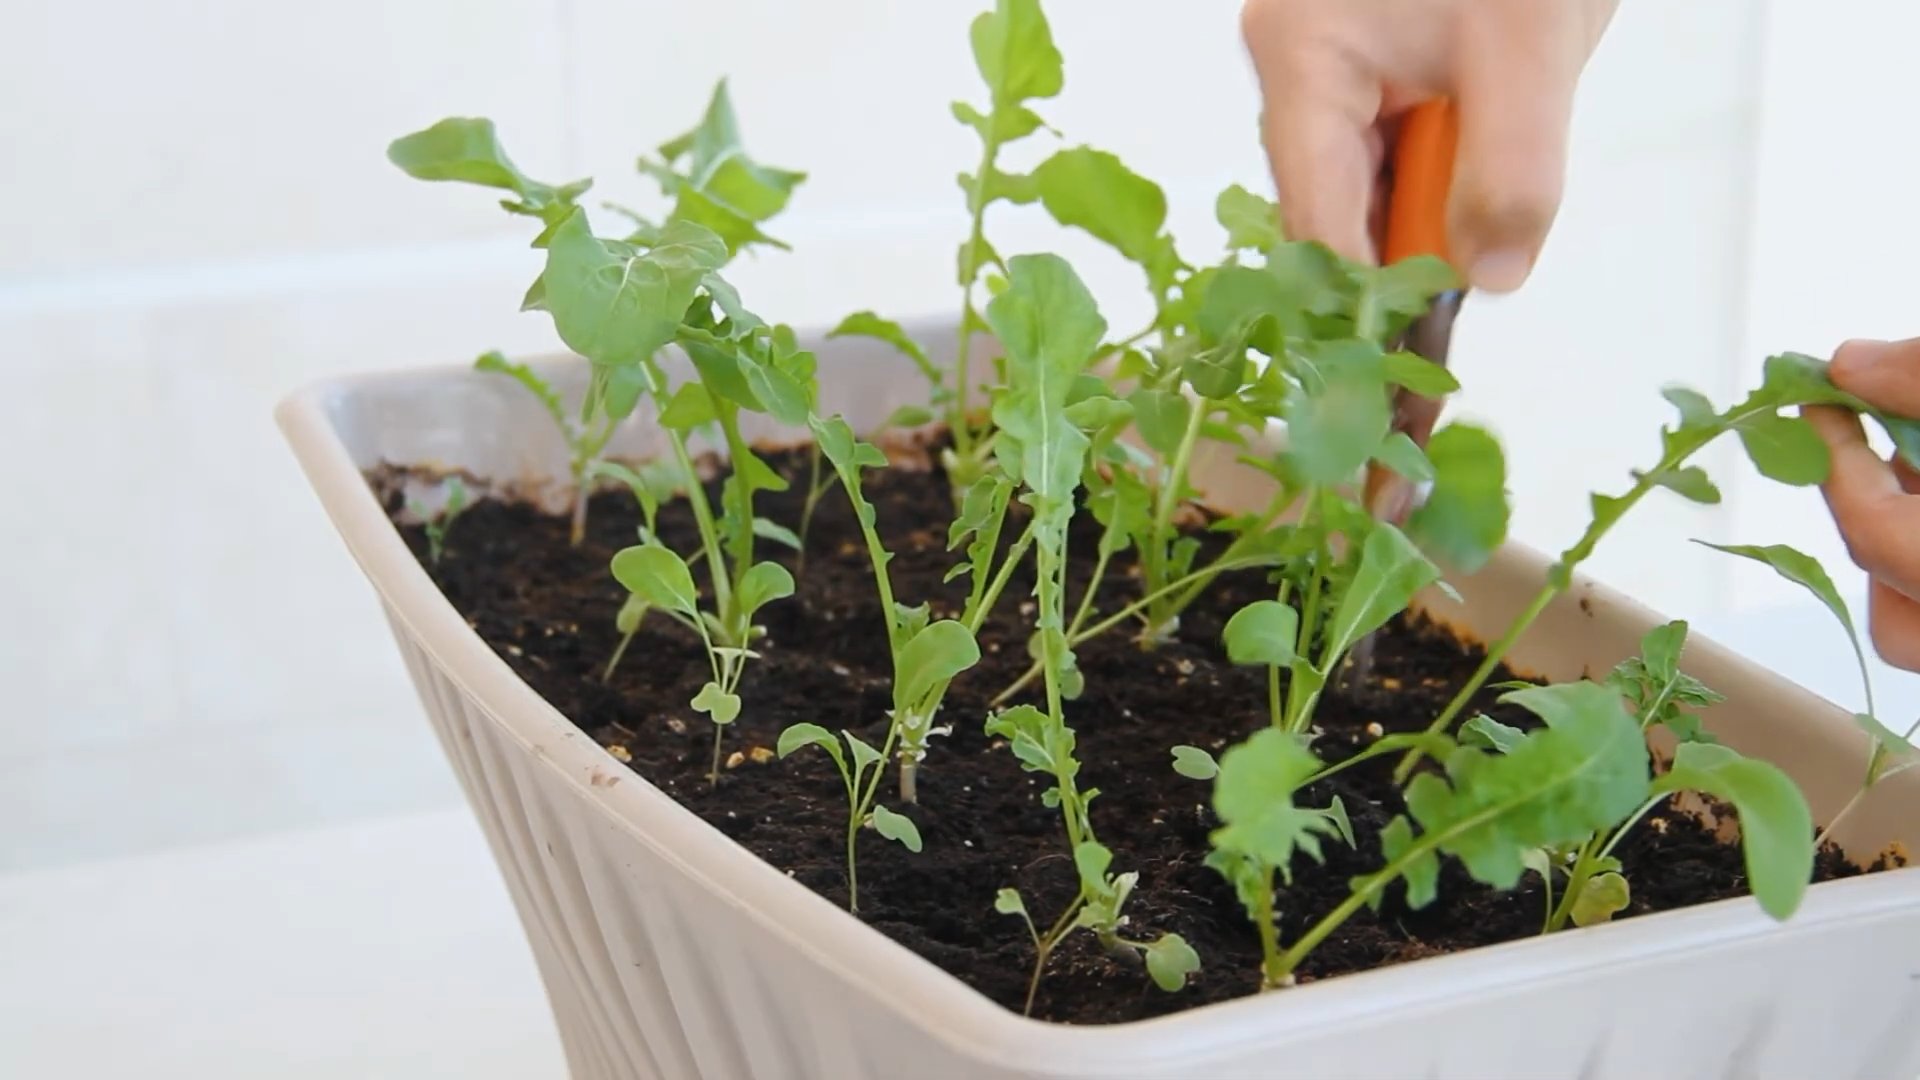
2. Thinning (If Necessary): Once your seedlings emerge and have a few true leaves (the second set of leaves), you may need to thin them out. This will give the remaining plants enough space to grow. Snip off the weaker seedlings at the soil line, leaving about 2-3 inches between plants. Don’t feel bad about thinning; you can add the thinned seedlings to your salad!
3. Fertilizing (Optional): Arugula doesn’t require a lot of fertilizer, but you can give it a boost with a diluted liquid fertilizer every few weeks. Look for a fertilizer that’s specifically formulated for leafy greens. Follow the instructions on the fertilizer label.
4. Temperature: Arugula prefers cooler temperatures, ideally between 60-70°F (15-21°C). Avoid placing your container near heat sources, such as radiators or vents.
5. Air Circulation: Good air circulation is important to prevent fungal diseases. Make sure your plants have enough space around them and avoid overcrowding. You can also use a small fan to gently circulate the air.
Harvest Time: Enjoying Your Homegrown Arugula
The best part! Arugula is a fast-growing plant, and you can usually start harvesting leaves within 3-4 weeks of planting.
1. Harvesting: Once the leaves are about 2-3 inches long, you can start harvesting them. Use scissors or your fingers to snip off the outer leaves, leaving the inner leaves to continue growing. This is called “cut-and-come-again” harvesting, and it allows you to harvest arugula multiple times from the same plant.
2. Washing: Wash your harvested arugula leaves thoroughly before eating.
3. Storage: Store your harvested arugula in a plastic bag in the refrigerator. It will stay fresh for several days.
Troubleshooting: Common Arugula Issues
Even with the best care, you might encounter a few issues while growing arugula indoors. Here are some common problems and how to solve them:
* Leggy Plants: If your arugula plants are tall and spindly with long stems, they’re likely not getting enough light. Move them to a sunnier location or provide supplemental light with grow lights.
* Yellowing Leaves: Yellowing leaves can be a sign of overwatering, underwatering, or nutrient deficiency. Check the soil moisture and adjust your watering accordingly. If you suspect a nutrient deficiency, try fertilizing with a diluted liquid fertilizer.
* Pests: Arugula can be susceptible to pests like aphids and flea beetles. Inspect your plants regularly for signs of infestation. If you find pests, try spraying them with insecticidal soap or neem oil.
* Fungal Diseases: Fungal diseases can occur in humid conditions. Ensure good air circulation and avoid overwatering. If you notice signs of fungal disease, such as powdery mildew, remove the affected leaves and treat the plants with a fungicide.
Continuous Harvest: Keeping the Arugula Coming
To ensure a continuous supply of fresh arugula, consider succession planting. This means planting new seeds every 2-3 weeks. This way, you’ll always have a batch of arugula ready to harvest.
1. Succession Planting: Start a new batch of seeds in a separate container every 2-3 weeks. Once the seedlings are large enough, you can transplant them into your main container or grow them in their own container.
2. Extending the Harvest: Arugula tends to bolt (go to seed) in hot weather. To extend your harvest, try growing arugula in a cooler location or providing shade during the hottest part of the day. You can also pinch off any flower buds that appear to prevent bolting.
Beyond the Salad Bowl: Creative Arugula Uses
While arugula is delicious in salads, there are many other ways to enjoy this versatile green.
* Pesto: Make a flavorful pesto by blending arugula with garlic, Parmesan cheese, pine nuts, and olive oil.
* Pizza Topping: Add fresh arugula to your pizza after it comes out of the oven for a peppery kick.
* Sandwiches and Wraps: Use arugula as a flavorful addition to sandwiches and wraps.
* Soups and Stews: Stir arugula into soups and stews just before serving for a burst of flavor and nutrients.
* Sautéed Arugula: Sauté arugula with garlic and olive oil for a simple and delicious side dish.
Final Thoughts: Your Indoor Arugula Adventure
Growing arugula indoors is a rewarding and delicious experience. With a little care and attention, you can enjoy a constant supply of fresh, peppery greens right in your own home. So, grab your seeds, get planting, and get ready to enjoy the fruits (or rather, the leaves!) of your labor! Happy growing!
Conclusion
So, there you have it! Growing arugula indoors is not only achievable, but it’s also a remarkably rewarding experience. Forget those wilted, overpriced greens from the grocery store. Imagine stepping into your kitchen and harvesting fresh, peppery arugula leaves whenever you need them. This DIY trick transforms your windowsill into a miniature, edible garden, providing you with a constant supply of flavorful greens.
Why is this a must-try? Because it’s simple, cost-effective, and incredibly satisfying. You’re in control of the entire process, from seed to salad, ensuring you’re consuming the freshest, most nutritious arugula possible. Plus, it’s a fantastic way to add a touch of green to your living space, especially during those long winter months when access to fresh produce is limited.
But the fun doesn’t stop there! Feel free to experiment with different varieties of arugula. Some are spicier than others, while some have a milder, more nutty flavor. Try growing ‘Sylvetta’ for a wild, intense flavor, or ‘Slow Bolt’ for a more heat-tolerant option. You can also experiment with different containers. While a simple pot works perfectly well, you could also use a repurposed container, adding a touch of personality to your indoor garden. Consider using a long, rectangular planter to maximize space and create a mini-arugula farm on your windowsill.
Another variation to consider is companion planting. While arugula thrives on its own, you can plant it alongside other herbs like basil or chives. These herbs can help deter pests and even enhance the flavor of your arugula. Just be sure to choose plants with similar growing requirements.
Don’t be afraid to get creative with your arugula harvest, too. Beyond salads, arugula adds a peppery kick to pizzas, sandwiches, and even smoothies. Sauté it with garlic and olive oil for a simple side dish, or blend it into pesto for a vibrant sauce. The possibilities are endless!
We wholeheartedly encourage you to give this DIY trick a try. It’s a simple project that yields delicious results. Once you’ve experienced the joy of harvesting your own fresh arugula, you’ll never look at store-bought greens the same way again.
And most importantly, we want to hear about your experience! Share your photos, tips, and tricks in the comments below. Let us know what varieties of arugula you’re growing, what containers you’re using, and what delicious dishes you’re creating. Your feedback will not only inspire other readers but also help us refine this guide and make it even better. Let’s cultivate a community of indoor arugula growers! So go ahead, embrace your inner gardener, and start growing arugula indoors today. You won’t regret it!
Frequently Asked Questions (FAQ)
What kind of soil should I use for growing arugula indoors?
Arugula thrives in well-draining soil that is rich in organic matter. A good starting point is a standard potting mix amended with compost or other organic material. Avoid using garden soil, as it can be too heavy and may contain pests or diseases. Look for a potting mix that is specifically formulated for vegetables or herbs. You can also create your own mix by combining equal parts of potting soil, compost, and perlite or vermiculite. This will provide good drainage and aeration, which are essential for healthy arugula growth.
How much sunlight does arugula need when grown indoors?
Arugula needs at least 6 hours of direct sunlight per day to thrive. If you don’t have a sunny windowsill, you can supplement with grow lights. Place the grow lights about 6-12 inches above the plants and keep them on for 12-14 hours per day. Rotate your arugula plants regularly to ensure that all sides receive adequate light. Insufficient light can lead to leggy growth and a less flavorful harvest. South-facing windows are generally the best for indoor arugula growing, followed by east- or west-facing windows.
How often should I water my indoor arugula plants?
Water your arugula plants when the top inch of soil feels dry to the touch. Avoid overwatering, as this can lead to root rot. Water deeply, until water drains out of the bottom of the pot. Be sure to empty the saucer underneath the pot to prevent the plants from sitting in water. The frequency of watering will depend on the temperature, humidity, and size of the pot. Check the soil moisture regularly and adjust your watering schedule accordingly.
How long does it take for arugula to grow indoors?
Arugula is a fast-growing plant, and you can typically start harvesting leaves within 3-4 weeks of planting. The exact time will depend on the variety of arugula, the growing conditions, and the size of the plants you want to harvest. For baby greens, you can harvest even sooner, around 2-3 weeks. To encourage continuous growth, harvest the outer leaves first, leaving the inner leaves to continue growing.
What are some common pests and diseases that affect indoor arugula?
While growing arugula indoors minimizes the risk of pests and diseases, they can still occur. Common pests include aphids, spider mites, and whiteflies. These pests can be controlled with insecticidal soap or neem oil. Diseases such as powdery mildew and damping-off can also affect arugula. To prevent these diseases, ensure good air circulation, avoid overwatering, and use a well-draining potting mix. If you notice any signs of pests or diseases, treat them promptly to prevent them from spreading.
Can I grow arugula indoors year-round?
Yes, you can grow arugula indoors year-round, provided you have adequate light and temperature. Arugula prefers cooler temperatures, between 60-70°F (15-21°C). If your home is too warm, you may need to provide additional ventilation or cooling. During the winter months, you may need to supplement with grow lights to ensure that your arugula receives enough light. With proper care, you can enjoy fresh arugula from your indoor garden all year long.
How do I harvest arugula leaves?
Harvest arugula leaves when they are about 2-4 inches long. Use scissors or a knife to cut the leaves close to the base of the plant. Harvest the outer leaves first, leaving the inner leaves to continue growing. This will encourage continuous production. You can also harvest the entire plant at once, but this will prevent it from regrowing. Wash the harvested leaves thoroughly before using them.
How do I prevent arugula from bolting (going to seed)?
Bolting is when a plant prematurely flowers and goes to seed, which can make the leaves bitter. To prevent arugula from bolting, keep the soil consistently moist, provide adequate shade during hot weather, and harvest the leaves regularly. Bolting is more likely to occur when the plant is stressed, so providing optimal growing conditions is key. Choose bolt-resistant varieties of arugula for best results.
Can I grow arugula from seed indoors?
Yes, growing arugula from seed indoors is easy and rewarding. Sow the seeds directly into the potting mix, about ¼ inch deep. Keep the soil moist until the seeds germinate, which usually takes about 5-7 days. Once the seedlings emerge, thin them out to about 2-3 inches apart. Provide adequate light and water, and you’ll be harvesting fresh arugula in no time.
Is growing arugula indoors organic?
Yes, growing arugula indoors allows you to control the growing environment and ensure that your plants are grown organically. Use organic potting mix, organic fertilizers, and avoid using synthetic pesticides or herbicides. This will ensure that your arugula is free from harmful chemicals and is safe to eat.
Leave a Comment