
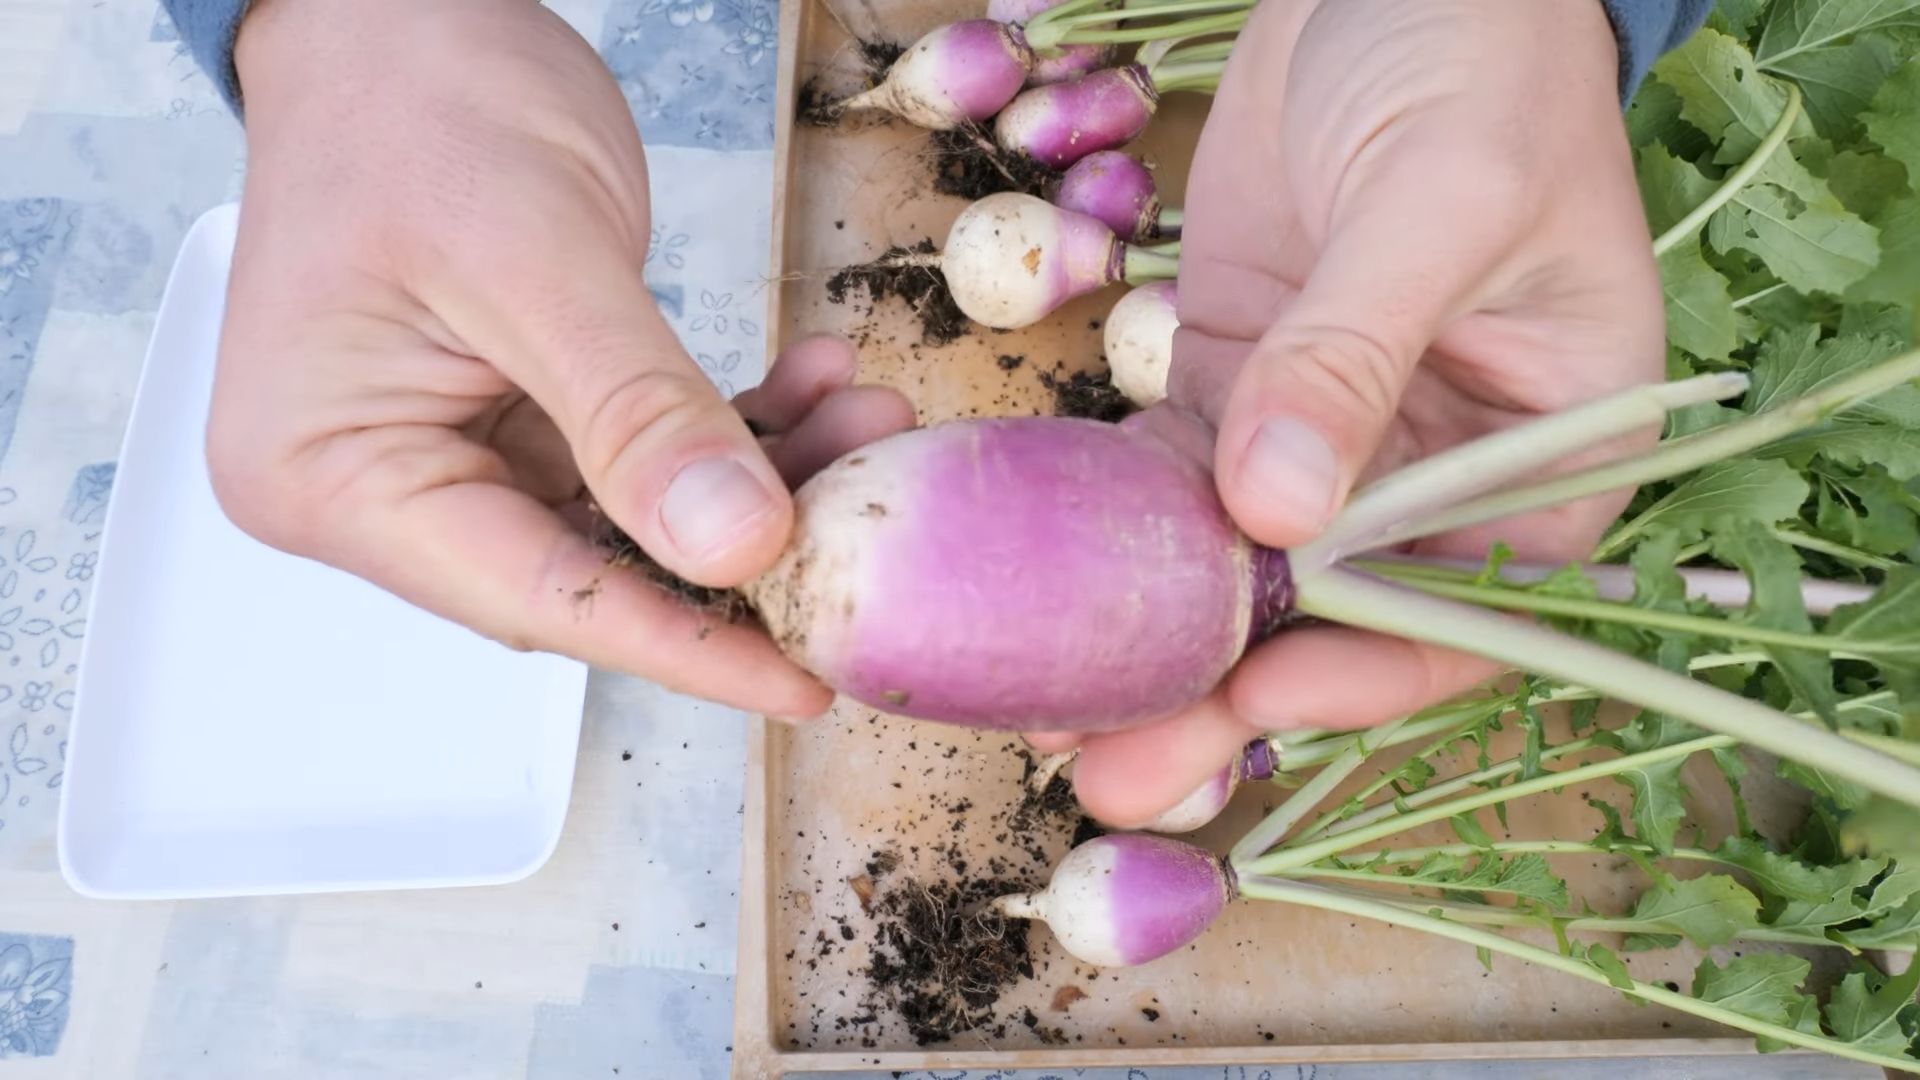
Planting Turnips in your home garden might seem like a task reserved for seasoned farmers, but I’m here to tell you it’s surprisingly easy and incredibly rewarding! Imagine pulling fresh, crisp turnips straight from your backyard, ready to be roasted, mashed, or even enjoyed raw in a vibrant salad. Sounds delightful, right?
Turnips have a rich history, dating back to ancient Rome and Greece, where they were a staple food. They’ve nourished communities for centuries, and now, you can bring that tradition to your own home. But why bother with growing your own turnips when you can just buy them at the store? Well, for starters, homegrown turnips taste infinitely better! Plus, you get the satisfaction of knowing exactly where your food comes from and that it’s free from harmful pesticides.
This DIY guide is packed with simple tricks and hacks to make planting turnips in your home garden a breeze, even if you’re a complete beginner. I’ll walk you through everything from choosing the right variety to preparing your soil and protecting your precious crop from pests. So, grab your gardening gloves, and let’s get started on this exciting journey to fresh, homegrown turnips!
Planting Artichokes at Home: A Gardener’s Guide
Hey there, fellow garden enthusiasts! I’m so excited to share my experience with growing artichokes at home. These architectural beauties aren’t just delicious; they’re also stunning additions to any garden. While they might seem intimidating, trust me, with a little know-how, you can absolutely cultivate these thistles in your own backyard. Let’s dive in!
Choosing Your Artichoke Variety
Before we get our hands dirty, let’s talk varieties. Different artichokes thrive in different climates, so picking the right one is crucial.
* ‘Green Globe’: This is the most common variety, known for its large, round, green buds. It’s a reliable choice for many regions.
* ‘Violetta’: If you’re looking for something a bit different, ‘Violetta’ offers beautiful purple buds and a slightly sweeter flavor.
* ‘Imperial Star’: This variety is known for its early production, making it a good option for shorter growing seasons.
* ‘Big Heart’: As the name suggests, this variety produces large, meaty hearts with fewer prickly chokes.
Consider your local climate and growing season when making your selection. Your local nursery can also provide valuable insights into which varieties perform best in your area.
Preparing the Soil: The Foundation for Success
Artichokes are heavy feeders, meaning they need nutrient-rich soil to thrive. Proper soil preparation is key to a bountiful harvest.
* Sunlight: Artichokes need at least 6-8 hours of direct sunlight per day. Choose a location that receives plenty of sunshine.
* Soil Type: They prefer well-draining soil that is rich in organic matter. Clay soil can be amended to improve drainage.
* pH Level: Aim for a soil pH between 6.0 and 7.0. You can test your soil using a home testing kit or send a sample to your local agricultural extension office.
Step-by-Step Planting Guide
Now for the fun part! Let’s get those artichokes in the ground.
1. Timing is Everything: The best time to plant artichokes depends on your climate. In warmer regions (zones 7-10), you can plant in the fall for a spring harvest. In colder regions (zones 6 and below), plant in the spring after the last frost.
2. Soil Amendment: Before planting, amend the soil with plenty of compost or well-rotted manure. This will provide the necessary nutrients and improve drainage. I usually dig in about 4-6 inches of compost.
3. Digging the Hole: Dig a hole that is twice as wide and as deep as the root ball of your artichoke plant.
4. Planting the Artichoke: Gently remove the artichoke plant from its container and loosen the roots. Place the plant in the hole, ensuring that the top of the root ball is level with the surrounding soil.
5. Backfilling: Fill the hole with soil, gently firming it around the plant.
6. Watering: Water thoroughly after planting. This will help settle the soil and encourage root growth.
7. Spacing: If you’re planting multiple artichokes, space them about 4-6 feet apart. They need plenty of room to grow.
8. Mulching: Apply a layer of mulch around the base of the plant. This will help retain moisture, suppress weeds, and regulate soil temperature. I like to use straw or wood chips.
Caring for Your Artichokes: Nurturing Your Plants
Once your artichokes are planted, consistent care is essential for healthy growth and abundant harvests.
* Watering: Artichokes need consistent moisture, especially during dry periods. Water deeply and regularly, aiming for about 1-2 inches of water per week. Avoid overhead watering, as this can lead to fungal diseases.
* Fertilizing: Feed your artichokes regularly with a balanced fertilizer. I like to use a slow-release fertilizer in the spring and then supplement with liquid fertilizer every few weeks during the growing season.
* Weeding: Keep the area around your artichokes free of weeds. Weeds compete for nutrients and water, hindering the growth of your plants.
* Pest Control: Artichokes can be susceptible to pests such as aphids, snails, and slugs. Inspect your plants regularly and take action if you notice any signs of infestation. I often use organic pest control methods like insecticidal soap or diatomaceous earth.
* Pruning: In the fall, after the harvest is complete, cut back the plant to about 12 inches above the ground. This will encourage new growth in the spring. Remove any dead or damaged leaves throughout the growing season.
Overwintering Artichokes in Colder Climates
If you live in a colder climate, you’ll need to protect your artichokes from frost and freezing temperatures.
* Cutting Back: In late fall, after the first frost, cut back the plant to about 6-8 inches above the ground.
* Mulching Heavily: Apply a thick layer of mulch around the base of the plant. This will insulate the roots and protect them from freezing. I use a combination of straw and leaves.
* Covering: For added protection, you can cover the plant with a burlap sack or a frost blanket.
* Container Growing: If you’re growing artichokes in containers, you can move them to a sheltered location, such as a garage or shed, during the winter months.
Harvesting Your Artichokes: The Sweet Reward
Harvesting artichokes is the culmination of all your hard work.
* Timing: Artichokes are typically ready to harvest in the spring or early summer. The exact timing will depend on your climate and the variety you’re growing.
* Identifying Readiness: Look for buds that are firm and plump, with tightly closed scales. The size of the bud will vary depending on the variety.
* Cutting: Use a sharp knife to cut the artichoke stem about 2-3 inches below the bud.
* Storage: Artichokes can be stored in the refrigerator for up to a week. Wrap them in a damp paper towel and place them in a plastic bag.
Troubleshooting Common Artichoke Problems
Even with the best care, you might encounter some challenges along the way. Here are a few common problems and how to address them:
* Aphids: These tiny pests can suck the sap from your artichoke plants, causing them to weaken and become distorted. Spray with insecticidal soap or neem oil.
* Snails and Slugs: These slimy creatures can feast on your artichoke leaves, leaving behind unsightly holes. Use snail bait or handpick them off the plants.
* Fungal Diseases: Overwatering or poor air circulation can lead to fungal diseases such as powdery mildew. Ensure good air circulation and avoid overhead watering. Treat with a fungicide if necessary.
* Lack of Bud Production: If your artichoke plant isn’t producing buds, it could be due to a lack of sunlight, nutrients, or water. Ensure that your plant is receiving adequate sunlight, fertilize regularly, and water deeply.
Propagating Artichokes: Expanding Your Garden
Once you’ve successfully grown artichokes, you might want to propagate them to expand your garden or share them with friends.
* Division: Artichokes can be propagated by dividing the root clumps. In the spring, carefully dig up the plant and separate the root clumps into individual plants. Replant the divisions in well-prepared soil.
* Seed: While you can grow artichokes from seed, it’s not the most reliable method. The resulting plants may not be true to type, meaning they may not produce the same quality of buds as the parent plant. If you choose to grow from seed, start the seeds indoors 8-10 weeks before the last frost.
Enjoying Your Harvest: Culinary Delights
Finally, the best part – enjoying the fruits (or rather, the buds!) of your labor. Artichokes are incredibly versatile and can be prepared in countless ways.
* Steaming: Steaming is a classic way to cook artichokes. Simply steam them until the leaves are tender and easily pulled off. Serve with melted butter or a dipping sauce.
* Grilling: Grilled artichokes have a smoky, charred flavor that is simply irresistible. Cut the artichokes in half, brush them with olive oil, and grill them until tender.
* Roasting: Roasting artichokes brings out their natural sweetness. Toss them with olive oil, garlic, and herbs, and roast them until tender and slightly caramelized.
* Artichoke Hearts: Artichoke hearts are a delicious addition to salads, pasta dishes, and dips. You can buy them canned or jarred, or you can prepare them yourself from fresh artichokes.
Growing artichokes at home is a rewarding experience that allows you to enjoy fresh, delicious produce straight from your
Conclusion
So, there you have it! Mastering the art of planting turnips in your home garden is not only achievable but also incredibly rewarding. We’ve walked through the essential steps, from selecting the right variety to nurturing your crop for a bountiful harvest. But why is this DIY trick a must-try? Because it puts you in control of your food source, connects you with nature, and offers a delicious, nutritious addition to your table, all while saving money and reducing your environmental impact.
Imagine the satisfaction of pulling fresh, crisp turnips from your own backyard, knowing exactly where they came from and how they were grown. This isn’t just about planting a vegetable; it’s about cultivating a connection to the earth and embracing a more sustainable lifestyle. Plus, fresh, homegrown turnips taste significantly better than anything you’ll find in the grocery store. They’re sweeter, more tender, and bursting with flavor.
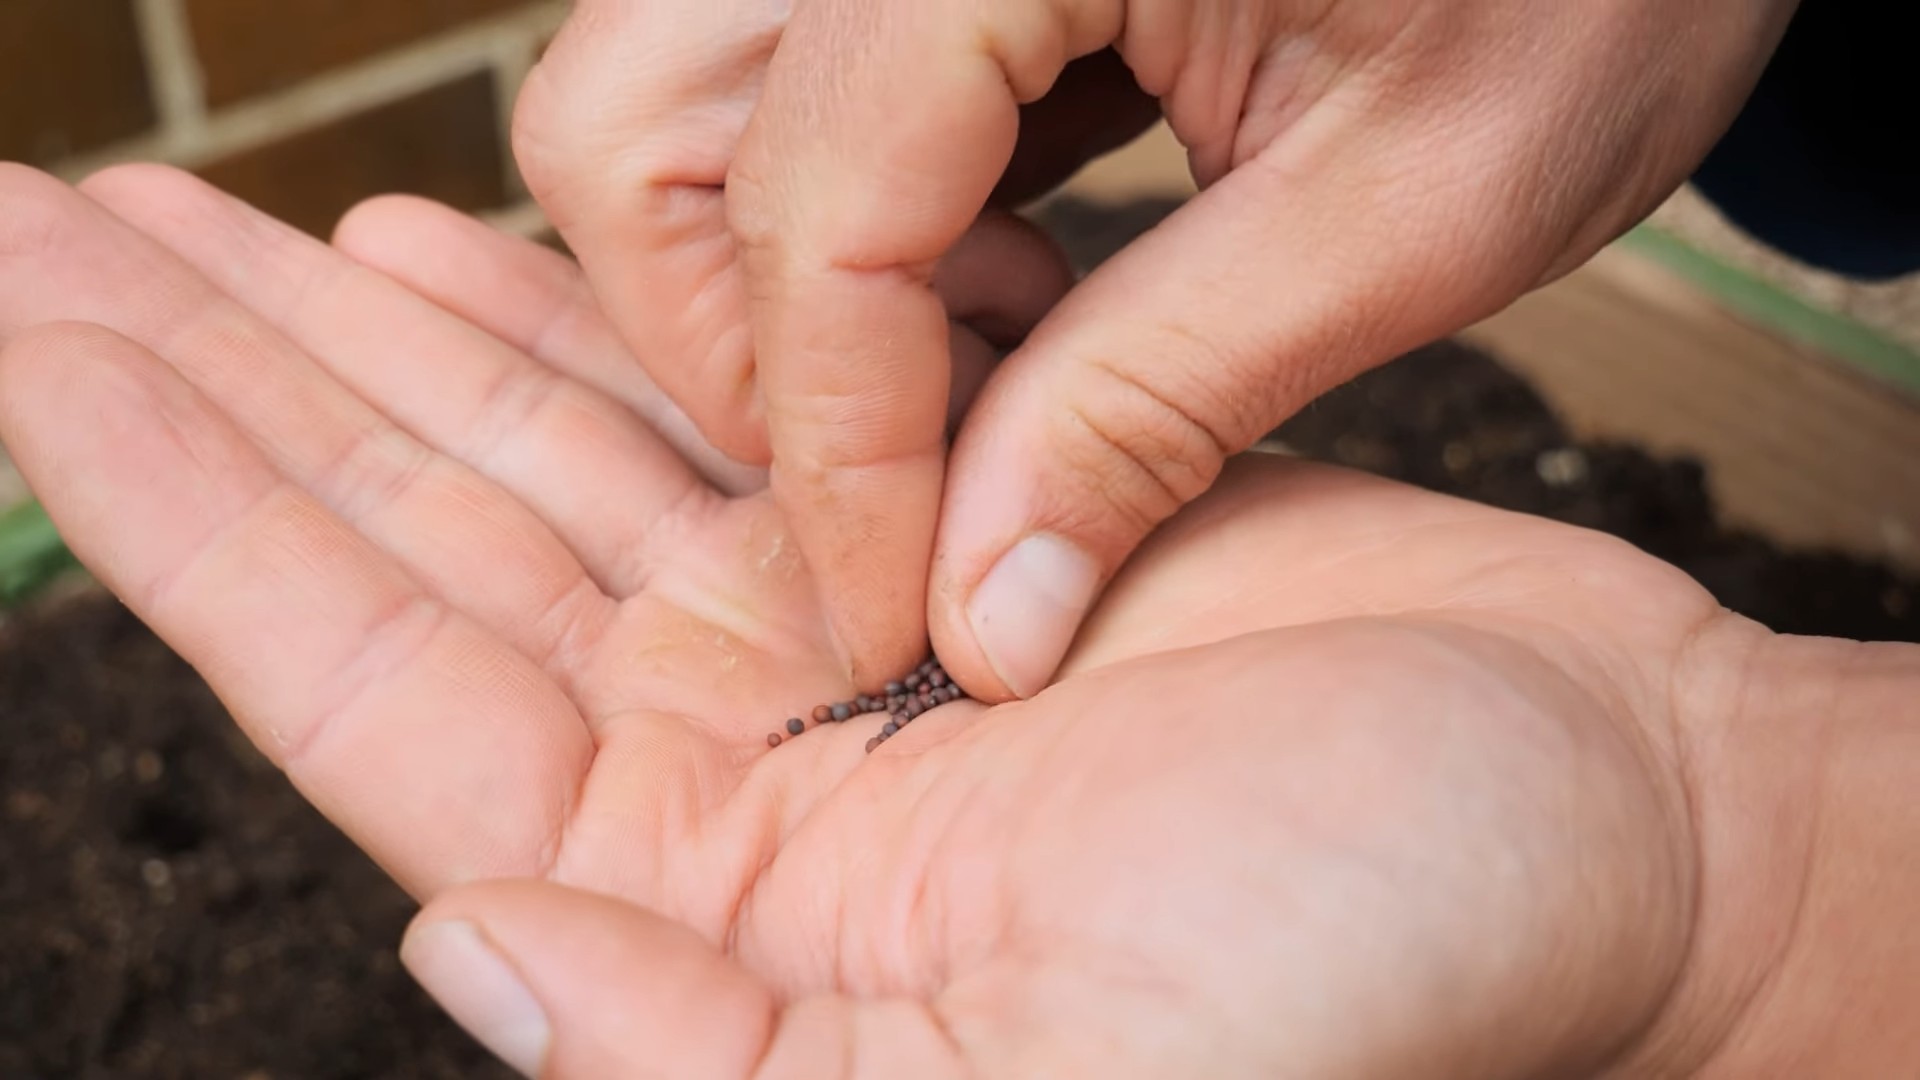
But the beauty of gardening lies in its adaptability. Feel free to experiment with different varieties of turnips. For a milder flavor, try ‘Tokyo Cross’ or ‘Golden Ball’. If you’re looking for something with a bit more bite, ‘Purple Top White Globe’ is a classic choice. Consider succession planting, sowing seeds every few weeks, to ensure a continuous harvest throughout the growing season. You can also interplant turnips with other crops, such as radishes or lettuce, to maximize space and deter pests.
Don’t be afraid to get your hands dirty and embrace the learning process. Gardening is a journey, and there will be successes and setbacks along the way. But with a little patience and persistence, you’ll be amazed at what you can achieve.
We wholeheartedly encourage you to try this DIY trick and experience the joy of growing your own turnips. It’s a simple, fulfilling, and delicious way to connect with nature and nourish your body. And most importantly, share your experiences with us! We’d love to hear about your successes, challenges, and any variations you’ve tried. Post photos of your harvest, share your favorite turnip recipes, and let’s build a community of passionate home gardeners. Happy planting!
Frequently Asked Questions (FAQs)
What is the best time to plant turnips?
The best time to plant turnips depends on your climate and the variety you’re growing. Generally, turnips are a cool-season crop, meaning they thrive in cooler temperatures. For a spring harvest, plant turnips 4-6 weeks before the last expected frost. For a fall harvest, plant them 6-8 weeks before the first expected frost. In warmer climates, you can often plant turnips throughout the fall and winter. Check your local frost dates and the specific recommendations for your chosen turnip variety for the most accurate timing.
How much sunlight do turnips need?
Turnips need at least 6 hours of direct sunlight per day to thrive. While they can tolerate some partial shade, especially in hotter climates, insufficient sunlight can result in smaller roots and less vigorous growth. Choose a planting location that receives ample sunlight throughout the day.
What kind of soil is best for planting turnips?
Turnips prefer well-drained, fertile soil with a pH between 6.0 and 6.8. Amend heavy clay soil with compost or other organic matter to improve drainage and aeration. Sandy soil can be improved by adding compost or peat moss to help retain moisture and nutrients. Before planting, work the soil to a depth of at least 6 inches and incorporate compost or fertilizer to provide essential nutrients.
How often should I water my turnips?
Turnips need consistent moisture to develop properly. Water deeply and regularly, especially during dry periods. Aim to keep the soil consistently moist but not waterlogged. A good rule of thumb is to water when the top inch of soil feels dry to the touch. Mulching around the plants can help retain moisture and suppress weeds.
What are some common pests and diseases that affect turnips?
Turnips can be susceptible to several pests and diseases, including aphids, flea beetles, cabbage loopers, and root maggots. Regularly inspect your plants for signs of infestation or disease. Use organic pest control methods, such as insecticidal soap or neem oil, to control pests. Ensure good air circulation and avoid overwatering to prevent fungal diseases. Crop rotation can also help reduce the risk of soilborne diseases.
When are turnips ready to harvest?
Turnips are typically ready to harvest 50-60 days after planting, depending on the variety. The roots should be 2-3 inches in diameter. You can harvest the greens at any time, but they are most tender when young. To harvest the roots, gently loosen the soil around the plant and pull it up by the greens.
Can I eat turnip greens?
Yes, turnip greens are edible and nutritious. They are a good source of vitamins A, C, and K, as well as fiber and calcium. You can cook turnip greens in a variety of ways, such as steaming, boiling, sautéing, or adding them to soups and stews.
How do I store turnips?
To store turnips, remove the greens and wash the roots thoroughly. Store them in a cool, dark, and humid place, such as a root cellar or refrigerator. They can be stored in a plastic bag or container to prevent them from drying out. Properly stored turnips can last for several months.
Can I grow turnips in containers?
Yes, turnips can be grown in containers, but you’ll need to choose a container that is at least 8-10 inches deep and wide to accommodate the root growth. Use a well-draining potting mix and provide adequate sunlight and water. Container-grown turnips may require more frequent watering and fertilization than those grown in the ground.
What are some good companion plants for turnips?
Good companion plants for turnips include beans, peas, radishes, lettuce, and garlic. These plants can help deter pests, improve soil health, or provide shade. Avoid planting turnips near other members of the brassica family, such as cabbage, broccoli, and cauliflower, as they can attract similar pests and diseases.

Leave a Comment