
Grow Basil at Home, and unlock a world of fresh, aromatic flavors right at your fingertips! Have you ever dreamt of snipping fragrant basil leaves just moments before adding them to your pasta sauce or sprinkling them over a Caprese salad? Well, dream no more! This isn’t just about gardening; it’s about bringing a little piece of Italy (or your favorite cuisine!) into your own backyard, balcony, or even windowsill.
Basil, revered for centuries in various cultures, isn’t just a culinary delight; it’s steeped in history and symbolism. From ancient medicinal uses to its association with love and good fortune, basil has always held a special place in our hearts and homes. But let’s be honest, buying fresh basil from the store can be expensive, and sometimes it wilts before you even get a chance to use it all. That’s where the magic of DIY comes in!
I’m here to share some simple, effective, and totally doable tricks and hacks that will empower you to grow basil at home successfully, even if you don’t have a green thumb. Imagine the satisfaction of nurturing your own basil plant, knowing exactly where your food comes from, and enjoying the freshest, most flavorful basil you’ve ever tasted. Ready to get started? Let’s dive in and transform your space into a basil-filled paradise!
Growing Basil at Home: A Beginner’s Guide to Fresh, Flavorful Herbs
Hey there, fellow herb enthusiasts! I’m so excited to share my tried-and-true method for growing basil right in your own home. Forget those sad, wilted bunches from the grocery store – with a little love and attention, you can have a constant supply of fresh, fragrant basil at your fingertips. Trust me, once you taste homemade pesto with homegrown basil, you’ll never go back!
What You’ll Need: The Basil Starter Kit
Before we dive in, let’s gather our supplies. Don’t worry, you probably have most of this stuff already!
* **Basil Seeds:** You can find these at any garden center or online. I personally love Genovese basil for its classic flavor, but feel free to experiment with different varieties like Thai basil or lemon basil.
* **Seed Starting Tray or Small Pots:** These are perfect for getting your seedlings started. Make sure they have drainage holes!
* **Seed Starting Mix:** This is a light, fluffy soil specifically formulated for seedlings. It’s different from regular potting soil, so don’t skip this step.
* **Spray Bottle:** For gently watering your delicate seedlings.
* **Grow Lights (Optional but Recommended):** Especially if you don’t have a super sunny windowsill.
* **Potting Soil:** Once your seedlings are big enough, you’ll need potting soil for their permanent homes.
* **Pots (4-6 inches in diameter):** One pot per basil plant.
* **Watering Can or Pitcher:** For watering your mature plants.
* **Scissors or Pruning Shears:** For harvesting your basil.
* **A Sunny Spot:** Basil loves sunshine!
Phase 1: Starting Your Basil Seeds
This is where the magic begins! We’re going to coax those tiny seeds into becoming vibrant basil plants.
1. **Prepare Your Seed Starting Tray:** Fill your seed starting tray or small pots with seed starting mix. Gently pat it down to remove any air pockets.
2. **Sow the Seeds:** Sprinkle a few basil seeds on top of the soil in each cell or pot. Don’t overcrowd them! A few seeds per cell is plenty.
3. **Cover the Seeds:** Lightly cover the seeds with a thin layer of seed starting mix.
4. **Water Gently:** Use your spray bottle to mist the soil thoroughly. You want it to be moist, but not soggy.
5. **Provide Light and Warmth:** Place your seed starting tray in a warm, sunny spot. If you don’t have a sunny windowsill, use grow lights. Keep the lights on for about 12-16 hours per day.
6. **Maintain Moisture:** Keep the soil consistently moist by misting it with your spray bottle whenever it starts to dry out.
7. **Be Patient:** Basil seeds typically germinate in 5-10 days. Keep an eye on them and don’t give up!
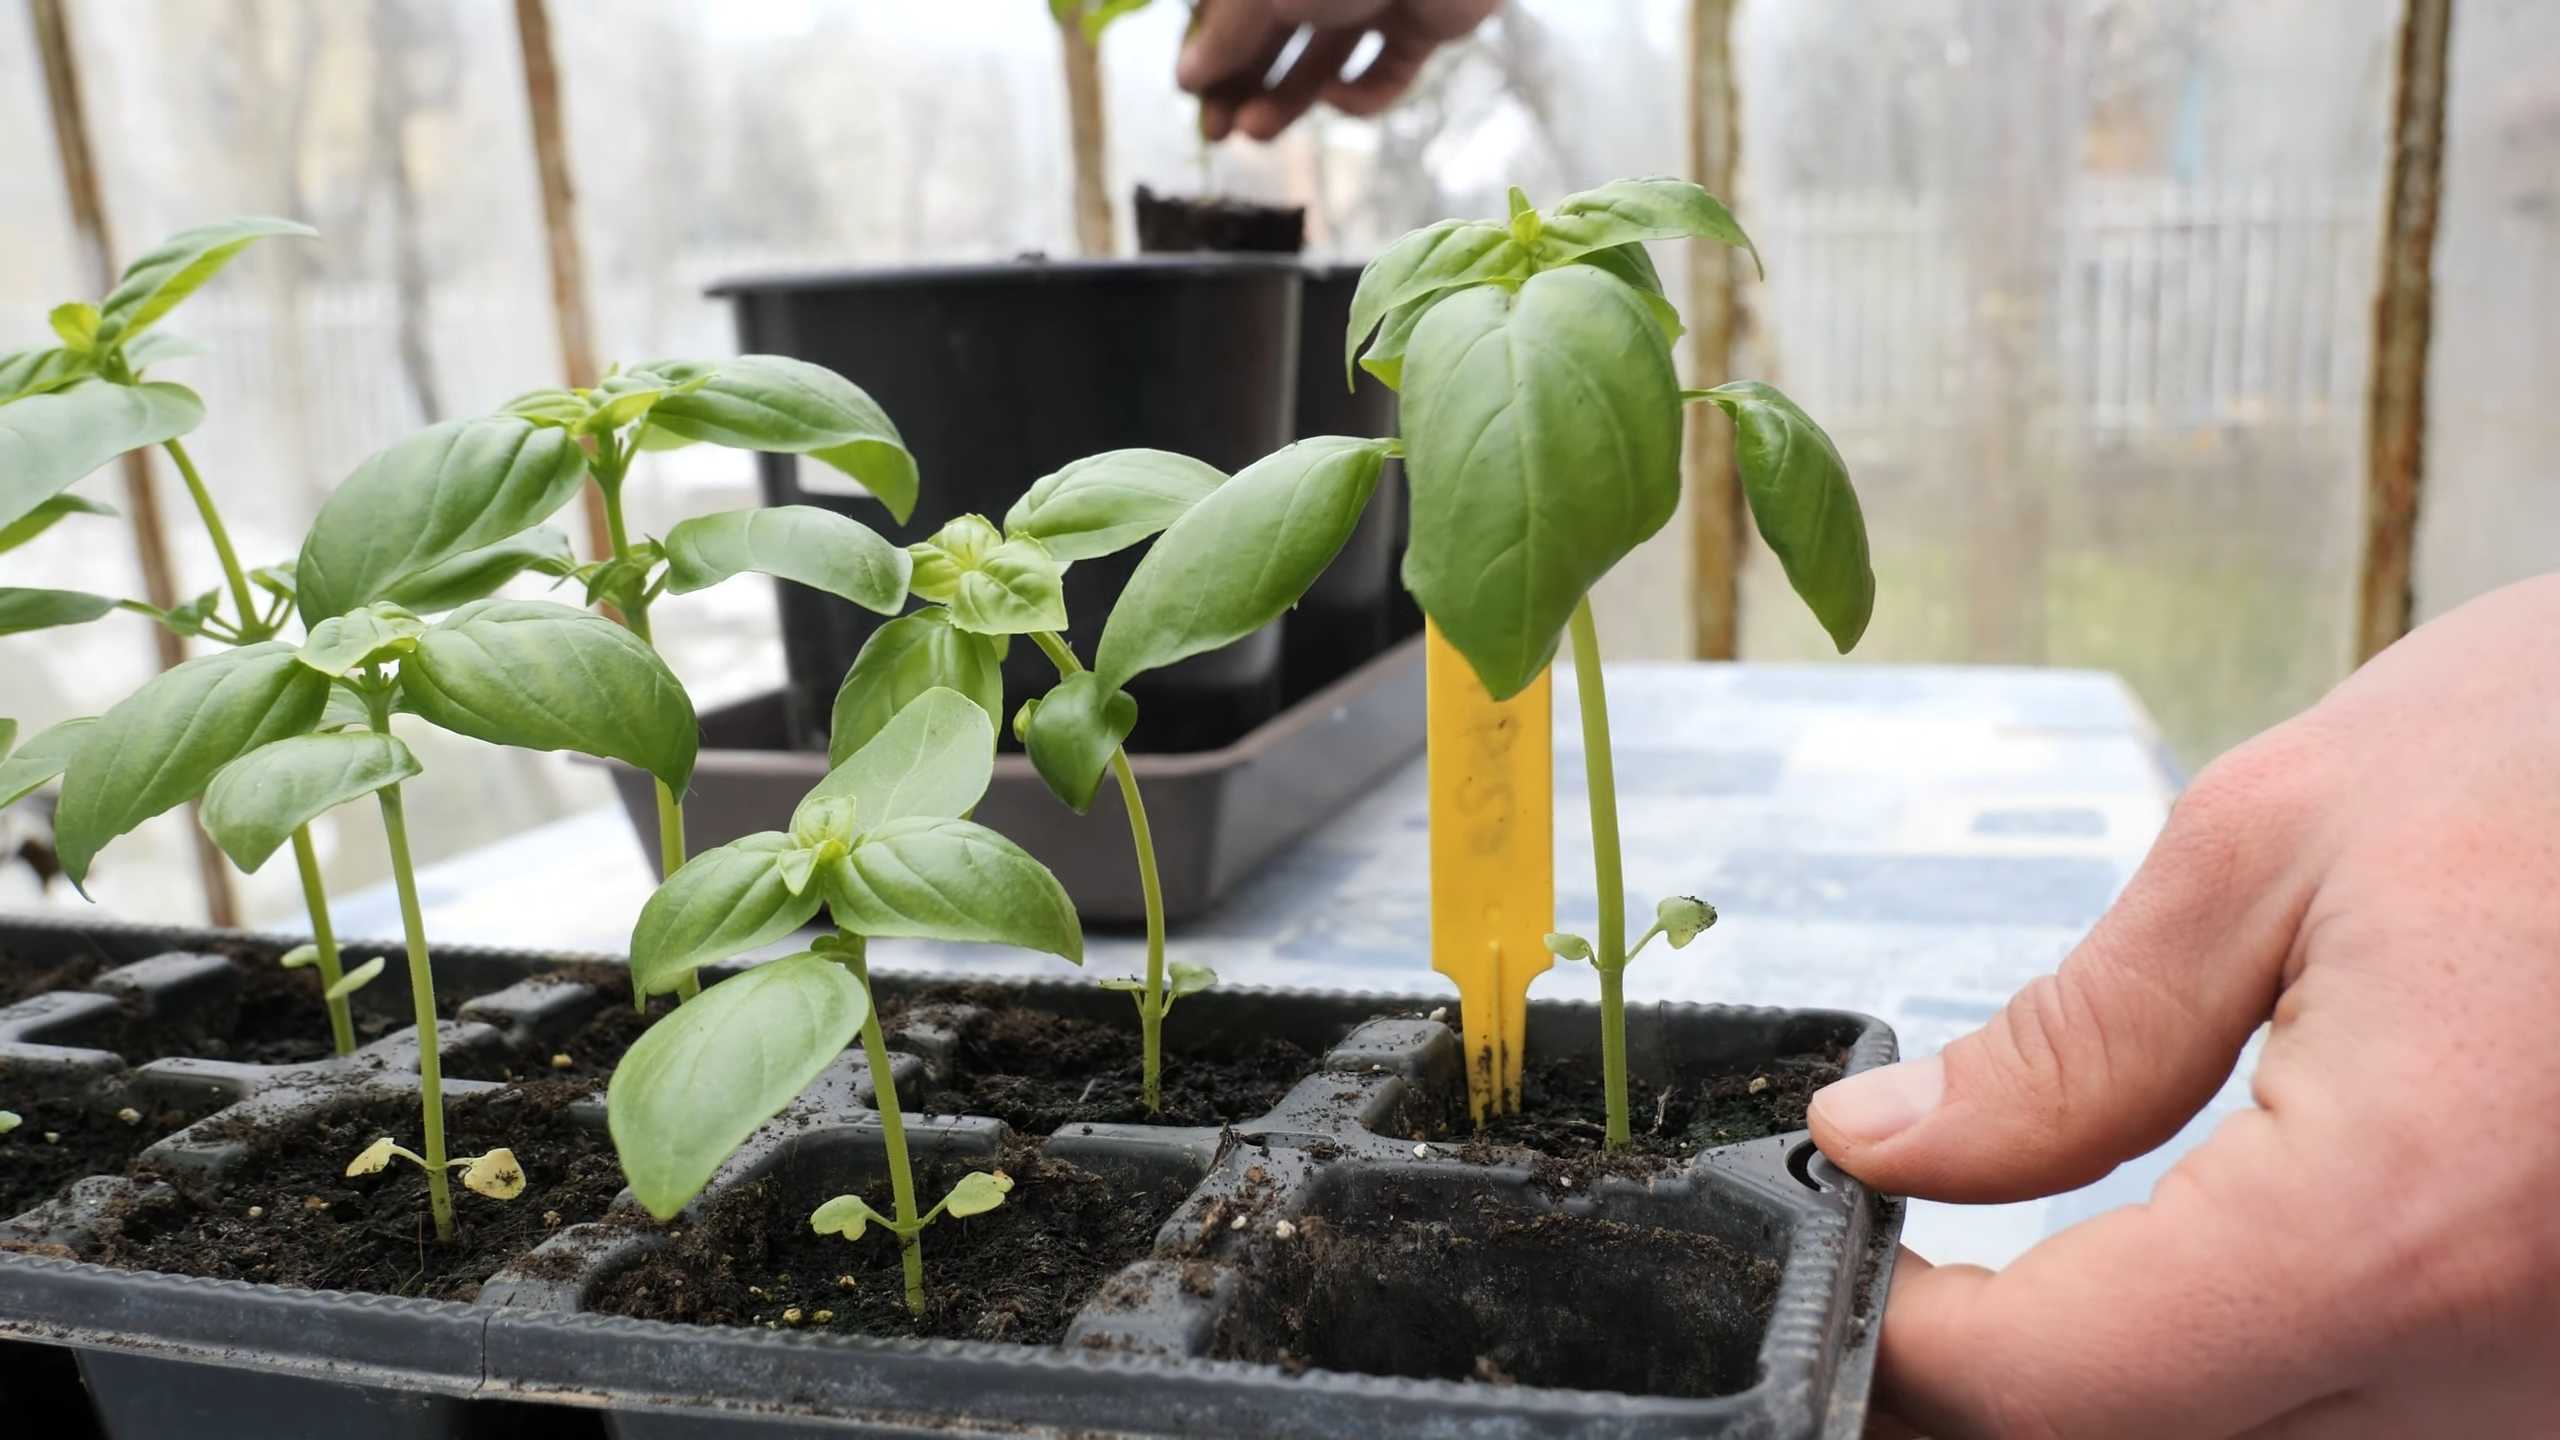
Phase 2: Transplanting Your Basil Seedlings
Once your seedlings have developed a few sets of true leaves (the leaves that look like basil leaves, not just the initial seed leaves), it’s time to transplant them into their own pots.
1. **Prepare Your Pots:** Fill your pots with potting soil, leaving about an inch of space at the top.
2. **Gently Remove Seedlings:** Carefully remove the seedlings from the seed starting tray or small pots. Be gentle! You don’t want to damage the delicate roots. I like to use a small spoon or fork to help me lift them out.
3. **Plant the Seedlings:** Make a small hole in the center of each pot and gently place a seedling in the hole. Cover the roots with potting soil and gently pat it down.
4. **Water Thoroughly:** Water the newly transplanted seedlings thoroughly.
5. **Provide Light and Warmth:** Place the pots in a sunny spot or under grow lights.
6. **Monitor and Water:** Keep the soil consistently moist, but not soggy. Water when the top inch of soil feels dry to the touch.
Phase 3: Caring for Your Basil Plants
Now that your basil plants are established, it’s time to give them the care they need to thrive.
1. **Watering:** Water your basil plants regularly, especially during hot weather. Check the soil moisture daily and water when the top inch feels dry. Avoid overwatering, as this can lead to root rot.
2. **Fertilizing:** Basil plants are heavy feeders, so they need regular fertilization. Use a balanced liquid fertilizer every 2-3 weeks. Follow the instructions on the fertilizer label.
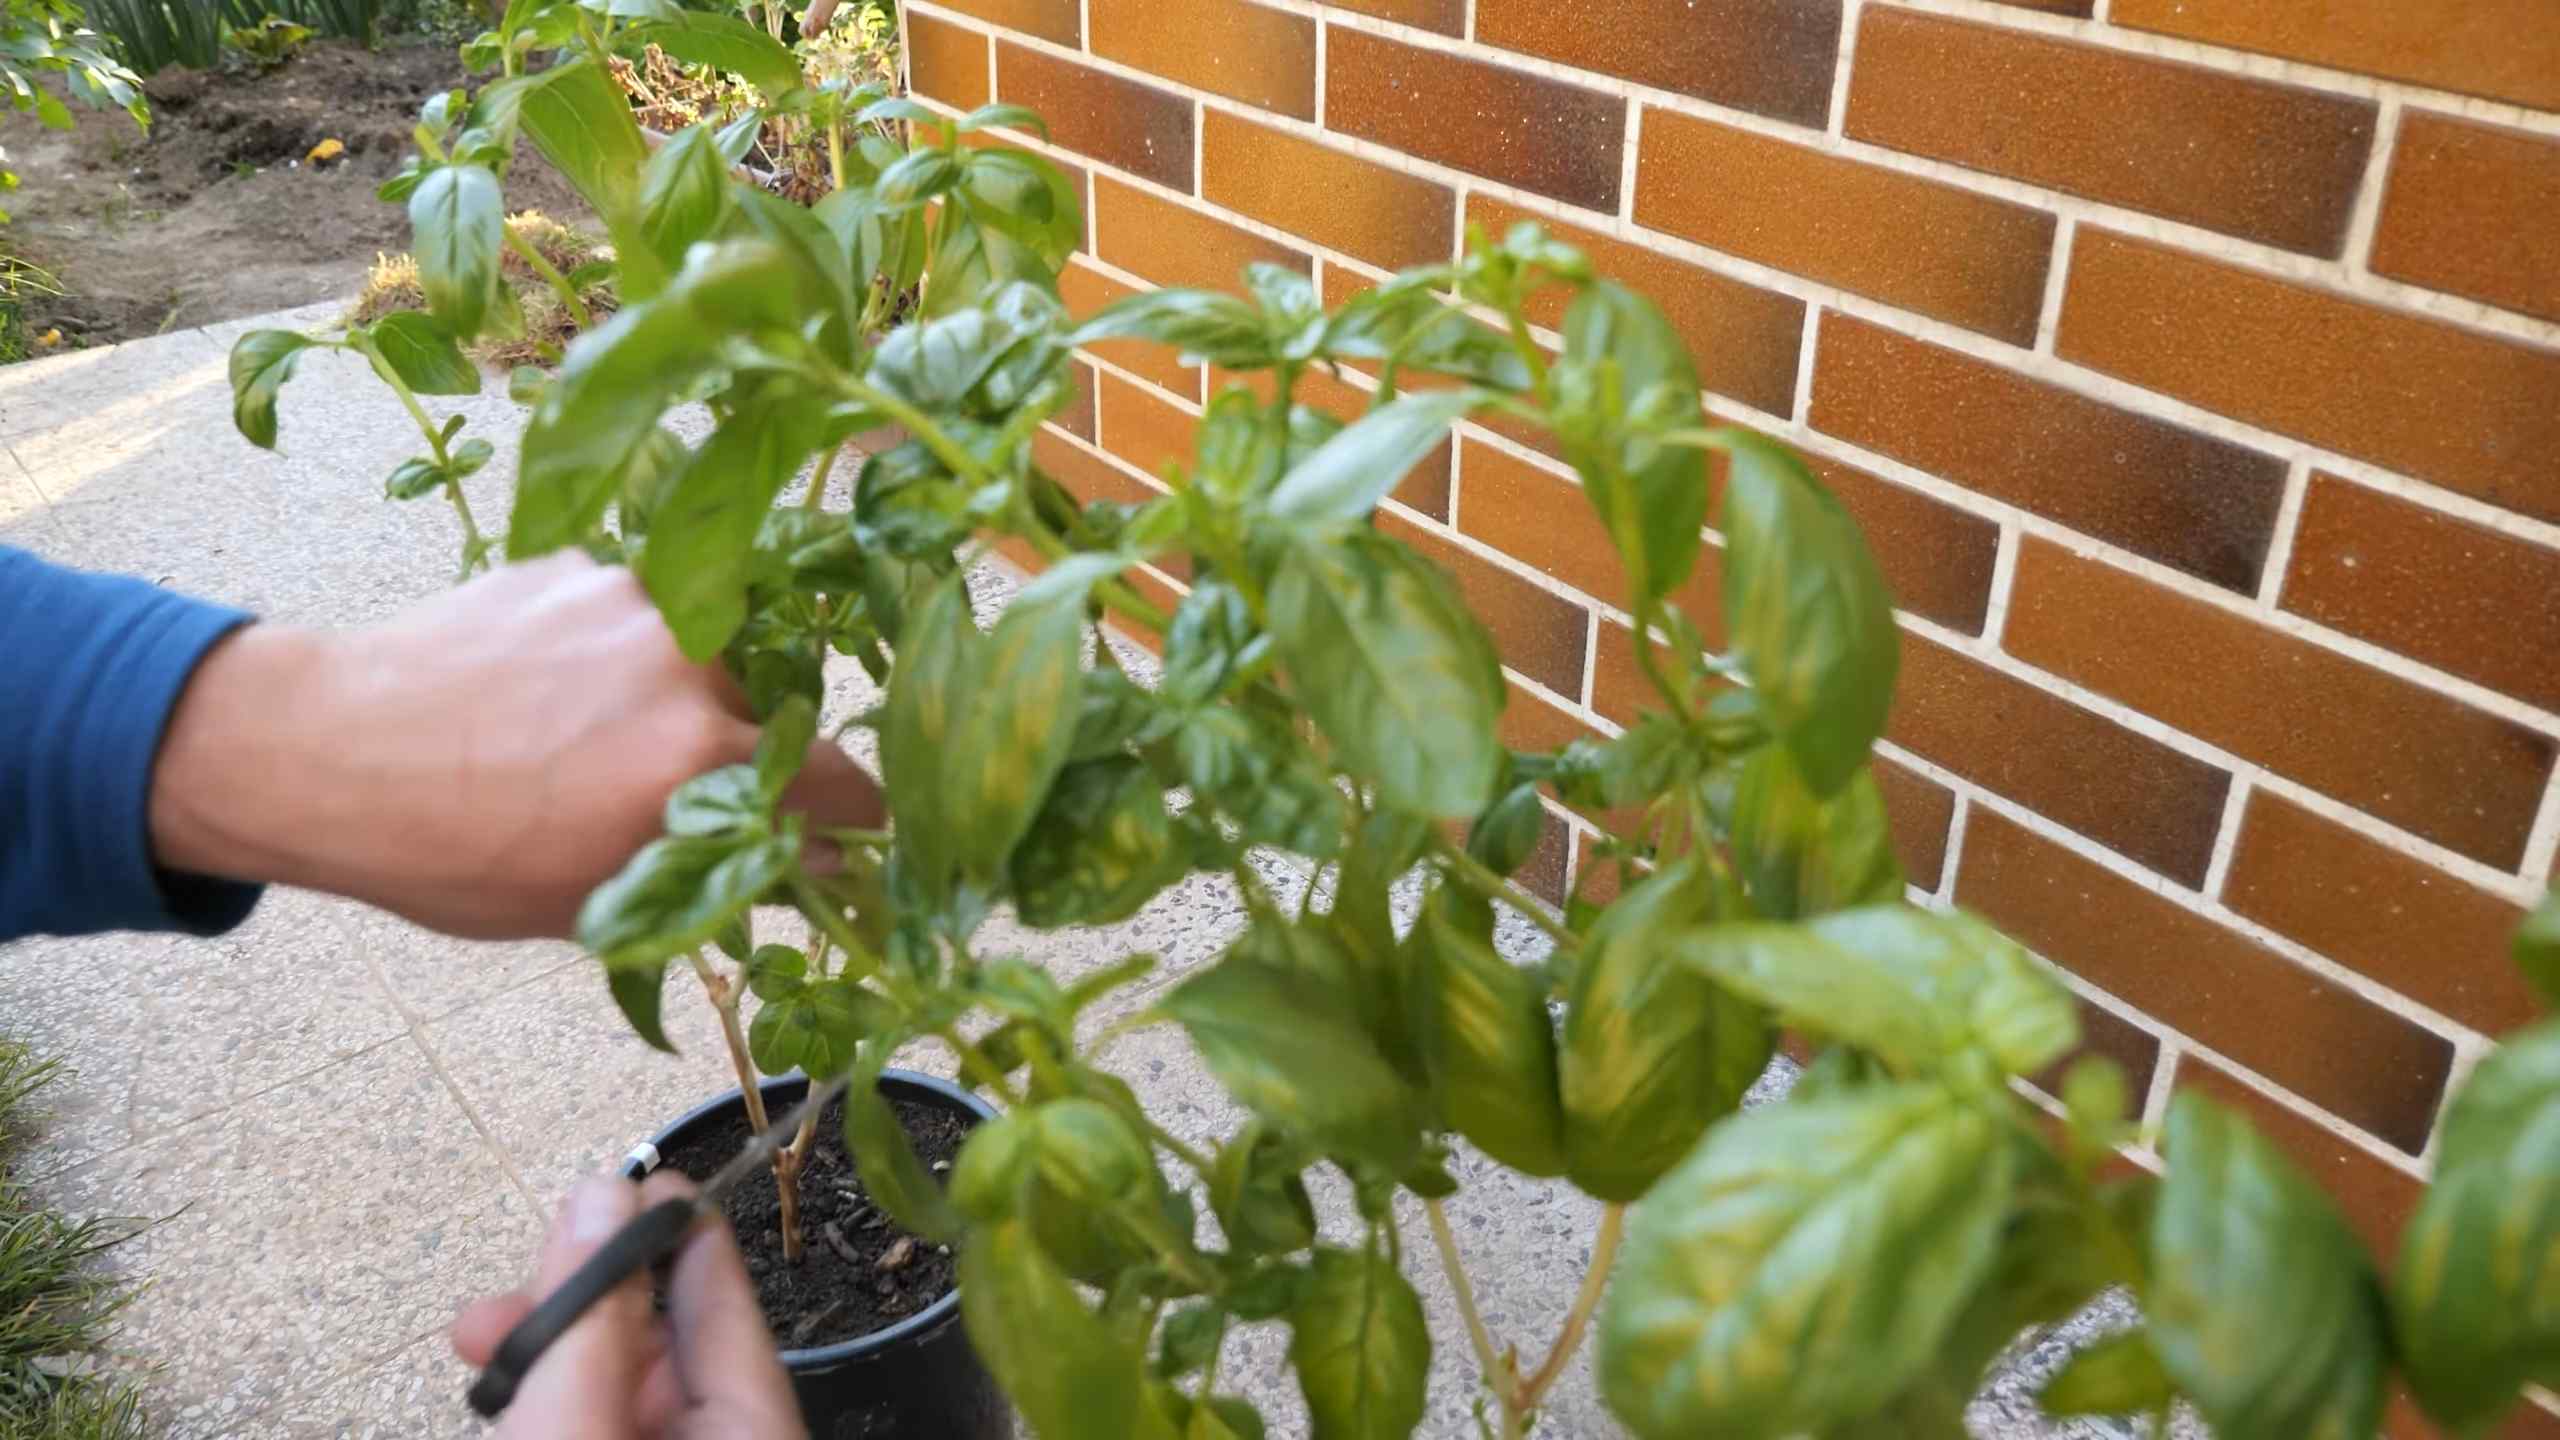
3. **Pruning:** Pruning is essential for keeping your basil plants healthy and productive. When your plants are about 6 inches tall, pinch off the top set of leaves. This will encourage the plant to branch out and produce more leaves.
4. **Pinching Off Flower Buds:** Basil plants will eventually produce flower buds. Pinch these off as soon as you see them. If you let the plant flower, it will stop producing leaves and the leaves will become bitter.
5. **Sunlight:** Basil needs at least 6 hours of sunlight per day. If you don’t have a sunny spot, use grow lights.
6. **Temperature:** Basil prefers warm temperatures, between 60 and 80 degrees Fahrenheit. Protect your plants from frost.
7. **Pest Control:** Keep an eye out for pests like aphids and spider mites. If you see any pests, spray your plants with insecticidal soap.
Phase 4: Harvesting Your Basil
The best part! Harvesting your basil is easy and rewarding.
1. **Harvest Regularly:** The more you harvest, the more your basil plant will produce.
2. **Use Scissors or Pruning Shears:** Use scissors or pruning shears to cut off the stems of the basil leaves.
3. **Harvest Above a Leaf Node:** Cut the stems just above a leaf node (the point where leaves grow out of the stem). This will encourage the plant to branch out and produce more leaves.
4. **Harvest in the Morning:** Harvest your basil in the morning, after the dew has dried. This is when the leaves are at their most flavorful.
5. **Store Your Basil:** You can store your basil in the refrigerator for a few days. Wrap the leaves in a damp paper towel and place them in a plastic bag. You can also freeze basil leaves for longer storage.
Troubleshooting: Common Basil Problems and Solutions
Even with the best care, you might encounter some problems along the way. Here are a few common issues and how to fix them:
* **Yellowing Leaves:** This could be a sign of overwatering, underwatering, or nutrient deficiency. Check the soil moisture and adjust your watering accordingly. Fertilize your plants regularly.
* **Wilting Leaves:** This could be a sign of underwatering or root rot. Check the soil moisture and adjust your watering accordingly. If you suspect root rot, repot your plant in fresh potting soil.
* **Brown Spots on Leaves:** This could be a sign of fungal disease. Remove any affected leaves and spray your plants with a fungicide.
* **Pests:** Keep an eye out for pests like aphids and spider mites. If you see any pests, spray your plants with insecticidal soap.
Tips and Tricks for Basil Success
Here are a few extra tips to help you grow the best basil ever:
* **Rotate Your Plants:** If you’re growing your basil indoors, rotate the pots regularly to ensure that all sides of the plant get equal sunlight.
* **Use a Humidifier:** Basil loves humidity. If you live in a dry climate, use a humidifier to increase the humidity around your plants.
* **Don’t Let Your Plants Get Too Cold:** Basil is sensitive to cold temperatures. Protect your plants from frost.
* **Experiment with Different Varieties:** There are many different varieties of basil to choose from. Experiment with different varieties to find your favorites.
* **Enjoy Your Harvest!** Use your fresh basil in all your favorite recipes.
Growing basil at home is a rewarding experience. With a little care and attention, you can have a constant supply of fresh, flavorful herbs at your fingertips. Happy gardening!
Conclusion
So, there you have it! Growing basil at home is not only achievable, but it’s also incredibly rewarding. Imagine stepping into your kitchen and having fresh, fragrant basil readily available to elevate your culinary creations. No more wilted, expensive bunches from the grocery store – just vibrant, flavorful leaves waiting to be plucked.
This DIY approach to growing basil offers a multitude of benefits. You control the growing environment, ensuring your basil is free from harmful pesticides and herbicides. You also reduce your carbon footprint by eliminating the transportation involved in getting basil from farm to store. Plus, let’s be honest, there’s a certain satisfaction that comes from nurturing a plant from seedling to harvest.
But the best part? The possibilities are endless! Experiment with different varieties of basil. Try growing Genovese basil for classic pesto, Thai basil for Asian-inspired dishes, or lemon basil for a citrusy twist. You can even get creative with your containers. Use terracotta pots for a rustic look, repurposed jars for a sustainable touch, or even a vertical garden to maximize space.
Don’t be afraid to experiment with different growing conditions to find what works best for your environment. Some basil varieties thrive in full sun, while others prefer partial shade. Pay attention to your plant’s needs and adjust accordingly.
We’ve covered the basics, but remember that gardening is a journey of learning and discovery. There will be successes and setbacks, but that’s all part of the fun. The key is to be patient, observant, and willing to adapt.
This method of growing basil at home is a game-changer for any home cook or gardening enthusiast. It’s a simple, cost-effective, and sustainable way to enjoy fresh basil year-round.
We wholeheartedly encourage you to give this DIY trick a try. Start small, perhaps with just a few basil plants, and see how it goes. Once you get the hang of it, you can expand your basil garden and enjoy an abundance of this versatile herb.
And most importantly, we want to hear about your experience! Share your tips, tricks, and photos with us in the comments below. Let’s create a community of basil-loving gardeners and inspire each other to grow our own fresh herbs at home. What are you waiting for? Get planting and enjoy the delicious rewards of your own homegrown basil!
Frequently Asked Questions (FAQ)
What is the best time of year to start growing basil?
The best time to start growing basil is in the late spring or early summer, after the last frost has passed. Basil is a warm-weather herb and thrives in temperatures between 60°F and 80°F (15°C and 27°C). If you live in a colder climate, you can start your basil seeds indoors 6-8 weeks before the last expected frost and then transplant them outdoors once the weather warms up. Starting indoors gives the seedlings a head start and protects them from the cold. You can also extend your growing season by using a greenhouse or cold frame.
How much sunlight does basil need?
Basil needs at least 6-8 hours of sunlight per day to thrive. Choose a location in your garden or on your windowsill that receives plenty of direct sunlight. If you are growing basil indoors, you may need to supplement with artificial light, especially during the winter months. A grow light can provide the necessary light intensity for healthy growth. Insufficient sunlight can lead to leggy growth and reduced flavor.
What kind of soil is best for growing basil?
Basil prefers well-draining soil that is rich in organic matter. A good potting mix for basil should be a blend of peat moss, perlite, and vermiculite. You can also amend your garden soil with compost or aged manure to improve its fertility and drainage. Avoid heavy clay soils, as they can become waterlogged and lead to root rot. The ideal soil pH for basil is between 6.0 and 7.5.
How often should I water my basil plants?
Water your basil plants regularly, especially during hot, dry weather. The soil should be kept consistently moist, but not waterlogged. Water deeply when the top inch of soil feels dry to the touch. Avoid overhead watering, as this can promote fungal diseases. Instead, water at the base of the plant. Mulching around the base of the plant can help to retain moisture and suppress weeds.
How do I harvest basil?
Harvest basil leaves regularly to encourage bushier growth. Pinch off the top sets of leaves, just above a leaf node. This will encourage the plant to produce more side shoots and leaves. Avoid harvesting more than one-third of the plant at a time. You can also harvest entire stems of basil by cutting them off at the base of the plant. The best time to harvest basil is in the morning, after the dew has dried.
How do I prevent basil from flowering?
Basil plants will eventually flower, but flowering can reduce the flavor of the leaves. To prevent flowering, pinch off any flower buds as soon as you see them. This will encourage the plant to focus its energy on producing leaves. If your basil plant does flower, you can still use the leaves, but they may have a slightly bitter taste.
What are some common pests and diseases that affect basil?
Some common pests that affect basil include aphids, spider mites, and whiteflies. These pests can be controlled with insecticidal soap or neem oil. Common diseases that affect basil include fungal diseases such as downy mildew and fusarium wilt. These diseases can be prevented by providing good air circulation, avoiding overhead watering, and using disease-resistant varieties.
Can I grow basil indoors year-round?
Yes, you can grow basil indoors year-round if you provide the right conditions. Basil needs plenty of sunlight, well-draining soil, and regular watering. You may also need to supplement with artificial light, especially during the winter months. Choose a pot that is at least 6 inches in diameter and has drainage holes. Fertilize your basil plants regularly with a balanced fertilizer.
How do I propagate basil from cuttings?
Basil can be easily propagated from cuttings. Take a 4-6 inch cutting from a healthy basil plant, just below a leaf node. Remove the lower leaves and place the cutting in a glass of water. Change the water every few days. After a few weeks, the cutting will develop roots. Once the roots are about an inch long, you can transplant the cutting into a pot of soil.
What are some creative ways to use fresh basil?
Fresh basil can be used in a variety of culinary applications. It can be added to salads, soups, sauces, and pesto. It can also be used to flavor oils and vinegars. Basil is a versatile herb that can be used in both sweet and savory dishes. Try adding basil to your next pizza, pasta dish, or Caprese salad. You can also use basil to make a refreshing basil lemonade or basil-infused ice cream. The possibilities are endless!

Leave a Comment