
Grow Chili Peppers, and unlock a world of fiery flavor right in your own backyard! Imagine plucking vibrant, sun-ripened peppers, ready to spice up your favorite dishes. Forget bland store-bought options; with a few simple tricks, you can cultivate a thriving chili pepper garden, tailored to your exact taste preferences.
The history of chili peppers is as rich and vibrant as their colors. Originating in South America, these fiery fruits have been cultivated for thousands of years, playing a vital role in culinary traditions and even medicinal practices across cultures. From the ancient Aztecs using them in rituals to the fiery curries of India, chili peppers have left an indelible mark on global cuisine.
But why should you embark on this spicy adventure? Well, for starters, growing your own chili peppers is incredibly rewarding. It’s a chance to connect with nature, learn about plant life, and enjoy the satisfaction of nurturing something from seed to harvest. Plus, let’s be honest, fresh, homegrown chili peppers taste infinitely better than anything you can buy at the supermarket. And with the rising cost of groceries, learning how to grow chili peppers yourself is a budget-friendly way to add some zest to your meals. I’m here to share some easy DIY tricks and hacks that will help you achieve a bountiful harvest, even if you’re a complete beginner. Get ready to turn your thumb green and your taste buds happy!
Growing Chili Peppers: From Seed to Spice Rack (A DIY Guide)
Hey there, fellow spice enthusiasts! Ever dreamt of having a constant supply of fiery chili peppers right at your fingertips? Well, you’ve come to the right place! I’m going to walk you through everything you need to know to grow your own chili peppers, from starting seeds indoors to harvesting a bumper crop. Get ready to add some serious heat to your kitchen!
Choosing Your Chili Pepper Varieties
Before we dive into the nitty-gritty, let’s talk about variety. Chili peppers come in a dazzling array of shapes, sizes, and heat levels. Choosing the right ones for you is crucial. Here’s a quick rundown:
* Mild Peppers: If you’re just starting out or prefer a gentle warmth, consider varieties like Poblano, Anaheim, or Shishito. These are great for stuffing, roasting, or adding a subtle kick to your dishes.
* Medium-Heat Peppers: For a bit more zing, try Jalapeños, Serrano peppers, or Cayenne peppers. These are versatile and can be used in everything from salsas to stir-fries.
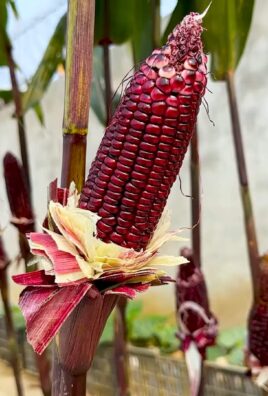
* Hot Peppers: If you’re a true chili head, you’ll want to explore the world of Habaneros, Scotch Bonnets, or even Ghost Peppers. Be warned, these pack a serious punch! Handle with care!
* Super-Hot Peppers: Proceed with extreme caution! These include Carolina Reapers, Trinidad Moruga Scorpions, and other peppers that can reach scorching Scoville Heat Units (SHU). Only for the truly brave!
Pro Tip: Research the Scoville Heat Units (SHU) of each pepper variety before you buy seeds. This will give you a good idea of how hot they are.
Starting Chili Pepper Seeds Indoors
Because chili peppers need a long growing season, starting them indoors is essential, especially if you live in a cooler climate. I usually start my seeds about 8-10 weeks before the last expected frost.
1. Gather Your Supplies:
* Chili pepper seeds (from a reputable source)
* Seed starting trays or small pots
* Seed starting mix (a light, well-draining mix is best)
* Spray bottle with water
* Heat mat (optional, but highly recommended)
* Grow light (also optional, but helps prevent leggy seedlings)
* Clear plastic dome or plastic wrap (to create a humid environment)
2. Prepare the Seed Starting Trays:
* Moisten the seed starting mix with water until it’s damp but not soggy.
* Fill the seed starting trays or pots with the moistened mix, leaving about half an inch of space at the top.
* Gently press down on the mix to compact it slightly.
3. Sow the Seeds:
* Make a small indentation (about ¼ inch deep) in the center of each cell or pot.
* Place 1-2 seeds in each indentation.
* Cover the seeds with a thin layer of seed starting mix.
* Gently water the surface with a spray bottle to avoid disturbing the seeds.
4. Create a Humid Environment:
* Cover the seed starting trays with a clear plastic dome or plastic wrap. This will help retain moisture and create a warm, humid environment that’s ideal for germination.
5. Provide Warmth and Light:
* Place the seed starting trays on a heat mat set to around 80-85°F (27-29°C). This will significantly speed up germination.
* Position a grow light a few inches above the trays. If you don’t have a grow light, place the trays in a warm, sunny window, but be aware that the seedlings may become leggy (tall and spindly) if they don’t get enough light.
6. Monitor and Water:
* Check the seed starting trays daily. Keep the soil consistently moist, but not waterlogged. Water with a spray bottle as needed.
* Once the seeds germinate (usually within 7-14 days, depending on the variety), remove the plastic dome or plastic wrap.
7. Provide Adequate Light:
* Continue to provide ample light to the seedlings. If using a grow light, keep it on for 14-16 hours per day.
* If using a sunny window, rotate the trays regularly to ensure that the seedlings receive even light on all sides.
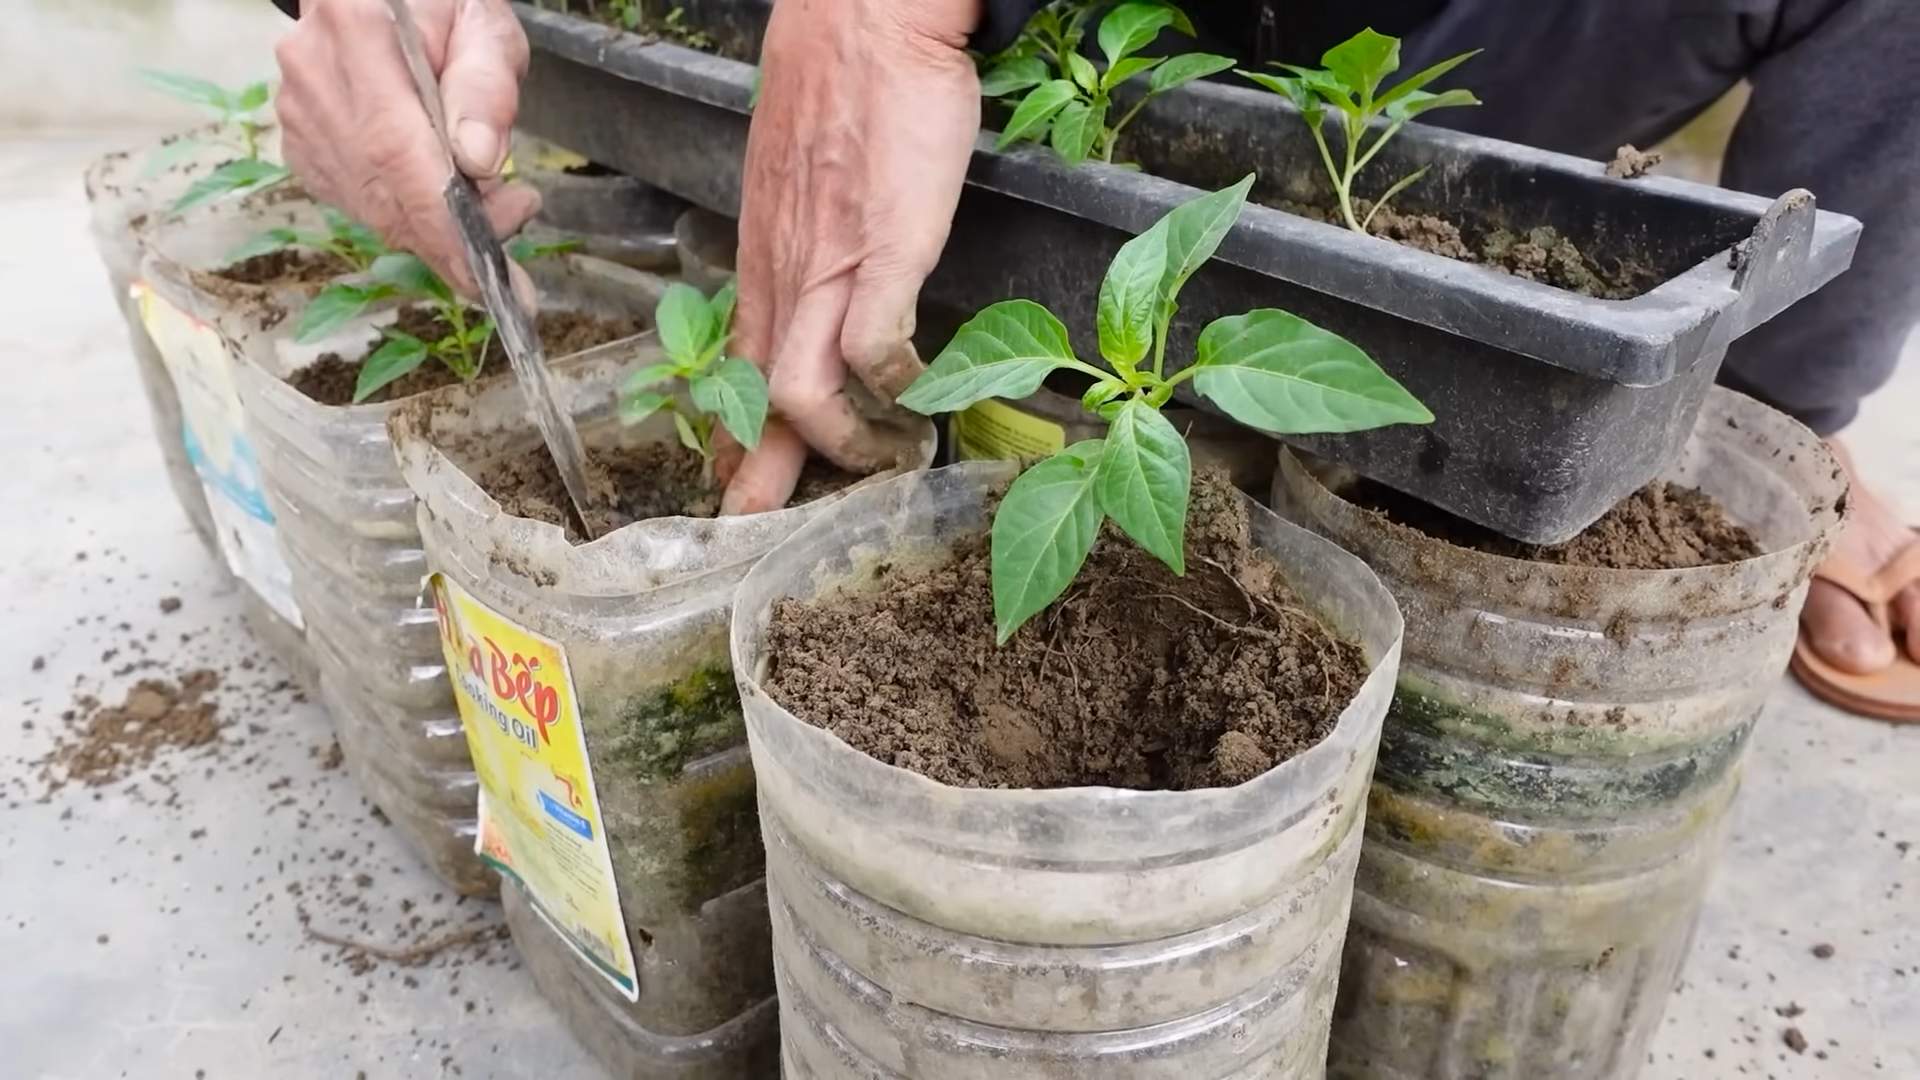
Transplanting Seedlings
Once your seedlings have developed their first set of true leaves (the leaves that appear after the initial seed leaves), it’s time to transplant them into larger pots.
1. Prepare the Pots:
* Choose pots that are at least 3-4 inches in diameter.
* Fill the pots with a good quality potting mix.
2. Gently Remove the Seedlings:
* Carefully loosen the soil around the seedlings with a small tool or your fingers.
* Gently lift the seedlings out of the seed starting trays, being careful not to damage the roots.
3. Transplant the Seedlings:
* Make a hole in the center of each pot that’s large enough to accommodate the seedling’s root ball.
* Place the seedling in the hole and gently backfill with potting mix.
* Water the seedlings thoroughly.
4. Harden Off the Seedlings:
* Before transplanting your chili pepper plants outdoors, you need to “harden them off.” This process gradually acclimates the plants to outdoor conditions, such as sunlight, wind, and temperature fluctuations.
* Start by placing the seedlings outdoors in a sheltered location for a few hours each day, gradually increasing the amount of time they spend outdoors over the course of a week or two.
* Protect the seedlings from direct sunlight and strong winds during the hardening off process.
Planting Chili Peppers Outdoors
Once the danger of frost has passed and the soil has warmed up, it’s time to transplant your chili pepper plants into their final growing location.
1. Choose a Sunny Location:
* Chili peppers need at least 6-8 hours of direct sunlight per day to thrive. Choose a location that receives plenty of sun.
2. Prepare the Soil:
* Chili peppers prefer well-drained soil that’s rich in organic matter. Amend the soil with compost or other organic material before planting.
3. Plant the Chili Peppers:
* Dig holes that are slightly larger than the root balls of the chili pepper plants.
* Carefully remove the plants from their pots and place them in the holes.
* Backfill with soil and gently firm around the base of the plants.
* Space the plants about 18-24 inches apart.
4. Water Thoroughly:
* Water the chili pepper plants thoroughly after planting.
5. Mulch:
* Apply a layer of mulch around the base of the plants to help retain moisture, suppress weeds, and regulate soil temperature.
Caring for Your Chili Pepper Plants
Once your chili pepper plants are in the ground, it’s important to provide them with proper care to ensure a bountiful harvest.
* Watering: Water your chili pepper plants regularly, especially during hot, dry weather. Aim to keep the soil consistently moist, but not waterlogged.
* Fertilizing: Fertilize your chili pepper plants every 2-3 weeks with a balanced fertilizer or a fertilizer specifically formulated for peppers.
* Pruning: Pruning is not essential for chili peppers, but it can help to improve air circulation and encourage bushier growth. Remove any dead or yellowing leaves.
* Pest and Disease Control: Keep an eye out for pests and diseases, such as aphids, spider mites, and blossom end rot. Treat any problems promptly with appropriate organic or chemical controls.
Supporting Your Plants
As your chili pepper plants grow, they may need some support to prevent them from toppling over, especially when they’re laden with fruit.
* Staking: Use stakes to support individual plants. Drive a stake into the ground near the base of the plant and tie the plant to the stake with soft twine.
* Caging: Use tomato cages to provide support for multiple plants. Place the cages over the plants when they’re young and allow them to grow up through the cages.
Harvesting Chili Peppers
The time it takes for chili peppers to mature depends on the variety. Generally, you can expect to harvest your first peppers about 60-90 days after transplanting.
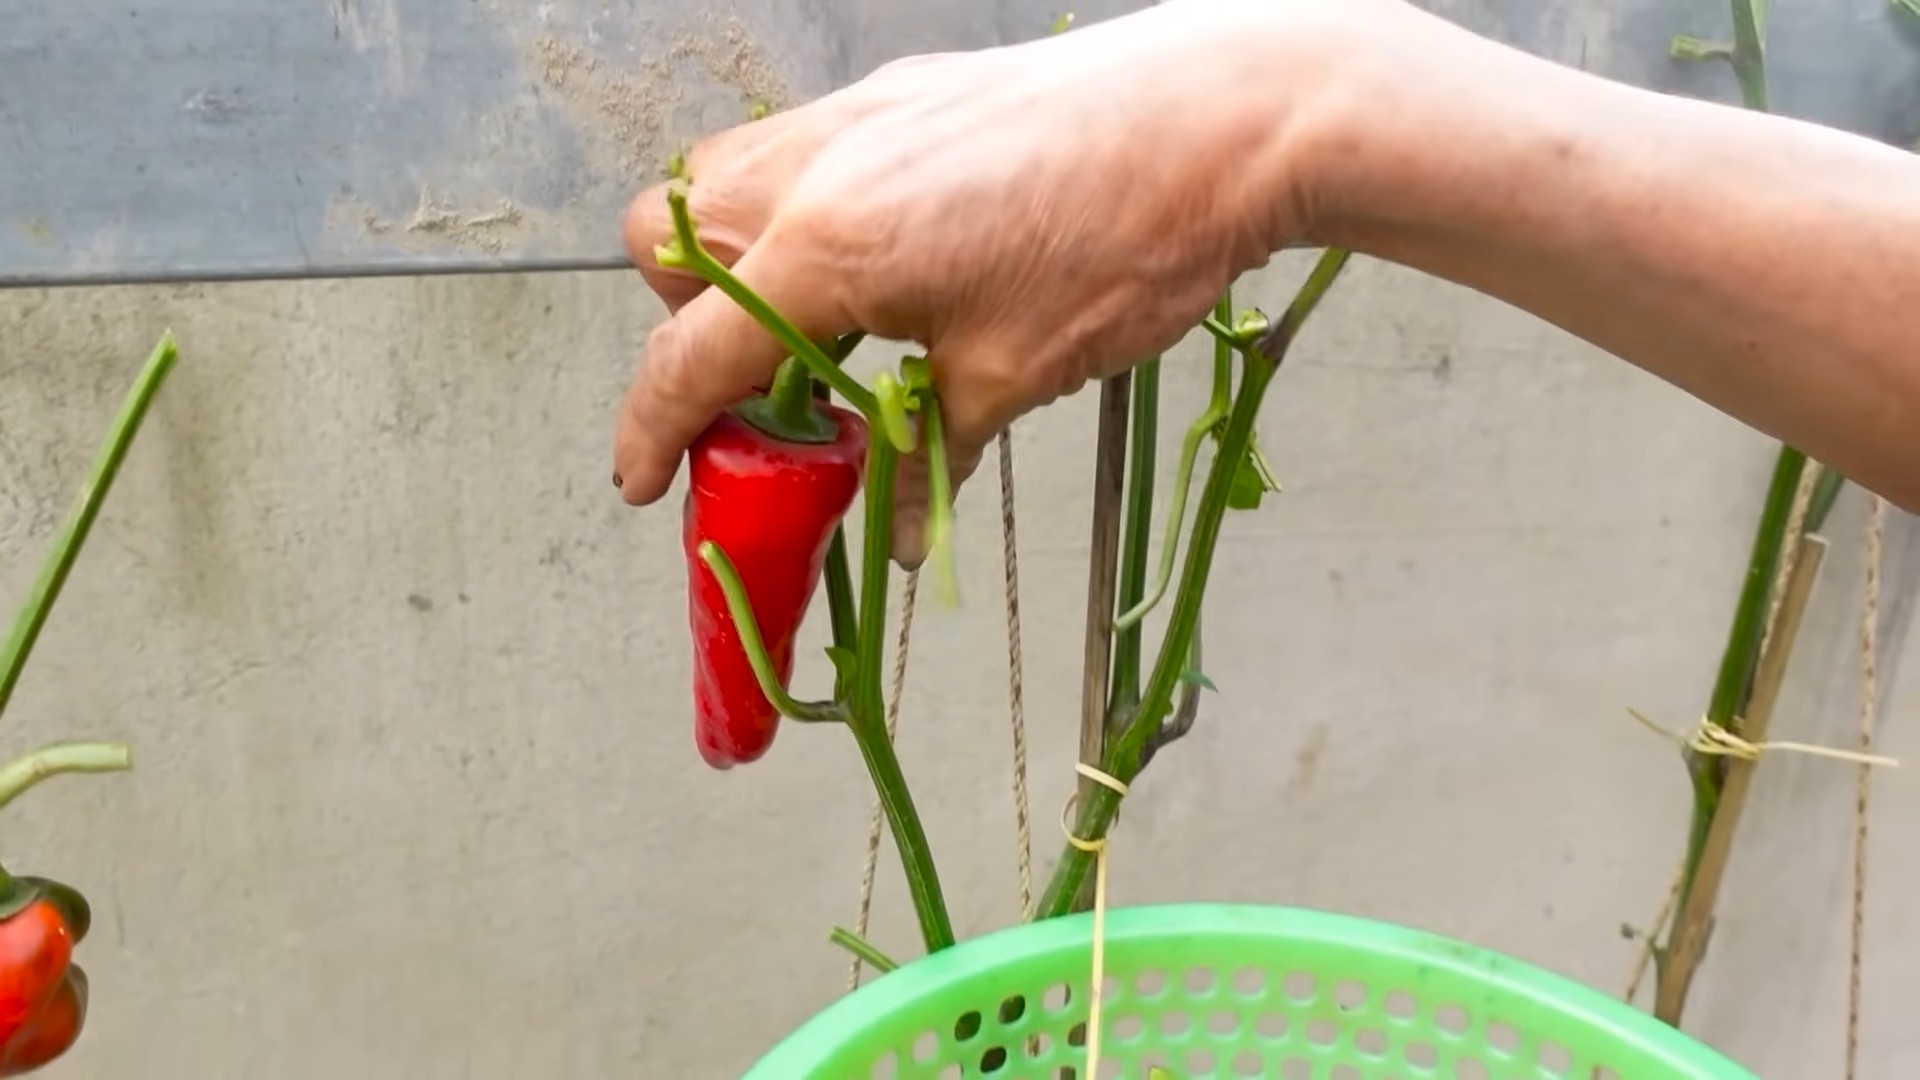
* Harvesting Green Peppers: If you prefer green chili peppers, you can harvest them when they’re fully sized but still green.
* Harvesting Ripe Peppers: For ripe chili peppers, wait until they turn their mature color (red
Conclusion
So, there you have it! Growing chili peppers at home, while it might seem daunting at first, is incredibly rewarding and surprisingly simple with this DIY trick. We’ve walked you through the process, highlighting the key steps to ensure a bountiful harvest of fiery goodness. But why should you bother with this method instead of buying peppers at the store? The answer is multifaceted.
Firstly, the flavor of homegrown chili peppers is simply unmatched. You control the growing conditions, ensuring optimal ripeness and a depth of flavor you just can’t find in commercially grown varieties. Think about it: you’ll be able to pick your peppers at their peak, bursting with heat and aroma, ready to add a kick to your favorite dishes.
Secondly, you have complete control over the growing process. No need to worry about pesticides or other harmful chemicals. You can grow your chili peppers organically, knowing exactly what’s going into your food. This is especially important if you’re health-conscious or have dietary restrictions.
Thirdly, it’s incredibly cost-effective. Once you’ve invested in the initial supplies (which are minimal), you can grow chili peppers year after year, saving money on grocery bills and enjoying a constant supply of fresh, flavorful peppers.
But the benefits don’t stop there. Growing chili peppers is also a fantastic hobby. It’s a great way to connect with nature, learn about plant life, and enjoy the satisfaction of nurturing something from seed to harvest. Plus, it’s a conversation starter! Imagine the envy of your friends and neighbors when they see your thriving chili pepper plants.
Now, let’s talk about variations. Feel free to experiment with different types of chili peppers. From the mild jalapeño to the scorching habanero, there’s a chili pepper out there for every palate. You can also try growing your chili peppers in different containers, such as raised beds, pots, or even hanging baskets. Just make sure the container is large enough to accommodate the plant’s root system.
Another fun variation is to experiment with different growing mediums. While we recommend a well-draining potting mix, you can also try using coco coir or perlite. These mediums can help improve drainage and aeration, leading to healthier plants.
And don’t forget about companion planting! Certain plants, such as basil and marigolds, can help deter pests and attract beneficial insects to your chili pepper plants. This is a great way to keep your plants healthy and thriving without using harmful chemicals.
Finally, consider the climate you live in. If you live in a colder climate, you may need to start your chili pepper seeds indoors and transplant them outdoors after the last frost. You may also need to provide supplemental lighting to ensure your plants get enough sunlight.
We are confident that this DIY trick will revolutionize your approach to growing chili peppers. It’s a simple, effective, and rewarding way to enjoy fresh, flavorful peppers all season long.
So, what are you waiting for? Grab your seeds, gather your supplies, and get ready to embark on a chili pepper growing adventure! We encourage you to try this DIY trick and share your experience with us. Let us know what varieties you’re growing, what challenges you’ve faced, and what successes you’ve achieved. We’re eager to hear your stories and learn from your experiences. Share your photos and tips on social media using #HomegrownChiliPeppers and let’s build a community of passionate chili pepper growers! Happy growing!
Frequently Asked Questions (FAQ)
What kind of soil is best for growing chili peppers?
Chili peppers thrive in well-draining soil that is rich in organic matter. A good quality potting mix specifically formulated for vegetables is ideal. You can also amend your garden soil with compost or well-rotted manure to improve its drainage and fertility. Avoid heavy clay soils, as they can retain too much moisture and lead to root rot. The ideal pH for chili peppers is between 6.0 and 7.0. You can test your soil’s pH with a soil testing kit and amend it accordingly.
How much sunlight do chili peppers need?
Chili peppers need at least 6-8 hours of direct sunlight per day to thrive. If you’re growing them indoors, you may need to supplement with grow lights, especially during the winter months. Insufficient sunlight can lead to leggy plants with poor fruit production. When choosing a location for your chili pepper plants, make sure it’s a spot that receives plenty of sunlight throughout the day.
How often should I water my chili pepper plants?
Water your chili pepper plants regularly, especially during hot, dry weather. The soil should be kept consistently moist, but not waterlogged. Overwatering can lead to root rot, while underwatering can cause the plants to wilt and stress. A good rule of thumb is to water when the top inch of soil feels dry to the touch. When watering, water deeply, allowing the water to soak into the soil and reach the roots. Avoid watering the foliage, as this can encourage fungal diseases.
When should I fertilize my chili pepper plants?
Fertilize your chili pepper plants regularly throughout the growing season. Start fertilizing about two weeks after transplanting the seedlings outdoors. Use a balanced fertilizer with equal amounts of nitrogen, phosphorus, and potassium. You can also use a fertilizer specifically formulated for vegetables. Follow the instructions on the fertilizer label for application rates. Avoid over-fertilizing, as this can lead to excessive foliage growth and reduced fruit production.
How do I prevent pests and diseases on my chili pepper plants?
There are several things you can do to prevent pests and diseases on your chili pepper plants. First, choose disease-resistant varieties. Second, provide good air circulation around the plants. Third, water the plants at the base, avoiding wetting the foliage. Fourth, inspect the plants regularly for pests and diseases. If you find any pests, you can remove them by hand or use an insecticidal soap or neem oil. If you find any diseases, you can treat them with a fungicide. Companion planting with basil or marigolds can also help deter pests.
How do I know when my chili peppers are ripe?
The color of the chili pepper is the best indicator of ripeness. Most chili peppers will turn from green to red, yellow, orange, or brown when they are ripe, depending on the variety. The peppers should also feel firm and slightly heavy for their size. You can also taste a small piece of the pepper to check for ripeness. The flavor should be fully developed and the heat level should be at its peak.
Can I grow chili peppers indoors?
Yes, you can grow chili peppers indoors, but you’ll need to provide them with adequate light and warmth. Place the plants in a sunny window or under grow lights. Keep the temperature between 70 and 80 degrees Fahrenheit during the day and 60 and 70 degrees Fahrenheit at night. Water the plants regularly and fertilize them every two weeks. You may also need to hand-pollinate the flowers to ensure fruit production.
How do I store chili peppers?
There are several ways to store chili peppers. You can dry them, freeze them, pickle them, or make them into hot sauce. To dry chili peppers, simply string them together and hang them in a warm, dry place until they are completely dry. To freeze chili peppers, wash them, dry them, and then place them in a freezer bag. To pickle chili peppers, follow a pickling recipe. To make hot sauce, blend the chili peppers with vinegar, salt, and other spices.
What are some common problems when growing chili peppers and how do I fix them?
Some common problems include blossom drop (caused by temperature fluctuations or lack of pollination), aphids (treat with insecticidal soap), and fungal diseases (improve air circulation and treat with fungicide). Overwatering can lead to root rot, while underwatering can cause wilting. Nutrient deficiencies can also cause problems, so make sure to fertilize your plants regularly.
What are some good chili pepper varieties for beginners?
Jalapeños are a great choice for beginners because they are relatively easy to grow and produce a good yield. Bell peppers are also a good option if you prefer a milder flavor. Other good varieties for beginners include Anaheim peppers, poblano peppers, and serrano peppers. Research the heat level and growing requirements of different varieties before you choose one.
Leave a Comment