
Grow Green Beans Home – sounds like a dream, right? Imagine stepping outside your back door and plucking fresh, crisp green beans straight from the vine for dinner. No more trips to the grocery store, no more wondering about pesticides – just pure, homegrown goodness. But maybe you’ve tried gardening before and felt a little overwhelmed, or perhaps you’re a complete newbie. Don’t worry, I’m here to tell you that growing your own green beans is easier than you think, and this DIY guide is packed with tricks and hacks to make it a success, even if you have limited space or a less-than-green thumb!
For centuries, cultivating beans has been a vital part of human history, dating back to ancient civilizations in the Americas. They were a staple food source, providing essential nutrients and playing a significant role in cultural traditions. Today, while we have access to beans from all over the world, there’s something incredibly satisfying about nurturing your own plants from seed to harvest.
Why do you need these DIY tricks? Because let’s face it, gardening can sometimes feel like a mystery. Knowing the right techniques, like proper soil preparation, companion planting, and pest control, can make all the difference between a bountiful harvest and a disappointing one. Plus, these hacks will save you time, money, and effort, allowing you to grow green beans home with confidence and joy. So, let’s get started and transform your backyard (or balcony!) into a green bean paradise!

Growing Green Beans: A Beginner’s Guide to a Bountiful Harvest
Hey there, fellow gardening enthusiasts! I’m so excited to share my experience growing green beans. They’re one of the easiest and most rewarding vegetables to cultivate, perfect for beginners and seasoned gardeners alike. Plus, nothing beats the taste of fresh, homegrown green beans! This guide will walk you through everything you need to know, from choosing the right variety to harvesting your delicious crop.
Choosing Your Green Bean Variety
Before we get our hands dirty, let’s talk about the different types of green beans. This is important because it will affect how you plant and care for them.
* **Bush Beans:** These are compact and don’t require staking. They produce a large harvest all at once, making them great for canning or freezing.
* **Pole Beans:** These beans climb and need a trellis or other support. They produce a steady harvest over a longer period.
* **Snap Beans:** These are the most common type, with edible pods and beans.
* **String Beans:** Older varieties used to have tough strings along the sides, but most modern varieties are stringless.
* **Dry Beans:** These are grown for their dried beans, which are used in soups and stews.
I personally love growing both bush and pole beans. Bush beans are great for a quick harvest, while pole beans keep me supplied with fresh beans for weeks! Some of my favorite varieties include ‘Blue Lake Bush’, ‘Kentucky Wonder Pole’, and ‘Roma II’.
Preparing Your Garden Bed
Green beans thrive in well-drained soil with a pH between 6.0 and 7.0. Here’s how I prepare my garden bed:
* **Sunlight:** Choose a spot that gets at least 6-8 hours of sunlight per day. Green beans need plenty of sunshine to produce a good harvest.
* **Soil Testing:** If you’re unsure about your soil’s pH, get a soil testing kit from your local garden center. It’s a simple way to ensure your beans have the best possible start.
* **Clearing the Area:** Remove any weeds, rocks, and debris from the planting area.
* **Soil Amendment:** Amend the soil with compost or well-rotted manure. This will improve drainage, add nutrients, and help retain moisture. I usually add a generous layer of compost, about 2-3 inches thick.
* **Tilling or Digging:** Till the soil to a depth of 6-8 inches. This will loosen the soil and make it easier for the bean roots to grow. If you prefer not to till, you can use a garden fork to loosen the soil.
* **Leveling:** Rake the soil smooth and level.
Planting Your Green Beans
Now for the fun part – planting! Here’s how I plant my green beans:
1. **Timing:** Plant green beans after the last frost. The soil temperature should be at least 60°F (15°C). I usually wait until the soil has warmed up nicely in late spring or early summer.
2. **Spacing:**
* **Bush Beans:** Plant seeds 1-2 inches deep and 2-4 inches apart in rows that are 18-24 inches apart.
* **Pole Beans:** Plant seeds 1-2 inches deep and 4-6 inches apart at the base of your trellis or support.
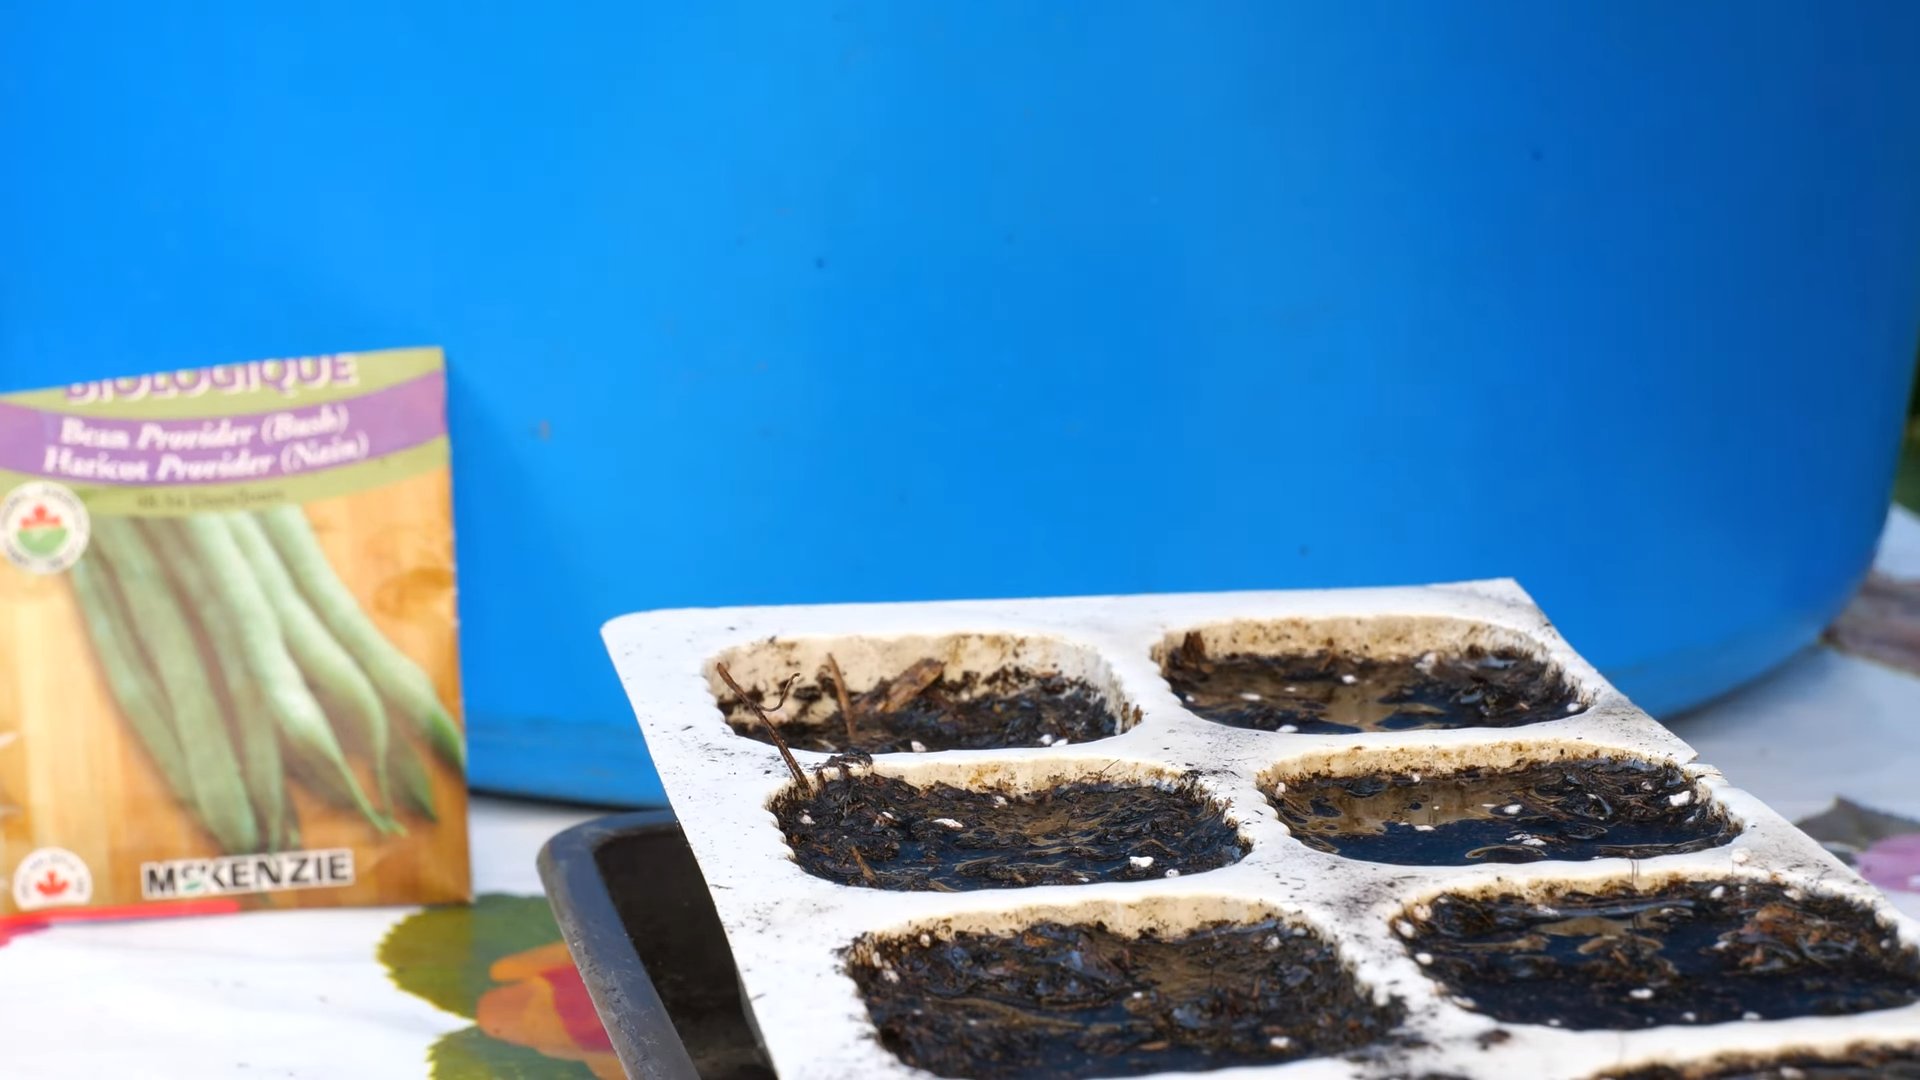
3. **Sowing the Seeds:** Create small holes in the soil at the appropriate spacing. Drop 1-2 seeds into each hole and cover with soil. Gently pat the soil down.
4. **Watering:** Water the newly planted seeds thoroughly. Keep the soil consistently moist until the seeds germinate.
5. **Germination:** Green bean seeds usually germinate in 5-10 days, depending on the soil temperature and moisture levels.
Building a Trellis for Pole Beans
If you’re growing pole beans, you’ll need to provide them with a trellis or other support to climb on. Here are a few options:
* **Bamboo Trellis:** This is a simple and inexpensive option. You can create a teepee shape by tying bamboo poles together at the top.
* **Netting:** Attach netting to posts or a fence.
* **Wire Mesh:** Use wire mesh to create a sturdy trellis.
* **Existing Structures:** You can also train pole beans to climb on a fence, arbor, or even a sturdy sunflower stalk.
I personally love using a bamboo trellis because it’s easy to build and looks great in the garden.
1. **Gather Materials:** You’ll need bamboo poles (or other sturdy sticks), twine, and pruning shears.
2. **Arrange Poles:** Arrange the poles in a circle, leaning them towards the center. The number of poles will depend on the size of your trellis. I usually use 5-6 poles.
3. **Tie the Top:** Tie the poles together at the top with twine. Make sure the knot is secure.
4. **Secure the Base:** Push the base of the poles firmly into the ground.
5. **Add Horizontal Supports (Optional):** For extra support, you can add horizontal bamboo poles or twine between the vertical poles.
Caring for Your Green Beans
Once your green beans have sprouted, it’s important to provide them with proper care.
* **Watering:** Water regularly, especially during dry periods. Green beans need about 1 inch of water per week. Water at the base of the plants to avoid wetting the foliage, which can lead to fungal diseases. I like to water in the morning so the foliage has time to dry before nightfall.
* **Weeding:** Keep the area around your green beans free of weeds. Weeds compete with the beans for nutrients and water. Hand-pull weeds regularly or use a hoe to cultivate the soil.
* **Fertilizing:** Green beans don’t need a lot of fertilizer, but you can give them a boost with a side dressing of compost or a balanced fertilizer a few weeks after they emerge. Avoid over-fertilizing, as this can lead to excessive foliage growth and fewer beans.
* **Pest Control:** Keep an eye out for pests such as aphids, bean beetles, and spider mites. You can control these pests with insecticidal soap, neem oil, or by hand-picking them off the plants. I prefer using organic pest control methods whenever possible.
* **Supporting Pole Beans:** As your pole beans grow, gently guide them onto the trellis. They will eventually start to climb on their own.
Dealing with Common Green Bean Problems
Even with the best care, you might encounter some problems while growing green beans. Here are a few common issues and how to address them:
* **Yellowing Leaves:** This can be caused by a variety of factors, including nutrient deficiencies, overwatering, or disease. Check the soil drainage and pH. If the soil is too acidic, add lime. If the soil is lacking nutrients, fertilize with a balanced fertilizer.
* **Bean Beetles:** These pests can quickly defoliate your bean plants. Hand-pick them off the plants or use insecticidal soap or neem oil.
* **Aphids:** These tiny insects suck the sap from plants, causing them to weaken and distort. Spray aphids with insecticidal soap or neem oil. You can also attract beneficial insects like ladybugs, which prey on aphids.
* **Powdery Mildew:** This fungal disease causes a white, powdery coating on the leaves. Improve air circulation by spacing plants properly and avoid overhead watering. You can also spray with a fungicide.
* **Root Rot:** This fungal disease can occur in poorly drained soil. Improve drainage by amending the soil with compost or planting in raised beds.
Harvesting Your Green Beans
The moment you’ve been waiting for – harvesting! Here’s how I harvest my green beans:
1. **Timing:** Harvest green beans when the pods are firm, crisp, and about the size of a pencil. They should snap easily when bent. Don’t let the beans get too large and tough.
2. **Picking:** Gently snap the beans off the plant, being careful not to damage the stems.
3. **Frequency:** Harvest green beans regularly, every few days, to encourage continued production. The more you pick, the more they’ll produce!
4. **Storage:** Store green beans in the refrigerator for up to a week. For longer storage, you can blanch and freeze them.
Preserving Your Green Bean Harvest
If you have a bumper crop of green beans, you might want to preserve some for later. Here are a few options:
* **Freezing:** Blanch the green beans in boiling water for 3 minutes, then plunge them into ice water to stop the cooking process. Drain well and freeze in freezer bags or containers.
* **Canning:** Pressure canning is the safest way to preserve green beans. Follow a tested recipe from a reputable source, such as the National Center for Home Food Preservation.
* **Pickling:** Pickle green beans for a tangy and delicious treat. There are many different pickling recipes available online.
Enjoying Your Homegrown Green Beans
Now that you’ve harvested your green beans, it’
Conclusion
So, there you have it! Growing green beans at home is not only achievable but also incredibly rewarding. We’ve explored a simple yet effective DIY trick that can significantly boost your harvest and make the entire process more enjoyable. Forget complicated setups and expensive equipment; this method focuses on maximizing space, improving soil conditions, and providing optimal support for your climbing green bean varieties.
Why is this DIY trick a must-try? Because it’s a game-changer for both novice and experienced gardeners. It addresses common challenges like limited garden space, poor soil drainage, and inadequate support structures. By implementing this technique, you’ll witness healthier plants, increased yields, and a longer harvest season. Plus, there’s immense satisfaction in knowing you’ve nurtured your own food from seed to table.
But the beauty of gardening lies in its adaptability. Feel free to experiment with variations to suit your specific needs and preferences. For instance, if you’re short on vertical space, consider using a shorter trellis or even growing bush bean varieties, which don’t require extensive support. You can also amend your soil with different types of organic matter, such as compost or aged manure, to further enhance its fertility. Another variation is to try companion planting. Marigolds, for example, are known to deter pests that commonly attack green beans. Basil is another great companion plant, improving the flavor of your beans and repelling bean beetles.
Don’t be afraid to get creative with your support structures. While we’ve outlined a basic trellis design, you can adapt it using materials you have on hand, such as bamboo poles, repurposed branches, or even old ladders. The key is to provide a sturdy and accessible framework for your green beans to climb.
Ultimately, the success of your green bean garden depends on your willingness to experiment and learn. Observe your plants closely, adjust your watering and fertilization practices as needed, and don’t be discouraged by occasional setbacks. Gardening is a journey, and every challenge is an opportunity to grow, both literally and figuratively.
We wholeheartedly encourage you to try this DIY trick for growing green beans at home. It’s a simple, cost-effective, and highly effective way to enjoy fresh, delicious green beans straight from your garden. Once you’ve given it a try, we’d love to hear about your experience! Share your photos, tips, and challenges in the comments section below. Let’s create a community of green bean enthusiasts and learn from each other’s successes. Happy gardening!
Frequently Asked Questions (FAQ)
What type of green beans work best with this DIY trick?
This DIY trick is particularly well-suited for pole beans, also known as climbing beans. These varieties, such as Kentucky Wonder, Blue Lake, and Scarlet Runner, require vertical support to thrive. Bush beans, on the other hand, are more compact and don’t necessarily need a trellis, although they can still benefit from some support in windy areas. When selecting your green bean seeds, be sure to check the variety and its growth habit to ensure it’s compatible with this method.
How often should I water my green bean plants?
Watering frequency depends on several factors, including the weather, soil type, and stage of plant growth. Generally, green beans need consistent moisture, especially during flowering and pod development. Aim to water deeply whenever the top inch of soil feels dry to the touch. Avoid overwatering, as this can lead to root rot. A good rule of thumb is to water early in the morning to allow the foliage to dry before nightfall, which can help prevent fungal diseases. Consider using a soaker hose or drip irrigation system to deliver water directly to the roots, minimizing water waste and reducing the risk of foliar diseases.
What kind of soil is best for growing green beans?
Green beans prefer well-drained, fertile soil with a slightly acidic to neutral pH (around 6.0 to 7.0). Before planting, amend your soil with plenty of organic matter, such as compost, aged manure, or leaf mold. This will improve drainage, aeration, and nutrient content. Avoid heavy clay soils, as they can become waterlogged and inhibit root growth. If you have clay soil, consider adding sand and organic matter to improve its texture. A soil test can help you determine the pH and nutrient levels of your soil, allowing you to make necessary amendments before planting.
How much sunlight do green beans need?
Green beans require at least 6-8 hours of direct sunlight per day to thrive. Choose a planting location that receives ample sunlight throughout the day. If you live in a hot climate, some afternoon shade can be beneficial to prevent the plants from overheating. Insufficient sunlight can lead to leggy growth, reduced flowering, and lower yields.
What are some common pests and diseases that affect green beans, and how can I prevent them?
Common pests that attack green beans include aphids, bean beetles, and spider mites. Diseases include powdery mildew, bean rust, and anthracnose. To prevent these problems, practice good garden hygiene, such as removing plant debris and weeds. Encourage beneficial insects, such as ladybugs and lacewings, which prey on aphids and other pests. Use organic pest control methods, such as insecticidal soap or neem oil, if necessary. Ensure good air circulation around your plants to prevent fungal diseases. Choose disease-resistant varieties whenever possible. Crop rotation can also help prevent soilborne diseases from building up in your garden.
When is the best time to harvest green beans?
Green beans are typically ready to harvest about 50-60 days after planting. Harvest them when the pods are firm, plump, and snap easily. Avoid letting the pods become too large and tough, as they will lose their flavor and tenderness. Ha
So, there you have it! Growing green beans at home is not only achievable but also incredibly rewarding. We’ve explored a simple yet effective DIY trick that can significantly boost your harvest and make the entire process more enjoyable. Forget complicated setups and expensive equipment; this method focuses on maximizing space, improving soil conditions, and providing optimal support for your climbing green bean varieties.
Why is this DIY trick a must-try? Because it’s a game-changer for both novice and experienced gardeners. It addresses common challenges like limited garden space, poor soil drainage, and inadequate support structures. By implementing this technique, you’ll witness healthier plants, increased yields, and a longer harvest season. Plus, there’s immense satisfaction in knowing you’ve nurtured your own food from seed to table.
But the beauty of gardening lies in its adaptability. Feel free to experiment with variations to suit your specific needs and preferences. For instance, if you’re short on vertical space, consider using a shorter trellis or even growing bush bean varieties, which don’t require extensive support. You can also amend your soil with different types of organic matter, such as compost or aged manure, to further enhance its fertility. Another variation is to try companion planting. Marigolds, for example, are known to deter pests that commonly attack green beans. Basil is another great companion plant, improving the flavor of your beans and repelling bean beetles.
Don’t be afraid to get creative with your support structures. While we’ve outlined a basic trellis design, you can adapt it using materials you have on hand, such as bamboo poles, repurposed branches, or even old ladders. The key is to provide a sturdy and accessible framework for your green beans to climb.
Ultimately, the success of your green bean garden depends on your willingness to experiment and learn. Observe your plants closely, adjust your watering and fertilization practices as needed, and don’t be discouraged by occasional setbacks. Gardening is a journey, and every challenge is an opportunity to grow, both literally and figuratively.
We wholeheartedly encourage you to try this DIY trick for growing green beans at home. It’s a simple, cost-effective, and highly effective way to enjoy fresh, delicious green beans straight from your garden. Once you’ve given it a try, we’d love to hear about your experience! Share your photos, tips, and challenges in the comments section below. Let’s create a community of green bean enthusiasts and learn from each other’s successes. Happy gardening!
Frequently Asked Questions (FAQ)
What type of green beans work best with this DIY trick?
This DIY trick is particularly well-suited for pole beans, also known as climbing beans. These varieties, such as Kentucky Wonder, Blue Lake, and Scarlet Runner, require vertical support to thrive. Bush beans, on the other hand, are more compact and don’t necessarily need a trellis, although they can still benefit from some support in windy areas. When selecting your green bean seeds, be sure to check the variety and its growth habit to ensure it’s compatible with this method.
How often should I water my green bean plants?
Watering frequency depends on several factors, including the weather, soil type, and stage of plant growth. Generally, green beans need consistent moisture, especially during flowering and pod development. Aim to water deeply whenever the top inch of soil feels dry to the touch. Avoid overwatering, as this can lead to root rot. A good rule of thumb is to water early in the morning to allow the foliage to dry before nightfall, which can help prevent fungal diseases. Consider using a soaker hose or drip irrigation system to deliver water directly to the roots, minimizing water waste and reducing the risk of foliar diseases.
What kind of soil is best for growing green beans?
Green beans prefer well-drained, fertile soil with a slightly acidic to neutral pH (around 6.0 to 7.0). Before planting, amend your soil with plenty of organic matter, such as compost, aged manure, or leaf mold. This will improve drainage, aeration, and nutrient content. Avoid heavy clay soils, as they can become waterlogged and inhibit root growth. If you have clay soil, consider adding sand and organic matter to improve its texture. A soil test can help you determine the pH and nutrient levels of your soil, allowing you to make necessary amendments before planting.
How much sunlight do green beans need?
Green beans require at least 6-8 hours of direct sunlight per day to thrive. Choose a planting location that receives ample sunlight throughout the day. If you live in a hot climate, some afternoon shade can be beneficial to prevent the plants from overheating. Insufficient sunlight can lead to leggy growth, reduced flowering, and lower yields.
What are some common pests and diseases that affect green beans, and how can I prevent them?
Common pests that attack green beans include aphids, bean beetles, and spider mites. Diseases include powdery mildew, bean rust, and anthracnose. To prevent these problems, practice good garden hygiene, such as removing plant debris and weeds. Encourage beneficial insects, such as ladybugs and lacewings, which prey on aphids and other pests. Use organic pest control methods, such as insecticidal soap or neem oil, if necessary. Ensure good air circulation around your plants to prevent fungal diseases. Choose disease-resistant varieties whenever possible. Crop rotation can also help prevent soilborne diseases from building up in your garden.
When is the best time to harvest green beans?
Green beans are typically ready to harvest about 50-60 days after planting. Harvest them when the pods are firm, plump, and snap easily. Avoid letting the pods become too large and tough, as they will lose their flavor and tenderness. Harvest regularly to encourage continued production. The best time to harvest is in the morning, after the dew has dried.
Can I grow green beans in containers?
Yes, you can successfully grow green beans in containers, especially bush bean varieties. Choose a large container with good drainage holes. Use a high-quality potting mix and provide adequate support for the plants. Water regularly and fertilize as needed. Container-grown green beans may require more frequent watering and fertilization than those grown in the ground.
How do I save seeds from my green bean plants?
To save seeds from your green bean plants, allow some of the pods to mature fully on the vine. The pods will become dry and brittle. Once the pods are completely dry, harvest them and shell the seeds. Spread the seeds out on a tray to dry completely for a few days. Store the dried seeds in an airtight container in a cool, dark, and dry place. Be sure to label the container with the variety and date. Note that seeds saved from hybrid varieties may not produce true-to-type plants.
What fertilizer should I use for my green bean plants?
Green beans are legumes, which means they can fix nitrogen from the air into the soil. Therefore, they don’t require a lot of nitrogen fertilizer. However, they do benefit from phosphorus and potassium. Use a balanced fertilizer with a lower nitrogen content, such as a 5-10-10 or 10-20-20. Apply the fertilizer according to the package instructions. You can also amend your soil with bone meal and wood ash to provide phosphorus and potassium. Avoid over-fertilizing, as this can lead to excessive foliage growth and reduced pod production.
My green bean plants are flowering, but not producing pods. What could be the problem?
There are several reasons why your green bean plants might be flowering but not producing pods. One common reason is lack of pollination. Ensure that there are plenty of pollinators in your garden, such as bees and butterflies. You can attract pollinators by planting flowers that provide nectar and pollen. Another reason could be high temperatures. Green beans prefer temperatures between 65°F and 80°F. If temperatures are consistently above 90°F, the flowers may drop off before they can be pollinated. Insufficient watering or fertilization can also contribute to poor pod production. Make sure your plants are receiving adequate water and nutrients. Finally, some varieties of green beans are self-pollinating, while others require cross-pollination. If you are growing a variety that requires cross-pollination, you may need to plant multiple plants to ensure successful pollination.


Leave a Comment