
Grow Melons at Home – imagine biting into a juicy, sun-ripened melon that you nurtured from seed to fruit, right in your own backyard! Forget those bland, store-bought melons; with a few clever tricks and a little DIY spirit, you can cultivate the sweetest, most flavorful melons you’ve ever tasted.
Melons have a rich history, dating back to ancient civilizations in Africa and Asia. They were prized for their refreshing taste and nutritional value, often depicted in art and literature. For centuries, growing melons was a skill passed down through generations, a testament to the connection between people and the land.
But why should you bother growing your own? Well, for starters, commercially grown melons are often harvested before they’re fully ripe to withstand shipping, sacrificing flavor in the process. Plus, knowing exactly where your food comes from and how it’s grown gives you peace of mind. In this article, I’m going to share some simple yet effective DIY hacks to help you grow melons at home, even if you have limited space or experience. From choosing the right varieties to optimizing soil conditions and warding off pests, I’ll guide you through every step of the process. Get ready to transform your garden into a melon paradise!
Growing Melons at Home: A Sweet DIY Project
Hey there, fellow gardening enthusiasts! Ever dreamt of biting into a juicy, homegrown melon, bursting with flavor that store-bought ones just can’t match? Well, you’re in the right place! Growing melons at home might seem daunting, but trust me, with a little know-how and some TLC, you can absolutely do it. I’m going to walk you through everything you need to know, from choosing the right variety to harvesting your delicious reward. Let’s get started!
Choosing Your Melon Variety
First things first, you need to pick the right melon for your climate and space. Not all melons are created equal, and some are definitely easier to grow than others, especially for beginners.
* Consider your climate: Melons need warm weather and plenty of sunshine. If you live in a cooler climate, opt for shorter-season varieties.
* Think about space: Watermelons, in particular, can be space hogs. If you have a small garden, consider bush varieties or smaller melons like cantaloupe or honeydew.
* Popular choices:
* Watermelon: ‘Sugar Baby’ (small, early), ‘Crimson Sweet’ (classic), ‘Black Diamond’ (large, dark green).
* Cantaloupe: ‘Athena’ (disease-resistant), ‘Hales Best Jumbo’ (reliable), ‘Ambrosia’ (sweet and aromatic).
* Honeydew: ‘Honey Globe’ (classic), ‘Temptation’ (early).
I personally love ‘Sugar Baby’ watermelons because they mature quickly and are perfect for smaller gardens. ‘Athena’ cantaloupes are also a great choice because they’re super reliable and taste amazing.
Preparing Your Melon Patch
Melons are hungry plants, so preparing the soil is crucial for success. Think of it as building a solid foundation for your sweet, juicy harvest.
* Sunlight: Melons need at least 6-8 hours of direct sunlight per day. Choose a spot in your garden that gets plenty of sunshine.
* Soil: Melons thrive in well-drained, fertile soil with a pH between 6.0 and 6.8.
* Amendments: Amend your soil with plenty of compost or well-rotted manure. This will improve drainage, add nutrients, and help retain moisture.
* Raised beds: If your soil is heavy clay or poorly drained, consider growing your melons in raised beds. This will improve drainage and warm the soil faster.
I always add a generous amount of compost to my melon patch before planting. It makes a huge difference in the size and sweetness of the melons.
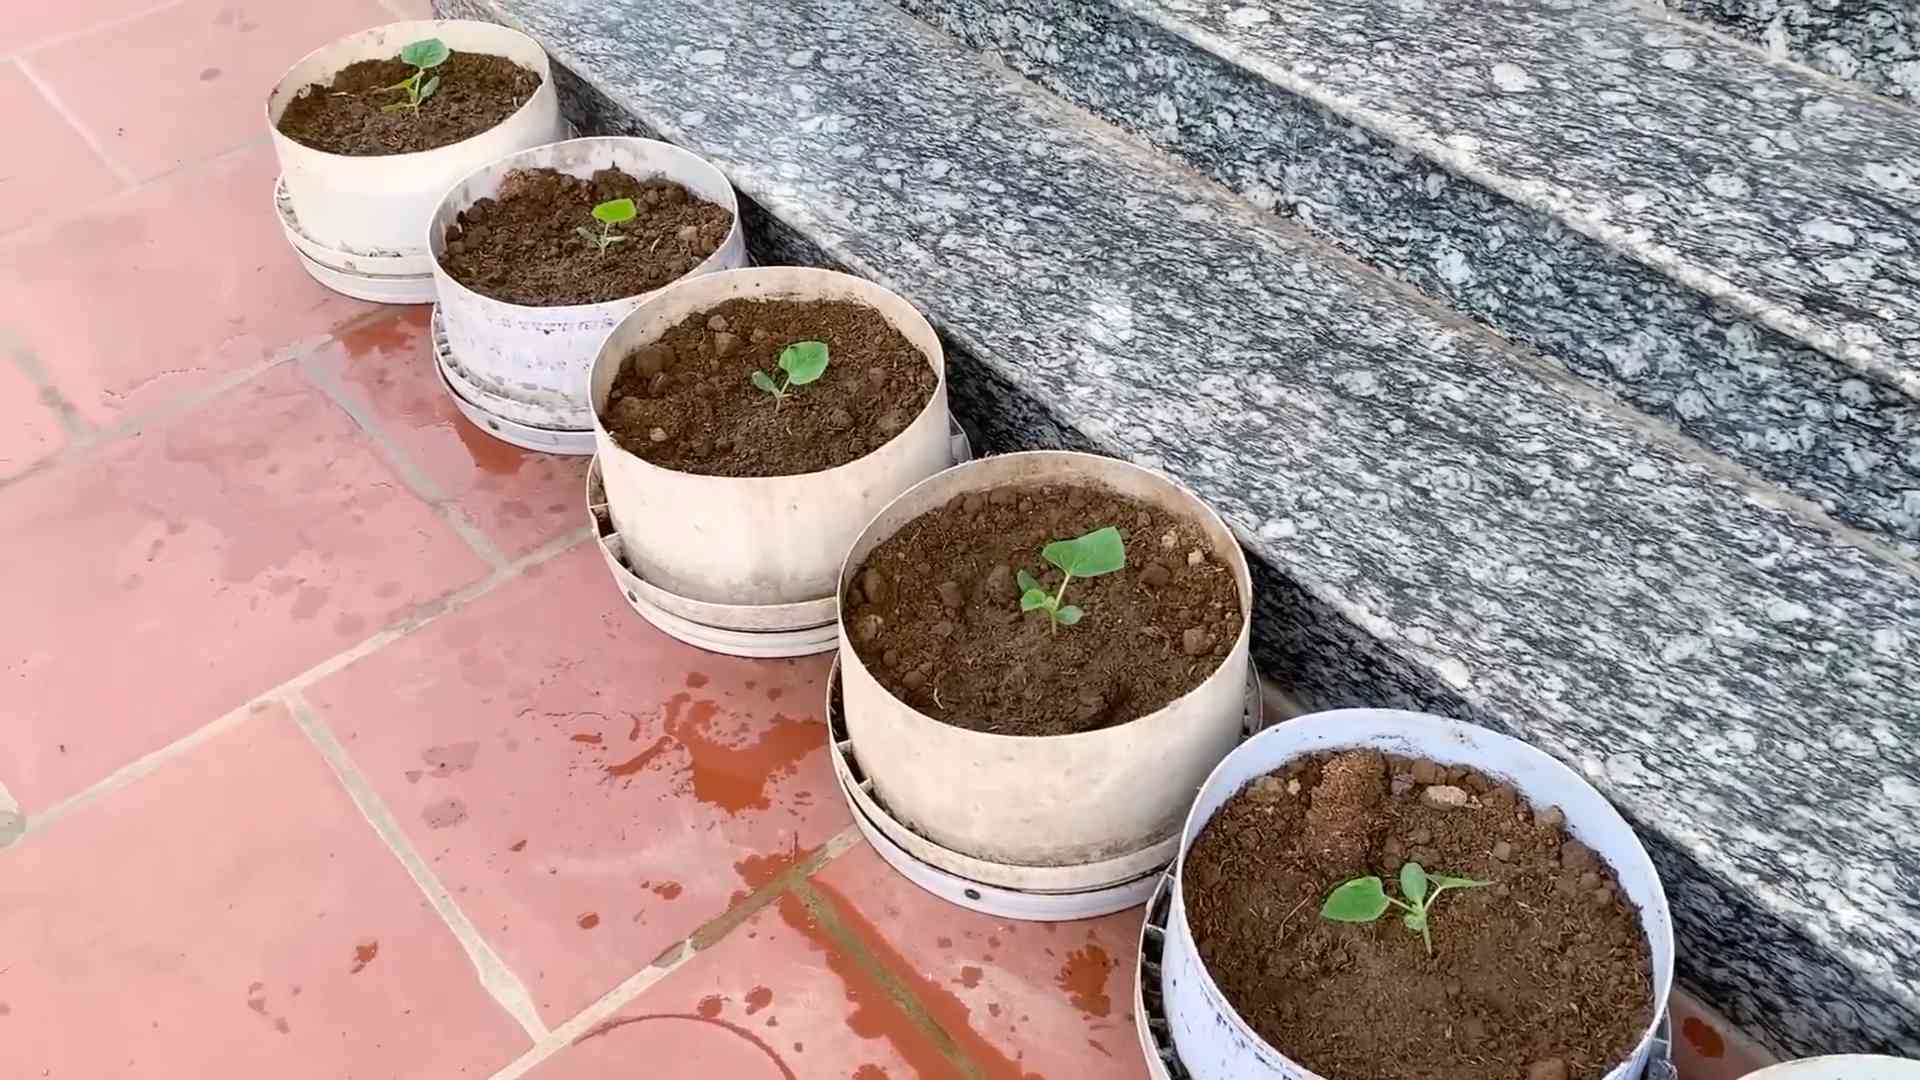
Starting Your Melon Seeds
You can either start your melon seeds indoors or direct sow them in the garden. Starting them indoors gives you a head start, especially in cooler climates.
Starting Seeds Indoors
1. Timing: Start your seeds indoors about 4-6 weeks before the last expected frost.
2. Containers: Use peat pots or biodegradable pots to avoid disturbing the roots when transplanting.
3. Soil: Use a seed-starting mix.
4. Planting: Plant 2-3 seeds per pot, about ½ inch deep.
5. Watering: Keep the soil moist but not soggy.
6. Warmth: Provide bottom heat with a heat mat to speed up germination.
7. Light: Once the seeds germinate, provide plenty of light with a grow light or a sunny window.
8. Thinning: Thin the seedlings to one strong plant per pot.
Direct Sowing Seeds
1. Timing: Direct sow your seeds after the last frost when the soil has warmed to at least 70°F (21°C).
2. Planting: Plant seeds about 1 inch deep, spacing them according to the variety’s recommendations.
3. Watering: Keep the soil consistently moist until the seedlings emerge.
4. Protection: Protect young seedlings from pests and cold snaps with row covers.
I usually start my melon seeds indoors to get a jump start on the season. It’s so rewarding to see those little seedlings emerge!
Transplanting Melon Seedlings
Once your seedlings have developed a few true leaves and the weather has warmed up, it’s time to transplant them into the garden.
1. Harden off: Before transplanting, harden off your seedlings by gradually exposing them to outdoor conditions for a week or two.
2. Timing: Transplant on a cloudy day or in the late afternoon to minimize stress.
3. Spacing: Space plants according to the variety’s recommendations. Watermelons typically need more space than cantaloupes or honeydews.
4. Planting: Dig a hole slightly larger than the root ball. Gently remove the seedling from the pot and place it in the hole. Backfill with soil and water thoroughly.
5. Mulching: Mulch around the plants with straw or black plastic to retain moisture, suppress weeds, and warm the soil.
Remember those biodegradable pots I mentioned? They make transplanting so much easier because you can plant the whole pot without disturbing the roots!
Caring for Your Melon Plants
Now that your melon plants are in the ground, it’s time to provide them with the care they need to thrive.
* Watering: Water deeply and regularly, especially during hot, dry weather. Avoid overhead watering, which can promote fungal diseases. Drip irrigation is ideal.
* Fertilizing: Fertilize regularly with a balanced fertilizer or a fertilizer specifically formulated for melons. Follow the instructions on the fertilizer label.
* Weeding: Keep the area around your melon plants free of weeds. Weeds compete with melons for water and nutrients.
* Pest control: Monitor your plants for pests such as aphids, squash bugs, and cucumber beetles. Use organic pest control methods such as insecticidal soap or neem oil.
* Vine training: Train the vines to grow in the desired direction. This will help to maximize sunlight exposure and prevent overcrowding.
* Pollination: Melons need to be pollinated to produce fruit. If you’re not seeing any fruit set, you may need to hand-pollinate the flowers.
I like to use a soaker hose to water my melon plants. It delivers water directly to the roots, which helps to conserve water and prevent fungal diseases.
Hand-Pollinating Melons
If you’re not seeing any fruit set, it’s possible that your melons aren’t being pollinated properly. This can happen if there aren’t enough bees or other pollinators in your area. Don’t worry, you can easily hand-pollinate your melons!
1. Identify male and female flowers: Male flowers have a long, thin stem, while female flowers have a small, immature fruit at the base.
2. Timing: Hand-pollinate in the morning, when the flowers are open.
3. Procedure: Use a small paintbrush or cotton swab to collect pollen from the male flower. Gently transfer the pollen to the stigma of the female flower.
4. Mark the flower: Mark the pollinated flower with a piece of ribbon or tape so you know which ones you’ve already pollinated.
Hand-pollinating can be a bit tedious, but it’s worth it if you want to ensure a good harvest.
Protecting Your Melons
As your melons start to grow, they’ll become a target for pests and diseases. Here are some tips for protecting your precious fruit:
* Pest control: Use row covers to protect young plants from pests. Handpick pests such as squash bugs and cucumber beetles. Use organic pest control methods such as insecticidal soap or neem oil.
* Disease prevention: Avoid overhead watering to prevent fungal diseases. Provide good air circulation by spacing plants properly. Remove any diseased leaves or fruit.
* Support: Support heavy melons with slings or trellises to prevent them from breaking off the vine.
* Critter control: Protect your melons from critters such as squirrels and raccoons with netting or fencing.
I had a squirrel problem one year, and they were eating all my melons! I ended up building a small fence around my melon patch, and it worked like a charm.
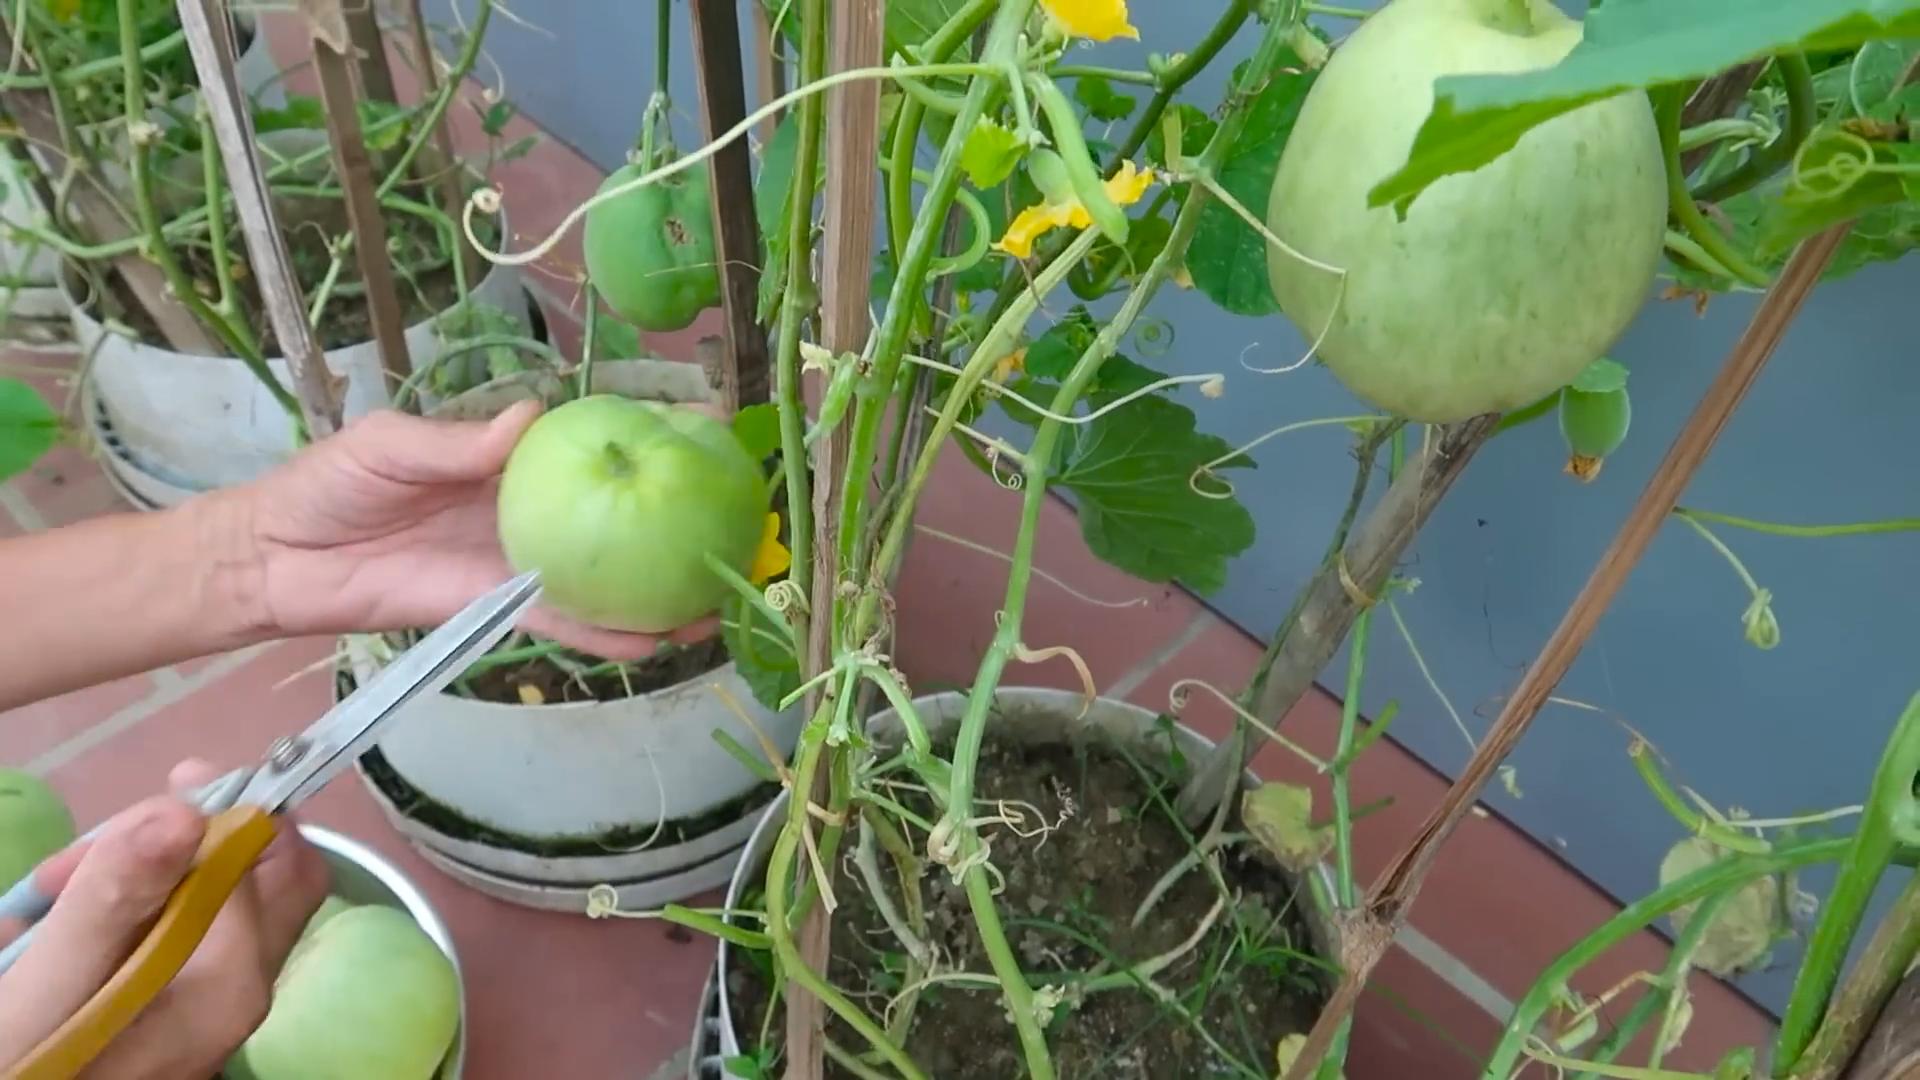
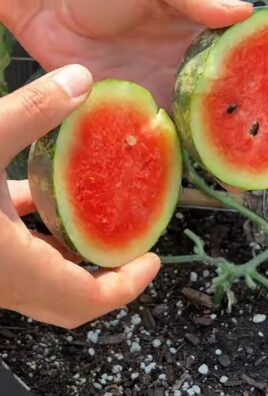
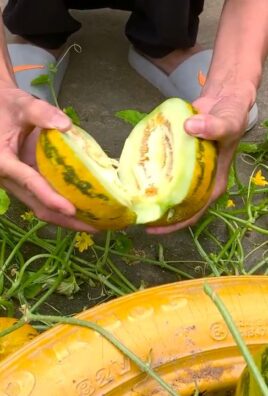
Harvesting Your Melons
The moment you’ve been waiting for! Harvesting your melons at the peak of ripeness is key to enjoying their full flavor.
* Watermelons: Look for a dull, dry spot on the bottom of the melon where it rests on the ground (the “ground spot”). The tendril closest to the melon should be brown and dry. Thump the melon; a ripe watermelon will sound hollow.
* Cantaloupes: The melon should slip easily from the vine with a gentle tug. The skin should be a golden color and have a sweet aroma.
* Honeydews: The skin
Conclusion
So, there you have it! Growing melons at home, while it might seem daunting at first, is entirely achievable with a little planning and the right approach. We’ve walked you through the essential steps, from selecting the perfect variety for your climate to nurturing those precious seedlings and finally, harvesting the sweet reward of your labor.
But why should you even bother? Why not just pick up a melon at the grocery store? The answer is simple: flavor and satisfaction. Commercially grown melons are often harvested before they’re fully ripe to withstand transportation and storage. This means they often lack the intense sweetness and complex flavors that a homegrown melon, ripened on the vine, can offer. Plus, there’s nothing quite like the pride and joy of serving a melon you’ve nurtured from seed to table.
This DIY approach to growing melons at home isn’t just about saving money (though that’s a nice bonus!). It’s about connecting with nature, understanding the growing process, and enjoying the unparalleled taste of a truly fresh, locally grown fruit. It’s about knowing exactly where your food comes from and the care that went into producing it.
Don’t be afraid to experiment! Try different melon varieties to discover your favorites. Watermelons, cantaloupes, honeydews – the possibilities are endless. Consider using raised beds or containers if you have limited space or poor soil. You can even try vertical gardening techniques to maximize your yield in a small area. Companion planting, such as growing basil or marigolds near your melon plants, can help deter pests and attract beneficial insects.
Growing melons at home is a rewarding experience that will tantalize your taste buds and connect you with nature.
We encourage you to take the plunge and give it a try. Start small, learn as you go, and don’t be discouraged by setbacks. Gardening is a journey, and every season brings new lessons and opportunities.
Once you’ve harvested your first homegrown melon, we’d love to hear about your experience! Share your photos, tips, and challenges in the comments below. Let’s build a community of home melon growers and inspire others to discover the joy of growing their own food. What variety did you grow? What challenges did you face, and how did you overcome them? Your insights could be invaluable to other aspiring melon growers.
And remember, the sweetest reward is the taste of success – a juicy, flavorful melon grown with your own two hands. Happy gardening!
Frequently Asked Questions (FAQ)
What is the best time to start growing melons?
The best time to start growing melons depends on your climate and the specific variety you’re growing. Generally, melons need warm weather and plenty of sunshine to thrive. In most regions, you’ll want to start seeds indoors about 4-6 weeks before the last expected frost. Once the soil has warmed up to at least 60°F (15°C) and the danger of frost has passed, you can transplant the seedlings outdoors. For warmer climates with longer growing seasons, you can direct sow melon seeds directly into the ground after the last frost. Check your local frost dates and the specific recommendations for your chosen melon variety for the most accurate timing.
What kind of soil do melons need?
Melons thrive in well-drained, fertile soil that is rich in organic matter. The ideal soil pH is between 6.0 and 6.8. Before planting, amend your soil with compost, aged manure, or other organic materials to improve drainage, fertility, and water retention. If your soil is heavy clay, consider growing melons in raised beds or containers to ensure proper drainage. A soil test can help you determine the specific nutrient needs of your soil and guide your amendment choices.
How much sun do melons need?
Melons are sun-loving plants and require at least 6-8 hours of direct sunlight per day to produce abundant, sweet fruit. Choose a planting location that receives full sun throughout the day. If you live in a particularly hot climate, some afternoon shade may be beneficial to prevent the plants from overheating.
How often should I water my melon plants?
Melons need consistent moisture, especially during fruit development. Water deeply and regularly, aiming to keep the soil consistently moist but not waterlogged. Avoid overhead watering, as this can increase the risk of fungal diseases. Drip irrigation or soaker hoses are excellent options for delivering water directly to the roots. As the melons ripen, you can reduce watering slightly to concentrate the sugars and enhance the flavor.
How do I know when my melons are ripe?
Determining when a melon is ripe can be tricky, but there are several indicators to look for. For watermelons, check the underside where the melon rests on the ground. This spot, called the ground spot, should turn from white to a creamy yellow. You can also thump the melon; a ripe watermelon will sound hollow. For cantaloupes, the stem should slip easily from the vine when the melon is ripe. The skin will also develop a distinct aroma and the netting will become more pronounced. Honeydew melons are ripe when the skin turns a creamy yellow color and the blossom end is slightly soft to the touch.
What are some common pests and diseases that affect melons?
Melons can be susceptible to various pests and diseases, including aphids, squash bugs, vine borers, powdery mildew, and fusarium wilt. Regularly inspect your plants for signs of infestation or disease. Use organic pest control methods, such as insecticidal soap or neem oil, to control pests. Ensure good air circulation around your plants to prevent fungal diseases. Choose disease-resistant varieties whenever possible. Crop rotation can also help prevent soilborne diseases from building up in your garden.
Can I grow melons in containers?
Yes, you can grow melons in containers, but you’ll need to choose a large container (at least 20 gallons) and select a compact or bush variety. Use a high-quality potting mix and provide regular watering and fertilization. You may also need to provide support for the vines as they grow. Container-grown melons may not produce as large or as many fruits as those grown in the ground, but they can still provide a delicious harvest.
How do I fertilize my melon plants?
Melons are heavy feeders and benefit from regular fertilization. Before planting, incorporate compost or aged manure into the soil. After planting, fertilize with a balanced fertilizer every 2-3 weeks. During fruit development, switch to a fertilizer that is higher in phosphorus and potassium to promote fruit growth and sweetness. Avoid over-fertilizing with nitrogen, as this can lead to excessive foliage growth at the expense of fruit production.
How can I improve the sweetness of my melons?
Several factors can influence the sweetness of your melons, including variety, sunlight, water, and soil fertility. Choose a variety known for its sweetness. Ensure your plants receive at least 6-8 hours of direct sunlight per day. Water deeply and regularly, but reduce watering slightly as the melons ripen. Fertilize with a fertilizer that is high in potassium. Allowing the melons to ripen fully on the vine will also maximize their sweetness.
What are some good companion plants for melons?
Companion planting can help deter pests, attract beneficial insects, and improve the overall health of your melon plants. Good companion plants for melons include basil, marigolds, nasturtiums, radishes, and beans. Basil repels aphids and other pests. Marigolds deter nematodes and other soil pests. Nasturtiums attract beneficial insects. Radishes deter squash vine borers. Beans fix nitrogen in the soil, which can benefit melon growth. Avoid planting melons near potatoes or other members of the nightshade family, as they can compete for nutrients.
Leave a Comment