
Grow Melons Backyard, and transform your outdoor space into a personal oasis bursting with juicy, homegrown goodness! Imagine stepping outside and plucking a perfectly ripe, sun-warmed melon straight from the vine – a taste far superior to anything you can find in a grocery store. Sounds like a dream? It doesn’t have to be! This DIY guide is packed with simple, effective tricks to help you cultivate a thriving melon patch, even if you’re a beginner gardener.
Melons have a rich history, dating back thousands of years to Africa and Asia. They were prized by ancient civilizations for their refreshing taste and nutritional value. Today, the joy of growing your own food, including delicious melons, is experiencing a resurgence. More and more people are discovering the satisfaction of connecting with nature and enjoying the fruits (literally!) of their labor.
But let’s face it, growing melons can seem intimidating. They have a reputation for being finicky and demanding. That’s where these DIY tricks come in! I’m going to share my secrets for choosing the right varieties, preparing your soil, providing optimal watering and sunlight, and protecting your precious melons from pests and diseases. You’ll learn how to grow melons backyard like a pro, saving money, reducing your carbon footprint, and enjoying the unparalleled flavor of homegrown produce. So, grab your gardening gloves, and let’s get started!
Growing Delicious Melons in Your Backyard: A Comprehensive DIY Guide
Hey there, fellow gardening enthusiasts! I’m so excited to share my tried-and-true method for growing juicy, flavorful melons right in your own backyard. Forget those bland, store-bought melons – with a little effort and these simple steps, you’ll be enjoying the sweet taste of homegrown goodness in no time. This guide covers everything from choosing the right variety to harvesting your prize-winning melons. Let’s get started!
Choosing the Right Melon Variety
Before we dive into the nitty-gritty, let’s talk about melon varieties. Not all melons are created equal, and some are better suited for certain climates and growing conditions than others. Here’s a breakdown to help you choose the perfect melon for your backyard:
* Watermelons: These are the kings of summer! They need plenty of space and sunshine. Consider smaller, “icebox” varieties like Sugar Baby or Bush Sugar Baby if you have limited space. Larger varieties like Crimson Sweet are also popular but require more room to sprawl.
* Cantaloupes: These fragrant melons are relatively easy to grow and are a great choice for beginners. Look for varieties like Athena or Hale’s Best Jumbo.
* Honeydew Melons: These smooth-skinned melons have a delicate flavor. They require a longer growing season than cantaloupes, so make sure you have enough time before the first frost.
* Specialty Melons: Don’t be afraid to experiment! There are many unique melon varieties out there, like Galia melons (a cross between cantaloupe and honeydew) or Crenshaw melons (known for their sweet, spicy flavor).
Important Considerations:
* Climate: Check the seed packet or plant tag for the recommended growing zone.
* Space: Consider the mature size of the melon vine. Watermelons need the most space, while cantaloupes and honeydews are more compact.
* Days to Maturity: This is the number of days it takes for the melon to ripen after planting. Choose varieties that will ripen before your first frost.
* Disease Resistance: Look for varieties that are resistant to common melon diseases like powdery mildew and fusarium wilt.
Preparing Your Garden Bed
Melons are heavy feeders, meaning they need a lot of nutrients to thrive. Proper soil preparation is crucial for a successful harvest.
* Sunlight: Melons need at least 6-8 hours of direct sunlight per day. Choose a location in your yard that gets plenty of sun.
* Soil: Melons prefer well-drained, sandy loam soil with a pH of 6.0-6.8. If your soil is heavy clay or sandy, amend it with compost or other organic matter to improve drainage and fertility.
* Nutrients: Melons need a lot of nitrogen, phosphorus, and potassium. Before planting, amend your soil with a balanced fertilizer or compost. You can also add bone meal for phosphorus and wood ash for potassium.
Step-by-Step Soil Preparation:
1. Clear the Area: Remove any weeds, rocks, or debris from the planting area.
2. Till the Soil: Till the soil to a depth of 12-18 inches. This will loosen the soil and improve drainage.
3. Amend the Soil: Add compost, manure, or other organic matter to the soil. Work it in well with a garden fork or tiller.
4. Fertilize: Apply a balanced fertilizer according to the package directions.
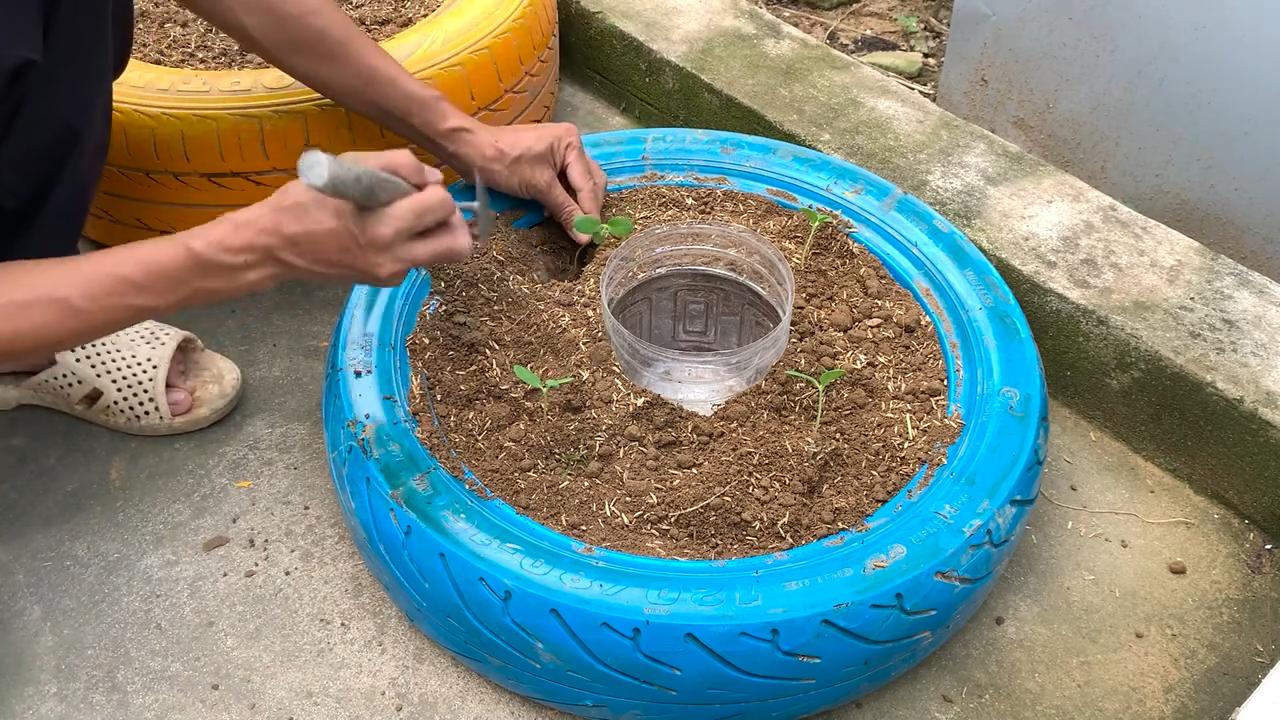
5. Create Mounds or Rows: Melons grow best on raised mounds or rows. This helps to improve drainage and warm the soil. Create mounds that are about 12 inches high and 2-3 feet wide. Space the mounds 3-4 feet apart for watermelons and 2-3 feet apart for cantaloupes and honeydews.
Planting Your Melon Seeds or Seedlings
You can start melon seeds indoors 4-6 weeks before the last expected frost, or you can direct sow them in the garden after the soil has warmed up to at least 70°F (21°C).
* Starting Seeds Indoors: Use peat pots or biodegradable pots to avoid disturbing the roots when transplanting. Sow seeds about 1 inch deep and keep the soil moist. Provide plenty of light, either from a sunny window or a grow light.
* Direct Sowing: Sow seeds about 1 inch deep in the prepared mounds or rows. Space the seeds 6-12 inches apart. Thin the seedlings to the strongest plant per mound or row after they emerge.
* Transplanting Seedlings: Harden off seedlings by gradually exposing them to outdoor conditions for a week before transplanting. Transplant them into the prepared mounds or rows, spacing them according to the variety.
Step-by-Step Planting Instructions:
1. Choose Your Method: Decide whether you’ll start seeds indoors or direct sow them.
2. Prepare Your Seeds: If starting indoors, soak the seeds in water for 24 hours to improve germination.
3. Sow or Transplant: Sow seeds or transplant seedlings into the prepared mounds or rows.
4. Water Thoroughly: Water the newly planted seeds or seedlings thoroughly.
5. Mulch: Apply a layer of mulch around the plants to help retain moisture and suppress weeds. Straw, hay, or black plastic mulch are all good options.
Caring for Your Melon Plants
Melons need consistent watering, fertilizing, and pest control to thrive.
* Watering: Water deeply and regularly, especially during hot, dry weather. Avoid overhead watering, which can promote fungal diseases. Use a soaker hose or drip irrigation to water at the base of the plants.
* Fertilizing: Fertilize every 2-3 weeks with a balanced fertilizer or compost tea.
* Weeding: Keep the garden bed free of weeds, which can compete with the melon plants for nutrients and water.
* Pest Control: Monitor your plants for pests like aphids, squash bugs, and cucumber beetles. Use insecticidal soap or neem oil to control these pests.
* Pollination: Melons need to be pollinated to produce fruit. If you’re not seeing any fruit set, you may need to hand-pollinate the flowers. To hand-pollinate, use a small paintbrush to transfer pollen from the male flowers to the female flowers. Female flowers have a small fruit behind the flower, while male flowers do not.
Detailed Care Tips:
1. Watering Schedule: Water deeply 2-3 times per week, depending on the weather. Aim for about 1-2 inches of water per week.
2. Fertilizing Schedule: Fertilize every 2-3 weeks with a balanced fertilizer or compost tea. Reduce fertilizing once the fruits start to develop.
3. Pruning: Prune away any dead or diseased leaves or vines. You can also prune away some of the side shoots to encourage the plant to focus its energy on producing fruit.
4. Supporting the Fruit: As the melons grow, you may need to support them to prevent them from rotting on the ground. Use melon cradles or place the melons on a bed of straw.
5. Protecting from Pests: Regularly inspect your plants for pests and diseases. Take action immediately if you see any problems.
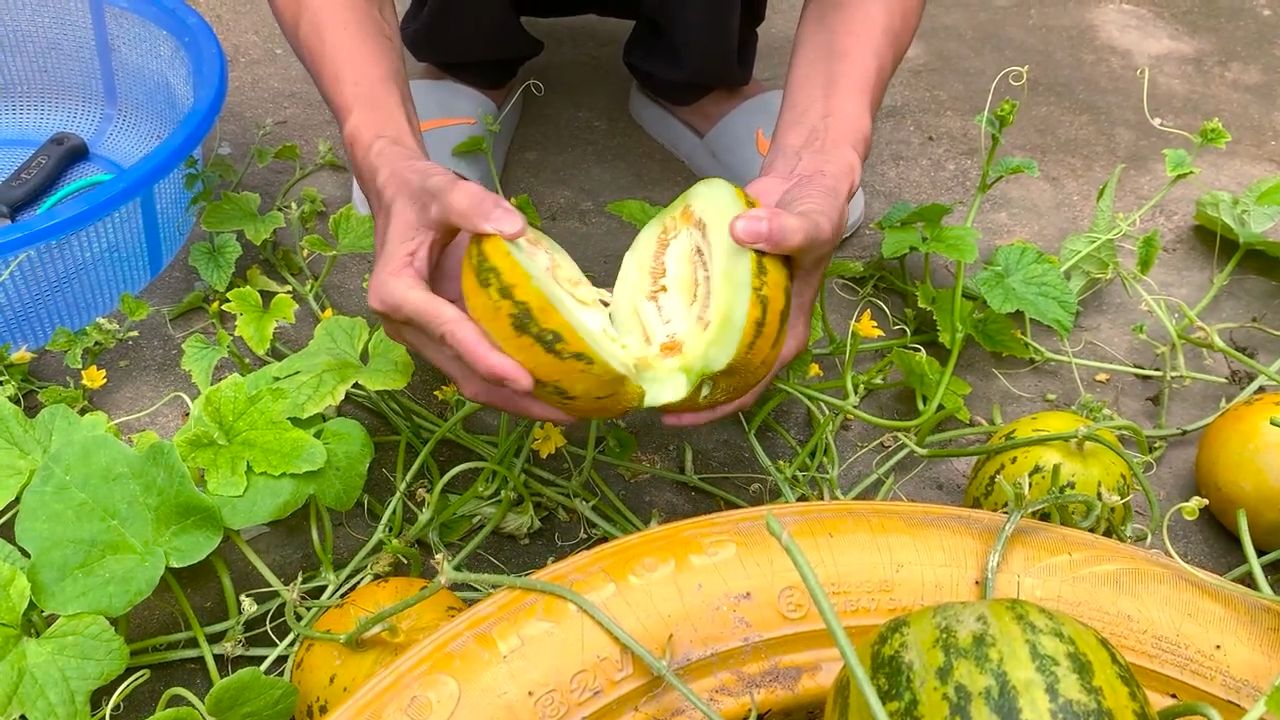
Harvesting Your Melons
Knowing when to harvest your melons is key to enjoying their peak flavor. Each type of melon has its own indicators of ripeness.
* Watermelons: Look for a dull rind, a yellow or cream-colored spot on the bottom where the melon rested on the ground (the “ground spot”), and a hollow sound when you thump the melon. The tendril closest to the melon should also be brown and dry.
* Cantaloupes: The melon should slip easily from the vine when ripe. The rind will also turn from green to tan or yellow, and the melon will have a fragrant aroma.
* Honeydew Melons: The rind will turn from green to creamy white, and the melon will have a slightly waxy feel. The blossom end of the melon will also be slightly soft.
Harvesting Steps:
1. Check for Ripeness: Use the indicators above to determine if the melon is ripe.
2. Harvest Carefully: Cut the melon from the vine with a sharp knife or pruning shears. Leave a few inches of stem attached.
3. Handle with Care: Melons are delicate and can bruise easily. Handle them with care to avoid damaging the fruit.
4. Cool and Store: Cool the melons in the refrigerator for a few hours before eating. Store them in the refrigerator for up to a week.
Troubleshooting Common Problems
Even with the best care, you may encounter some problems when growing melons. Here are some common issues and how to address them:
* Poor Germination: Make
Conclusion
So, there you have it! Mastering the art of growing melons in your backyard is not just a whimsical dream; it’s an achievable reality with a little know-how and dedication. We’ve explored the essential steps, from selecting the right varieties and preparing the soil to providing optimal sunlight and water. But the real magic lies in understanding how to nurture these sun-loving fruits to their full potential.
Why is this DIY trick a must-try? Because nothing beats the taste of a vine-ripened melon, bursting with sweetness and flavor that store-bought varieties simply can’t match. Imagine biting into a juicy watermelon on a hot summer day, knowing that you cultivated it from seed to table. The satisfaction is unparalleled. Beyond the taste, growing your own melons is a sustainable and rewarding way to connect with nature, reduce your carbon footprint, and enjoy fresh, healthy produce.
But don’t stop there! Experiment with different melon varieties to discover your favorites. Try growing cantaloupe, honeydew, or even specialty melons like Galia or Charentais. Consider companion planting to deter pests and attract beneficial insects. Basil, marigolds, and nasturtiums are excellent choices for planting alongside your melons.
For those with limited space, consider growing melons vertically on trellises or fences. This not only saves space but also improves air circulation and reduces the risk of fungal diseases. Just be sure to provide adequate support for the heavy fruits as they develop.
And for those in cooler climates, don’t despair! You can still enjoy homegrown melons by starting seeds indoors several weeks before the last frost and using row covers or cold frames to protect your plants from chilly temperatures. Choose early-maturing varieties that are well-suited to shorter growing seasons.
We’ve armed you with the knowledge and inspiration to embark on your melon-growing adventure. Now it’s time to get your hands dirty and experience the joy of harvesting your own delicious melons. We encourage you to try this DIY trick and share your experiences with us. What varieties did you grow? What challenges did you face? What tips and tricks did you discover along the way? Your insights can help other gardeners succeed in their own melon-growing endeavors.
So, go ahead, transform your backyard into a melon paradise. You’ll be amazed at what you can achieve with a little effort and a whole lot of love. Happy gardening!
Frequently Asked Questions (FAQs)
What are the best melon varieties to grow in a backyard garden?
The best melon varieties for your backyard depend on your climate, space, and personal preferences. For beginners, watermelon varieties like ‘Sugar Baby’ (small and early-maturing) and ‘Crimson Sweet’ (classic flavor) are excellent choices. Cantaloupe varieties like ‘Athena’ (disease-resistant) and ‘Hales Best Jumbo’ (reliable producer) are also popular. Honeydew melons like ‘Honeycrisp’ (sweet and crisp) are a good option for those who enjoy a milder flavor. Consider your local climate and growing season when making your selection. If you have limited space, bush or dwarf varieties are a great option.
How much sunlight do melons need to grow properly?
Melons are sun-loving plants and require at least 6-8 hours of direct sunlight per day to thrive. Choose a location in your backyard that receives ample sunlight throughout the day. If your garden is partially shaded, try to position your melon plants so that they receive the most sunlight possible. Insufficient sunlight can result in poor fruit production and smaller, less flavorful melons.
What type of soil is best for growing melons?
Melons prefer well-drained, fertile soil that is rich in organic matter. Before planting, amend your soil with compost, aged manure, or other organic materials to improve its drainage and fertility. The ideal soil pH for melons is between 6.0 and 6.8. You can test your soil pH using a soil testing kit and adjust it accordingly. Avoid planting melons in heavy clay soil, as this can lead to root rot.
How often should I water my melon plants?
Melons need consistent moisture, especially during fruit development. Water your melon plants deeply and regularly, especially during hot, dry weather. Aim to water at the base of the plants to avoid wetting the foliage, which can increase the risk of fungal diseases. A good rule of thumb is to water when the top inch of soil feels dry to the touch. Consider using a soaker hose or drip irrigation system to deliver water directly to the roots.
How do I know when my melons are ripe?
Determining when a melon is ripe can be tricky, but there are a few telltale signs to look for. For watermelons, look for a dull, thudding sound when you tap the fruit. The underside of the melon (where it rests on the ground) should also be a creamy yellow color. For cantaloupes, the stem should slip easily from the fruit when it’s ripe. The melon should also have a fragrant aroma. For honeydew melons, look for a creamy white or yellowish color and a slightly waxy feel.
What are some common pests and diseases that affect melon plants?
Melon plants can be susceptible to a variety of pests and diseases, including aphids, squash bugs, cucumber beetles, powdery mildew, and fusarium wilt. To prevent pest and disease problems, practice good garden hygiene, such as removing weeds and debris from around your plants. You can also use insecticidal soap or neem oil to control pests. For fungal diseases, use a fungicide or copper spray. Choose disease-resistant melon varieties whenever possible.
Can I grow melons in containers?
Yes, you can grow melons in containers, but you’ll need to choose a large container (at least 20 gallons) and use a high-quality potting mix. Dwarf or bush varieties are best suited for container gardening. Be sure to provide adequate support for the vines as they grow. Container-grown melons may require more frequent watering and fertilization than those grown in the ground.
How can I improve the sweetness of my melons?
Several factors can influence the sweetness of your melons, including sunlight, water, and soil fertility. Ensure that your melon plants receive plenty of sunlight and water them regularly. Avoid over-watering, as this can dilute the sugars in the fruit. Fertilize your plants with a balanced fertilizer or a fertilizer specifically formulated for melons. You can also try pinching off some of the side shoots to encourage the plant to focus its energy on fruit production.
What are some companion plants for melons?
Companion planting can help deter pests, attract beneficial insects, and improve the overall health of your melon plants. Good companion plants for melons include basil, marigolds, nasturtiums, rosemary, and thyme. Avoid planting melons near potatoes, as they can compete for nutrients.
How do I save seeds from my melons for next year?
Saving seeds from your melons is a great way to preserve your favorite varieties and save money. To save seeds, allow the melon to fully ripen on the vine. Scoop out the seeds and rinse them thoroughly to remove any pulp. Spread the seeds out on a paper towel to dry completely. Once the seeds are dry, store them in an airtight container in a cool, dark place. Be aware that hybrid melon varieties may not produce true-to-type seeds.

Leave a Comment