
Grow More Chili Peppers: Who doesn’t love the fiery kick of a homegrown chili pepper? Imagine baskets overflowing with vibrant reds, yellows, and greens, all thanks to your own green thumb! But let’s be honest, sometimes getting those peppers to really thrive can feel like a battle. You’re not alone! Many home gardeners struggle to maximize their chili pepper yield, often facing challenges like blossom drop, stunted growth, or simply not enough peppers to satisfy their spicy cravings.
For centuries, chili peppers have been a staple in cuisines around the world, adding flavor and heat to dishes from Mexico to Thailand. They’re more than just a spice; they’re a cultural symbol, a source of pride for gardeners, and a delicious addition to any meal. But what if I told you there are simple, DIY tricks and hacks you can use to dramatically increase your chili pepper harvest?
That’s right! This article is packed with easy-to-follow tips and techniques that will help you grow more chili peppers than you ever thought possible. We’ll delve into everything from soil preparation and watering techniques to pest control and even some secret fertilizer recipes. So, ditch the store-bought peppers and get ready to transform your garden into a chili pepper paradise! Let’s unlock the secrets to a bountiful harvest together!
Supercharge Your Chili Pepper Harvest: A DIY Guide to Growing More Heat!
Hey fellow chiliheads! Are you dreaming of a garden overflowing with fiery peppers? I know I am! Growing chili peppers can be incredibly rewarding, but sometimes it feels like you’re not getting the yield you deserve. Don’t worry, I’ve been there, and I’ve learned a few tricks along the way to seriously boost my chili pepper production. This guide is packed with my tried-and-true methods, from seed to harvest, to help you grow more chili peppers than you ever thought possible. Let’s get started!
Choosing the Right Chili Pepper Varieties
Before we even think about planting, it’s crucial to choose the right chili pepper varieties for your climate and taste preferences. Not all peppers are created equal!
* Consider your climate: Some chili peppers thrive in hot, humid conditions, while others prefer cooler, drier climates. Research which varieties are best suited for your region.
* Think about your heat tolerance: From mild bell peppers to scorching ghost peppers, the Scoville scale measures the heat level of chili peppers. Choose varieties that match your spice tolerance.
* Experiment with different types: Don’t be afraid to try a few different varieties to see which ones grow best in your garden and which flavors you enjoy the most. I personally love growing jalapenos for everyday use and habaneros for adding serious heat to my dishes.
* Check for disease resistance: Look for varieties that are resistant to common chili pepper diseases in your area. This can save you a lot of headaches down the road.
Starting Your Chili Pepper Seeds Indoors
Starting your chili pepper seeds indoors gives them a head start and allows you to control the growing environment. This is especially important if you live in a region with a short growing season.
* When to start: Start your seeds 6-8 weeks before the last expected frost in your area.
* What you’ll need:
* Seed starting trays or small pots
* Seed starting mix (a light, well-draining mix is essential)
* Heat mat (optional, but highly recommended)
* Grow light (also optional, but provides consistent light)
* Spray bottle
* The process:
1. Prepare your seed starting trays: Fill your seed starting trays or pots with seed starting mix. Gently tap the trays to settle the mix.
2. Sow the seeds: Make a small indentation (about 1/4 inch deep) in the center of each cell or pot. Place 1-2 chili pepper seeds in each indentation.
3. Cover the seeds: Gently cover the seeds with seed starting mix.
4. Water the seeds: Use a spray bottle to lightly mist the soil. Avoid overwatering, as this can lead to damping off (a fungal disease that kills seedlings).
5. Provide warmth: Place the seed starting trays on a heat mat to maintain a soil temperature of 75-85°F (24-29°C). This will significantly improve germination rates.
6. Provide light: If you’re using a grow light, position it a few inches above the seed starting trays. Keep the light on for 14-16 hours per day. If you’re not using a grow light, place the trays in a sunny window.
7. Maintain moisture: Keep the soil consistently moist, but not soggy. Check the soil moisture daily and mist with a spray bottle as needed.
8. Wait for germination: Chili pepper seeds can take anywhere from 7-21 days to germinate, depending on the variety and growing conditions. Be patient!
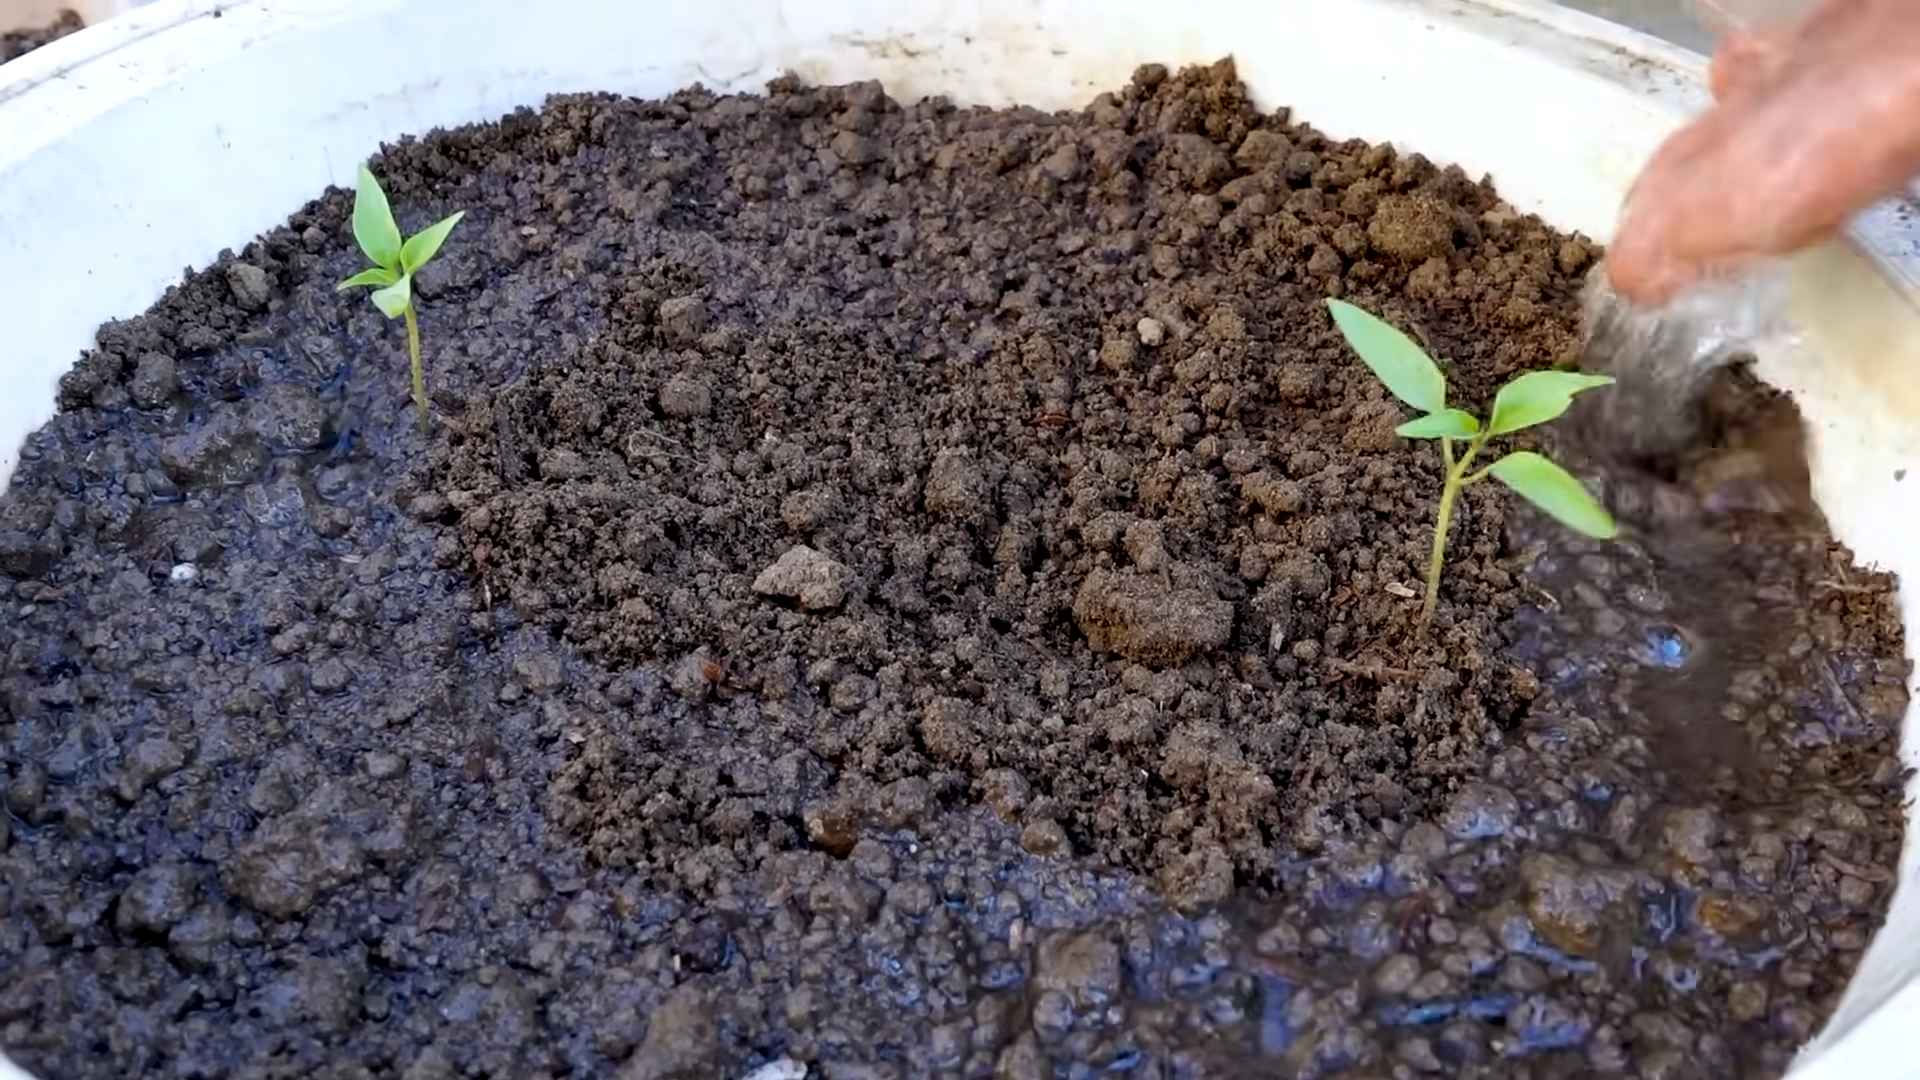
9. Thin the seedlings: Once the seedlings have emerged and have their first true leaves (the second set of leaves), thin them to one seedling per cell or pot. Choose the strongest, healthiest seedling and snip off the others at the soil line.
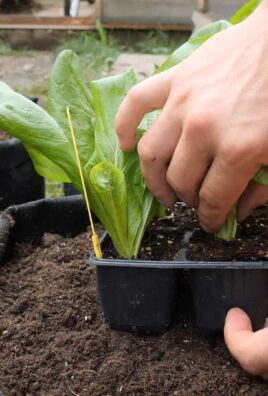
Transplanting Your Chili Pepper Seedlings
Once your chili pepper seedlings have grown large enough, it’s time to transplant them into larger pots or directly into your garden.
* When to transplant: Transplant your seedlings when they are 4-6 inches tall and have several sets of true leaves. Make sure the risk of frost has passed before transplanting outdoors.
* Hardening off: Before transplanting your seedlings outdoors, you need to harden them off. This process gradually acclimates them to the outdoor environment. Start by placing the seedlings outdoors in a sheltered location for a few hours each day, gradually increasing the amount of time they spend outdoors over the course of a week.
* Preparing the soil: Chili peppers prefer well-draining soil that is rich in organic matter. Amend your garden soil with compost or well-rotted manure before transplanting.
* Transplanting into pots: Choose pots that are at least 1 gallon in size. Fill the pots with a high-quality potting mix. Dig a hole in the center of each pot that is large enough to accommodate the root ball of the seedling. Gently remove the seedling from its original container and place it in the hole. Backfill with potting mix and water thoroughly.
* Transplanting into the garden: Space your chili pepper plants 18-24 inches apart in rows that are 2-3 feet apart. Dig a hole in the ground that is large enough to accommodate the root ball of the seedling. Gently remove the seedling from its original container and place it in the hole. Backfill with soil and water thoroughly.
Optimizing Growth for Maximum Yield
Now that your chili pepper plants are in their final growing location, it’s time to focus on optimizing their growth for maximum yield.
* Sunlight: Chili peppers need at least 6-8 hours of sunlight per day. Choose a location that receives plenty of sunlight.
* Watering: Water your chili pepper plants regularly, especially during hot, dry weather. Avoid overwatering, as this can lead to root rot. Water deeply and less frequently, rather than shallowly and more often.
* Fertilizing: Chili peppers are heavy feeders and benefit from regular fertilization. Use a balanced fertilizer (e.g., 10-10-10) or a fertilizer specifically formulated for peppers and tomatoes. Follow the instructions on the fertilizer label. I like to use a liquid fertilizer every 2-3 weeks during the growing season.
* Pruning: Pruning your chili pepper plants can help to improve air circulation and sunlight penetration, which can lead to increased yields. Remove any suckers (small shoots that grow from the base of the plant) and any yellowing or diseased leaves.
* Support: As your chili pepper plants grow, they may need support to prevent them from falling over. Use stakes or cages to support the plants. This is especially important for taller varieties.
* Pest and disease control: Monitor your chili pepper plants regularly for pests and diseases. Common pests include aphids, spider mites, and whiteflies. Common diseases include blossom end rot, fungal leaf spot, and powdery mildew. Treat any infestations or diseases promptly. I prefer to use organic pest control methods whenever possible, such as insecticidal soap or neem oil.
Boosting Blossom Set and Fruit Production
Getting your chili pepper plants to produce lots of blossoms and fruits is the key to a bountiful harvest. Here are some tips to help you boost blossom set and fruit production:
* Epsom salts: Epsom salts (magnesium sulfate) can help to improve blossom set and fruit production. Dissolve 1 tablespoon of Epsom salts in 1 gallon of water and spray the foliage of your chili pepper plants every 2-3 weeks.
* Calcium: Calcium is essential for healthy fruit development. Blossom end rot is a common problem in chili peppers that is caused by a calcium deficiency. To prevent blossom end rot, add calcium to the soil before planting or use a calcium-rich fertilizer. Crushed eggshells are a great natural source of calcium.
* Pollination: Chili peppers are self-pollinating, but they can benefit from hand-pollination. Use a small paintbrush to transfer pollen from one flower to another. You can also gently shake the plants to help release pollen.
* Temperature: Extreme temperatures can inhibit blossom set. If temperatures are consistently above 90°F (32°C) or below 55°F (13°C), your chili pepper plants may not produce as many blossoms or fruits. Provide shade during the hottest part of the day or use row covers to protect the plants from cold temperatures.
* Avoid over-fertilizing with nitrogen: Too much nitrogen can promote leafy growth at the expense of fruit production. Use a fertilizer that is lower in nitrogen and higher in phosphorus and potassium.
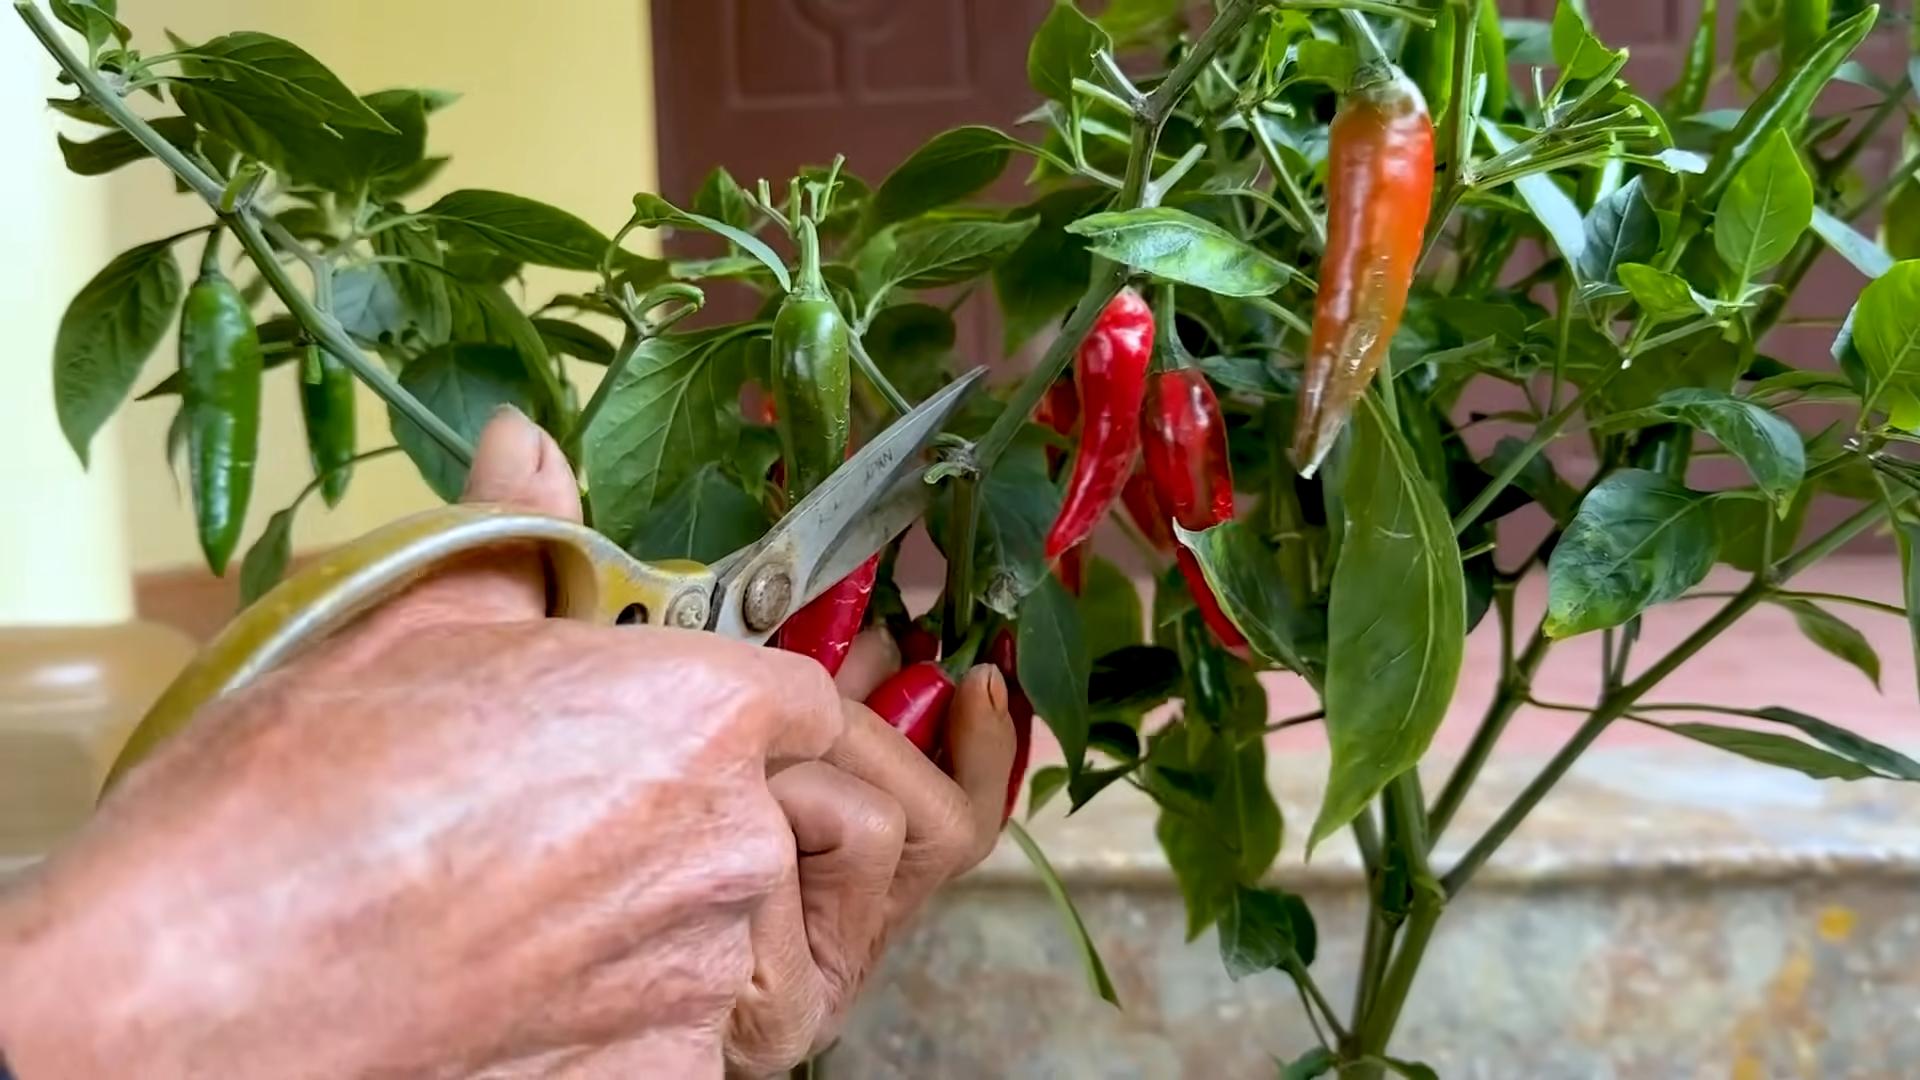
Harvesting Your Chili Peppers
The moment you’ve been waiting for! Harvesting your chili peppers at the right time is crucial for optimal flavor and heat.
* When to harvest: The best time to harvest chili peppers depends on the variety and your personal preference. Generally, chili peppers are ready to harvest when they have reached their mature color and size. They should also be firm to
Conclusion
So, there you have it! This simple, yet incredibly effective, DIY trick to grow more chili peppers is a game-changer for any chili enthusiast, from the casual gardener to the seasoned pepper pro. We’ve walked you through the process, highlighting the benefits and providing you with the knowledge to significantly boost your chili pepper yield.
Why is this a must-try? Because it’s efficient, cost-effective, and, most importantly, it works! Imagine harvesting baskets overflowing with vibrant, fiery chili peppers, all thanks to a little extra care and attention during their crucial growth stages. This method not only encourages more fruit production but also often results in healthier, more robust plants, better equipped to withstand pests and diseases.
But don’t just take our word for it. The beauty of this DIY approach is its adaptability. Feel free to experiment with different types of fertilizers, adjusting the dilution rates to suit your specific chili pepper variety and growing conditions. For instance, if you’re growing super-hot peppers like Scotch Bonnets or Ghost Peppers, you might consider adding a small amount of Epsom salts to the fertilizer mix to provide extra magnesium, which is known to enhance pepper production and flavor.
Another variation to consider is the timing of the fertilizer application. While we recommend starting when the first flowers appear, you can also adjust the frequency based on your plant’s needs. If you notice your plants are particularly vigorous, you might increase the frequency slightly. Conversely, if they seem stressed or over-fertilized, reduce the frequency or dilute the fertilizer further.
Furthermore, consider the environment in which you are growing your chili peppers. If you are growing them indoors, you might need to supplement with artificial lighting to ensure they receive enough sunlight. If you are growing them outdoors, be mindful of the weather conditions and protect your plants from extreme heat, cold, or strong winds.
This DIY trick isn’t just about increasing the quantity of chili peppers; it’s about enhancing the overall quality and flavor. By providing your plants with the nutrients they need at the right time, you’re setting them up for success, resulting in peppers that are not only abundant but also packed with flavor and heat.
We are confident that this DIY trick will transform your chili pepper growing experience. It’s a simple, yet powerful technique that can make a significant difference in your harvest.
Now, it’s your turn! We encourage you to try this DIY trick and witness the incredible results for yourself. Don’t be afraid to experiment, adapt, and fine-tune the process to suit your specific needs and preferences.
And most importantly, share your experience with us! We’d love to hear about your successes, challenges, and any variations you’ve tried. Your feedback will not only help us improve this guide but also inspire other chili pepper enthusiasts to embark on their own pepper-growing adventures. Share your photos, tips, and stories in the comments section below. Let’s create a community of passionate chili pepper growers who are dedicated to maximizing their yields and enjoying the fruits (or should we say, peppers) of their labor. Happy growing!
Frequently Asked Questions (FAQ)
What type of fertilizer should I use for this DIY trick?
The best type of fertilizer to use for this DIY trick is a balanced, water-soluble fertilizer with an NPK ratio (Nitrogen, Phosphorus, Potassium) that is suitable for flowering and fruiting plants. A ratio of 10-10-10 or 15-30-15 is generally a good starting point. Look for fertilizers specifically formulated for tomatoes or peppers, as they often contain the necessary micronutrients for optimal growth. Avoid using fertilizers that are too high in nitrogen, as this can promote excessive foliage growth at the expense of fruit production. Organic options like compost tea or fish emulsion can also be effective, but be sure to dilute them properly to avoid burning the plants. Always read and follow the instructions on the fertilizer packaging.
How often should I apply the fertilizer?
The frequency of fertilizer application depends on several factors, including the type of fertilizer you’re using, the size of your plants, and the growing conditions. As a general guideline, you can start by applying the diluted fertilizer every 1-2 weeks, starting when the first flowers appear. Observe your plants closely for any signs of nutrient deficiencies or over-fertilization. If the leaves are turning yellow or the plant seems stunted, it may need more fertilizer. If the leaves are dark green and the plant is growing rapidly but not producing many flowers, it may be getting too much nitrogen. Adjust the frequency and concentration of the fertilizer accordingly. During periods of heavy fruiting, you may need to increase the frequency of application to provide the plants with the extra nutrients they need.
Can I use this trick on all types of chili peppers?
Yes, this DIY trick can be used on virtually all types of chili peppers, from mild bell peppers to scorching hot varieties like Carolina Reapers. However, it’s important to adjust the fertilizer type and concentration based on the specific needs of each variety. Some chili peppers, particularly the super-hot ones, may benefit from additional micronutrients like magnesium and calcium. You can supplement with Epsom salts (magnesium sulfate) or calcium nitrate to provide these essential nutrients. Research the specific needs of your chili pepper variety to ensure you’re providing them with the optimal growing conditions.
What if I don’t see any results after trying this trick?
If you don’t see any noticeable increase in chili pepper production after trying this DIY trick, there could be several reasons why. First, make sure you’re using the right type of fertilizer and applying it at the correct frequency and concentration. Second, consider other factors that may be affecting your plants’ growth, such as sunlight, water, and soil quality. Chili peppers need at least 6-8 hours of direct sunlight per day to thrive. Ensure your plants are getting enough sunlight and that the soil is well-draining and rich in organic matter. Overwatering or underwatering can also negatively impact pepper production. Check the soil moisture regularly and water only when the top inch of soil feels dry. Finally, be patient. It may take several weeks or even months to see the full effects of this DIY trick.
My chili pepper plants are already producing peppers. Is it too late to try this trick?
No, it’s not too late to try this trick even if your chili pepper plants are already producing peppers. In fact, applying fertilizer during the fruiting stage can help to increase the size and quality of the peppers. Just be sure to use a fertilizer that is specifically formulated for fruiting plants and avoid using too much nitrogen, as this can cause the plants to focus on foliage growth rather than pepper production. Start with a lower concentration of fertilizer and gradually increase it as needed, observing your plants closely for any signs of nutrient deficiencies or over-fertilization.
How do I know if I’m over-fertilizing my chili pepper plants?
Signs of over-fertilization in chili pepper plants include dark green leaves, rapid foliage growth, a lack of flowers or fruit, and a buildup of salts on the soil surface. The leaves may also become curled or burned at the edges. If you suspect you’re over-fertilizing, stop applying fertilizer immediately and flush the soil with plenty of water to remove excess nutrients. Allow the soil to dry out slightly before resuming fertilization, and reduce the frequency and concentration of the fertilizer. It’s always better to under-fertilize than to over-fertilize, as it’s easier to add more fertilizer than to remove it.
Can I use this trick for other types of plants besides chili peppers?
While this DIY trick is specifically tailored for chili peppers, the general principles of providing plants with the nutrients they need during the flowering and fruiting stages can be applied to other types of plants as well. Tomatoes, eggplants, and other fruiting vegetables can also benefit from regular fertilization with a balanced, water-soluble fertilizer. However, it’s important to research the specific nutrient requirements of each plant species and adjust the fertilizer type and concentration accordingly. Some plants may prefer a fertilizer with a higher nitrogen content, while others may need more phosphorus or potassium. Always read and follow the instructions on the fertilizer packaging.

Leave a Comment