
Grow mushrooms at home – imagine plucking fresh, flavorful fungi right from your own little indoor farm! Forget those bland, pre-packaged mushrooms from the grocery store. I’m about to show you how to cultivate a delicious and rewarding hobby right in your kitchen.
For centuries, mushroom cultivation has been shrouded in mystery and revered in various cultures. From ancient Chinese medicinal practices to the sophisticated truffle farms of Europe, the art of growing mushrooms has always been valued. Now, you don’t need to be a seasoned mycologist to enjoy the fruits (or rather, fungi!) of this ancient practice.
Why should you learn to grow mushrooms at home? Well, for starters, it’s incredibly satisfying! There’s something magical about watching these fascinating organisms sprout and flourish under your care. Plus, you’ll have access to a wider variety of mushrooms than you’d ever find in a supermarket, each with its unique flavor profile. But more importantly, growing your own mushrooms is a sustainable and cost-effective way to add a healthy and delicious ingredient to your meals. Ready to ditch the store-bought stuff and embark on a fun, fungi-filled adventure? Let’s get started!
Grow Your Own Gourmet Mushrooms at Home: A Beginner’s Guide
Hey there, fellow fungi enthusiasts! Ever dreamt of harvesting your own delicious, fresh mushrooms right in your kitchen? Well, dream no more! Growing mushrooms at home is surprisingly achievable, even for beginners. I’m going to walk you through a simple method using readily available materials. We’ll focus on growing oyster mushrooms, as they are relatively easy to cultivate and incredibly rewarding.
What You’ll Need: The Mushroom Growing Shopping List
Before we dive in, let’s gather our supplies. This is crucial for a smooth and successful growing experience.
* Oyster Mushroom Spawn: This is the “seed” of your mushrooms. You can find it online or at specialty gardening stores. Make sure it’s a reputable source!
* Straw: This will be our substrate, the material the mushrooms will grow on. Wheat straw is ideal, but other types of straw can work too. Avoid hay, as it contains seeds that can contaminate your grow.
* Large Plastic Bags: Heavy-duty garbage bags work great. We need something that can hold the straw and spawn and withstand the pasteurization process.
* Heat-Resistant Container: A large pot or tub that can withstand boiling water. This is for pasteurizing the straw.
* Thermometer: To monitor the water temperature during pasteurization. A candy thermometer works perfectly.
* Spray Bottle: Filled with clean water for misting the mushrooms later.
* Bleach (Optional): For sanitizing your work area and tools.
* Gloves: To keep everything clean and prevent contamination.
* Drill or Sharp Knife: For creating ventilation holes in the plastic bags.
* Scale (Optional): To accurately measure the spawn and straw.
Phase 1: Preparing the Substrate (Straw)
The key to successful mushroom growing is a properly prepared substrate. We need to pasteurize the straw to kill off any competing organisms that could hinder the mushroom growth.
1. Chop the Straw: Using scissors or a knife, chop the straw into smaller pieces, about 2-4 inches long. This will make it easier to pack into the bags and for the mushroom mycelium (the “roots” of the mushroom) to colonize.
2. Soak the Straw: Place the chopped straw into your heat-resistant container. Fill the container with water until the straw is completely submerged. Let it soak for at least 24 hours. This helps hydrate the straw, which is essential for mushroom growth.
3. Pasteurize the Straw: This is the most important step! Drain the soaked straw and place it back into the container. Fill the container with fresh water until the straw is submerged again. Place the container on a heat source (stove or burner) and heat the water to 160-180°F (71-82°C). Maintain this temperature for 60-90 minutes. Use your thermometer to monitor the temperature closely. Don’t let the water boil! Boiling can damage the straw and make it unsuitable for mushroom growth.
4. Drain and Cool the Straw: After pasteurization, carefully drain the hot water from the container. Let the straw cool down to room temperature. This can take several hours. You can spread the straw out on a clean surface to speed up the cooling process. Make sure the straw is cool enough to handle before moving on to the next step.
Phase 2: Inoculating the Straw with Mushroom Spawn
Now comes the exciting part – introducing the mushroom spawn to the prepared straw!
1. Sanitize Your Work Area: Clean your work surface with a bleach solution (1 part bleach to 10 parts water) to minimize the risk of contamination. Wear gloves to keep your hands clean.
2. Prepare the Plastic Bags: Using a drill or sharp knife, create several small ventilation holes (about ¼ inch in diameter) in the plastic bags. These holes will allow for air exchange, which is crucial for mushroom growth. Space the holes evenly around the bag.
3. Layer the Straw and Spawn: This is where we create our mushroom growing “cake.” Start by placing a layer of pasteurized straw at the bottom of the plastic bag. Then, sprinkle a layer of mushroom spawn over the straw. Repeat this process, layering straw and spawn, until the bag is almost full. Aim for about 5-10% spawn by weight of the straw. For example, if you have 10 pounds of straw, use about 0.5-1 pound of spawn.
4. Pack the Bag: Gently pack the straw and spawn mixture into the bag. This will help ensure good contact between the spawn and the straw.
5. Seal the Bag: Close the top of the bag securely with tape or a zip tie.
Phase 3: Incubation and Colonization
This is the waiting game! We need to provide the right conditions for the mushroom mycelium to colonize the straw.
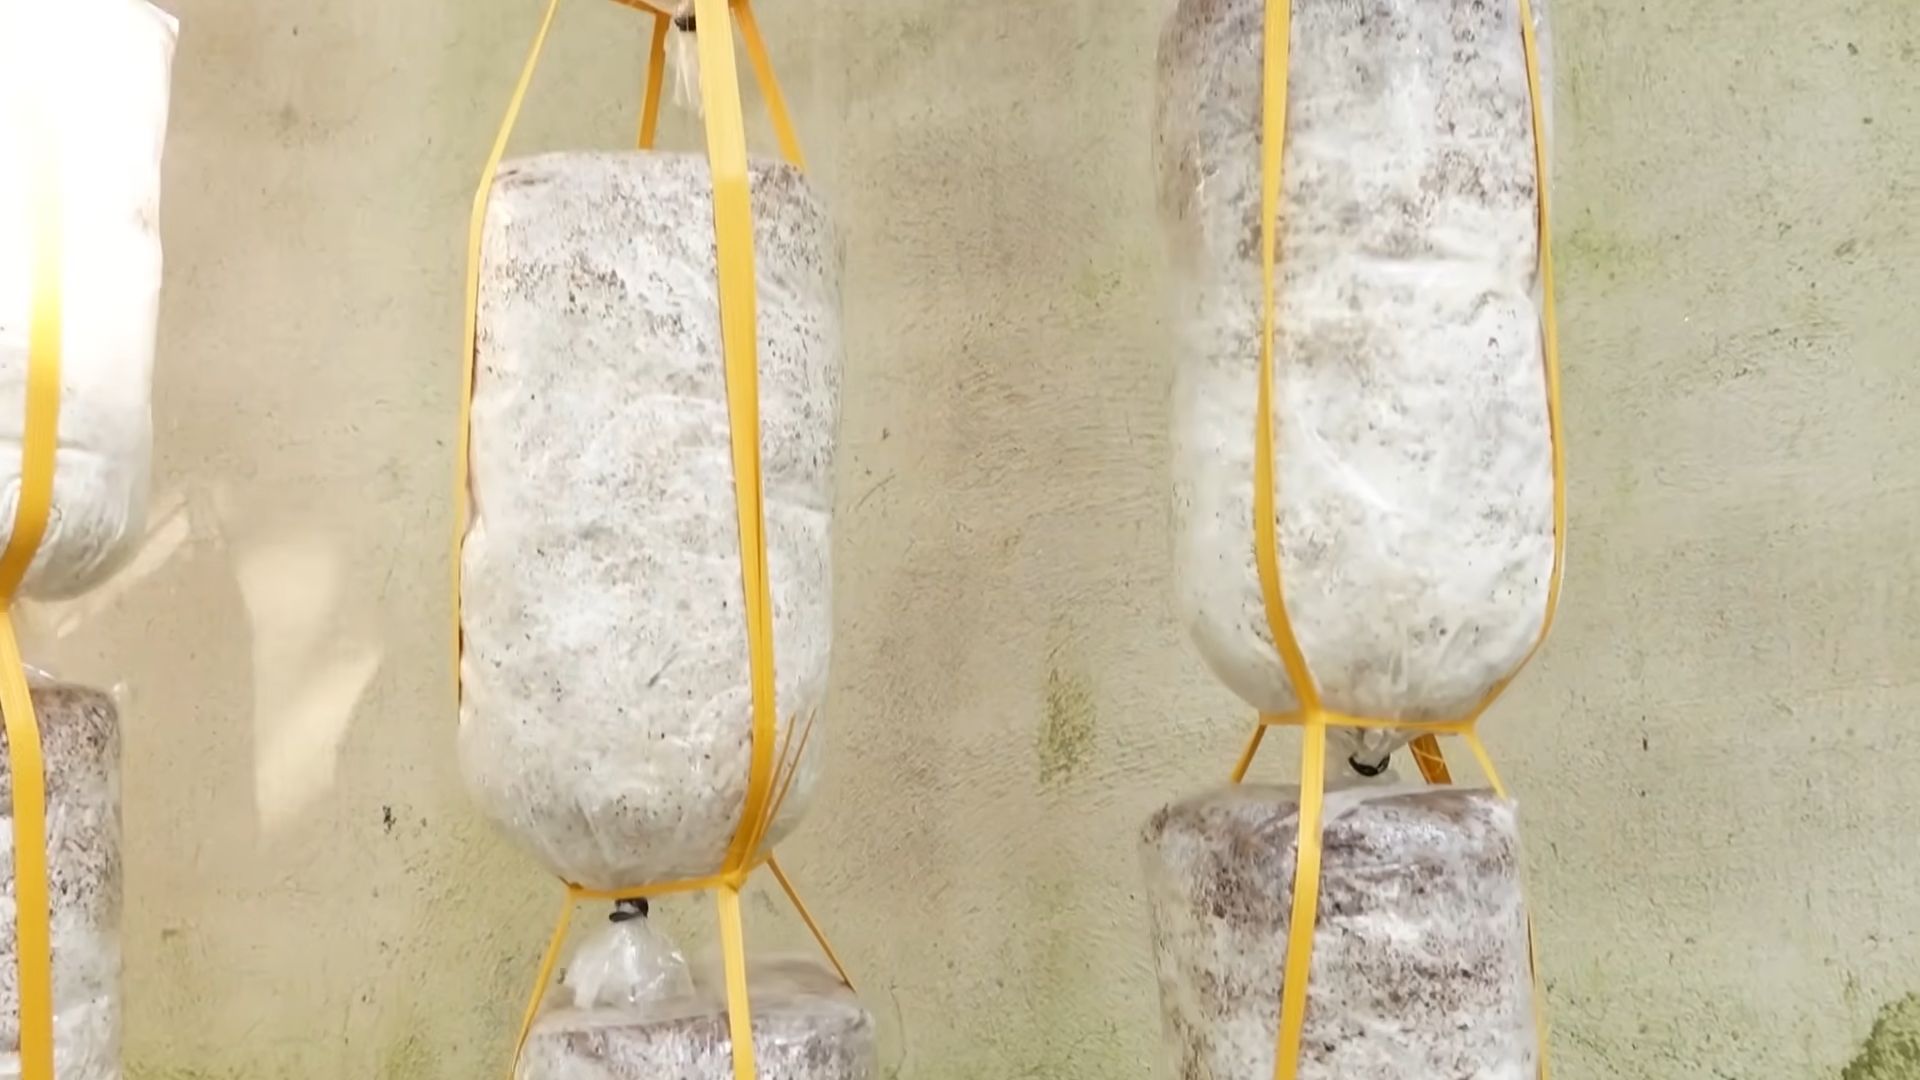
1. Find a Suitable Location: Place the inoculated bags in a dark, humid, and well-ventilated location. A basement, closet, or spare room works well. The ideal temperature for oyster mushroom colonization is between 65-75°F (18-24°C).
2. Monitor the Bags: Check the bags regularly for signs of colonization. You should start to see white, fuzzy mycelium spreading throughout the straw. This process can take anywhere from 2-4 weeks, depending on the temperature and humidity.
3. Maintain Humidity: If the air in your growing area is dry, you may need to mist the bags lightly with water every few days to maintain humidity. Avoid overwatering, as this can lead to contamination.
Phase 4: Fruiting and Harvesting
The moment we’ve been waiting for – mushroom time!
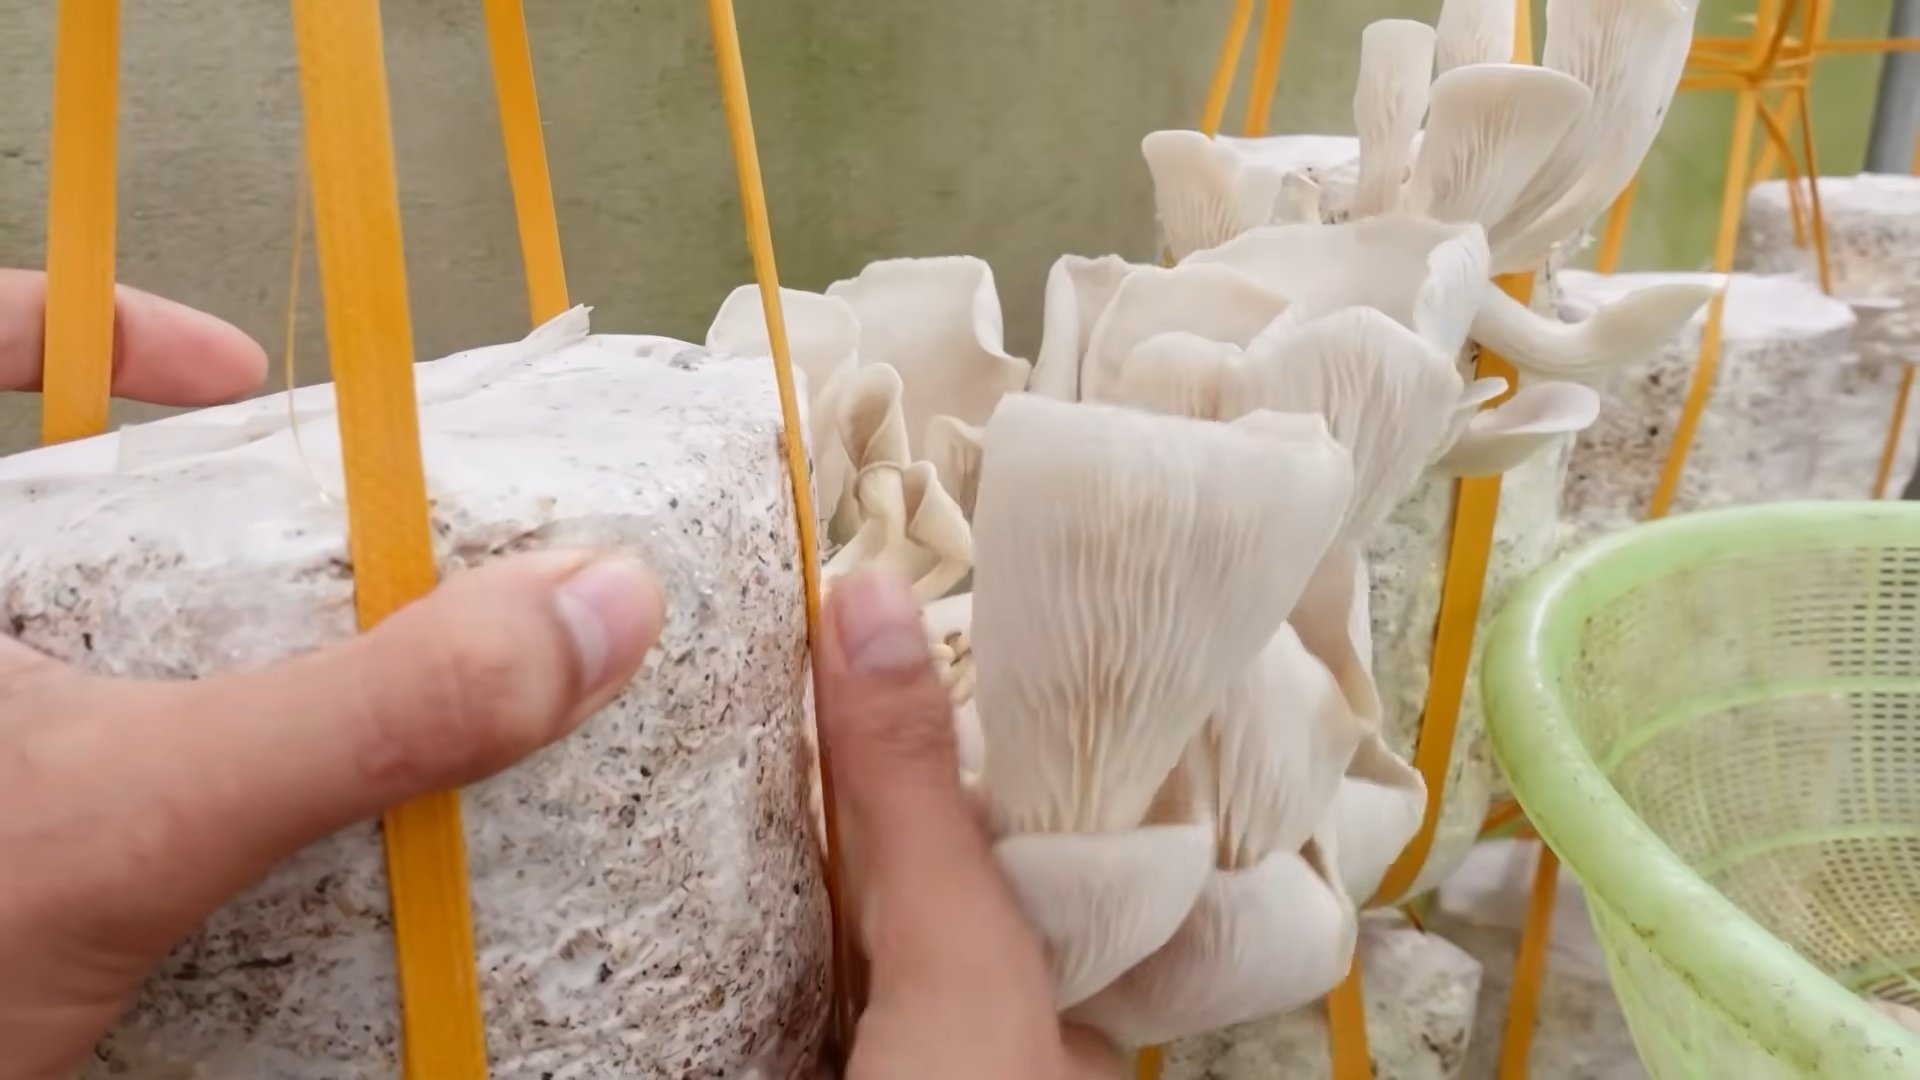
1. Introduce Light and Fresh Air: Once the straw is fully colonized (completely covered in white mycelium), it’s time to trigger fruiting. Move the bags to a location with more light (indirect sunlight is best) and increased fresh air. You can also cut a slit in the bag near the top to encourage mushroom formation.
2. Maintain Humidity: Continue to mist the bags regularly to maintain high humidity. The mushrooms need moisture to develop properly.
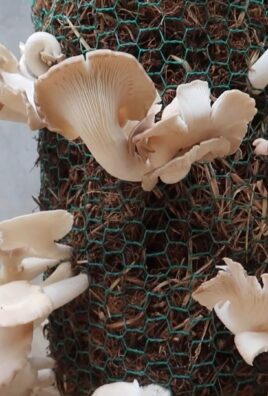
3. Watch for Pinheads: Tiny mushroom “pinheads” will start to form on the surface of the straw. These will rapidly grow into mature mushrooms.
4. Harvest the Mushrooms: Harvest the mushrooms when the caps are fully developed but before they start to release spores (you’ll see a powdery substance on the caps). To harvest, simply twist or cut the mushrooms off the straw.
5. Second Flush: After harvesting, you can often get a second (or even third) flush of mushrooms from the same bag. Simply continue to mist the bag and provide the right conditions.
Troubleshooting: Common Issues and Solutions
Even with the best preparation, you might encounter some challenges. Here are a few common issues and how to address them:
* Contamination: If you see green, black, or other colored molds growing on the straw, it’s likely contaminated. Unfortunately, there’s not much you can do at this point. Dispose of the contaminated bag to prevent the spread of the mold. Proper pasteurization and sanitation are key to preventing contamination.
* Slow Colonization: If the mycelium is growing slowly, it could be due to low temperature, low humidity, or poor spawn quality. Make sure the temperature is within the ideal range, increase humidity by misting, and ensure you’re using fresh, high-quality spawn.
* No Fruiting: If the straw is fully colonized but no mushrooms are forming, it could be due to lack of light, fresh air, or humidity. Move the bags to a location with more light and fresh air, and increase humidity by misting.
* Small Mushrooms: If the mushrooms are small and stunted, it could be due to lack of humidity or nutrients. Make sure you’re misting regularly and consider adding a small amount of nutrient-rich material (like coffee grounds) to the straw during pasteurization.
Tips for Success: Making Your Mushroom Garden Thrive
* Start Small: Don’t try to grow too many mushrooms at once. Start with a few bags and gradually increase the scale as you gain experience.
* Keep it Clean: Sanitation is crucial for preventing contamination. Clean your work area and tools thoroughly before starting.
* Be Patient: Mushroom growing takes time. Don’t get discouraged if you don’t see results immediately.
* Experiment: Try different types of straw, spawn, and growing conditions to find what works best for you.
* Enjoy the Process: Growing mushrooms is a rewarding experience. Enjoy the process of watching your mushrooms grow and harvesting your own delicious food!
Growing mushrooms at home is a fun and rewarding hobby. With a little patience and attention to detail, you can enjoy fresh, delicious mushrooms right from your
Conclusion
So, there you have it! Cultivating your own mushrooms at home isn’t just a fun project; it’s a gateway to fresh, flavorful ingredients right at your fingertips. We’ve walked you through a simple, effective method that demystifies the process, making it accessible even for beginners. Forget those expensive, often less-than-fresh mushrooms from the grocery store. Imagine the satisfaction of harvesting your own bounty, knowing exactly where it came from and how it was grown.
This DIY approach to mushroom cultivation offers a multitude of benefits. Beyond the obvious cost savings, you gain control over the entire growing process, ensuring your mushrooms are free from unwanted pesticides and chemicals. Plus, the flavor of homegrown mushrooms is simply unparalleled. They’re fresher, more vibrant, and bursting with earthy goodness.
But the real magic lies in the versatility. While we’ve focused on a specific method, the world of mushroom cultivation is vast and exciting. Feel free to experiment with different substrates, like coffee grounds or straw, to see what works best for you. Consider trying different mushroom varieties, such as oyster mushrooms, shiitake, or even the more challenging but rewarding lion’s mane. Each variety offers a unique flavor profile and texture, opening up a world of culinary possibilities.
Don’t be afraid to get creative! You can even incorporate your mushroom growing into a larger gardening project, using the spent substrate as a nutrient-rich compost for your other plants. It’s a sustainable and rewarding cycle that benefits both your garden and your palate.
This isn’t just about growing mushrooms; it’s about connecting with nature, learning new skills, and enjoying the fruits (or fungi!) of your labor. It’s about embracing a more sustainable and self-sufficient lifestyle. And it’s about having access to incredibly delicious and nutritious food whenever you want it.
We wholeheartedly encourage you to give this DIY mushroom growing trick a try. It’s easier than you might think, and the rewards are well worth the effort. Once you’ve experienced the joy of harvesting your own mushrooms, you’ll never look at store-bought mushrooms the same way again.
So, grab your supplies, follow our guide, and embark on your mushroom growing adventure. And most importantly, don’t forget to share your experiences with us! We’d love to hear about your successes, your challenges, and any variations you’ve tried. Share your photos, your tips, and your stories in the comments below. Let’s build a community of home mushroom growers and inspire others to discover the magic of fungi! Let us know if you have successfully managed to grow mushrooms at home.
Frequently Asked Questions (FAQ)
What are the easiest types of mushrooms to grow at home for beginners?
Oyster mushrooms are generally considered the easiest for beginners. They are fast-growing, relatively forgiving of environmental fluctuations, and can thrive on a variety of substrates like straw, coffee grounds, and even cardboard. Shiitake mushrooms are another good option, although they require a bit more patience as they take longer to fruit. Avoid more demanding varieties like morels or truffles when you’re just starting out.
What is the best substrate to use for growing mushrooms at home?
The best substrate depends on the type of mushroom you’re growing. For oyster mushrooms, pasteurized straw is a popular and readily available choice. Coffee grounds are also a great option, especially if you have access to a steady supply. Shiitake mushrooms typically require hardwood logs or sawdust. Research the specific needs of the mushroom variety you’re interested in to determine the ideal substrate.
How long does it take to grow mushrooms at home?
The time it takes to grow mushrooms varies depending on the species and the growing conditions. Oyster mushrooms can often be harvested within a few weeks of inoculation, while shiitake mushrooms may take several months to a year to fruit on logs. Factors like temperature, humidity, and light can also affect the growth rate.
What are the ideal temperature and humidity conditions for growing mushrooms?
Most mushrooms prefer a cool and humid environment. The ideal temperature range is typically between 60-75°F (15-24°C), but this can vary depending on the species. Humidity levels should be high, ideally around 80-90%. You can maintain humidity by misting the growing area regularly or using a humidity tent.
How much light do mushrooms need?
Mushrooms don’t need a lot of light. In fact, direct sunlight can be harmful. They thrive in low-light conditions, similar to what you’d find in a forest understory. Indirect light or even artificial light is sufficient for most mushroom varieties.
How do I prevent contamination when growing mushrooms at home?
Contamination is a common challenge in mushroom cultivation. To minimize the risk, it’s crucial to maintain a clean and sterile environment. Pasteurize or sterilize your substrate before inoculation to kill any competing organisms. Use sterile tools and gloves when handling the substrate and spawn. Keep the growing area clean and well-ventilated. Regularly inspect your mushrooms for signs of contamination, such as mold or unusual colors.
What are some common signs of contamination in mushroom growing?
Common signs of contamination include the presence of mold (especially green, black, or orange mold), unusual colors or textures on the substrate or mushrooms, and foul odors. If you suspect contamination, it’s best to remove the affected area immediately to prevent it from spreading.
Can I use spent coffee grounds to grow mushrooms?
Yes, spent coffee grounds are an excellent substrate for growing certain types of mushrooms, particularly oyster mushrooms. Coffee grounds are rich in nutrients and have already been pasteurized during the brewing process, making them a convenient and readily available option.
How do I harvest mushrooms properly?
Harvest mushrooms when the caps are fully developed but before they start to release spores. Gently twist or cut the mushrooms off at the base of the stem. Avoid pulling them out, as this can damage the mycelium and prevent future flushes.
What can I do with the spent substrate after harvesting mushrooms?
The spent substrate is a valuable resource that can be used as a soil amendment or compost. It’s rich in nutrients and beneficial microbes that can improve soil health and promote plant growth. Add it to your garden beds, compost pile, or use it as a potting mix.
Is it safe to eat mushrooms grown at home?
Yes, it is generally safe to eat mushrooms grown at home, provided you have correctly identified the species and followed proper growing techniques. However, it’s crucial to be absolutely certain of the mushroom’s identity before consuming it. If you are unsure, it’s best to err on the side of caution and discard it. Never eat wild mushrooms unless you are an experienced forager and can positively identify them.
Where can I find mushroom spawn?
Mushroom spawn can be purchased from a variety of online retailers and specialty gardening stores. Look for reputable suppliers that offer high-quality spawn of the mushroom variety you’re interested in growing.
What are the benefits of growing my own mushrooms?
There are many benefits to growing your own mushrooms, including:
* Fresh, flavorful ingredients
* Cost savings
* Control over the growing process
* Sustainable and eco-friendly
* A fun and rewarding hobby
* Access to unique mushroom varieties
How can I improve my chances of successfully growing mushrooms at home?
To improve your chances of success, start with a simple method and an easy-to-grow mushroom variety like oyster mushrooms. Follow the instructions carefully, maintain a clean and sterile environment, and monitor the growing conditions closely. Don’t be afraid to experiment and learn from your mistakes. And most importantly, have fun!
Leave a Comment