
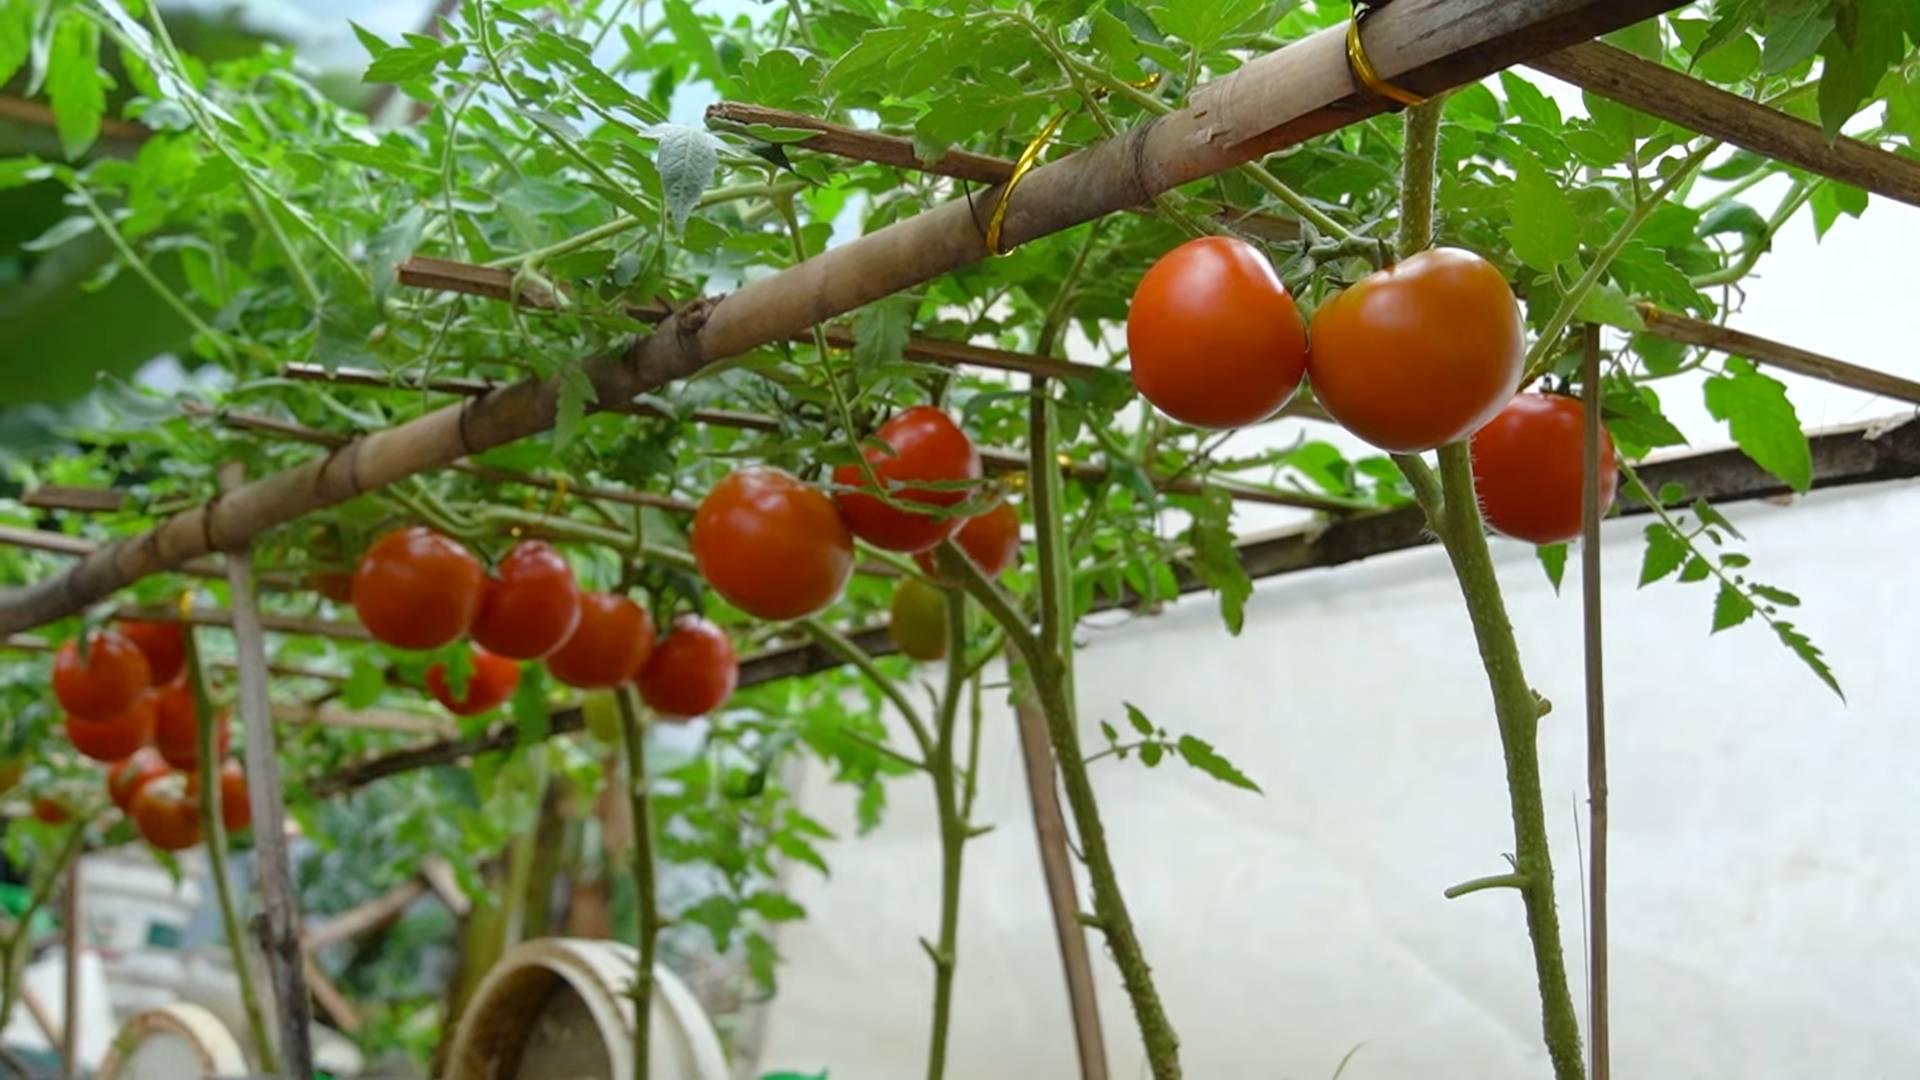
Tomato Growing Hack: Unlock the secrets to a bountiful harvest right in your backyard! Have you ever dreamed of plucking juicy, sun-ripened tomatoes straight from your own garden, but felt intimidated by the process? Or perhaps you’ve tried before with less-than-stellar results? I understand! Many gardeners struggle to achieve that perfect tomato yield, battling pests, diseases, and unpredictable weather. But what if I told you there’s a simple, yet incredibly effective, trick that can dramatically improve your tomato growing success?
For centuries, tomatoes have been a staple in cuisines worldwide, with their cultivation dating back to ancient civilizations in South America. Today, they’re a beloved ingredient in countless dishes, from simple salads to complex sauces. But beyond their culinary appeal, growing your own tomatoes offers a unique connection to nature and a sense of accomplishment.
That’s why I’m so excited to share this game-changing tomato growing hack with you. This DIY trick will not only save you time and money but also empower you to cultivate healthier, more productive tomato plants. Say goodbye to store-bought tomatoes and hello to a garden bursting with flavor! Let’s dive in and discover how to transform your tomato growing experience.
Upcycling Plastic into a Thriving Home Garden
Hey there, fellow garden enthusiasts! I’m super excited to share one of my favorite DIY projects with you: transforming discarded plastic containers into a vibrant and sustainable home garden. Not only is this a fantastic way to reduce waste, but it also allows you to grow your own herbs, vegetables, and flowers, even if you have limited space. So, grab your gloves, gather your plastic containers, and let’s get started!
Gathering Your Supplies
Before we dive into the nitty-gritty, let’s make sure we have everything we need. This will save you time and frustration later on.
* **Plastic Containers:** This is the heart of our project! Look for various sizes and shapes. Think plastic bottles (soda, water, juice), yogurt containers, margarine tubs, takeout containers, and even old plastic buckets. Just make sure they’re clean and food-safe if you plan on growing edibles.
* **Potting Soil:** Choose a good quality potting mix that’s well-draining. This is crucial for healthy plant growth.
* **Drainage Material:** Gravel, pebbles, broken pottery shards, or even packing peanuts work great for creating drainage at the bottom of your containers.
* **Tools:**
* Scissors or a utility knife (adult supervision required for younger gardeners!)
* Drill or nail and hammer (for drainage holes)
* Gloves (to protect your hands)
* Watering can or hose
* Measuring tape or ruler (optional, but helpful for spacing)
* **Seeds or Seedlings:** Decide what you want to grow! Herbs like basil, mint, and chives are easy to start with. Leafy greens like lettuce and spinach also thrive in containers. You can start from seeds or buy small seedlings from your local garden center.
* **Optional Supplies:**
* Spray paint (for decorating your containers)
* Landscape fabric or burlap (to line containers and prevent soil erosion)
* Labels (to identify your plants)
* Compost (to enrich your soil)
Preparing Your Plastic Containers
This is a crucial step to ensure your plants have a healthy environment to grow in.
1. **Cleaning:** Thoroughly wash all your plastic containers with soap and water. Remove any labels or sticky residue. This is important to prevent any contaminants from affecting your plants.
2. **Drainage Holes:** This is non-negotiable! Plants need drainage to prevent root rot.
* **Bottles and Small Containers:** Use a drill or a nail and hammer to create several drainage holes in the bottom of each container. I usually aim for at least 4-5 holes, depending on the size.
* **Larger Containers:** For bigger containers like buckets or tubs, you’ll want to create more drainage holes, perhaps 6-8, spaced evenly across the bottom.
3. **Lining (Optional):** If you’re using containers that might leach chemicals or if you want to prevent soil erosion, consider lining them with landscape fabric or burlap. Cut the fabric to fit the inside of the container, leaving a few inches of overlap. This will help keep the soil in place and prevent it from washing out through the drainage holes.
4. **Decorating (Optional):** This is where you can get creative! If you want to add some personality to your garden, you can paint your containers with spray paint. Choose colors that complement your plants or your outdoor space. Let the paint dry completely before moving on to the next step. You can also use stencils, stickers, or other decorative elements to personalize your containers.
Planting Your Garden
Now for the fun part – bringing your garden to life!
1. **Add Drainage Material:** Place a layer of drainage material (gravel, pebbles, etc.) at the bottom of each container. This will help prevent the soil from becoming waterlogged and promote healthy root growth. A 1-2 inch layer is usually sufficient.
2. **Fill with Potting Soil:** Fill the containers with potting soil, leaving about an inch or two of space at the top. Gently pat down the soil to remove any air pockets.
3. **Planting Seeds:** If you’re starting from seeds, follow the instructions on the seed packet for planting depth and spacing. Generally, you’ll want to create small holes in the soil, sprinkle in the seeds, and cover them lightly with soil. Water gently after planting.
4. **Planting Seedlings:** If you’re using seedlings, gently remove them from their nursery pots. Loosen the roots slightly before planting. Dig a hole in the soil that’s large enough to accommodate the root ball. Place the seedling in the hole and fill in around it with soil. Gently pat down the soil and water thoroughly.
5. **Spacing:** Be mindful of spacing when planting. Give your plants enough room to grow and spread out. Overcrowding can lead to stunted growth and disease. Refer to the seed packet or plant label for recommended spacing guidelines.
6. **Labeling:** Don’t forget to label your plants! This will help you keep track of what you’ve planted and avoid any confusion later on. You can use plant markers, popsicle sticks, or even write directly on the containers with a permanent marker.
Caring for Your Upcycled Garden
Maintaining your garden is key to its success.
1. **Watering:** Water your plants regularly, especially during hot weather. Check the soil moisture by sticking your finger into the soil. If the top inch feels dry, it’s time to water. Water deeply, until the water drains out of the drainage holes. Avoid overwatering, as this can lead to root rot.
2. **Sunlight:** Most plants need at least 6 hours of sunlight per day. Place your containers in a sunny location where they’ll receive plenty of light. If you’re growing plants indoors, you may need to supplement with artificial light.
3. **Fertilizing:** Container plants need regular fertilization to thrive. Use a balanced liquid fertilizer every 2-4 weeks, following the instructions on the label. You can also add compost to your soil to provide nutrients.
4. **Pruning:** Prune your plants regularly to encourage bushier growth and remove any dead or diseased leaves. This will also help improve air circulation and prevent disease.
5. **Pest Control:** Keep an eye out for pests and diseases. If you notice any problems, take action immediately. You can use organic pest control methods, such as insecticidal soap or neem oil.
6. **Repotting:** As your plants grow, they may outgrow their containers. If you notice that the roots are circling around the bottom of the pot, it’s time to repot them into larger containers.
7. **Moving:** If you live in an area with harsh winters, you may need to move your containers indoors during the colder months. This will protect your plants from frost and freezing temperatures.
Specific Container Ideas and Plant Pairings
Here are some specific ideas to get your creative juices flowing:
* **Soda Bottle Herb Garden:** Cut soda bottles in half, create drainage holes, and plant herbs like basil, mint, oregano, and thyme. These are perfect for small spaces and can be placed on a windowsill or balcony.
* **Yogurt Container Succulent Garden:** Yogurt containers are ideal for succulents and cacti. These plants are drought-tolerant and require minimal care. Create a mini desert landscape by adding pebbles and sand to the containers.
* **Takeout Container Vegetable Garden:** Use takeout containers to grow leafy greens like lettuce, spinach, and kale. These vegetables are quick-growing and can be harvested in just a few weeks.
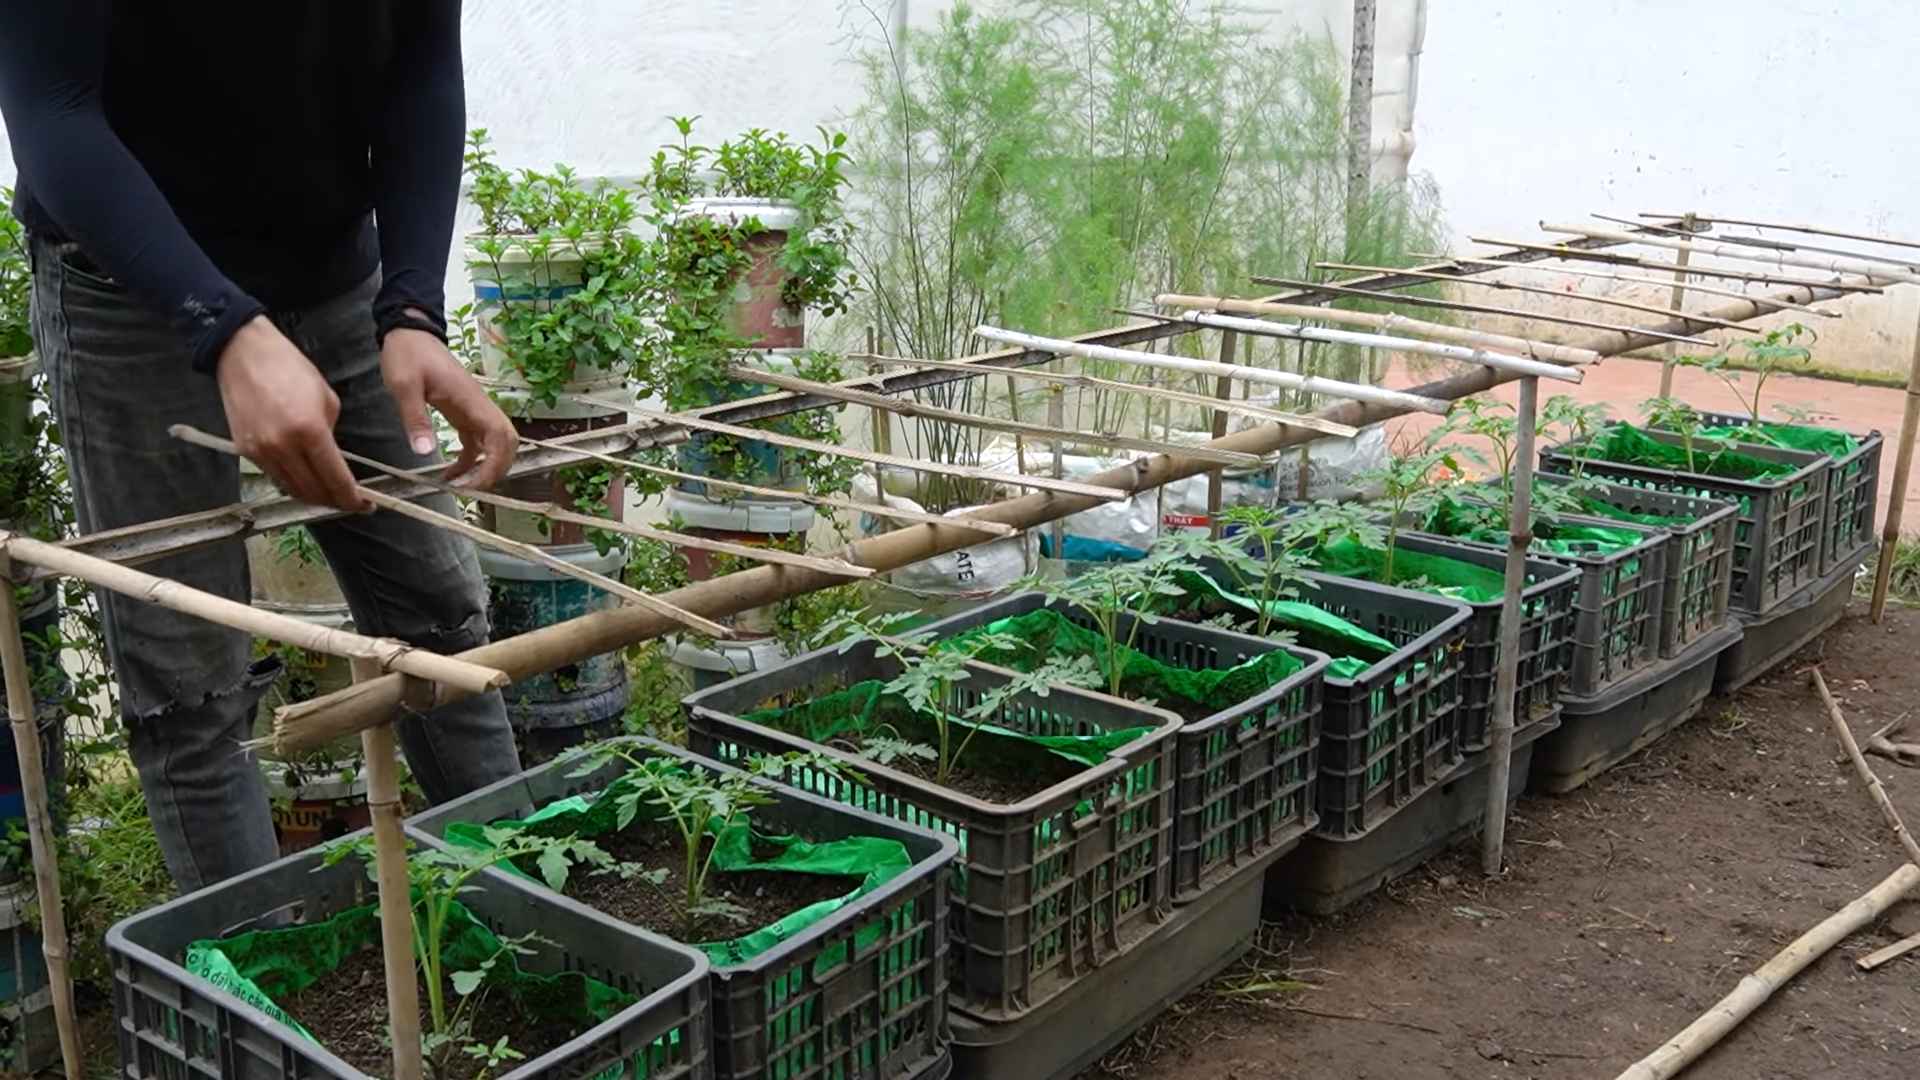
* **Plastic Bucket Tomato Garden:** Plastic buckets are great for growing larger plants like tomatoes, peppers, and eggplants. Make sure to provide support for these plants as they grow, such as stakes or cages.
* **Hanging Basket Petunia Garden:** Cut the top off a large plastic bottle, invert it, and create a hanging basket. Plant petunias or other trailing flowers for a beautiful display.
**Plant Pairing Ideas:**
* **Tomatoes and Basil:** Basil repels tomato hornworms and improves the flavor of tomatoes.
* **Carrots and Onions:** Onions repel carrot root flies.
* **Marigolds and Vegetables:** Marigolds repel nematodes and other pests.
* **Mint and Cabbage:** Mint repels cabbage moths.
Troubleshooting Common Problems
Even with the best care, you might encounter some problems along the way. Here are some common issues and how to address them:
* **Yellowing Leaves:** This could be a sign of overwatering, underwatering, or nutrient deficiency. Check the soil moisture and adjust your watering schedule accordingly. Fertilize your plants with a balanced fertilizer.
* **Wilting Leaves:** This could be a sign of underwatering or heat stress. Water your plants deeply and provide shade during the hottest part of the day.
* **Pests:** Inspect your plants regularly for pests. Use organic pest control methods to get rid of them.
* **Disease:** Remove any diseased leaves or plants to prevent the spread of disease. Improve air circulation and avoid overwatering.
*
Conclusion
So, there you have it! This simple, yet incredibly effective, tomato growing hack is a game-changer for anyone looking to maximize their yield and enjoy the freshest, most flavorful tomatoes imaginable. We’ve walked you through the process, highlighting the ease and affordability of this method. Forget complicated setups and expensive equipment; all you need are a few readily available materials and a little bit of your time to witness a remarkable transformation in your tomato plants.
Why is this tomato growing hack a must-try? Because it addresses several key challenges that tomato growers often face. It promotes stronger root development, leading to healthier and more resilient plants. It provides essential nutrients directly to the roots, bypassing the need for constant fertilization. And perhaps most importantly, it significantly increases the number of tomatoes your plants will produce. Imagine baskets overflowing with juicy, sun-ripened tomatoes, all thanks to this one simple trick!
But don’t just take our word for it. We encourage you to experiment and adapt this technique to suit your specific needs and growing conditions. For example, if you live in a particularly hot climate, consider using a larger container to provide more insulation for the roots. You could also try adding different types of organic matter to the planting hole, such as compost or worm castings, to further enrich the soil. Another variation is to use different types of rooting hormone, though we find that the willow water method is both effective and environmentally friendly.
Consider using this tomato growing hack in conjunction with other best practices for tomato cultivation. Proper watering techniques, adequate sunlight, and regular pruning are all essential for healthy and productive plants. This hack is not a magic bullet, but rather a powerful tool that, when used in conjunction with other good gardening practices, can significantly enhance your tomato growing success.
We are confident that this tomato growing hack will revolutionize your tomato growing experience. It’s a simple, cost-effective, and highly rewarding technique that will allow you to enjoy an abundance of delicious, homegrown tomatoes. So, grab your supplies, get your hands dirty, and prepare to be amazed by the results.
Don’t hesitate to share your experiences with us! We’d love to hear about your successes, challenges, and any variations you’ve tried. Post your photos and stories in the comments section below, or tag us on social media. Let’s create a community of tomato growers who are passionate about sharing their knowledge and helping each other succeed. Happy gardening!
Frequently Asked Questions (FAQ)
What exactly is this “tomato growing hack” and how does it work?
This tomato growing hack involves planting your tomato seedlings deeper than you normally would, after removing the lower leaves. The buried stem then develops roots along its length, creating a much larger and more robust root system. This enhanced root system allows the plant to absorb more water and nutrients, leading to stronger growth, increased resilience, and a higher yield of tomatoes. The deeper planting also provides better support for the plant, preventing it from toppling over under the weight of the fruit.
Why do I need to remove the lower leaves before planting deeply?
Removing the lower leaves is crucial because these leaves will rot if buried, potentially attracting pests and diseases that could harm the plant. By removing them, you create a clean stem that can readily develop roots without any risk of decomposition. It also encourages the plant to focus its energy on root development rather than maintaining leaves that will be underground.
What kind of soil should I use for this tomato growing hack?
The best soil for this tomato growing hack is a well-draining, nutrient-rich soil. A good quality potting mix amended with compost or other organic matter is ideal. Avoid using heavy clay soil, as it can become waterlogged and hinder root development. You can also add a slow-release fertilizer to the planting hole to provide a steady supply of nutrients to the developing roots.
How deep should I plant the tomato seedling?
You should plant the tomato seedling as deep as possible, burying up to two-thirds of the stem. The goal is to bury as much of the stem as possible to maximize root development. However, be sure to leave at least a few sets of leaves above the ground.
Can I use this tomato growing hack for all types of tomatoes?
Yes, this tomato growing hack is suitable for all types of tomatoes, including determinate (bush) and indeterminate (vining) varieties. However, it is particularly beneficial for indeterminate varieties, as they tend to grow taller and require more support.
Will this tomato growing hack work in containers as well as in the ground?
Yes, this tomato growing hack works equally well in containers and in the ground. Just make sure that the container is large enough to accommodate the extensive root system that will develop. A 5-gallon container is generally recommended for most tomato varieties.
How often should I water my tomato plants after using this tomato growing hack?
Water your tomato plants deeply and regularly, especially during hot and dry weather. The frequency of watering will depend on the soil type, climate, and size of the plant. A good rule of thumb is to water when the top inch of soil feels dry to the touch. Avoid overwatering, as this can lead to root rot.
Do I need to fertilize my tomato plants after using this tomato growing hack?
Yes, you should still fertilize your tomato plants, even after using this tomato growing hack. While the enhanced root system will allow the plant to absorb more nutrients, it will still need a regular supply of fertilizer to support its growth and fruit production. Use a balanced fertilizer specifically formulated for tomatoes, following the instructions on the package.
What are some common problems that I might encounter when using this tomato growing hack?
Some common problems that you might encounter include:
* **Root rot:** This can occur if the soil is poorly drained or if you overwater the plants.
* **Pest infestations:** Tomato plants are susceptible to a variety of pests, such as aphids, whiteflies, and tomato hornworms.
* **Diseases:** Tomato plants can also be affected by various diseases, such as early blight, late blight, and fusarium wilt.
To prevent these problems, use well-draining soil, water regularly but not excessively, and monitor your plants for signs of pests or diseases. Take appropriate action to control pests and diseases as soon as they are detected.
How long will it take to see results from this tomato growing hack?
You should start to see results from this tomato growing hack within a few weeks of planting. The plants will typically grow faster and stronger than plants that are not planted deeply. You should also notice an increase in the number of tomatoes produced. The exact timing will depend on the variety of tomato, the growing conditions, and your local climate.

Leave a Comment