
Grow Sweet Potatoes in Bags: Imagine harvesting a bounty of sweet potatoes right from your own backyard, without the need for a sprawling garden! For centuries, sweet potatoes have been a staple crop, deeply rooted in cultures around the globe, from their origins in Central and South America to their widespread cultivation in Asia and Africa. These vibrant tubers aren’t just delicious; they’re packed with nutrients and offer a taste of history with every bite.
But what if you’re short on space? That’s where this DIY trick comes in! I’m going to show you how to grow sweet potatoes in bags, a fantastic solution for urban gardeners, apartment dwellers, or anyone looking to maximize their yield in a limited area. This method is not only space-saving but also incredibly rewarding, allowing you to control the soil quality and protect your precious plants from pests and diseases.
Let’s face it, store-bought sweet potatoes can be expensive and sometimes lack the fresh, earthy flavor of homegrown produce. By learning how to grow sweet potatoes in bags, you’ll not only save money but also enjoy the satisfaction of nurturing your own food from start to finish. Plus, it’s a fun and educational activity for the whole family! So, grab your gardening gloves, and let’s get started on this exciting DIY adventure!
Grow Sweet Potatoes in Bags: A Beginner’s Guide
Hey there, fellow gardening enthusiasts! I’m so excited to share one of my favorite gardening hacks with you: growing sweet potatoes in bags! It’s a fantastic way to cultivate these delicious and nutritious tubers, especially if you’re short on space or have poor soil. Trust me, even if you’re a complete beginner, you can totally nail this. Let’s dive in!
Why Grow Sweet Potatoes in Bags?
Before we get started, let’s talk about why this method is so awesome:
* Space-Saving: Perfect for patios, balconies, or small gardens. You don’t need a huge plot of land.
* Soil Control: You get to create the perfect growing medium for your sweet potatoes. No more battling with rocky or clay-heavy soil!
* Easy Harvesting: Harvesting is a breeze! Just tip the bag over and voila – sweet potato treasure!
* Portability: Need to move your plants to a sunnier spot? No problem! Just pick up the bag and relocate.
* Less Weeding: Bags tend to have fewer weeds compared to traditional garden beds.
What You’ll Need
Alright, let’s gather our supplies. Here’s what you’ll need to get started:
* Sweet Potato Slips: These are sprouted sweet potatoes, and they’re what you’ll plant. You can buy them online, at your local garden center, or even grow your own (more on that later!).
* Large Grow Bags: I recommend using bags that are at least 20 gallons in size. Fabric grow bags are ideal because they allow for good drainage and aeration.
* Potting Mix: A well-draining potting mix is crucial. I like to use a mix of compost, peat moss (or coco coir), and perlite.
* Compost: This will provide essential nutrients for your sweet potatoes.
* Water: Of course!
* Gardening Gloves: To keep your hands clean and protected.
* Trowel or Small Shovel: For planting.
* Optional: Slow-release fertilizer: To give your sweet potatoes an extra boost.
Step-by-Step Planting Guide
Okay, let’s get our hands dirty! Here’s how to plant your sweet potato slips in bags:
1. Prepare the Grow Bags:
* First, unfold your grow bags and place them in a sunny location. Sweet potatoes need at least 6-8 hours of sunlight per day.
* Next, fill the bags about two-thirds full with your potting mix.
* Mix in a generous amount of compost. I usually add about one-third compost to two-thirds potting mix. This will enrich the soil and provide essential nutrients.
* If you’re using slow-release fertilizer, mix it in now according to the package instructions.
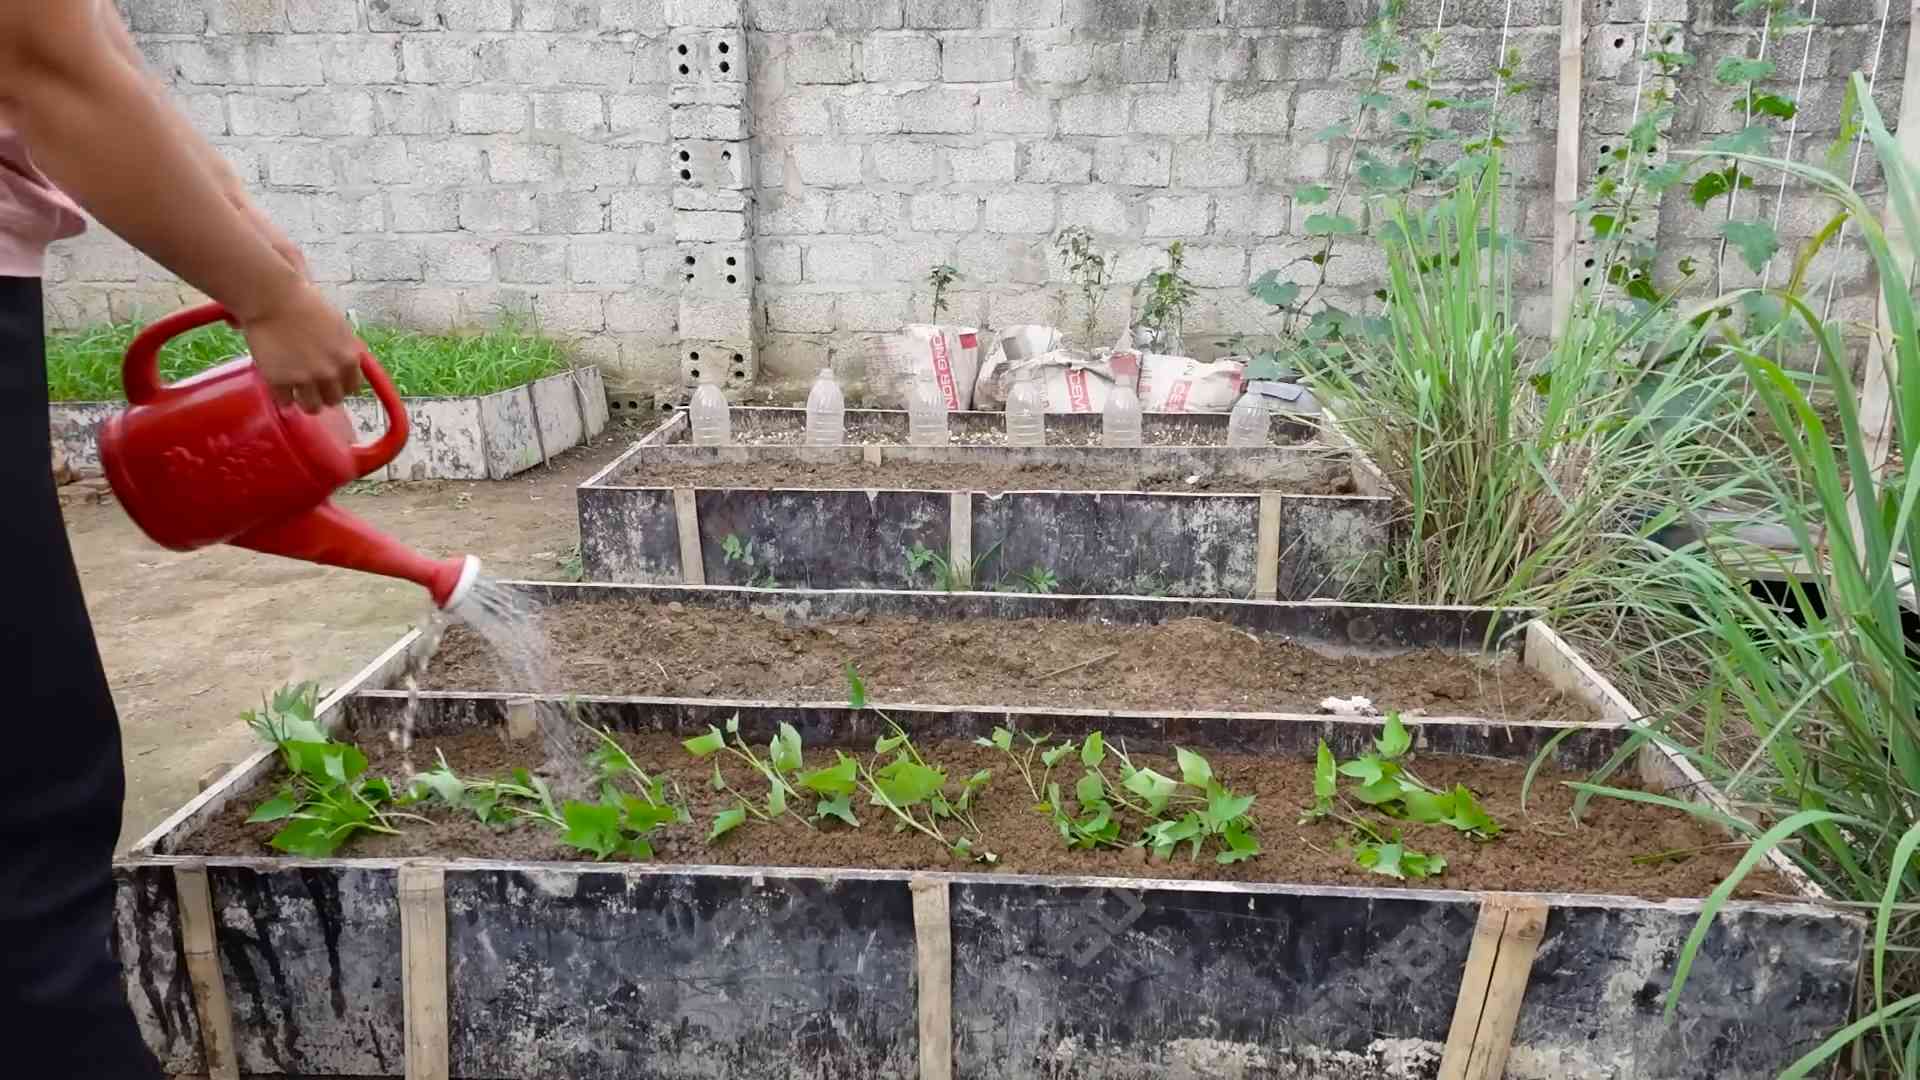
* Water the soil thoroughly until it’s evenly moist but not soggy.
2. Planting the Slips:
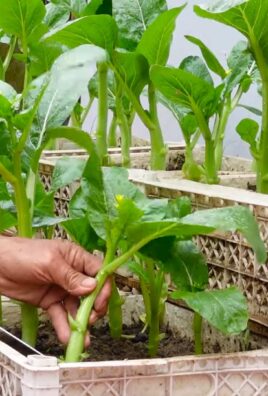
* Gently remove the sweet potato slips from their containers. If the roots are tightly bound, gently loosen them with your fingers.
* Dig a small hole in the soil, about 4-6 inches deep.
* Place the sweet potato slip in the hole, making sure the roots are well covered. Leave the top leaves exposed.
* Gently backfill the hole with soil and firm it around the base of the slip.
* Space the slips about 12 inches apart if you’re planting multiple slips in one bag.
* Water the newly planted slips thoroughly.
3. Mulching (Optional):
* Adding a layer of mulch around the base of the plants can help retain moisture, suppress weeds, and regulate soil temperature.
* I like to use straw or shredded leaves as mulch.
* Apply a 2-3 inch layer of mulch around the plants, being careful not to cover the stems.
Caring for Your Sweet Potato Plants
Now that your sweet potatoes are planted, it’s time to give them some TLC. Here’s what you need to do to keep them happy and healthy:
1. Watering:
* Sweet potatoes need consistent moisture, especially during hot weather.
* Water deeply whenever the top inch of soil feels dry to the touch.
* Avoid overwatering, as this can lead to root rot.
* I usually water my sweet potatoes every 2-3 days, but this will depend on your climate and the weather conditions.
2. Fertilizing:
* Sweet potatoes are heavy feeders, so they need regular fertilization.
* If you didn’t use slow-release fertilizer at planting time, you can fertilize every 2-3 weeks with a balanced liquid fertilizer.
* Follow the instructions on the fertilizer package.
* Avoid using fertilizers that are high in nitrogen, as this can promote leafy growth at the expense of tuber development.
3. Sunlight:
* Make sure your sweet potatoes are getting at least 6-8 hours of sunlight per day.
* If you live in a particularly hot climate, you may need to provide some afternoon shade to prevent the plants from getting scorched.
4. Weeding:
* Keep the area around your sweet potato plants free of weeds.
* Weeds can compete with your plants for nutrients and water.
* Hand-pull any weeds that appear.
5. Pest and Disease Control:
* Sweet potatoes are generally resistant to pests and diseases, but it’s still a good idea to keep an eye out for any problems.
* Common pests include aphids, flea beetles, and sweet potato weevils.
* If you notice any pests, you can try spraying them with insecticidal soap or neem oil.
* Common diseases include fungal leaf spots and root rot.
* To prevent fungal diseases, make sure your plants have good air circulation and avoid overwatering.
Growing Your Own Sweet Potato Slips
Want to save some money and grow your own sweet potato slips? It’s easier than you think! Here’s how:
1. Choose a Sweet Potato:
* Select a healthy, organic sweet potato from your local grocery store or farmer’s market.
* Avoid sweet potatoes that have been treated with sprout inhibitors.
2. Sprouting the Sweet Potato:
* There are two main methods for sprouting sweet potatoes: water sprouting and soil sprouting.
* Water Sprouting:
* Insert toothpicks around the middle of the sweet potato.
* Suspend the sweet potato in a jar or glass of water, with the bottom half submerged.
* Place the jar in a warm, sunny location.
* Change the water every few days.
* After a few weeks, sprouts will begin to emerge from the sweet potato.
* Soil Sprouting:
* Bury the sweet potato horizontally in a container filled with moist potting mix.
* Leave the top of the sweet potato exposed.
* Place the container in a warm, sunny location.
* Keep the soil moist but not soggy.
* After a few weeks, sprouts will begin to emerge from the sweet potato.
3. Harvesting the Slips:
* Once the sprouts are about 6-8 inches long, they’re ready to be harvested.
* Gently twist or cut the slips off the sweet potato.
* Place the slips in a glass of water to encourage root development.
* After a few days, roots will begin to form.
4. Planting the Slips:
* Once the roots are about 1-2 inches long, the slips are ready to be planted in your grow bags.
* Follow the planting instructions above.
Harvesting Your Sweet Potatoes
The moment we’ve all been waiting for! Harvesting time! Here’s how to know when your sweet potatoes are ready and how to harvest them:
1. When to Harvest:
* Sweet potatoes are typically ready to harvest about 90-120 days after planting.
* The leaves will start to turn yellow and the vines will begin to die back.
* You can also gently dig around the base of the plant to check the size of the tubers.
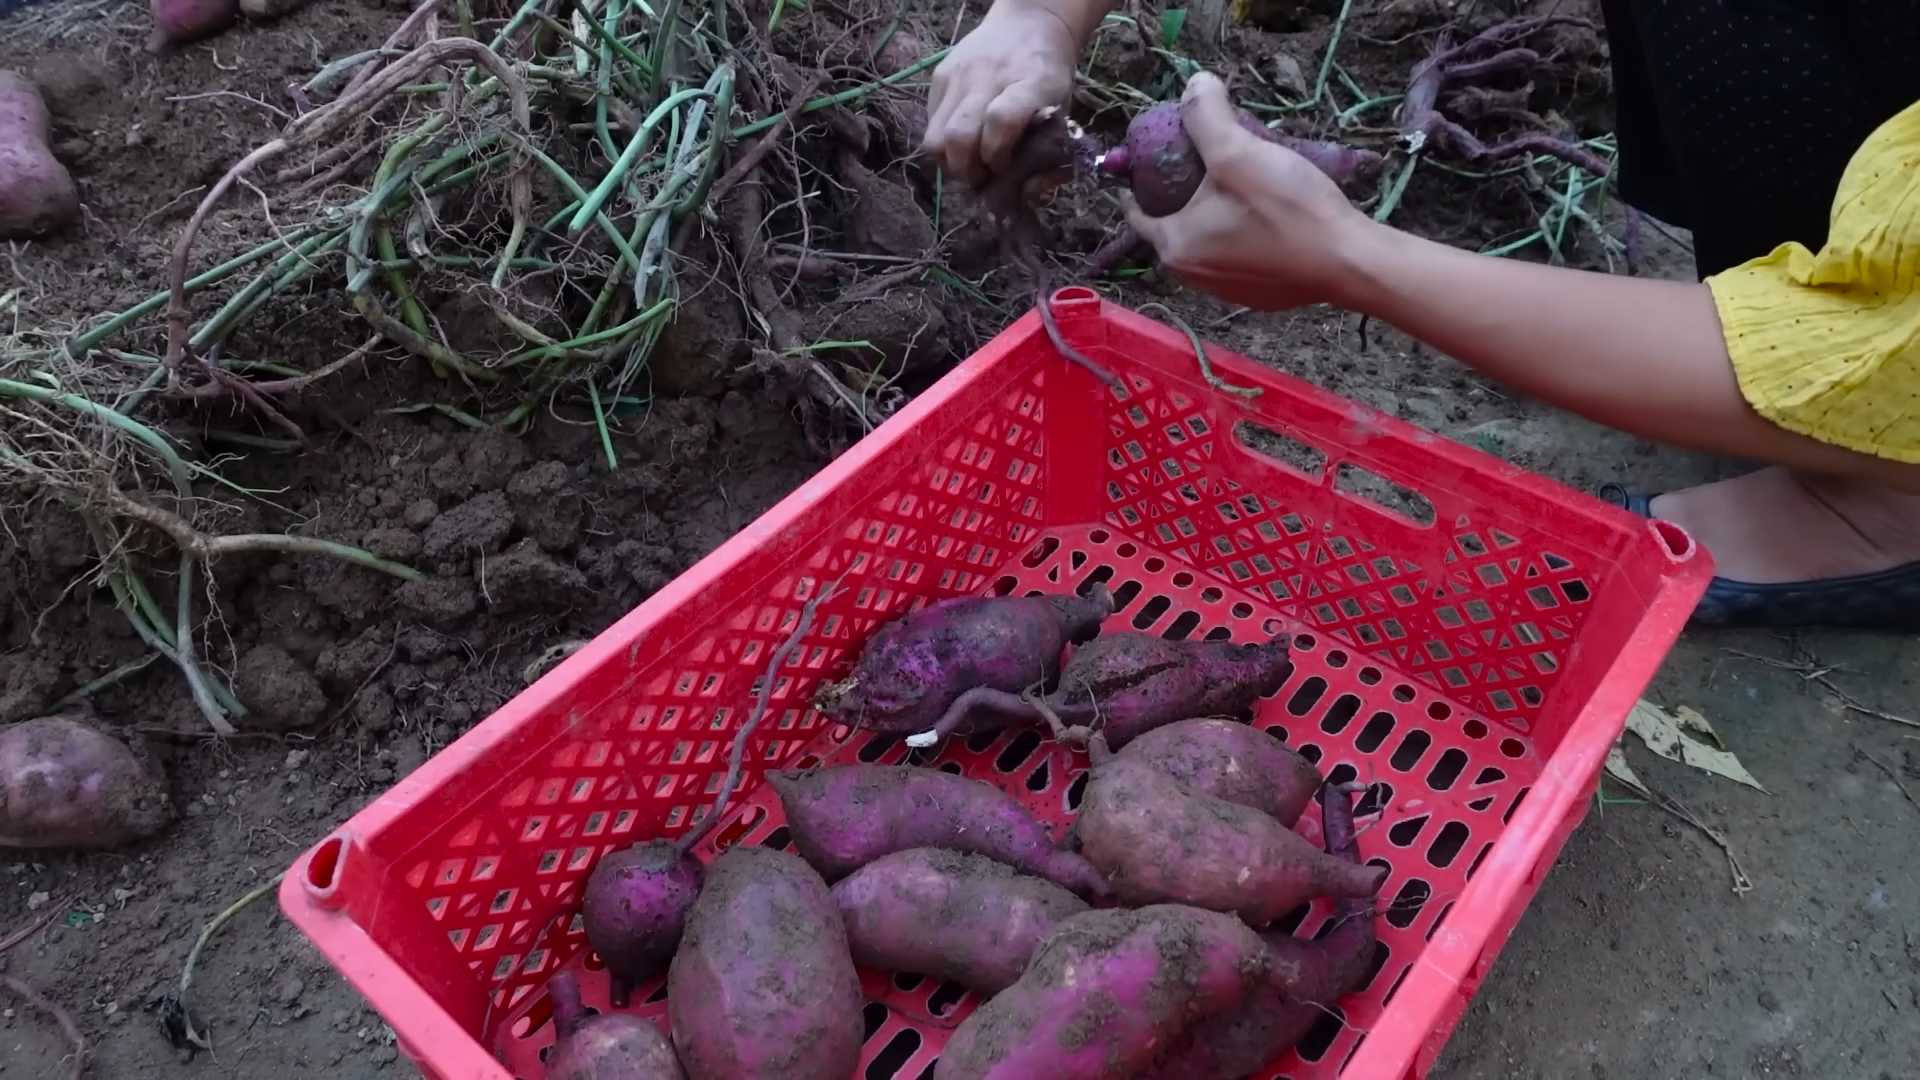
2. Harvesting:
* The easiest way to harvest sweet potatoes from bags is to simply tip the bag over and gently remove the tubers.
* Be careful not to damage the sweet potatoes during harvesting.
* Use your hands or a small trowel to loosen the soil around the tubers.
3. Curing:
* Curing is an important step in the
Conclusion
So, there you have it! Growing sweet potatoes in bags is not just a gardening trend; it’s a game-changer for anyone with limited space, challenging soil, or simply a desire for a more controlled and rewarding harvest. This method offers a unique blend of convenience and efficiency, allowing you to nurture these delicious and nutritious tubers right on your patio, balcony, or even a sunny corner of your driveway.
Why is this DIY trick a must-try? Because it democratizes sweet potato cultivation. No longer are you bound by the limitations of a traditional garden plot. You have complete control over the soil composition, drainage, and even the microclimate surrounding your plants. This translates to healthier, more robust plants and, ultimately, a more abundant yield of those sweet, orange treasures.
Beyond the practical benefits, growing sweet potatoes in bags is incredibly satisfying. Witnessing the transformation from a humble slip to a sprawling vine laden with developing tubers is a truly rewarding experience. It connects you to the natural world in a tangible way and provides a sense of accomplishment that’s hard to match.
But the fun doesn’t stop there! Feel free to experiment with different varieties of sweet potatoes. Beauregard, with its classic orange flesh, is always a reliable choice, but why not try something a little more adventurous? Consider growing Japanese sweet potatoes with their purple skin and creamy white flesh, or perhaps the Covington variety, known for its vibrant color and exceptional sweetness.
You can also play around with the soil mix. While the recipe we provided is a great starting point, feel free to adjust the proportions of compost, peat moss, and perlite to suit your specific needs and preferences. Some gardeners even add a small amount of bone meal to the mix to provide an extra boost of phosphorus, which is essential for root development.
Another variation to consider is vertical gardening. By using taller, narrower bags and providing a sturdy trellis or support system, you can train your sweet potato vines to grow upwards, maximizing your space and creating a stunning visual display. This is a particularly effective technique for those with very limited horizontal space.
And don’t forget about companion planting! Marigolds, basil, and nasturtiums are all excellent companions for sweet potatoes, helping to deter pests and attract beneficial insects. Planting these alongside your sweet potatoes can create a healthier and more vibrant growing environment.
The key to success with this DIY trick is observation and adaptation. Pay close attention to your plants, monitor their growth, and adjust your watering and fertilizing schedule as needed. Don’t be afraid to experiment and try new things. Gardening is a journey of discovery, and the more you learn, the more successful you’ll become.
So, what are you waiting for? Grab some bags, mix up some soil, and get ready to embark on a sweet potato growing adventure! We are confident that you will find this method to be both enjoyable and rewarding.
We encourage you to try this **DIY sweet potato** growing method and share your experiences with us! Post photos of your plants, share your tips and tricks, and let us know what varieties you’re growing. We’re eager to hear from you and learn from your successes (and even your failures!). Together, we can create a community of bag-grown sweet potato enthusiasts and spread the joy of homegrown goodness. Happy gardening!
Frequently Asked Questions (FAQ)
1. What kind of bags should I use for growing sweet potatoes?
The best bags for growing sweet potatoes are durable, breathable, and large enough to accommodate the plant’s root system. Fabric grow bags, particularly those made from felt or a similar breathable material, are an excellent choice. These bags allow for good drainage and aeration, which is crucial for healthy root development. Avoid using plastic bags, as they can trap moisture and lead to root rot. The ideal size is typically a 10-20 gallon bag per plant, depending on the variety. Larger bags are always better than smaller ones, as they provide more room for the tubers to grow.
2. How often should I water my sweet potatoes grown in bags?
Watering frequency depends on several factors, including the weather, the type of soil mix you’re using, and the size of the bag. Generally, you should water your sweet potatoes when the top inch or two of soil feels dry to the touch. During hot, dry weather, you may need to water them daily, while during cooler, wetter periods, you may only need to water them every few days. The key is to keep the soil consistently moist but not waterlogged. Overwatering can lead to root rot, while underwatering can stunt growth. A good rule of thumb is to water deeply and thoroughly, allowing the excess water to drain out of the bottom of the bag.
3. What kind of fertilizer should I use for sweet potatoes in bags?
Sweet potatoes are heavy feeders, so regular fertilization is essential for optimal growth and tuber production. A balanced fertilizer with an NPK ratio of 5-10-10 or similar is a good choice. You can also use a fertilizer specifically formulated for root vegetables. Apply the fertilizer according to the package instructions, typically every 2-3 weeks during the growing season. In addition to granular fertilizer, you can also supplement with liquid fertilizers, such as fish emulsion or seaweed extract, which provide a quick boost of nutrients. Avoid using fertilizers that are too high in nitrogen, as this can promote excessive vine growth at the expense of tuber development.
4. How do I know when my sweet potatoes are ready to harvest?
Sweet potatoes are typically ready to harvest about 90-120 days after planting, depending on the variety and growing conditions. A good indicator is when the vines start to turn yellow and die back. You can also gently dig around the base of the plant to check the size of the tubers. They should be at least a few inches in diameter. To harvest, carefully tip the bag over and gently remove the soil, being careful not to damage the tubers. Cure the sweet potatoes for 7-10 days in a warm, humid place to allow the skins to harden and the sugars to develop.
5. Can I reuse the soil from my sweet potato bags?
Yes, you can reuse the soil from your sweet potato bags, but it’s important to amend it before replanting. Sweet potatoes deplete the soil of nutrients, so you’ll need to replenish them. Add plenty of compost, aged manure, or other organic matter to the soil to improve its fertility and structure. You may also want to add a slow-release fertilizer to provide a sustained release of nutrients. It’s also a good idea to sterilize the soil to kill any potential pests or diseases. You can do this by baking the soil in the oven at 200 degrees Fahrenheit for 30 minutes or by solarizing it in a black plastic bag for several weeks.
6. What are some common pests and diseases that affect sweet potatoes grown in bags?
Some common pests that can affect sweet potatoes include aphids, flea beetles, and sweet potato weevils. Diseases include fungal diseases like fusarium wilt and black rot. Regularly inspect your plants for signs of pests or diseases and take appropriate action if necessary. Insecticidal soap or neem oil can be effective for controlling aphids and flea beetles. For fungal diseases, ensure good air circulation and avoid overwatering. You can also use a fungicide if necessary. Crop rotation and using disease-resistant varieties can also help prevent problems.
7. Can I grow sweet potatoes in bags indoors?
While it’s possible to grow sweet potatoes in bags indoors, it can be challenging. Sweet potatoes require a lot of sunlight, so you’ll need to provide them with at least 6-8 hours of direct sunlight per day, or supplement with grow lights. You’ll also need to ensure good air circulation and maintain a consistent temperature. Indoor growing can also increase the risk of pests and diseases. If you do decide to grow sweet potatoes indoors, choose a sunny location and provide them with the best possible growing conditions.
8. How many slips should I plant in each bag?
Generally, it’s best to plant only one slip per bag, especially if you’re using a 10-20 gallon bag. Planting multiple slips in the same bag can lead to overcrowding and competition for resources, resulting in smaller tubers and a lower yield. If you’re using a larger bag, you may be able to plant two slips, but make sure to space them adequately to allow for proper growth.
9. What do I do with the sweet potato vines after harvest?
The sweet potato vines are edible and can be used in salads, stir-fries, or other dishes. They are a good source of vitamins and minerals. You can also compost the vines or use them as mulch in your garden. Alternatively, you can allow the vines to continue growing and harvest the sweet potato leaves throughout the growing season.
10. Can I save my own sweet potato slips for next year?
Yes, you can save your own sweet potato slips for next year. To do this, select healthy, disease-free sweet potatoes and store them in a cool, dry place over the winter. In the spring, place the sweet potatoes in a container of water, partially submerged, and wait for them to sprout. Once the sprouts are a few inches long, carefully remove them from the sweet potato and plant them in a pot of soil. These slips can then be transplanted into your bags once the weather warms up.


Leave a Comment