
Grow Celery Indoors: A Beginner’s Guide to Year-Round Freshness
Have you ever dreamt of enjoying crisp, homegrown celery stalks all year round, regardless of the weather outside? Well, dream no more! This article is your passport to the surprisingly simple world of growing celery indoors. I’ll walk you through everything you need to know, from selecting the right celery stalks to harvesting your own delicious, pesticide-free crop. Forget those limp, tasteless supermarket stalks; prepare to experience the unparalleled flavor and satisfaction of homegrown goodness.
The history of celery cultivation is fascinating, stretching back centuries. While its exact origins are debated, celery has been a valued culinary and medicinal herb across various cultures for ages. Today, we’re bringing this ancient tradition into the modern home, making it easier than ever to enjoy this versatile vegetable.
Why Grow Celery Indoors?
There are so many reasons to try growing celery indoors! For starters, it’s incredibly rewarding. There’s nothing quite like biting into a stalk you nurtured from a simple cutting. Beyond the personal satisfaction, growing your own celery ensures you have access to fresh, flavorful stalks whenever you need them. This is especially beneficial during winter months when fresh produce can be scarce or expensive. Plus, you’ll know exactly what went into growing your celery, avoiding any unwanted pesticides or chemicals.
So, whether you’re a seasoned gardener or a complete beginner, get ready to embark on this exciting journey. Let’s dive into the practical tips and tricks that will transform your kitchen into a thriving celery farm!

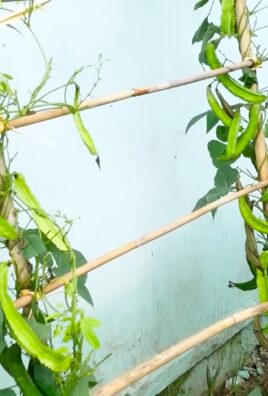
Growing Chili Peppers: A DIY Guide to a Spicy Harvest
I love the vibrant colors and intense heat of chili peppers! Growing your own is incredibly rewarding, and it’s easier than you might think. This guide will walk you through the entire process, from seed to harvest.
Phase 1: Starting Seeds Indoors
- Choosing Your Chili Pepper Variety: Research different chili pepper varieties to find ones that suit your climate and spice preference. Consider factors like plant size, heat level (Scoville units), and days to maturity.
- Gathering Your Supplies: You’ll need chili pepper seeds, seed-starting mix (not regular garden soil!), small pots or seed trays, a heat mat (optional but highly recommended), a humidity dome (optional but helpful), and a spray bottle.
- Sowing the Seeds: Fill your pots or seed trays with the seed-starting mix, moistening it thoroughly but not making it soggy. Plant the seeds about ¼ inch deep and about 1 inch apart. Gently cover with more seed-starting mix.
- Providing Warmth and Humidity: Place the pots on a heat mat set to around 70-80°F (21-27°C). This significantly speeds up germination. Cover the pots with a humidity dome or plastic wrap to maintain high humidity. Mist the soil regularly to keep it moist but not waterlogged.
- Germination and Monitoring: Germination usually takes 1-3 weeks, depending on the variety and temperature. Once you see seedlings emerge, remove the humidity dome or plastic wrap gradually to avoid damping off (a fungal disease). Ensure the seedlings receive adequate light; a sunny windowsill is ideal, or consider using grow lights.
- Fill small pots (2-3 inches in diameter) with seed-starting mix. Make sure the mix is moist but not overly wet. You can use your fingers to check the moisture level.
- Plant one chili pepper seed per pot, about ¼ inch deep. Gently cover with the seed-starting mix.
- Water gently using a spray bottle, ensuring the soil is evenly moistened. Avoid overwatering, which can lead to root rot.
- Place the pots on a heat mat (if using) and cover with a humidity dome or plastic wrap to maintain high humidity. This is crucial for successful germination.
- Check the moisture level daily. Mist the soil as needed to keep it consistently moist but not soggy. Remove condensation from the inside of the humidity dome or plastic wrap to prevent mold growth.
- Once the seedlings emerge (usually within 1-3 weeks), gradually acclimate them to lower humidity by removing the humidity dome or plastic wrap for increasing periods each day.
- Ensure the seedlings receive at least 6 hours of sunlight per day. If your windowsill doesn’t provide enough light, consider using grow lights to supplement.
- Once the seedlings have developed their first few true leaves (the leaves that appear after the cotyledons, or seed leaves), they are ready for transplanting.
Phase 2: Transplanting Seedlings
- Choosing the Right Location: Select a sunny location in your garden that receives at least 6-8 hours of direct sunlight per day. Chili peppers need plenty of sun to thrive.
- Preparing the Soil: Amend your garden soil with compost or other organic matter to improve drainage and fertility. Chili peppers prefer well-drained soil that is slightly acidic (pH 6.0-7.0).
- Hardening Off: Before transplanting, gradually acclimate your seedlings to outdoor conditions. Start by placing them outside for a few hours each day, gradually increasing the exposure time over several days. This prevents shock from the sudden change in environment.
- Transplanting: Dig holes slightly larger than the root balls of your seedlings. Gently remove the seedlings from their pots, being careful not to damage the roots. Plant them at the same depth they were growing in their pots. Space them appropriately according to the mature size of the variety you chose (check the seed packet for spacing recommendations).
- Watering After Transplanting: Water thoroughly after transplanting to help the seedlings settle into their new home. Continue to water regularly, keeping the soil consistently moist but not waterlogged.
- Choose a sunny location in your garden that receives at least 6-8 hours of direct sunlight daily. Avoid areas with strong winds.
- Prepare the soil by amending it with compost or other organic matter. This improves drainage and provides essential nutrients for healthy growth.
- Gently remove the seedlings from their pots, being careful not to damage the roots. If the roots are root-bound, gently loosen them before planting.
- Dig holes slightly larger than the root balls of your seedlings. Space the holes according to the mature size of your chili pepper variety (usually 12-18 inches apart).
- Plant the seedlings at the same depth they were growing in their pots. Gently fill the holes with soil, ensuring there are no air pockets around the roots.
- Water thoroughly after transplanting to help the seedlings settle in. Use a gentle stream of water to avoid washing away the soil.
- Mulch around the base of the plants to help retain moisture and suppress weeds.
Phase 3: Ongoing Care and Maintenance
- Watering: Water regularly, especially during dry periods. The frequency will depend on your climate and soil type. Aim to keep the soil consistently moist but not waterlogged. Overwatering can lead to root rot, while underwatering can stress the plants.
- Fertilizing: Feed your chili peppers regularly with a balanced fertilizer, following the instructions on the package. You can use a liquid fertilizer or slow-release granules. Avoid over-fertilizing, as this can burn the plants.
- Pest and Disease Control: Regularly inspect your plants for pests and diseases. Take appropriate action if you find any problems. Consider using organic pest control methods whenever possible.
- Staking or Caging: Some chili pepper varieties can become quite tall and may need staking or caging to support them, especially in windy areas. This prevents the plants from falling over.
- Harvesting: Harvest your chili peppers when they reach their mature size and color. The timing will vary depending on the variety. Use sharp scissors or pruning shears to harvest the peppers, leaving the stems intact.
- Water deeply and less frequently rather than shallowly and often. Check the soil moisture regularly by sticking your finger a couple of inches into the soil. If it feels dry, it’s time to water.
- Fertilize every 2-3 weeks with a balanced liquid fertilizer, following the instructions on the package. Alternatively, you can use slow-release fertilizer granules at planting time.
- Inspect your plants regularly for signs of pests or diseases. Common pests include aphids, spider mites, and whiteflies. Common diseases include blight and blossom-end rot.
- If you notice any pests or diseases, take appropriate action. You can use insecticidal soap or neem oil for pests, and fungicides for diseases. Always follow the instructions on the product label.
- Stake or cage tall varieties to prevent them from falling over, especially in windy conditions. Use sturdy stakes and tie the plants gently to the stakes.
- Harvest your chili peppers when they reach their mature size and color. This will vary depending on the variety, but generally, the peppers will be firm and brightly colored.
- Use sharp scissors or pruning shears to harvest the peppers, leaving a small portion of the stem attached. This helps prevent disease.
Phase 4: Enjoying Your Harvest
Once you’ve harvested your chili peppers, you can use them fresh in salsas, sauces, or other dishes. You can also dry them for later use or freeze them to preserve their flavor and heat.
Remember: Always wear gloves when handling chili peppers, especially hot varieties, to avoid skin irritation. Wash your hands thoroughly after handling them.

Conclusion
So there you have it – a simple, yet incredibly rewarding method for growing celery indoors. This DIY trick isn’t just about saving money on grocery bills; it’s about experiencing the satisfaction of nurturing life from a humble stalk to a vibrant, flavorful plant. Growing celery indoors allows you to enjoy fresh, crisp celery year-round, regardless of the season or weather conditions. The process is surprisingly straightforward, requiring minimal effort and resources. You’ll be amazed at how quickly your celery cuttings take root and begin to flourish, providing you with a continuous supply of this versatile vegetable for salads, soups, and countless other culinary creations. Beyond the practical benefits, the act of growing your own celery connects you to the natural world in a tangible way, offering a rewarding experience for both novice and experienced gardeners alike. This method is a fantastic introduction to indoor gardening, proving that even the most space-constrained urban dwellers can enjoy the pleasures of homegrown produce. Don’t be afraid to experiment – try different types of celery, or even explore growing other herbs and vegetables using similar techniques. The possibilities are endless!
We strongly encourage you to try this simple and effective method of growing celery indoors. Share your experiences with us – we’d love to see your thriving celery plants and hear about your successes (and even your minor setbacks!). Post your photos on social media using #GrowCeleryIndoors and tag us! Let’s build a community of indoor gardeners, sharing tips, tricks, and the joy of homegrown goodness. Remember, the journey of growing your own food is as rewarding as the delicious results. So grab some celery stalks, follow our simple steps, and embark on your indoor gardening adventure today! You might just discover a newfound appreciation for the humble celery stalk and the magic of growing your own food. This DIY method is a fantastic way to bring a touch of nature into your home and enjoy the freshest, most flavorful celery you’ve ever tasted.
Frequently Asked Questions
What type of celery is best for growing indoors?
While most celery varieties can be successfully grown indoors, those with shorter, more compact growth habits are generally preferred. Look for varieties specifically marketed for home gardens or those described as having a shorter maturity period. Avoid very large or particularly tall varieties, as these may require more space and light than is readily available indoors. Experimentation is key – try different varieties to see which performs best in your specific indoor environment.
How much sunlight does indoor celery need?
Celery requires at least six hours of sunlight per day to thrive. If you don’t have access to ample natural sunlight, consider supplementing with grow lights. LED grow lights are particularly effective and energy-efficient. Place the lights close enough to the plants to provide adequate illumination without burning the leaves. Monitor your plants closely and adjust the light intensity and duration as needed. Observe the plants for signs of stretching or etiolation (leggy growth), which indicates insufficient light.
What kind of soil is best for growing celery indoors?
Celery prefers well-drained, fertile soil that retains moisture. A good quality potting mix is ideal, ensuring proper aeration and drainage. Avoid using heavy clay soils, which can become waterlogged and suffocate the roots. You can amend your potting mix with compost or other organic matter to improve its fertility and water retention capacity. Ensure the soil is consistently moist but not waterlogged.
How often should I water my indoor celery?
Water your celery regularly, keeping the soil consistently moist but not soggy. The frequency of watering will depend on factors such as the size of your container, the type of soil, and the ambient temperature and humidity. Check the soil moisture level before watering – stick your finger a couple of inches into the soil; if it feels dry, it’s time to water. Avoid overwatering, which can lead to root rot. Water thoroughly until water drains from the bottom of the pot.
What are the common problems when growing celery indoors?
Some common problems include insufficient light (leading to leggy growth), overwatering (resulting in root rot), and pest infestations (such as aphids or spider mites). Regularly inspect your plants for signs of pests or diseases. Address any issues promptly to prevent them from spreading. Ensure proper ventilation to prevent fungal diseases. Using insecticidal soap or neem oil can help control pest infestations. Proper light, watering, and soil conditions are crucial for preventing most common problems.
Can I grow celery from seeds indoors?
While it is possible to grow celery from seeds indoors, it’s generally easier and faster to propagate celery from cuttings. Starting from seeds requires more time, patience, and specialized conditions. If you choose to start from seeds, use a seed-starting mix and provide consistent warmth and moisture. Germination can take several weeks. The cutting method described in this article offers a much quicker and more reliable way to enjoy fresh celery indoors.
What can I do with the harvested celery?
The possibilities are endless! Use your homegrown celery in salads, soups, stews, stir-fries, and countless other dishes. Celery adds a refreshing crunch and subtle flavor to a wide variety of culinary creations. You can also use celery leaves as a flavorful garnish. Enjoy the fresh, crisp taste of your homegrown celery – it’s a rewarding experience from seed to plate!
Leave a Comment