
Grow Watermelons at Home? Absolutely! Imagine biting into a juicy, sweet watermelon that you nurtured from seed to fruit, right in your own backyard. Forget those bland, store-bought melons – we’re talking about homegrown flavor that bursts with sunshine and satisfaction. For centuries, watermelons have been a symbol of summer, abundance, and good times, enjoyed in cultures around the globe. From ancient Egypt, where they were buried with pharaohs, to modern-day picnics, watermelons hold a special place in our hearts (and stomachs!).
But let’s be honest, the thought of cultivating these sprawling vines can seem daunting. Many gardeners shy away, thinking they need acres of land or a professional green thumb. That’s where this DIY guide comes in! I’m here to show you that you don’t need a farm to grow watermelons at home. Whether you have a spacious garden or just a sunny balcony, I’ll share simple, effective tricks and hacks that will have you harvesting your own delicious watermelons in no time.
Why do you need these DIY tricks? Because growing your own food is empowering, rewarding, and frankly, just plain fun! Plus, you’ll know exactly what went into your watermelon – no mystery chemicals or long-distance transportation. Get ready to roll up your sleeves and discover the joy of homegrown watermelons!
Growing Watermelons: A Beginner’s Guide to Sweet Success!
Okay, so you want to grow watermelons? Awesome! It might seem daunting, but trust me, with a little planning and effort, you can be enjoying juicy, homegrown watermelons before you know it. I’m going to walk you through everything you need to know, from choosing the right variety to harvesting your prize-winning melon. Let’s get started!
Choosing the Right Watermelon Variety
First things first, you need to pick a watermelon variety that suits your climate and garden space. Not all watermelons are created equal! Some are huge, some are small, some are early-maturing, and some are better suited for warmer climates.
* Consider your climate: If you live in a region with a short growing season, opt for early-maturing varieties like ‘Sugar Baby’ (around 75 days to maturity) or ‘Bush Sugar Baby’ (perfect for smaller spaces). For longer, warmer summers, you can try larger varieties like ‘Charleston Gray’ (around 85 days) or ‘Crimson Sweet’ (around 80 days).
* Think about space: Watermelons need room to sprawl! Vining varieties can easily take over a garden. If you have limited space, consider bush varieties like ‘Bush Sugar Baby’ or ‘Garden Baby’. These are compact and ideal for containers or smaller gardens.
* Flavor preferences: Do you prefer a super sweet, red-fleshed watermelon? Or maybe a yellow-fleshed one with a slightly different flavor profile? Research different varieties and read reviews to find one that appeals to your taste buds. Some popular choices include ‘Black Diamond’ (classic red), ‘Yellow Doll’ (yellow flesh), and ‘Moon and Stars’ (unique rind pattern).
* Disease resistance: Look for varieties that are resistant to common watermelon diseases like Fusarium wilt and Anthracnose. This can save you a lot of headaches down the road.
Preparing the Soil
Watermelons are heavy feeders, meaning they need a lot of nutrients to thrive. Preparing the soil properly is crucial for a successful harvest.
* Sunlight is key: Watermelons need at least 6-8 hours of direct sunlight per day. Choose a location in your garden that gets plenty of sun.
* Well-drained soil: Watermelons don’t like soggy feet! Make sure your soil drains well. If you have heavy clay soil, amend it with compost, aged manure, or other organic matter to improve drainage.
* Rich in nutrients: Watermelons need a soil that is rich in organic matter. Work in plenty of compost or aged manure before planting. You can also add a slow-release fertilizer specifically formulated for vegetables.
* Soil pH: Watermelons prefer a slightly acidic soil pH of around 6.0 to 6.8. You can test your soil pH with a soil testing kit and amend it accordingly.
Starting Watermelon Seeds (Indoors or Outdoors)
You can either start watermelon seeds indoors or direct sow them in the garden. Starting them indoors gives you a head start, especially in areas with short growing seasons.
Starting Seeds Indoors:
1. Timing is everything: Start seeds about 4-6 weeks before the last expected frost.
2. Choose your containers: Use peat pots or biodegradable pots. Watermelon seedlings don’t like to have their roots disturbed, so these pots can be planted directly into the ground, minimizing transplant shock.
3. Use a good seed-starting mix: Fill the pots with a high-quality seed-starting mix.
4. Sow the seeds: Plant 2-3 seeds per pot, about 1 inch deep.
5. Water gently: Water the soil gently to moisten it, but don’t overwater.
6. Provide warmth: Watermelon seeds need warmth to germinate. Use a heat mat or place the pots in a warm location.
7. Provide light: Once the seeds germinate, provide them with plenty of light. A sunny windowsill or grow lights will work.
8. Thin the seedlings: Once the seedlings have a few true leaves, thin them to one strong seedling per pot.
9. Harden off the seedlings: Before transplanting the seedlings outdoors, you need to harden them off. This means gradually exposing them to outdoor conditions over a period of 7-10 days. Start by placing them in a sheltered location for a few hours each day, gradually increasing the amount of time they spend outdoors.
Direct Sowing Seeds Outdoors:
1. Wait for warm weather: Watermelon seeds need warm soil to germinate. Wait until the soil temperature is consistently above 70°F (21°C) before direct sowing.
2. Prepare the soil: Prepare the soil as described above, ensuring it is well-drained and rich in nutrients.
3. Sow the seeds: Plant the seeds about 1 inch deep, spacing them according to the variety you are growing (check the seed packet for recommendations).
4. Water gently: Water the soil gently to moisten it, but don’t overwater.
5. Keep the soil moist: Keep the soil consistently moist until the seeds germinate.
6. Thin the seedlings: Once the seedlings emerge, thin them to the strongest plant per hill.
Transplanting Watermelon Seedlings
If you started your watermelon seeds indoors, it’s time to transplant them into the garden!
1. Choose a cloudy day: Transplanting on a cloudy day will help reduce transplant shock.
2. Dig the holes: Dig holes that are slightly larger than the pots the seedlings are in. Space the holes according to the variety you are growing (check the seed packet for recommendations).
3. Carefully remove the seedlings: Gently remove the seedlings from their pots, being careful not to damage the roots. If you used peat pots or biodegradable pots, you can plant the entire pot directly into the ground.
4. Plant the seedlings: Place the seedlings in the holes and backfill with soil.
5. Water thoroughly: Water the seedlings thoroughly after planting.
6. Mulch around the plants: Mulch around the plants with straw or other organic mulch to help retain moisture and suppress weeds.
Caring for Your Watermelon Plants
Once your watermelon plants are in the ground, it’s important to provide them with the care they need to thrive.
* Watering: Watermelons need consistent moisture, especially during fruit development. Water deeply and regularly, especially during dry spells. Avoid overhead watering, as this can promote fungal diseases. Drip irrigation is ideal.
* Fertilizing: Watermelons are heavy feeders, so fertilize them regularly with a balanced fertilizer. You can also side-dress them with compost or aged manure.
* Weeding: Keep the area around your watermelon plants free of weeds. Weeds compete with the plants for nutrients and water.
* Pest control: Watermelons can be susceptible to pests like aphids, squash bugs, and cucumber beetles. Monitor your plants regularly and take action if you see signs of pests. Insecticidal soap or neem oil can be effective for controlling many common pests.
* Vine training: If you are growing vining varieties, you may need to train the vines to keep them from taking over your garden. You can use stakes or trellises to support the vines.
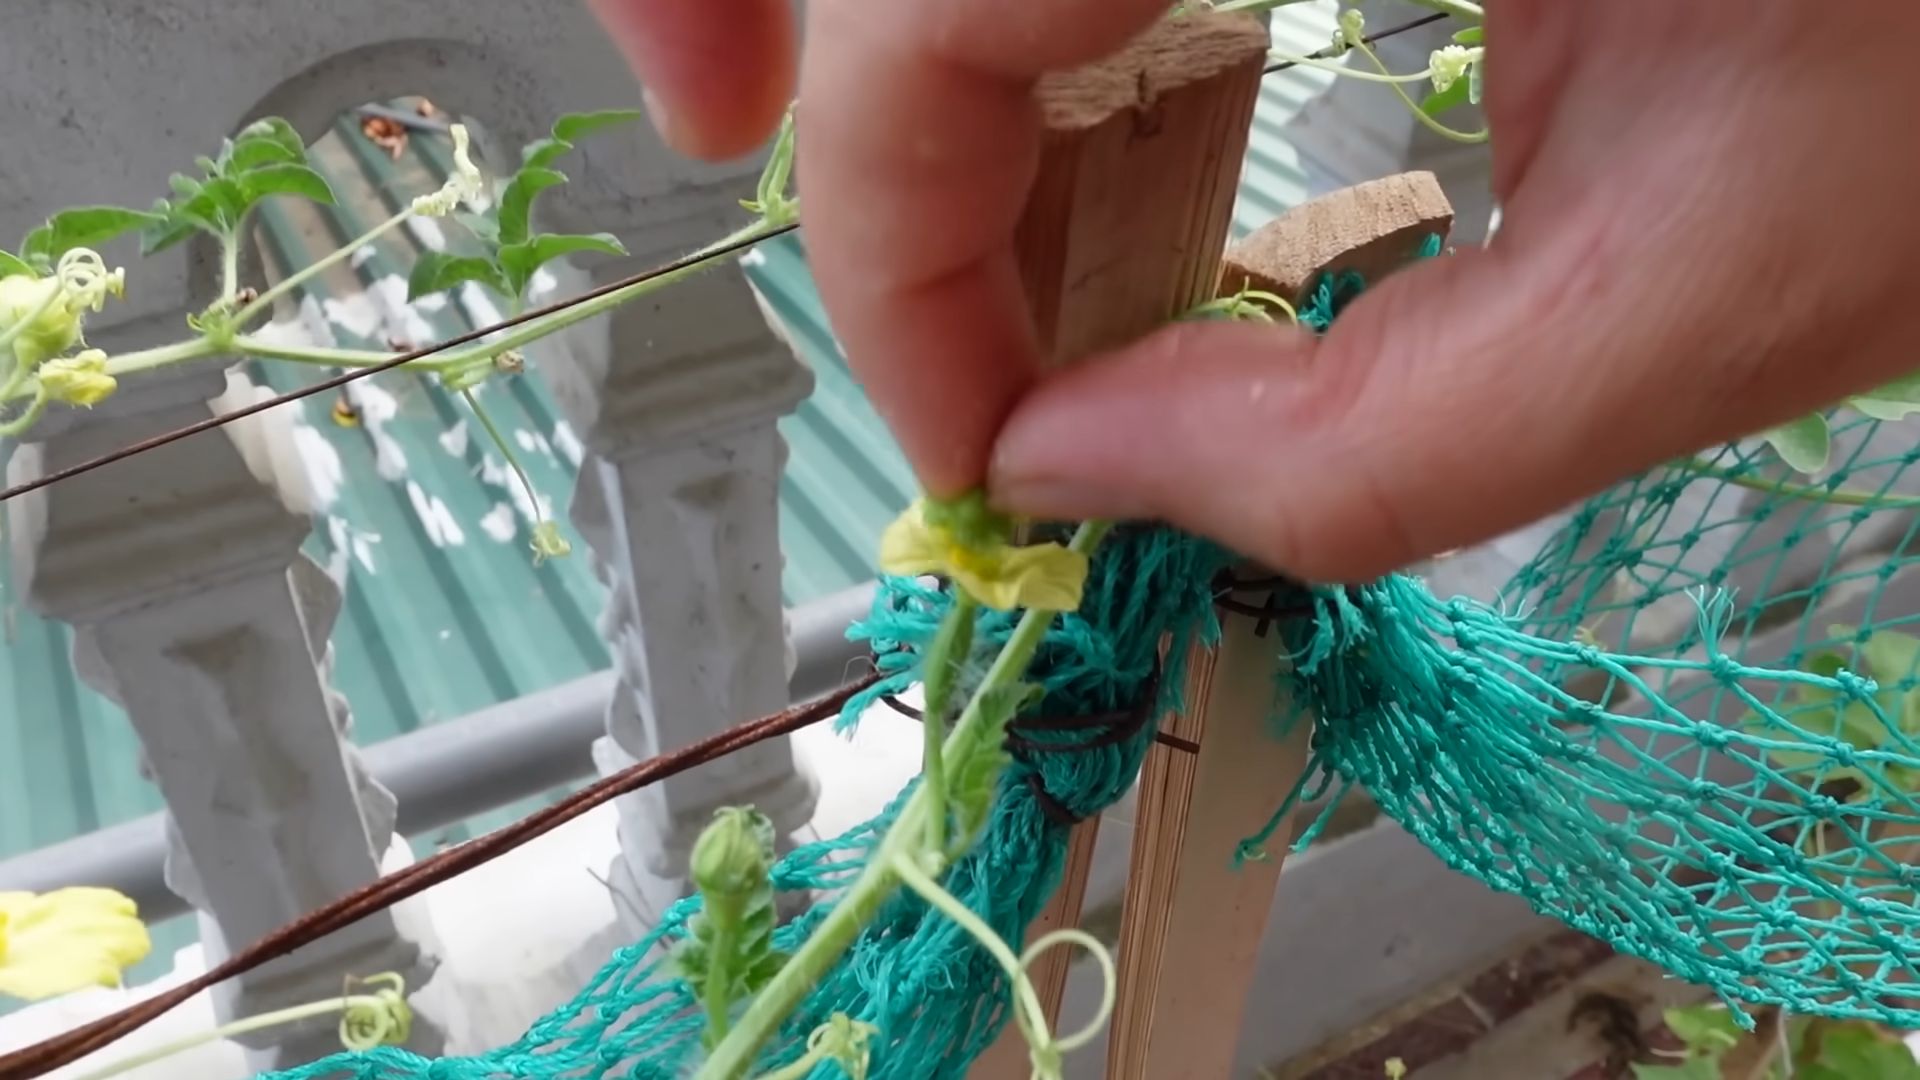
* Pollination: Watermelons need to be pollinated in order to produce fruit. If you don’t see bees visiting your plants, you may need to hand-pollinate them. To hand-pollinate, use a small paintbrush to transfer pollen from the male flowers to the female flowers. Female flowers have a small fruit behind the flower, while male flowers do not.
Harvesting Your Watermelons
Harvesting watermelons at the right time is crucial for getting the best flavor. Here are a few things to look for:
* The tendril closest to the fruit turns brown and dries: This is a reliable indicator that the watermelon is ripe.
* The bottom of the watermelon (where it rests on the ground) turns from white to yellow: This is another sign of ripeness.
* The watermelon sounds hollow when you thump it: This is a more subjective test, but with practice, you can learn to recognize the sound of a ripe watermelon.
* Days to maturity: Check the seed packet for the estimated days to maturity for your variety. This can give you a general idea of when to expect your watermelons to be ripe.
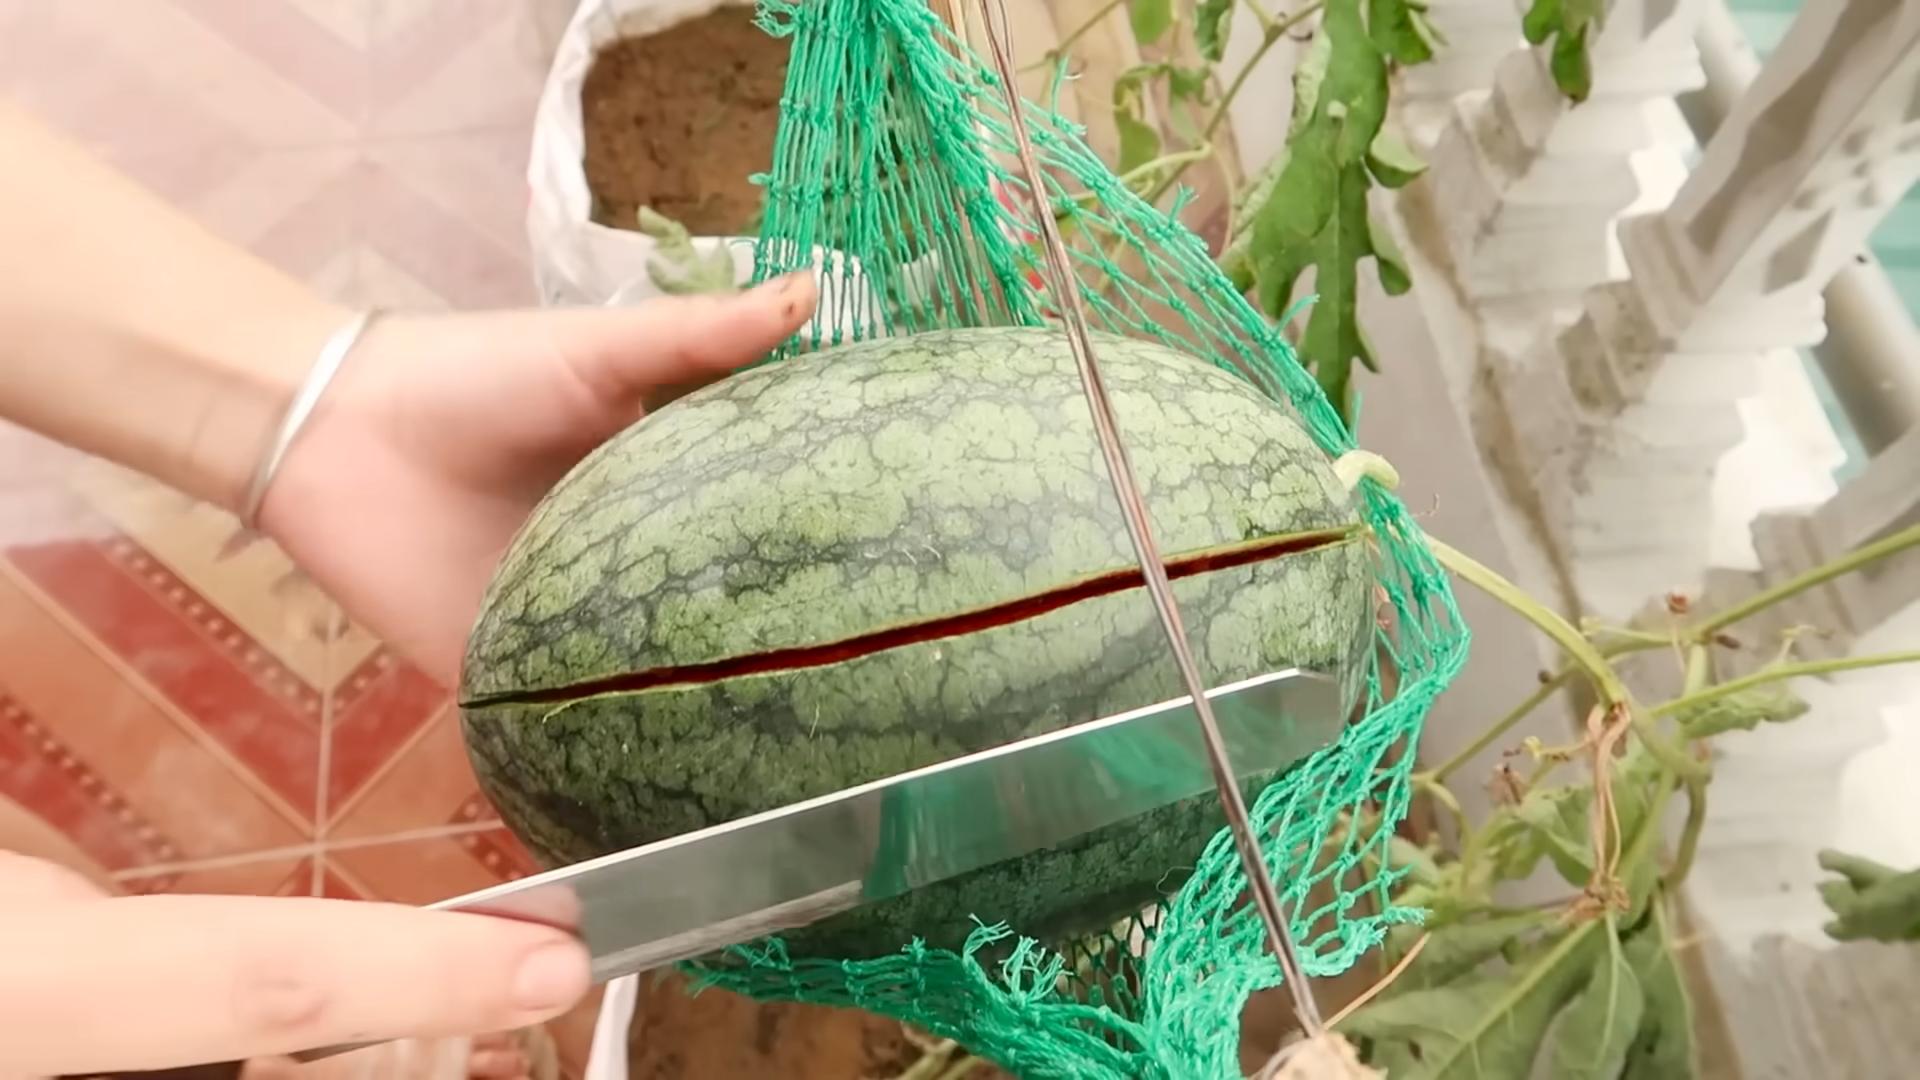
Once you think your watermelon is ripe, use a sharp knife to cut it from the vine, leaving a few inches of stem attached.
Enjoying Your Homegrown Watermelons!
Congratulations! You’ve successfully grown your own watermelons. Now it’s time to enjoy the fruits (or rather, vegetables!) of your labor. Chill your watermelon in the refrigerator for a few hours before slicing and serving.
Conclusion
So, there you have it! Growing watermelons at home might seem daunting at first, but with a little planning, patience, and the right techniques, you can be harvesting your own juicy, sweet watermelons before you know it. This DIY approach isn’t just about saving money; it’s about connecting with nature, understanding the food you eat, and experiencing the immense satisfaction of nurturing something from seed to table.
Why is this a must-try? Because store-bought watermelons, while convenient, often lack the intense flavor and sweetness of homegrown varieties. Plus, you have complete control over the growing process, ensuring your watermelons are free from unwanted chemicals and pesticides. Imagine biting into a watermelon you grew yourself, knowing exactly where it came from and how it was cared for – the taste is simply unparalleled.
But the benefits extend beyond just flavor. Growing your own watermelons is a fantastic learning experience, especially for children. It teaches them about plant life cycles, responsibility, and the importance of sustainable practices. It’s also a great way to get some exercise and fresh air while tending to your garden.
Looking for variations? Consider experimenting with different watermelon varieties. There are countless options, from the classic Crimson Sweet to the smaller, personal-sized Sugar Baby, and even yellow-fleshed varieties like Yellow Doll. Each variety offers a unique flavor profile and growing characteristics, so do some research and choose the ones that best suit your taste and climate. You can also try growing watermelons in raised beds or containers if you have limited space. Just be sure to choose a large enough container and provide adequate support for the vines.
Another fun variation is to try companion planting. Watermelons thrive when planted alongside certain other plants, such as marigolds (which deter pests) and basil (which attracts pollinators). Experiment with different combinations to see what works best in your garden.
Finally, don’t be afraid to get creative with your trellising methods. While watermelons are traditionally grown on the ground, you can train them to grow vertically on a sturdy trellis. This not only saves space but also helps to improve air circulation and prevent fungal diseases. Just be sure to provide adequate support for the heavy fruits as they develop.
We wholeheartedly encourage you to give this DIY trick a try. It’s a rewarding experience that will not only provide you with delicious watermelons but also connect you with the natural world in a meaningful way. And remember, even if your first attempt isn’t perfect, don’t give up! Gardening is a learning process, and every season brings new opportunities to improve.
So, grab some seeds, prepare your soil, and get ready to embark on your watermelon-growing adventure. We’re confident that you’ll be amazed by what you can achieve. And most importantly, don’t forget to share your experiences with us! We’d love to hear about your successes, challenges, and any tips you’ve learned along the way. Share your photos and stories on our social media pages using #HomegrownWatermelons. Let’s build a community of watermelon enthusiasts and inspire others to grow their own food! This DIY project is a great way to get started.
Frequently Asked Questions (FAQ)
What is the best time to start growing watermelons?
The ideal time to start growing watermelons depends on your climate. Watermelons are warm-season crops and require a long growing season of at least 70-90 days. In general, you should start seeds indoors about 6-8 weeks before the last expected frost. If you live in a warmer climate with a longer growing season, you can direct sow seeds outdoors once the soil temperature reaches at least 70°F (21°C). Make sure the danger of frost has passed before transplanting seedlings or direct sowing.
What kind of soil do watermelons need?
Watermelons thrive in well-drained, sandy loam soil that is rich in organic matter. The soil should have a pH between 6.0 and 6.8. Before planting, amend the soil with compost or well-rotted manure to improve drainage and fertility. Avoid heavy clay soils, as they can retain too much moisture and lead to root rot. If you have clay soil, consider growing watermelons in raised beds or containers.
How much sunlight do watermelons need?
Watermelons require at least 6-8 hours of direct sunlight per day to thrive. Choose a planting location that receives full sun throughout the day. If you live in a particularly hot climate, some afternoon shade may be beneficial to prevent the fruits from scorching.
How often should I water my watermelons?
Watermelons need consistent moisture, especially during fruit development. Water deeply and regularly, aiming for about 1-2 inches of water per week. Avoid overhead watering, as this can promote fungal diseases. Instead, water at the base of the plant or use a soaker hose. Reduce watering as the fruits begin to ripen to prevent them from cracking.
How do I fertilize my watermelons?
Watermelons are heavy feeders and benefit from regular fertilization. Before planting, incorporate a slow-release fertilizer into the soil. Once the plants begin to vine, fertilize every 2-3 weeks with a balanced fertilizer. When the fruits start to develop, switch to a fertilizer that is higher in phosphorus and potassium to promote fruit growth and sweetness. Avoid over-fertilizing, as this can lead to excessive vine growth and reduced fruit production.
How do I know when my watermelons are ripe?
Determining when a watermelon is ripe can be tricky, but there are a few telltale signs to look for. First, check the tendril closest to the fruit stem. When this tendril turns brown and dries out, it’s a good indication that the watermelon is ripe. Second, look at the spot where the watermelon rests on the ground. This spot should be yellow or cream-colored, not white or green. Finally, give the watermelon a gentle thump. A ripe watermelon will sound hollow and deep.
What are some common pests and diseases that affect watermelons?
Watermelons are susceptible to a variety of pests and diseases, including aphids, squash bugs, vine borers, powdery mildew, and fusarium wilt. To prevent pest and disease problems, practice good garden hygiene, such as removing weeds and debris, and rotate your crops each year. Inspect your plants regularly for signs of pests or diseases and take action promptly. Organic pest control methods, such as insecticidal soap and neem oil, can be effective for controlling many common pests. For fungal diseases, consider using a copper-based fungicide.
Can I grow watermelons in containers?
Yes, you can grow watermelons in containers, but you’ll need to choose a large container (at least 20 gallons) and select a compact or bush variety. Be sure to provide adequate support for the vines and fruits, and water and fertilize regularly. Container-grown watermelons may require more frequent watering than those grown in the ground.
How do I save watermelon seeds for next year?
Saving watermelon seeds is easy. Simply scoop out the seeds from a ripe watermelon and rinse them thoroughly to remove any pulp. Spread the seeds out on a paper towel to dry completely. Once the seeds are dry, store them in an airtight container in a cool, dark place. Watermelon seeds can remain viable for several years if stored properly.
My watermelon plant is producing flowers, but no fruit. What could be the problem?
There are several reasons why your watermelon plant might be producing flowers but no fruit. One common reason is a lack of pollination. Watermelons require pollination to set fruit, and if there are not enough bees or other pollinators in your area, you may need to hand-pollinate the flowers. Another possible reason is nutrient deficiency. Make sure your plants are getting enough phosphorus and potassium, which are essential for fruit development. Stress from extreme temperatures or inconsistent watering can also prevent fruit set.
Leave a Comment