
Grow Winged Beans at Home and unlock a world of culinary possibilities right in your backyard! Have you ever dreamt of harvesting your own exotic, nutrient-packed vegetables? Well, dream no more! This DIY guide will take you on a journey to cultivate these fascinating legumes, also known as asparagus peas, right from the comfort of your home garden.
Winged beans, with their intriguing history rooted in Southeast Asia and Papua New Guinea, have been a staple food source for centuries. They’re not just delicious; they’re a nutritional powerhouse, boasting high protein content and a wealth of vitamins and minerals. Traditionally, every part of the winged bean plant is utilized, from the young pods and leaves to the protein-rich seeds and even the tuberous roots.
But why should you bother to grow winged beans at home? In today’s world, where access to fresh, diverse produce can be limited, cultivating your own food offers a sense of self-sufficiency and control over what you eat. Plus, imagine the satisfaction of serving a unique and healthy dish made with ingredients you nurtured yourself! This guide provides simple, step-by-step instructions, ensuring even beginner gardeners can successfully cultivate these remarkable plants. So, let’s get our hands dirty and embark on this exciting gardening adventure together!
Growing Winged Beans: A Comprehensive DIY Guide
Hey there, fellow gardening enthusiasts! I’m so excited to share my experience with growing winged beans. These fascinating legumes are not only beautiful climbers but also incredibly nutritious, offering edible pods, beans, leaves, flowers, and even roots! If you’re looking for a unique and rewarding addition to your garden, look no further. This guide will walk you through every step, from seed to harvest.
Understanding Winged Beans
Before we dive in, let’s get to know our star plant a little better. Winged beans ( *Psophocarpus tetragonolobus*) are tropical legumes known for their distinctive winged pods. They thrive in warm climates and require a long growing season. They are also nitrogen-fixing plants, which means they enrich the soil as they grow – a win-win!
Materials You’ll Need
To get started, gather these essential materials:
* Winged bean seeds (available online or at specialty nurseries)
* Seed starting trays or small pots
* Seed starting mix
* Well-draining garden soil
* Compost or other organic matter
* A sturdy trellis or support structure (at least 6-8 feet tall)
* Gardening gloves
* Watering can or hose
* Optional: Liquid fertilizer (high in phosphorus)
Starting Your Winged Bean Seeds
Winged beans have a hard seed coat, so scarification and soaking are crucial for successful germination. Here’s how I do it:
Scarification and Soaking
1. Scarify the Seeds: Gently rub each seed with sandpaper or nick it with a knife. Be careful not to damage the inner part of the seed. This helps water penetrate the seed coat.
2. Soak the Seeds: Place the scarified seeds in a bowl of warm water and let them soak for 12-24 hours. This further softens the seed coat and encourages germination.
Sowing the Seeds
1. Prepare Your Seed Starting Trays: Fill your seed starting trays or small pots with seed starting mix. Moisten the mix thoroughly.
2. Sow the Seeds: Plant the soaked seeds about 1 inch deep in the seed starting mix. Place one or two seeds per cell or pot.
3. Cover and Water: Gently cover the seeds with more seed starting mix and water lightly.
4. Provide Warmth: Winged beans need warmth to germinate. Place the seed starting trays in a warm location, ideally between 70-80°F (21-27°C). You can use a heat mat to maintain a consistent temperature.
5. Maintain Moisture: Keep the seed starting mix consistently moist but not waterlogged. Check the moisture level daily and water as needed.
Germination
Expect germination to occur within 7-14 days. Once the seedlings emerge, provide them with plenty of light. If you’re growing them indoors, use grow lights to supplement natural sunlight.
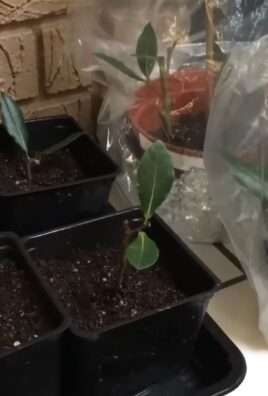
Transplanting Your Seedlings
Once your seedlings have developed a few sets of true leaves (usually after 4-6 weeks), they’re ready to be transplanted into the garden.
Preparing the Garden Bed
1. Choose a Sunny Location: Winged beans need at least 6-8 hours of direct sunlight per day. Select a location in your garden that receives ample sunlight.
2. Prepare the Soil: Winged beans prefer well-draining soil that is rich in organic matter. Amend the soil with compost or other organic matter to improve its fertility and drainage.
3. Install a Trellis: Winged beans are vigorous climbers and require a sturdy trellis or support structure. Install the trellis before transplanting the seedlings to avoid disturbing their roots later. Make sure the trellis is at least 6-8 feet tall. I’ve found that bamboo stakes tied together work well, or even a chain-link fence can do the trick.
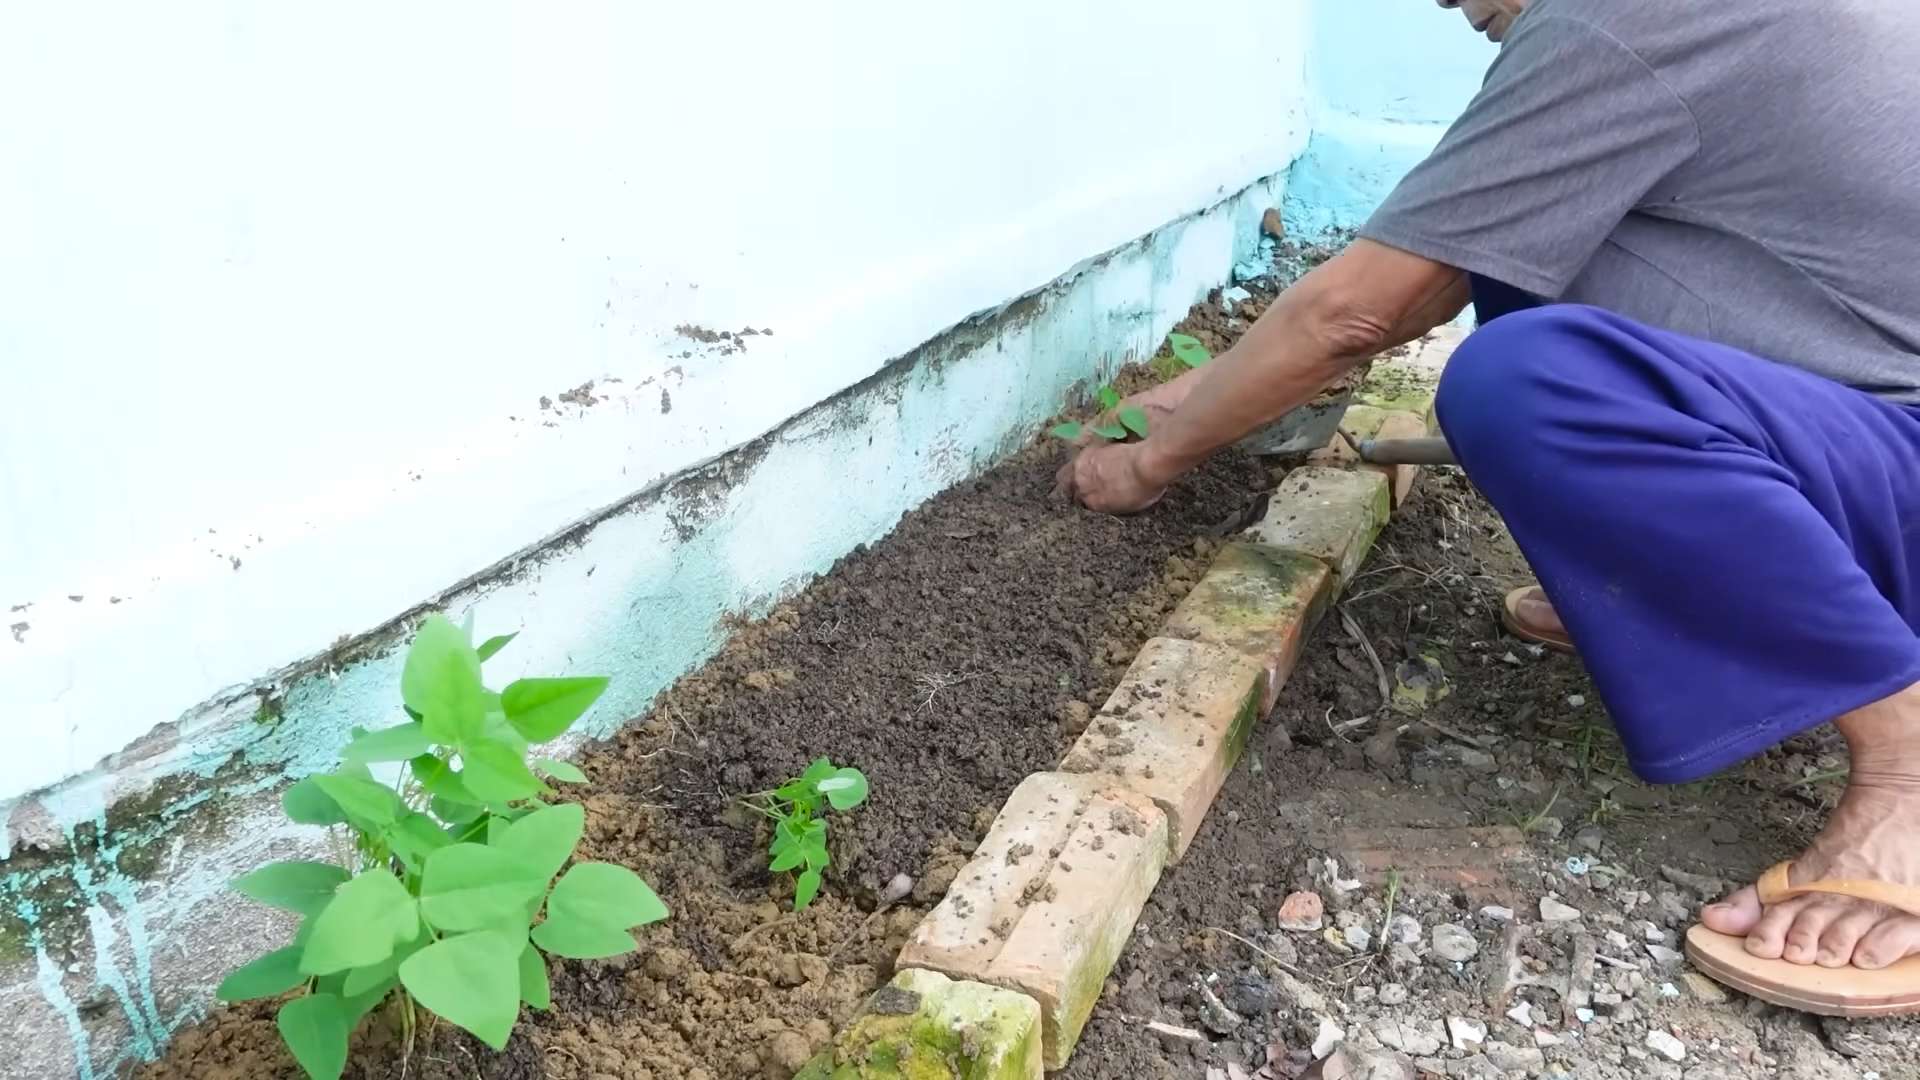
Transplanting
1. Harden Off the Seedlings: Before transplanting, gradually acclimate the seedlings to outdoor conditions by hardening them off. This involves exposing them to increasing amounts of sunlight and wind over a period of 7-10 days.
2. Dig Holes: Dig holes in the prepared garden bed that are slightly larger than the root balls of the seedlings. Space the holes about 12-18 inches apart.
3. Carefully Remove Seedlings: Gently remove the seedlings from their seed starting trays or pots, being careful not to damage the roots.
4. Plant the Seedlings: Place the seedlings in the holes and backfill with soil. Gently firm the soil around the base of the plants.
5. Water Thoroughly: Water the transplanted seedlings thoroughly to help them establish their roots.
Caring for Your Winged Bean Plants
Now that your winged bean plants are in the ground, it’s time to provide them with the care they need to thrive.
Watering
Water your winged bean plants regularly, especially during dry periods. Keep the soil consistently moist but not waterlogged. I usually water deeply once or twice a week, depending on the weather.
Fertilizing
Winged beans are nitrogen-fixing plants, so they don’t require a lot of nitrogen fertilizer. However, they do benefit from phosphorus and potassium. You can apply a liquid fertilizer that is high in phosphorus every few weeks to promote flowering and pod development. Bone meal is also a great organic option.
Weeding
Keep the garden bed free of weeds, as weeds can compete with the winged bean plants for nutrients and water. Hand-pull weeds regularly or use a hoe to cultivate the soil.
Training
As the winged bean plants grow, they will need to be trained to climb the trellis. Gently guide the vines up the trellis and tie them loosely with twine if necessary.
Pest and Disease Control
Winged beans are generally resistant to pests and diseases, but they can occasionally be affected by aphids, spider mites, or fungal diseases. Inspect your plants regularly for signs of pests or diseases and take action promptly.
* Aphids: Spray aphids with a strong stream of water or use insecticidal soap.
* Spider Mites: Increase humidity around the plants and spray with insecticidal soap.
* Fungal Diseases: Ensure good air circulation around the plants and avoid overhead watering. Apply a fungicide if necessary.
Harvesting Your Winged Beans
The best part of growing winged beans is, of course, the harvest! You can harvest different parts of the plant at different stages of growth.
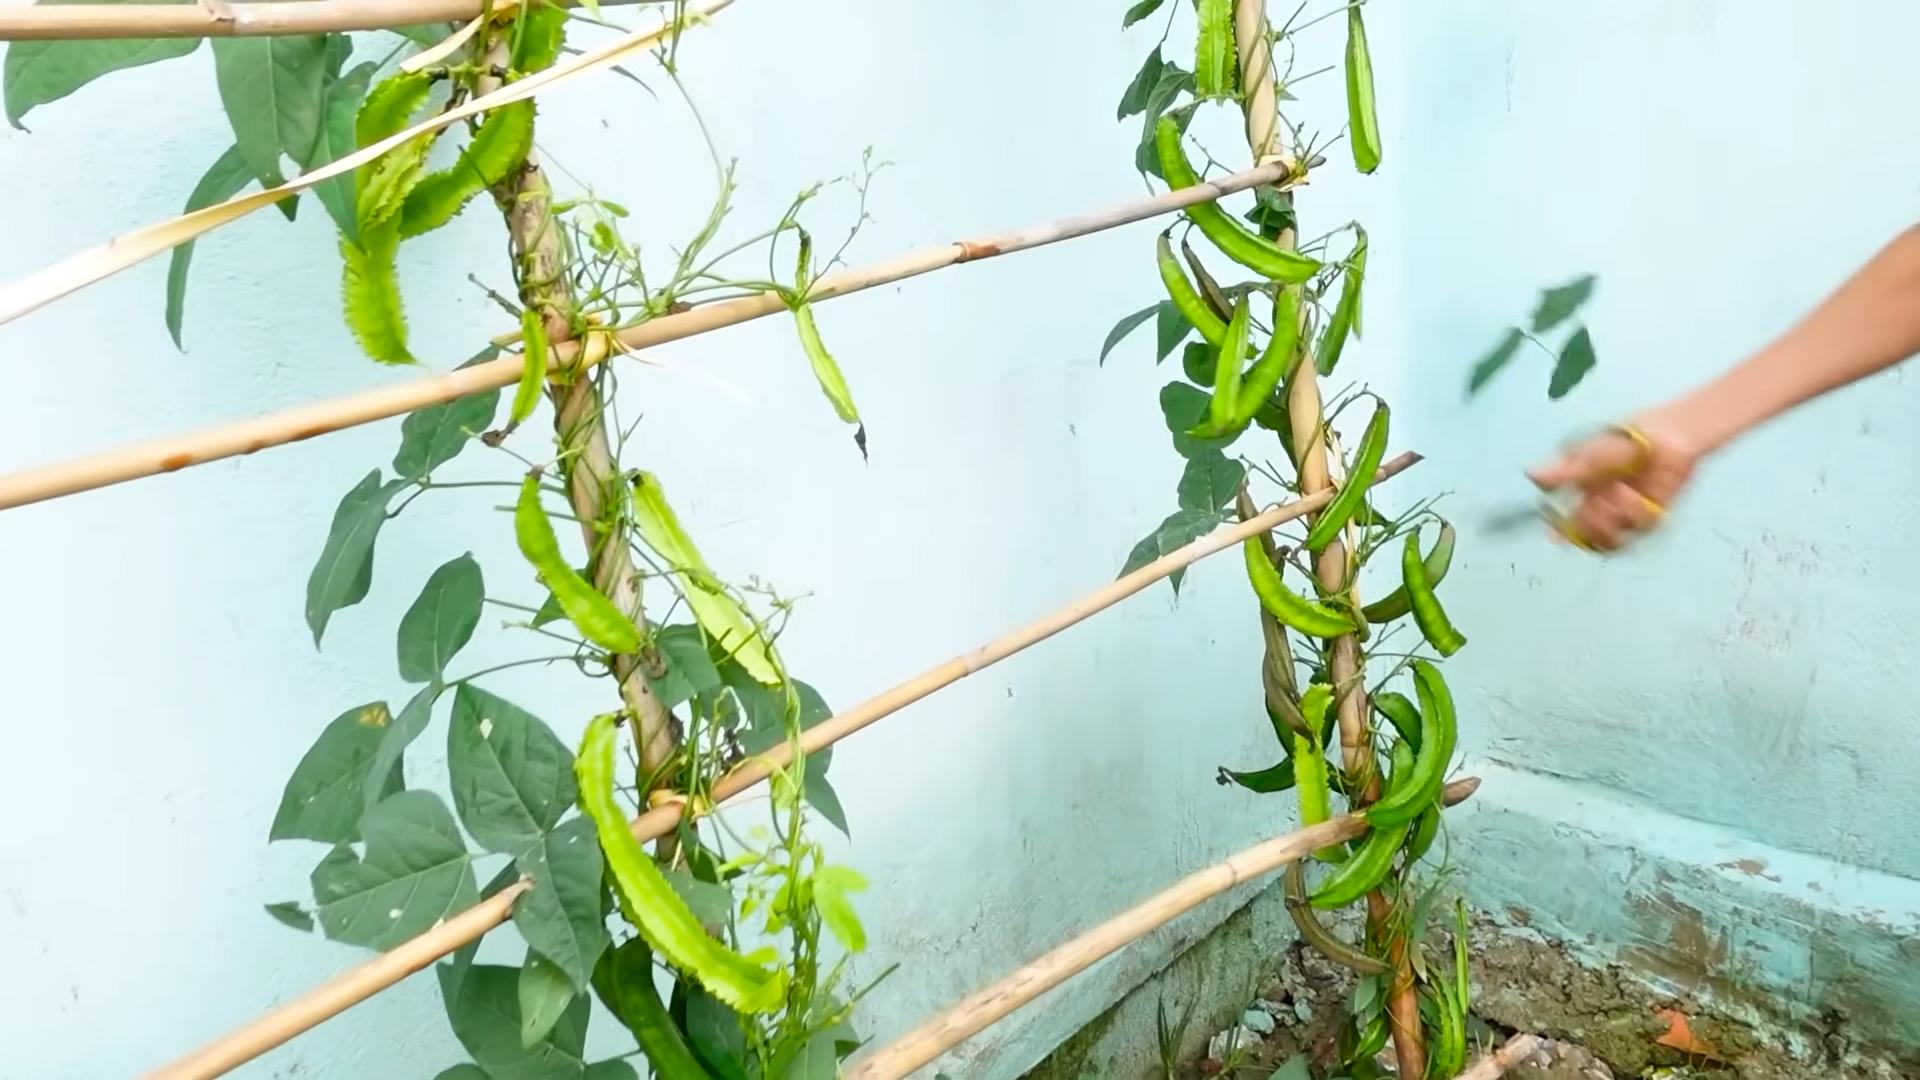
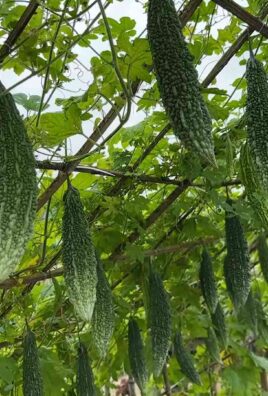
Harvesting the Pods
The pods are the most commonly harvested part of the winged bean plant. Harvest the pods when they are young and tender, usually about 6-8 inches long. The pods should be bright green and free of blemishes. You can eat the pods raw, steamed, stir-fried, or added to soups and stews. I love them stir-fried with garlic and a little soy sauce!
Harvesting the Beans
If you allow the pods to mature, you can harvest the dried beans. Let the pods dry on the vine until they turn brown and brittle. Then, shell the beans and store them in an airtight container. You can cook the dried beans like other dried beans, such as kidney beans or black beans.
Harvesting the Leaves
The young leaves of the winged bean plant are also edible and can be used like spinach. Harvest the leaves when they are young and tender. You can add them to salads, stir-fries, or soups.
Harvesting the Flowers
The flowers of the winged bean plant are also edible and have a slightly sweet flavor. You can add them to salads or use them as a garnish.
Harvesting the Roots
The roots of the winged bean plant are tuberous and can be harvested like potatoes. Harvest the roots when the plant is mature, usually after the pods have dried. The roots can be boiled, baked, or fried.
Enjoying Your Harvest
Now that you’ve harvested your winged beans, it’s time to enjoy the fruits (or rather, the pods, beans, leaves, flowers, and roots!) of your labor. Winged beans are a versatile and nutritious vegetable that can be used in a variety of dishes. Experiment with different recipes and find your favorite ways to enjoy this unique legume.
Troubleshooting
Even with the best care, you might encounter some challenges. Here are a few common issues and how I deal with them:
* Poor Germination: If your seeds aren’t germinating, double-check that you’ve properly scarified and soaked them. Also, ensure the soil is warm enough.
* Slow Growth: Winged beans need warmth and sunlight to thrive. Make sure they’re getting enough of both. A little fertilizer can also help.
* Lack of Flowers: If your plants aren’t flowering, it could be due to a lack of phosphorus. Try adding bone meal or a phosphorus-rich fertilizer.
* Pest Infestations: Regularly inspect your plants and take action quickly if you spot any pests.
Final Thoughts
Growing winged beans is a rewarding experience
Conclusion
So, there you have it! Growing winged beans at home is not just a gardening project; it’s an adventure in flavor, sustainability, and self-sufficiency. We’ve walked you through the process, from selecting the right seeds to providing the necessary support for these vigorous climbers. But why should you dedicate your precious garden space to this relatively unknown legume?
The answer lies in the sheer versatility and nutritional powerhouse that is the winged bean. Every part of the plant, from the young pods and leaves to the mature seeds and even the tubers, is edible and packed with protein, vitamins, and minerals. Imagine stepping into your backyard and harvesting fresh, crisp winged beans for a stir-fry, adding nutrient-rich leaves to your salad, or roasting the seeds for a healthy snack. This is the reality that awaits you when you embrace this rewarding DIY project.
Beyond the culinary benefits, growing winged beans is also an environmentally friendly choice. As a nitrogen-fixing plant, it enriches the soil, reducing the need for synthetic fertilizers. Plus, its rapid growth and dense foliage provide excellent shade and can even be used as a living fence.
But the real magic of growing winged beans at home lies in the connection you forge with your food. There’s something incredibly satisfying about nurturing a plant from seed to harvest, knowing that you’re providing yourself and your family with fresh, healthy, and sustainably grown food.
Ready to take your winged bean cultivation to the next level? Consider these variations:
* **Vertical Gardening:** If you’re short on space, train your winged beans to grow up a trellis or pergola. This not only maximizes your yield but also adds a beautiful vertical element to your garden.
* **Companion Planting:** Winged beans thrive alongside other vegetables like corn, sunflowers, and squash. Experiment with companion planting to create a mutually beneficial ecosystem in your garden.
* **Seed Saving:** Once your winged beans mature, save some of the seeds for next year’s planting. This ensures a continuous supply of this amazing legume and allows you to adapt the variety to your specific growing conditions.
* **Different Varieties:** Explore the different varieties of winged beans available. Some are better suited for specific climates or have unique flavor profiles. Experiment to find your favorite!
We understand that venturing into uncharted gardening territory can be daunting. But with a little patience, dedication, and the guidance provided in this article, you’ll be well on your way to enjoying the many benefits of growing winged beans at home.
So, what are you waiting for? Grab some seeds, prepare your garden, and embark on this exciting journey. We’re confident that you’ll be amazed by the results.
Don’t forget to share your experiences with us! We’d love to hear about your successes, challenges, and creative ways of using your homegrown winged beans. Share your photos and stories on social media using #HomeGrownWingedBeans. Let’s build a community of winged bean enthusiasts and inspire others to discover the wonders of this amazing plant. Happy gardening!
Frequently Asked Questions (FAQ)
What exactly are winged beans, and why should I bother growing them?
Winged beans (Psophocarpus tetragonolobus) are a tropical legume native to Southeast Asia. They are unique because virtually every part of the plant is edible: the young pods, leaves, flowers, seeds, and even the tubers. They are incredibly nutritious, boasting high levels of protein, fiber, vitamins (especially vitamin C and folate), and minerals (like iron and calcium). Growing them yourself ensures you have access to fresh, organic produce that’s often hard to find in stores. Plus, they are nitrogen-fixing, meaning they improve your soil health naturally. The taste is often described as similar to green beans, but with a slightly nutty flavor. The tubers, when cooked, resemble potatoes.
How much space do I need to grow winged beans?
Winged beans are vigorous climbers, so they require vertical space. Ideally, you’ll need at least 6-8 feet of vertical support, such as a trellis, fence, or pergola. The plants can spread quite wide, so allow at least 2-3 feet between plants if you’re growing multiple vines. If you’re limited on ground space, consider growing them in large containers with a sturdy trellis system.
What kind of soil and sunlight do winged beans need?
Winged beans prefer well-drained soil that is rich in organic matter. Amend your soil with compost or aged manure before planting. They thrive in full sun (at least 6-8 hours of direct sunlight per day), but can tolerate partial shade, especially in hotter climates. However, reduced sunlight may result in lower yields.
When is the best time to plant winged beans?
Winged beans are a warm-season crop and are sensitive to frost. Plant them after the last frost in your area, when the soil has warmed up to at least 65°F (18°C). In warmer climates, you can plant them earlier in the spring or even in the fall for a winter harvest.
How long does it take for winged beans to mature and produce pods?
Winged beans typically take about 120-180 days to mature and produce pods. The exact time will depend on the variety, climate, and growing conditions. You can start harvesting young pods when they are about 6-8 inches long and still tender. Regular harvesting encourages continued pod production.
What are some common pests and diseases that affect winged beans, and how can I prevent them?
Winged beans are generally resistant to pests and diseases, but they can be susceptible to aphids, spider mites, and fungal diseases like powdery mildew. To prevent these problems, ensure good air circulation around the plants, avoid overwatering, and inspect your plants regularly for any signs of infestation or disease. If you spot pests, you can try spraying them with insecticidal soap or neem oil. For fungal diseases, use a copper-based fungicide.
Can I grow winged beans in containers?
Yes, you can successfully grow winged beans in containers, but you’ll need to choose a large container (at least 15-20 gallons) with good drainage. Use a high-quality potting mix and provide a sturdy trellis or support system for the vines to climb. Water regularly and fertilize every few weeks with a balanced fertilizer.
How do I harvest winged beans, and how should I store them?
Harvest young pods when they are about 6-8 inches long and still tender. Use scissors or pruning shears to cut the pods from the vine. You can store fresh winged bean pods in the refrigerator for up to a week. For longer storage, you can blanch and freeze them. Mature seeds can be dried and stored in an airtight container for several months.
Are there any specific varieties of winged beans that are better suited for home gardens?
Several varieties of winged beans are well-suited for home gardens. Some popular choices include ‘Chimbu’, ‘UPS 122’, and ‘Tetragonolobus’. Research the varieties available in your area and choose one that is adapted to your climate and growing conditions.
Can I eat the tubers of winged beans, and how do I prepare them?
Yes, the tubers of winged beans are edible and can be cooked like potatoes. They have a slightly nutty flavor and are a good source of carbohydrates and protein. To prepare them, wash and peel the tubers, then boil, bake, or roast them until tender.
How can I save seeds from my winged bean plants for future planting?
To save seeds, allow some of the pods to mature fully on the vine until they are dry and brown. Harvest the pods and remove the seeds. Spread the seeds out on a tray to dry completely for a few days. Store the dried seeds in an airtight container in a cool, dark, and dry place.
What are some creative ways to use winged beans in cooking?
Winged beans are incredibly versatile in the kitchen. You can use the young pods in stir-fries, salads, soups, and stews. The leaves can be added to salads or cooked like spinach. The flowers can be used as a garnish or added to salads. The seeds can be roasted and eaten as a snack or ground into flour. The tubers can be boiled, baked, or roasted like potatoes. Experiment with different recipes and find your favorite ways to enjoy this amazing legume.
Leave a Comment