
Growing Calendula From Seed is easier than you might think, and I’m here to show you how! Have you ever dreamed of a vibrant, cheerful garden bursting with color and medicinal benefits? Well, Calendula, also known as pot marigold, is your answer! For centuries, this sunny flower has been cherished for its healing properties and culinary uses, dating back to ancient Roman and Greek civilizations where it was used to treat wounds and skin ailments.
But beyond its rich history, why should you learn about growing Calendula from seed? In today’s world, we’re all looking for ways to connect with nature, reduce our reliance on harsh chemicals, and create beautiful, sustainable spaces. Calendula offers all of that and more! Imagine harvesting your own petals to create soothing balms, adding a pop of color to your salads, or simply enjoying the beauty of these resilient blooms in your garden.
This DIY guide will walk you through every step, from selecting the right seeds to nurturing your seedlings and harvesting your vibrant flowers. Forget complicated gardening techniques – I’ll share simple, effective tips and tricks that even a complete beginner can master. Get ready to unlock the secrets to a thriving Calendula patch and experience the joy of growing your own natural remedies and garden delights!
Growing Calendula From Seed: A Sunshine-Filled DIY Project
Hey there, fellow gardening enthusiasts! I’m so excited to share my experience with growing calendula from seed. It’s a rewarding project that brings vibrant color and a host of benefits to your garden. Calendula, also known as pot marigold, is not only beautiful but also incredibly useful. Its petals are edible, and it boasts medicinal properties, making it a fantastic addition to any home garden. Plus, it’s super easy to grow from seed, even if you’re a beginner!
Why Grow Calendula?
Before we dive into the how-to, let’s quickly touch on why you should consider growing calendula.
* Beautiful Blooms: Calendula flowers come in shades of yellow, orange, and even cream, adding a cheerful splash of color to your garden.
* Edible Petals: You can use calendula petals to garnish salads, soups, and other dishes. They have a slightly peppery flavor.
* Medicinal Properties: Calendula is known for its anti-inflammatory, antiseptic, and wound-healing properties. You can use it to make infused oils, salves, and teas.
* Attracts Pollinators: Calendula attracts beneficial insects like bees and butterflies to your garden, helping to pollinate your other plants.
* Repels Pests: It can also help repel certain pests, making it a great companion plant for vegetables.
* Easy to Grow: Calendula is a relatively low-maintenance plant that thrives in a variety of conditions.
Getting Started: What You’ll Need
To successfully grow calendula from seed, you’ll need a few essential supplies. Don’t worry, most of them are readily available and won’t break the bank!
* Calendula Seeds: Choose a variety that you like. There are many different cultivars available, with varying flower colors and sizes. I personally love the ‘Pacific Beauty’ mix for its vibrant colors.
* Seed Starting Trays or Pots: These will provide a controlled environment for your seeds to germinate. You can also use recycled containers like yogurt cups or egg cartons, just make sure they have drainage holes.
* Seed Starting Mix: This is a lightweight, sterile soil mix specifically designed for starting seeds. It provides good drainage and aeration, which is crucial for successful germination.
* Watering Can or Spray Bottle: You’ll need a gentle way to water your seedlings without disturbing them.
* Grow Lights (Optional): If you’re starting your seeds indoors, grow lights can help provide adequate light for healthy growth, especially if you don’t have a sunny windowsill.
* Plant Labels: Trust me, you’ll want to label your seedlings! It’s easy to forget which variety is which, especially if you’re growing multiple types of flowers or vegetables.
* Small Trowel or Spoon: For transplanting seedlings.
* Gardening Gloves: To keep your hands clean and protected.
Sowing Calendula Seeds Indoors (Optional)
Starting calendula seeds indoors gives you a head start on the growing season, especially if you live in a colder climate. I usually start mine about 6-8 weeks before the last expected frost.
1. Prepare Your Seed Starting Trays or Pots: Fill your seed starting trays or pots with seed starting mix, leaving about half an inch of space at the top. Gently tap the trays or pots to settle the mix.
2. Sow the Seeds: Make a small indentation in the soil, about ¼ inch deep. Place one or two calendula seeds in each indentation.
3. Cover the Seeds: Gently cover the seeds with seed starting mix.
4. Water Thoroughly: Use a watering can or spray bottle to thoroughly moisten the soil. Be careful not to overwater, as this can lead to fungal problems.
5. Provide Light: Place the trays or pots under grow lights or in a sunny windowsill. If using a windowsill, rotate the trays or pots regularly to ensure even light exposure.
6. Maintain Moisture: Keep the soil consistently moist, but not soggy. You can cover the trays or pots with a clear plastic dome or plastic wrap to help retain moisture.
7. Wait for Germination: Calendula seeds typically germinate in 5-10 days.
8. Thin Seedlings (If Necessary): If you planted more than one seed per cell, thin the seedlings to one per cell once they have their first true leaves (the second set of leaves).
Direct Sowing Calendula Seeds Outdoors
Direct sowing is a simple and straightforward way to grow calendula, especially if you live in a warmer climate or have a longer growing season. I often direct sow a second batch of seeds a few weeks after transplanting my indoor-started seedlings to extend the blooming season.
1. Prepare the Soil: Choose a sunny spot in your garden with well-drained soil. Calendula prefers full sun but can tolerate partial shade. Remove any weeds, rocks, or debris from the area. Amend the soil with compost or other organic matter to improve its fertility and drainage.
2. Sow the Seeds: Make shallow furrows in the soil, about ½ inch deep. Space the furrows about 6-8 inches apart. Sprinkle the calendula seeds evenly along the furrows.
3. Cover the Seeds: Gently cover the seeds with soil.
4. Water Thoroughly: Use a watering can or hose to thoroughly moisten the soil.
5. Keep the Soil Moist: Keep the soil consistently moist until the seeds germinate.
6. Thin Seedlings (If Necessary): Once the seedlings emerge, thin them to about 6-8 inches apart.
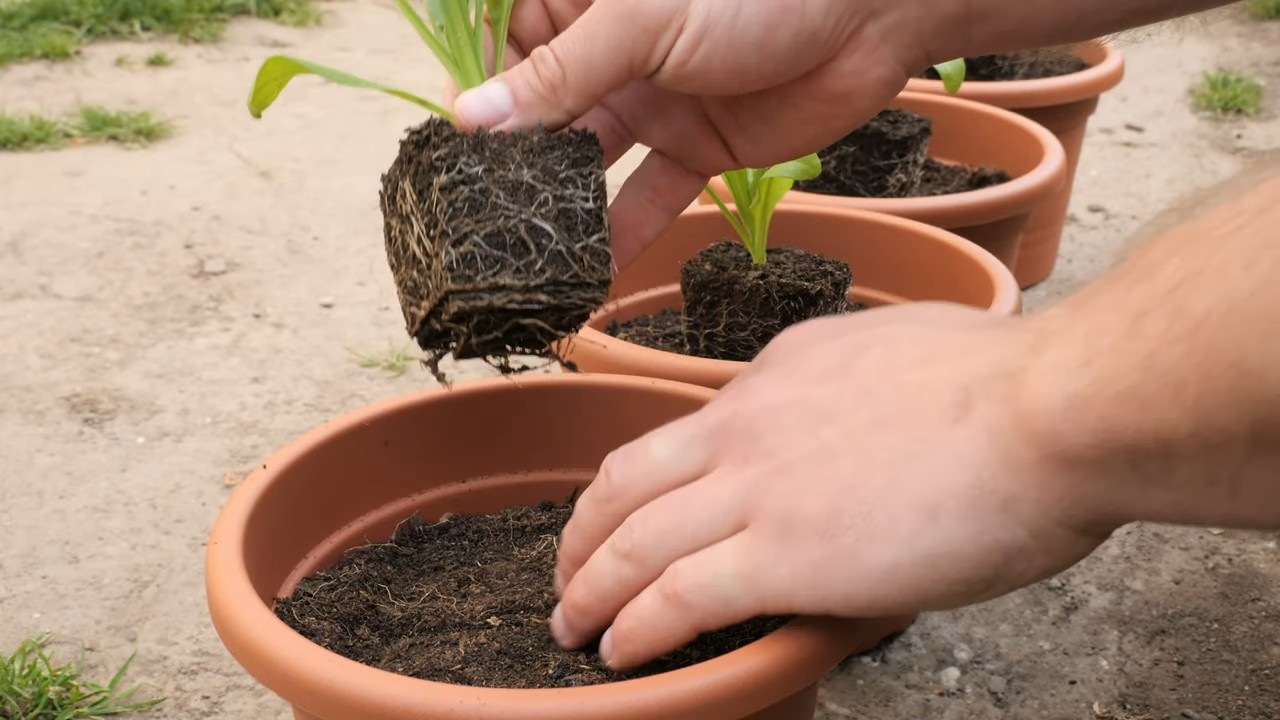
Transplanting Calendula Seedlings
Once your calendula seedlings have developed a few sets of true leaves and the weather has warmed up, it’s time to transplant them into your garden.
1. Harden Off Seedlings: Before transplanting, you’ll need to harden off your seedlings. This process gradually acclimates them to outdoor conditions. Start by placing the seedlings outdoors in a sheltered location for a few hours each day, gradually increasing the amount of time they spend outside over the course of a week.
2. Prepare the Planting Site: Choose a sunny spot in your garden with well-drained soil. Dig holes that are slightly larger than the root balls of your seedlings. Space the holes about 6-8 inches apart.
3. Remove Seedlings from Trays or Pots: Gently remove the seedlings from their trays or pots. Be careful not to damage the roots.
4. Plant the Seedlings: Place the seedlings in the holes and gently backfill with soil. Make sure the top of the root ball is level with the surrounding soil.
5. Water Thoroughly: Water the seedlings thoroughly after planting.
6. Mulch (Optional): Apply a layer of mulch around the plants to help retain moisture and suppress weeds.
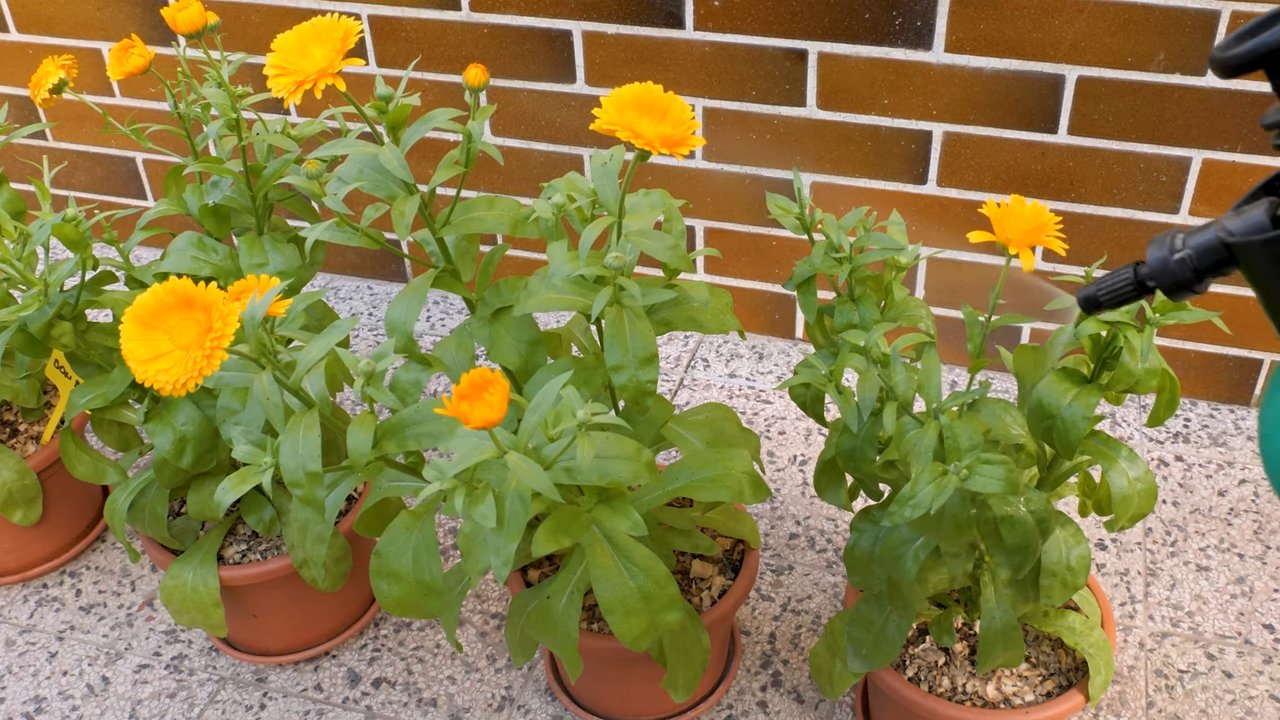
Caring for Your Calendula Plants
Calendula is a relatively low-maintenance plant, but there are a few things you can do to help it thrive.
* Watering: Water your calendula plants regularly, especially during dry spells. Avoid overwatering, as this can lead to root rot.
* Fertilizing: Calendula doesn’t require a lot of fertilizer. You can apply a balanced fertilizer once or twice during the growing season, but be careful not to over-fertilize, as this can lead to leggy growth.
* Deadheading: Deadhead spent flowers regularly to encourage more blooms. Simply pinch or cut off the faded flowers just below the flower head.
* Pest Control: Calendula is generally pest-resistant, but it can occasionally be affected by aphids or spider mites. If you notice any pests, you can spray the plants with insecticidal soap or neem oil.
* Disease Control: Calendula can sometimes be susceptible to fungal diseases like powdery mildew. To prevent fungal diseases, provide good air circulation and avoid overwatering.
Harvesting Calendula Flowers
You can start harvesting calendula flowers as soon as they open. The best time to harvest is in the morning, after the dew has dried.
1. Choose Your Flowers: Select flowers that are fully open and have bright, vibrant petals.
2. Cut the Flowers: Use scissors or pruning shears to cut the flowers just below the flower head.
3. Dry the Flowers (Optional): If you want to use the flowers for medicinal purposes or to make infused oils, you’ll need to dry them. You can dry them by hanging them upside down in a cool, dark, and well-ventilated place, or by using a dehydrator.
Using Your Calendula Harvest
Now for the fun part! There are so many ways to use your calendula harvest.
* Edible Petals: Add fresh calendula petals to salads, soups, and other dishes.
* Calendula Tea: Steep dried calendula petals
Conclusion
So, there you have it! Growing calendula from seed isn’t just a gardening project; it’s an investment in your well-being, a splash of vibrant color in your garden, and a gateway to a world of natural remedies. We’ve walked through the simple steps, from selecting the right seeds to nurturing your seedlings and finally, transplanting them into their permanent home. The beauty of this process lies in its accessibility – even if you’re a complete beginner, you can successfully cultivate these cheerful blooms.
But why is this DIY trick a must-try? Beyond the sheer joy of watching something grow from a tiny seed to a flourishing plant, growing your own calendula ensures you have access to the freshest, most potent flowers for your homemade salves, teas, and other herbal preparations. You know exactly what went into growing them – no hidden pesticides or questionable practices. This control over the process is invaluable, especially if you’re using calendula for medicinal purposes.
Furthermore, think of the cost savings! Purchasing dried calendula flowers can be surprisingly expensive. By growing your own, you’re essentially creating a sustainable source of this valuable herb, saving money in the long run and reducing your reliance on commercially produced products. Plus, you’ll have an abundance to share with friends and family, spreading the calendula love far and wide.
Variations and Suggestions:
Don’t be afraid to experiment! Try different varieties of calendula to see which ones thrive best in your specific climate and soil conditions. Some varieties boast particularly vibrant colors, while others are known for their higher resin content, making them ideal for medicinal use.
Consider companion planting. Calendula is a fantastic companion plant for many vegetables, attracting beneficial insects and deterring pests. Plant them alongside tomatoes, cucumbers, and other garden favorites to create a thriving and balanced ecosystem.
For a continuous harvest, practice succession planting. Sow new seeds every few weeks to ensure a steady supply of blooms throughout the growing season. This is especially useful if you plan on using calendula regularly for medicinal or cosmetic purposes.
And finally, don’t forget to save some seeds from your best plants for next year’s crop! This is a simple way to ensure you always have a supply of calendula seeds on hand, and it allows you to select for traits that you find particularly desirable, such as larger flowers or increased disease resistance.
We wholeheartedly encourage you to embark on this rewarding journey of growing calendula from seed. It’s a simple, sustainable, and incredibly satisfying way to connect with nature and harness the power of this amazing plant. Once you’ve experienced the joy of harvesting your own calendula flowers, you’ll never look back.
So, grab your seeds, prepare your soil, and get ready to witness the magic of calendula unfold. We can’t wait to hear about your experiences! Share your photos, tips, and stories in the comments below. Let’s create a community of calendula enthusiasts, sharing our knowledge and inspiring others to embrace the beauty and benefits of this remarkable flower. Happy gardening!
Frequently Asked Questions (FAQ)
What are the best conditions for growing calendula from seed?
Calendula thrives in full sun to partial shade. While it prefers full sun for optimal flowering, it can tolerate some shade, especially in hotter climates. The ideal soil is well-draining and moderately fertile. Amend heavy clay soils with compost or other organic matter to improve drainage. A slightly acidic to neutral pH (around 6.0 to 7.0) is best. Calendula is relatively adaptable and can tolerate a range of soil conditions, but providing the ideal environment will result in healthier plants and more abundant blooms.
How long does it take for calendula seeds to germinate?
Calendula seeds typically germinate within 5 to 14 days, depending on the temperature and moisture levels. Warmer temperatures (around 70-75°F or 21-24°C) will generally result in faster germination. Keep the soil consistently moist but not waterlogged during this period. Using a seed starting tray with a humidity dome can help maintain optimal moisture levels. Once the seedlings emerge, provide them with plenty of light to prevent them from becoming leggy.
When is the best time to harvest calendula flowers?
The best time to harvest calendula flowers is in the morning, after the dew has dried but before the sun gets too hot. This is when the flowers are at their peak potency and contain the highest concentration of beneficial compounds. Choose flowers that are fully open and brightly colored. Gently pluck the entire flower head from the stem, leaving a short piece of stem attached. Regular harvesting encourages the plant to produce more flowers, so don’t be afraid to harvest frequently.
How do I dry calendula flowers for later use?
There are several ways to dry calendula flowers. One popular method is to spread the flowers in a single layer on a screen or tray in a cool, dark, and well-ventilated area. Turn them occasionally to ensure even drying. Another option is to hang small bunches of flowers upside down in a similar environment. The drying process typically takes 1 to 3 weeks, depending on the humidity and temperature. The flowers are dry when they are brittle and easily crumble. Store the dried flowers in an airtight container in a cool, dark place to preserve their potency.
Can I eat calendula flowers?
Yes, calendula flowers are edible and can be used to add color and flavor to salads, soups, and other dishes. The petals have a slightly peppery taste and can be used as a substitute for saffron in some recipes. However, it’s important to only consume flowers that have been grown organically and are free from pesticides or other harmful chemicals. Also, some people may be allergic to calendula, so it’s always a good idea to start with a small amount to see how your body reacts.
Are there any pests or diseases that commonly affect calendula?
Calendula is generally a hardy plant, but it can be susceptible to certain pests and diseases. Aphids, spider mites, and whiteflies are common pests that can infest calendula plants. These can be controlled with insecticidal soap or neem oil. Powdery mildew is a fungal disease that can affect calendula, especially in humid conditions. To prevent powdery mildew, ensure good air circulation around the plants and avoid overhead watering. If powdery mildew does occur, treat it with a fungicide.
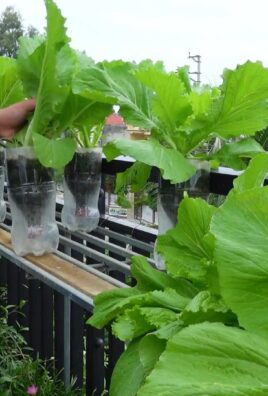
Can I grow calendula in containers?
Yes, calendula is well-suited to container gardening. Choose a pot that is at least 12 inches in diameter to allow the roots to spread. Use a well-draining potting mix and water regularly, especially during hot weather. Fertilize the plants every few weeks with a balanced liquid fertilizer. Container-grown calendula may require more frequent watering and fertilization than plants grown in the ground.
How can I use calendula for skin care?
Calendula has a long history of use in skin care due to its anti-inflammatory, antiseptic, and wound-healing properties. It can be used to soothe irritated skin, reduce inflammation, and promote healing of minor cuts, burns, and scrapes. Calendula-infused oil, salves, and creams are popular choices for skin care. You can make your own calendula-infused oil by steeping dried calendula flowers in a carrier oil, such as olive oil or almond oil, for several weeks.
Is calendula safe for pregnant or breastfeeding women?
While calendula is generally considered safe, it’s always best to consult with a healthcare professional before using it if you are pregnant or breastfeeding. There is limited research on the safety of calendula during pregnancy and breastfeeding, so it’s important to err on the side of caution.
How do I save calendula seeds for next year?
Saving calendula seeds is easy. Allow some of the flower heads to dry completely on the plant. Once the flower heads are dry and brown, carefully remove the seeds. The seeds are crescent-shaped and brown or black in color. Store the seeds in an airtight container in a cool, dark, and dry place. Calendula seeds can remain viable for several years if stored properly.
Leave a Comment