
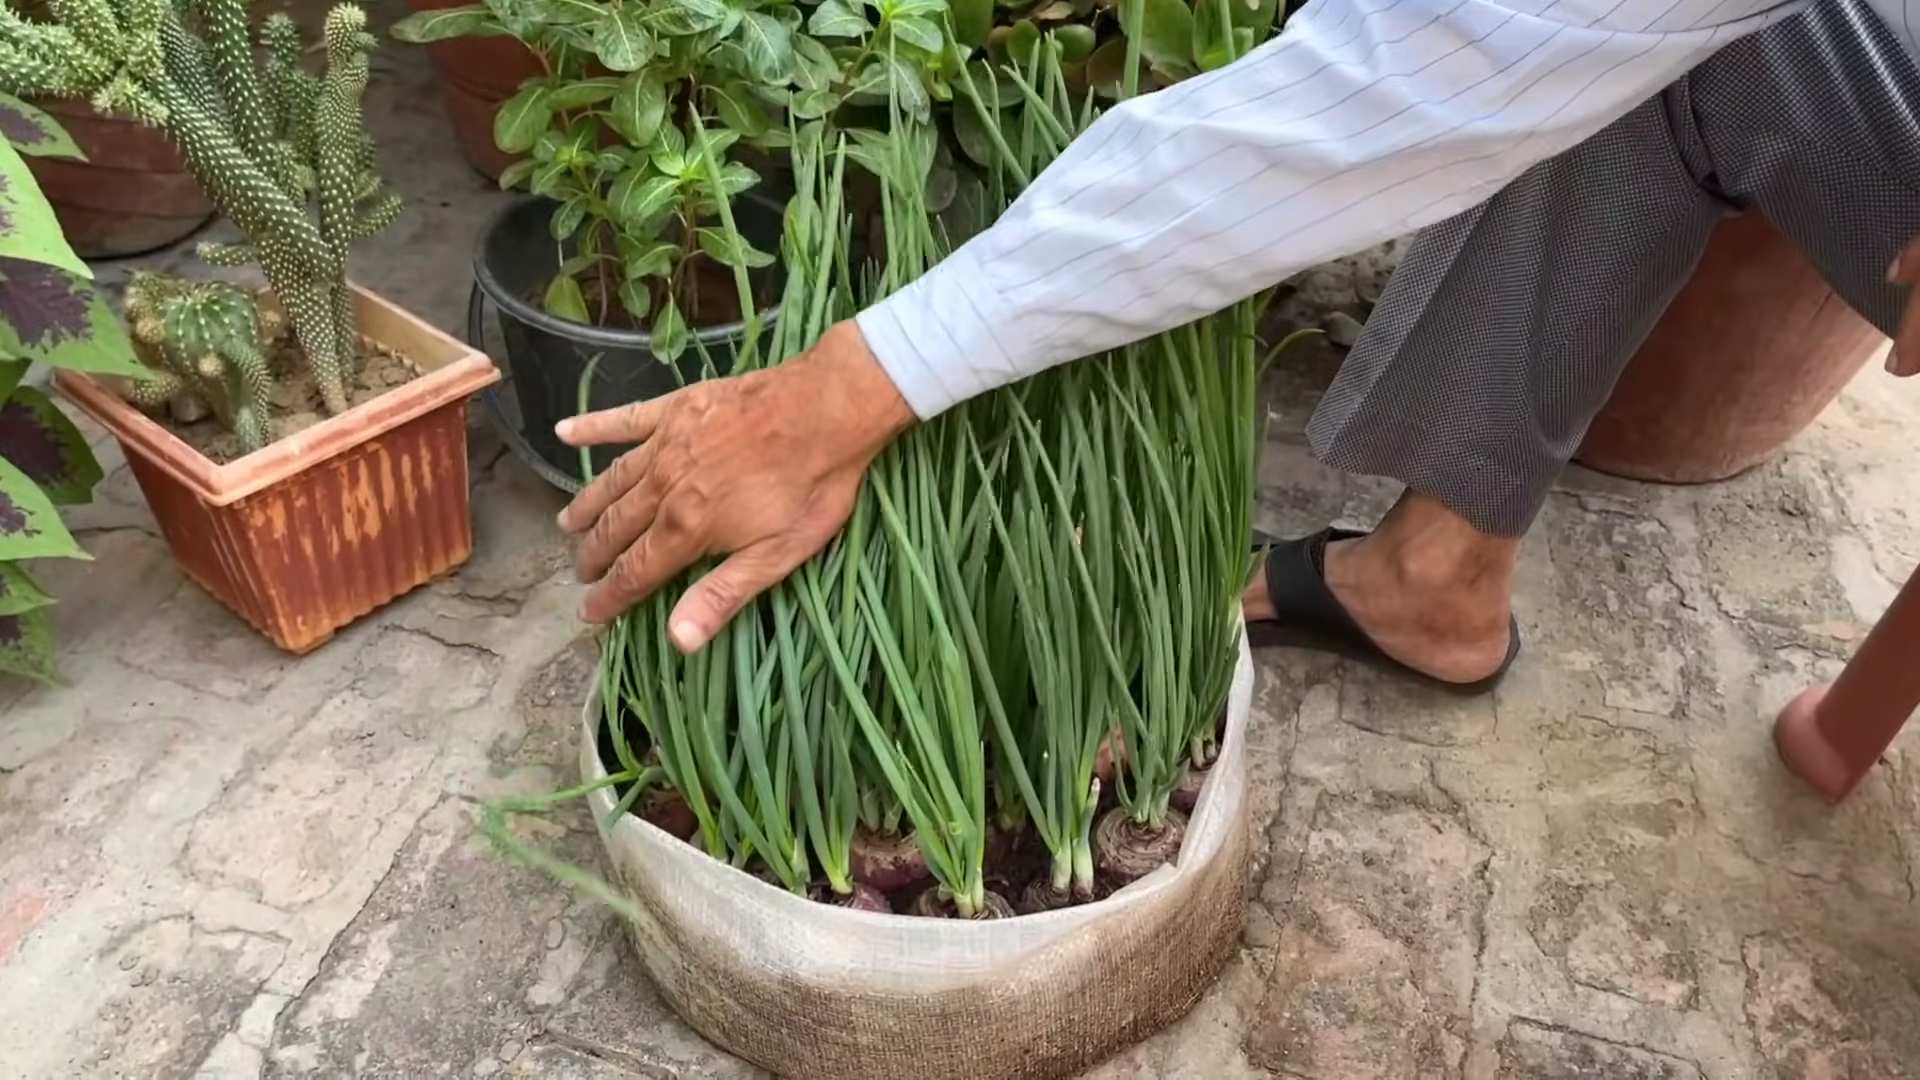
Growing Onions at Home can seem daunting, but trust me, it’s easier than you think! Imagine stepping outside your back door to harvest fresh, flavorful onions for your favorite recipes. No more trips to the grocery store for that one missing ingredient – you’ll have a readily available supply right in your backyard.
Onions have been cultivated for thousands of years, with evidence suggesting their use dates back to ancient Egypt. They were even revered and used in burial rituals! Today, onions are a staple in cuisines worldwide, adding depth and complexity to countless dishes. But why rely solely on store-bought onions when you can cultivate your own, bursting with flavor and free from potentially harmful chemicals?
This DIY guide is your ticket to unlocking the secrets of successful home onion cultivation. We’ll explore simple yet effective tricks and hacks that will transform your garden into an onion-growing paradise. Whether you’re a seasoned gardener or just starting out, these tips will help you avoid common pitfalls and maximize your yield. I’m excited to share these secrets with you, so let’s get started and discover the joy of growing onions at home!
DIY Home Theater Seating on a Budget: Build Your Own Comfy Couch!
Okay, so you’re dreaming of a home theater, but those fancy reclining seats are breaking the bank? I get it! I was in the same boat. But don’t despair! I’m going to show you how to build your own super comfy, custom home theater seating on a budget. This project is totally doable, even if you’re not a master carpenter. We’ll be repurposing some materials and getting creative to create seating that’s perfect for movie nights.
Materials You’ll Need
Before we dive in, let’s gather our supplies. This list might vary slightly depending on the size and style of seating you want, but here’s a general idea:
* Pallets: These are the foundation of our seating. You’ll need to source these. Check with local businesses, construction sites, or online marketplaces. Make sure they’re heat-treated (HT) and not chemically treated (look for an “HT” stamp). The number of pallets depends on how many seats you want. I used 4 for a two-seater.
* Plywood: We’ll use this to create a smooth, stable surface on top of the pallets. 3/4 inch thickness is ideal.
* 2×4 Lumber: For reinforcing the structure and building a backrest.
* Foam Padding: This is where the comfort comes in! I recommend high-density foam for the seat cushions and softer foam for the backrests. You can find this at fabric stores or online.
* Batting: This adds an extra layer of softness and helps smooth out any imperfections.
* Fabric: Choose a durable, comfortable fabric that you love! Microfiber, suede, or even heavy-duty canvas are great options. Measure your seating area carefully to determine how much fabric you’ll need.
* Staple Gun and Staples: Essential for attaching the fabric and batting.
* Screws: For attaching the plywood and 2x4s. I used 2-inch and 3-inch screws.
* Wood Glue: For extra reinforcement.
* Sandpaper: To smooth out any rough edges on the pallets and wood.
* Paint or Stain (Optional): To customize the look of your seating.
* Polyurethane (Optional): To protect the wood if you choose to paint or stain it.
* Measuring Tape: Crucial for accurate cuts.
* Saw: Circular saw or hand saw, depending on your preference.
* Drill: For screwing everything together.
* Safety Glasses: Always protect your eyes!
* Gloves: To protect your hands.
* Scissors or Utility Knife: For cutting fabric and foam.
* Pencil or Marker: For marking measurements.
* Buttons (Optional): For tufting the backrest.
* Upholstery Needle and Thread (Optional): For tufting.
Preparing the Pallets
This is a crucial step to ensure your seating is safe and comfortable.
1. Inspect the Pallets: Carefully examine each pallet for any loose nails, splinters, or damage. Remove any loose nails and sand down any rough spots.
2. Clean the Pallets: Use a brush and soapy water to clean the pallets thoroughly. Let them dry completely before moving on. I even used a pressure washer on mine (carefully!) to get them extra clean.
3. Sand the Pallets: Use sandpaper to smooth out any rough edges and surfaces. Pay special attention to the top surface where you’ll be sitting. I started with a coarse grit sandpaper (80 grit) and then moved to a finer grit (120 grit) for a smoother finish.
4. Paint or Stain (Optional): If you want to customize the look of your seating, now’s the time to paint or stain the pallets. I chose to stain mine a dark walnut color to match my existing furniture. Apply several coats, allowing each coat to dry completely before applying the next.
5. Apply Polyurethane (Optional): If you painted or stained the pallets, apply a coat of polyurethane to protect the finish. This will also make the pallets easier to clean.
Building the Base
Now we’re going to assemble the pallets to create the base of our seating.
1. Arrange the Pallets: Decide on the configuration of your seating. Do you want a single seat, a loveseat, or a larger sectional? Arrange the pallets accordingly. I wanted a loveseat, so I placed two pallets side-by-side.
2. Secure the Pallets: Use screws and wood glue to attach the pallets together. Make sure the pallets are aligned properly before screwing them together. I used 3-inch screws and applied wood glue to all the contact points.
3. Add Reinforcement (Optional): For extra stability, you can add 2x4s to the inside of the pallet structure. This will help prevent the pallets from shifting or separating over time. Cut the 2x4s to fit inside the pallet frame and screw them into place.
4. Attach the Plywood: Cut the plywood to the size of the pallet base. Place the plywood on top of the pallets and secure it with screws. This will create a smooth, stable surface for the cushions. I used 2-inch screws and made sure to space them evenly around the perimeter of the plywood.
Creating the Backrest
This is where we’ll build a comfortable back for our seating.
1. Measure and Cut the 2x4s: Determine the height and angle of your desired backrest. Cut the 2x4s to the appropriate length and angle. I wanted a slightly reclined backrest, so I cut the 2x4s at a slight angle.
2. Attach the 2x4s to the Base: Use screws and wood glue to attach the 2x4s to the back of the pallet base. Make sure the 2x4s are securely attached and can support the weight of the backrest. I used 3-inch screws and made sure to screw them into the solid parts of the pallet frame.
3. Attach Plywood to the Backrest Frame: Cut plywood to fit the frame created by the 2x4s. Secure the plywood to the 2x4s with screws. This will create a solid back for the backrest.
4. Consider the Angle: Think about the angle of your backrest. Do you want it straight up, or slightly reclined? Adjust the placement of the 2x4s accordingly.
Adding the Comfort: Foam and Batting
Now for the fun part – making it comfy!
1. Cut the Foam: Measure the seating area and cut the foam to the appropriate size. Use a sharp utility knife or scissors to cut the foam. I recommend cutting the foam slightly larger than the seating area to allow for some compression.
2. Wrap the Foam with Batting: Wrap the foam with batting to add an extra layer of softness and smooth out any imperfections. Secure the batting with a staple gun. I used a thin layer of batting to wrap the foam cushions.
3. Cut the Backrest Foam: Measure the backrest area and cut the foam to the appropriate size. Use a softer foam for the backrest than you used for the seat cushions.
4. Wrap the Backrest Foam with Batting: Wrap the backrest foam with batting and secure it with a staple gun.
Upholstering the Seating
This is where your fabric choice really shines!
1. Measure and Cut the Fabric: Measure the seating area and backrest area and cut the fabric to the appropriate size. Be sure to leave enough extra fabric to wrap around the edges and staple it to the frame. I recommend adding at least 6 inches of extra fabric on all sides.
2. Attach the Fabric to the Seat Cushions: Place the fabric over the seat cushion and begin stapling it to the underside of the plywood. Start in the center of each side and work your way outwards, pulling the fabric taut as you go. Be sure to fold the edges of the fabric under to create a clean, finished look.
3. Attach the Fabric to the Backrest: Place the fabric over the backrest and begin stapling it to the back of the plywood. Start in the center of each side and work your way outwards, pulling the fabric taut as you go. Again, be sure to fold the edges of the fabric under to create a clean, finished look.
4. Tufting (Optional): If you want to add a tufted look to the backrest, now’s the time to do it. Mark the locations of the tufts on the fabric. Use an upholstery needle and thread to pull the fabric through the foam and batting and secure it with a button. This creates a diamond-shaped pattern on the backrest.
Finishing Touches
Conclusion
So, there you have it! Growing onions at home, especially using this simple DIY trick, is not just a fun gardening project; it’s a gateway to fresher, more flavorful meals and a deeper connection with the food you eat. We’ve walked through the process, highlighting how easy it is to transform those forgotten onion scraps into thriving plants. This isn’t about complicated gardening techniques or expensive equipment; it’s about resourcefulness, sustainability, and enjoying the fruits (or rather, the vegetables!) of your labor.
Why is this DIY trick a must-try? Because it’s incredibly efficient. You’re essentially recycling food waste, reducing your grocery bill, and gaining access to a constant supply of fresh onions. Imagine the satisfaction of snipping off a few green onions to garnish your soup or adding freshly grown bulbs to your favorite stir-fry. The flavor is noticeably brighter and more vibrant than store-bought onions, adding a special touch to your culinary creations. Plus, it’s a fantastic way to introduce children to the wonders of gardening and teach them about where their food comes from.
But the benefits don’t stop there. Growing your own onions allows you to control the growing environment, ensuring they are free from harmful pesticides and chemicals. You know exactly what goes into your food, giving you peace of mind and promoting a healthier lifestyle.
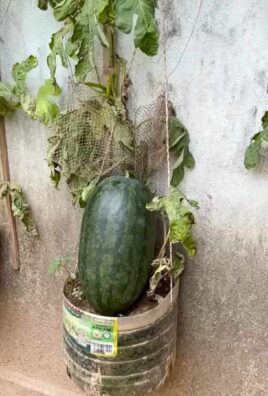
Looking for variations? Absolutely! Experiment with different types of onions. Try growing red onions, yellow onions, or even shallots using the same method. You can also explore different growing mediums. While we focused on water propagation, you can eventually transplant your sprouted onions into soil for larger bulb development. Consider adding organic fertilizers to the soil to boost growth and enhance flavor. Another fun variation is to grow onions in containers on your balcony or patio, making it accessible even if you don’t have a traditional garden. You can also try companion planting. Onions are known to deter certain pests, so planting them near other vegetables like carrots or tomatoes can be beneficial.
We truly believe that anyone can successfully grow onions at home using this DIY trick. It’s a rewarding experience that connects you to nature and provides you with delicious, homegrown produce.
Now, it’s your turn! We encourage you to give this a try. Gather your onion scraps, follow our simple steps, and watch the magic happen. Don’t be afraid to experiment and adapt the method to suit your own environment and preferences.
Most importantly, we want to hear about your experience! Share your photos, tips, and stories in the comments below. Let us know what worked for you, what challenges you faced, and any creative variations you discovered. Together, we can create a community of passionate home gardeners and inspire others to embrace the joy of growing their own food. Happy gardening!
Frequently Asked Questions (FAQ)
What kind of onions can I regrow using this method?
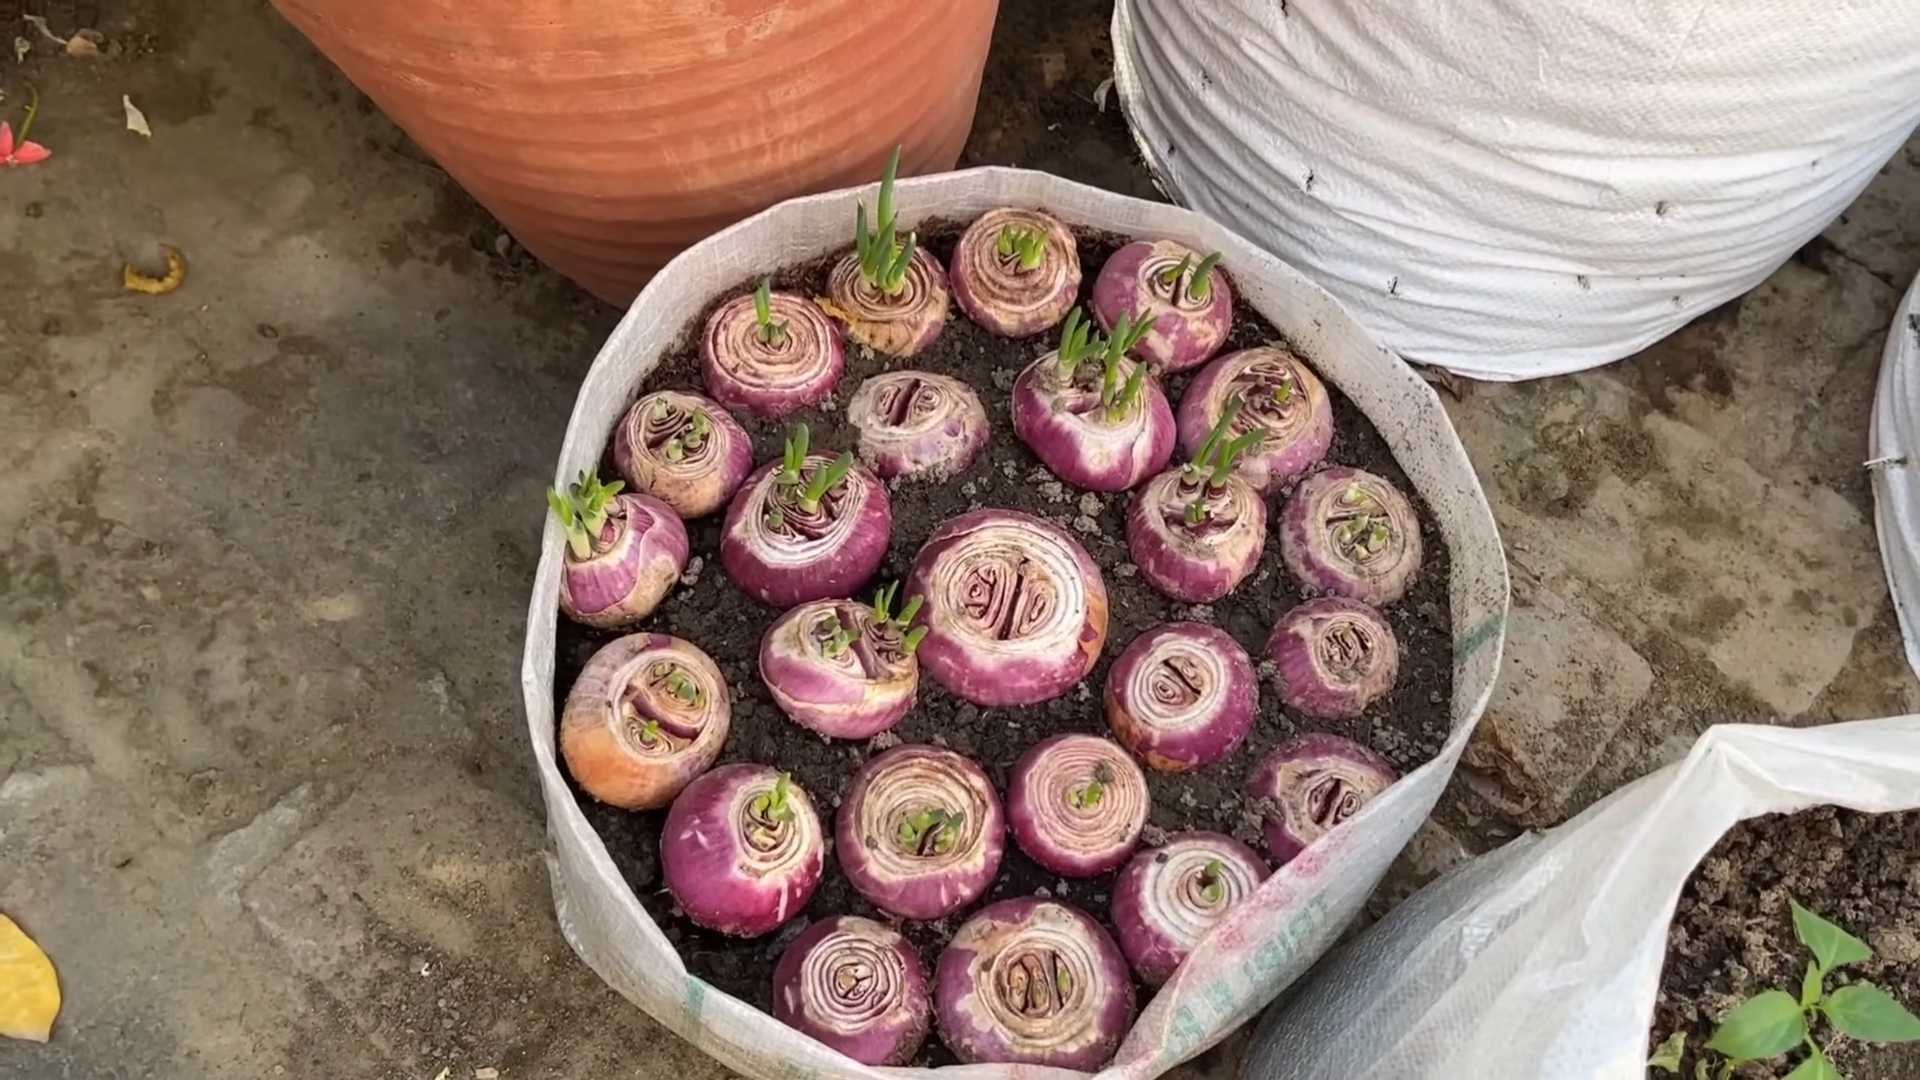
You can regrow most types of onions, including yellow onions, white onions, red onions, and even shallots. The key is to use the root end of the onion, the part that would normally be discarded. Make sure the root end is firm and healthy, with some visible root hairs. Avoid using onion scraps that are rotten or moldy, as they are unlikely to sprout. Experimenting with different varieties can be fun and allow you to enjoy a range of flavors in your homegrown onions.
How long does it take for the onion to start growing?
Generally, you should start to see new green shoots emerging from the onion within a few days to a week. Root growth may be visible even sooner. The exact time frame can vary depending on factors such as the onion variety, the temperature, and the amount of light it receives. Warmer temperatures and ample sunlight will generally promote faster growth. Be patient, and make sure to change the water regularly to prevent bacterial growth.
Can I grow onions indoors year-round?
Yes, you can absolutely grow onions indoors year-round. Onions are relatively adaptable to indoor environments, especially if you provide them with sufficient light. Place your onion in a sunny windowsill or under a grow light to ensure it receives at least 6-8 hours of light per day. You may need to adjust the watering schedule depending on the humidity levels in your home. Indoor growing allows you to enjoy fresh onions even during the colder months when outdoor gardening is not possible.
How often should I change the water?
It’s important to change the water every one to two days to prevent bacterial growth and keep the onion healthy. Stagnant water can lead to rot and hinder growth. When changing the water, gently rinse the onion root to remove any debris. Use fresh, clean water each time. This simple step will significantly improve your chances of success.
When should I transplant the onion to soil?
You can transplant the onion to soil once it has developed a good root system and several inches of green growth. This usually takes about 1-2 weeks. Choose a pot that is large enough to accommodate the growing roots. Use a well-draining potting mix and bury the onion bulb so that the top is just above the soil surface. Water thoroughly after transplanting and keep the soil consistently moist but not waterlogged.
What kind of soil is best for growing onions?
Onions prefer well-draining, fertile soil that is rich in organic matter. A good potting mix for onions should contain a blend of compost, peat moss, and perlite or vermiculite. You can also amend your garden soil with compost or well-rotted manure to improve its fertility and drainage. Onions thrive in slightly acidic to neutral soil with a pH of 6.0 to 7.0.
How much sunlight do onions need?
Onions need at least 6-8 hours of direct sunlight per day to thrive. If you are growing onions indoors, place them in a sunny windowsill or under a grow light. If you are growing onions outdoors, choose a location that receives full sun. Insufficient sunlight can result in weak, leggy growth and smaller bulbs.
Can I eat the green shoots that grow from the onion?
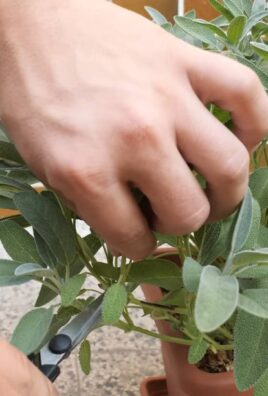
Yes, the green shoots that grow from the onion are perfectly edible and can be used as green onions or scallions. They have a mild onion flavor and can be added to salads, soups, stir-fries, and other dishes. You can snip off the green shoots as needed, allowing the onion to continue growing. Harvesting the green shoots regularly can also encourage the plant to produce more growth.
Will the onion regrow into a full-sized onion bulb?
While you can certainly get some bulb development, regrowing onions from scraps typically results in smaller bulbs compared to those grown from seed or sets. The primary benefit of this method is the continuous supply of green onions. However, if you transplant the sprouted onion into soil and provide it with adequate nutrients and sunlight, you may be able to encourage larger bulb formation.
What if my onion starts to rot?
If your onion starts to rot, it’s important to remove it immediately to prevent the spread of bacteria. Rotting can be caused by stagnant water, poor ventilation, or using an onion scrap that was already damaged. To prevent rotting, change the water regularly, ensure good air circulation, and use healthy onion scraps. If you notice any signs of rot, discard the onion and start with a fresh one.
Are there any pests or diseases that affect onions?
Onions can be susceptible to certain pests and diseases, such as onion maggots, thrips, and fungal diseases like downy mildew. To prevent these problems, practice good garden hygiene, such as removing weeds and debris around the plants. You can also use organic pest control methods, such as insecticidal soap or neem oil, to control pests. Ensure good air circulation to prevent fungal diseases.
Can I use this method to grow other vegetables?
While this specific method is primarily used for regrowing onions, you can use similar techniques to regrow other vegetables, such as celery, lettuce, and garlic. The key is to use the appropriate part of the vegetable and provide it with the right growing conditions. Experimenting with different vegetables can be a fun and rewarding way to reduce food waste and enjoy fresh, homegrown produce.
Leave a Comment