
Growing Turnips in Small Spaces can feel like a daunting task, right? I get it! You’re dreaming of fresh, earthy turnips straight from your garden, but you’re short on space. Don’t let that stop you! This isn’t just another gardening article; it’s your personal guide to unlocking the secrets of compact turnip cultivation.
Turnips have a rich history, dating back to ancient Rome, where they were a staple food. They’ve nourished civilizations for centuries, and now, they can nourish you too, even if you only have a balcony or a tiny backyard. For centuries, turnips have been a reliable food source, easily grown and stored. Now, with modern techniques, we can adapt this ancient crop to fit our modern, space-conscious lifestyles.
Why do you need these DIY tricks and hacks? Because store-bought turnips simply can’t compare to the flavor and satisfaction of harvesting your own. Plus, growing turnips in small spaces is incredibly rewarding. Imagine the pride of serving a meal featuring vegetables you nurtured from seed to table, all within the confines of your limited area. This article will provide you with the knowledge and confidence to successfully cultivate these root vegetables, regardless of your spatial constraints. I’m here to show you how to maximize your yield, choose the right varieties, and troubleshoot common problems, ensuring a bountiful harvest that will impress your friends and family. Let’s get started!
Growing Turnips in Small Spaces: A DIY Guide
Hey there, fellow gardening enthusiasts! So, you’re itching to grow some fresh, crunchy turnips but are short on space? Don’t worry, I’ve got you covered! Turnips are surprisingly adaptable and can thrive even in the tiniest of gardens, balconies, or patios. I’m going to walk you through everything you need to know to successfully grow turnips in small spaces. Let’s get our hands dirty!
Choosing the Right Turnip Variety
First things first, let’s talk about varieties. Not all turnips are created equal, especially when space is a concern. You’ll want to opt for smaller, faster-maturing varieties. Here are a few of my favorites:
- ‘Tokyo Cross’: This is a super-fast grower, maturing in just about 30 days! The roots are small and round, perfect for quick harvests.
- ‘Hakurei’: Another excellent choice, ‘Hakurei’ turnips are mild and sweet, and their greens are delicious too! They mature in around 35 days.
- ‘Purple Top White Globe’: While slightly larger than the others, this variety is still manageable in containers and offers a classic turnip flavor. Expect about 50-60 days to maturity.
Preparing Your Growing Space
Okay, now that we’ve picked our turnip stars, let’s get our growing space ready. This is crucial for success, so pay close attention!
- Container Selection: Choose containers that are at least 6-8 inches deep. Turnips need room for their roots to develop. I prefer using wide, shallow containers rather than tall, narrow ones. This allows for better root development and air circulation. You can use plastic pots, terracotta pots, or even repurposed containers like old buckets or tubs. Just make sure they have drainage holes!
- Soil Preparation: Turnips love well-drained, fertile soil. I recommend using a good quality potting mix. You can also amend your potting mix with compost or well-rotted manure to boost its nutrient content. Avoid using garden soil directly in containers, as it can become compacted and doesn’t drain as well. A good mix I like to use is 2 parts potting mix, 1 part compost, and 1 part perlite for extra drainage.
- Sunlight: Turnips need at least 6 hours of sunlight per day. If you’re growing them indoors or on a shady balcony, you might need to supplement with grow lights. I’ve had great success using LED grow lights, which are energy-efficient and provide the right spectrum of light for plant growth.
Planting Your Turnip Seeds
Alright, time to get those seeds in the ground! This is the fun part.
- Sowing the Seeds: Sow the turnip seeds directly into your prepared containers. Sprinkle the seeds evenly over the surface of the soil, spacing them about 1-2 inches apart. You can also sow them in rows if you prefer.
- Covering the Seeds: Gently cover the seeds with a thin layer of soil, about ¼ inch deep. Turnip seeds are small and don’t need to be buried too deep.
- Watering: Water the soil gently but thoroughly after planting. You want to keep the soil consistently moist but not waterlogged. I like to use a watering can with a gentle rose attachment to avoid disturbing the seeds.
- Germination: Keep the soil moist and warm, and you should see seedlings emerge in about 5-7 days.
Caring for Your Turnip Plants
Now that your turnip seedlings are up and growing, it’s time to provide them with the care they need to thrive.
- Thinning: Once the seedlings have a few true leaves, you’ll need to thin them out. This means removing some of the seedlings to give the remaining ones enough space to grow. Aim for a spacing of about 3-4 inches between plants. Don’t throw away the thinned seedlings! You can eat them as microgreens.
- Watering: Water your turnip plants regularly, especially during dry spells. The soil should be consistently moist but not soggy. Overwatering can lead to root rot, so be careful. I usually check the soil moisture by sticking my finger about an inch deep. If it feels dry, it’s time to water.
- Fertilizing: Turnips are relatively light feeders, but they will benefit from occasional fertilization. I like to use a balanced organic fertilizer, such as fish emulsion or compost tea. Apply the fertilizer according to the package directions. Avoid over-fertilizing, as this can lead to excessive foliage growth at the expense of root development.
- Weeding: Keep your containers free of weeds. Weeds compete with your turnip plants for nutrients and water. Gently pull out any weeds that appear.
- Pest Control: Turnips can be susceptible to certain pests, such as aphids and flea beetles. Inspect your plants regularly for signs of infestation. If you spot any pests, you can try spraying them with insecticidal soap or neem oil. I prefer using organic pest control methods whenever possible.
Harvesting Your Turnips
The moment we’ve all been waiting for – harvest time!
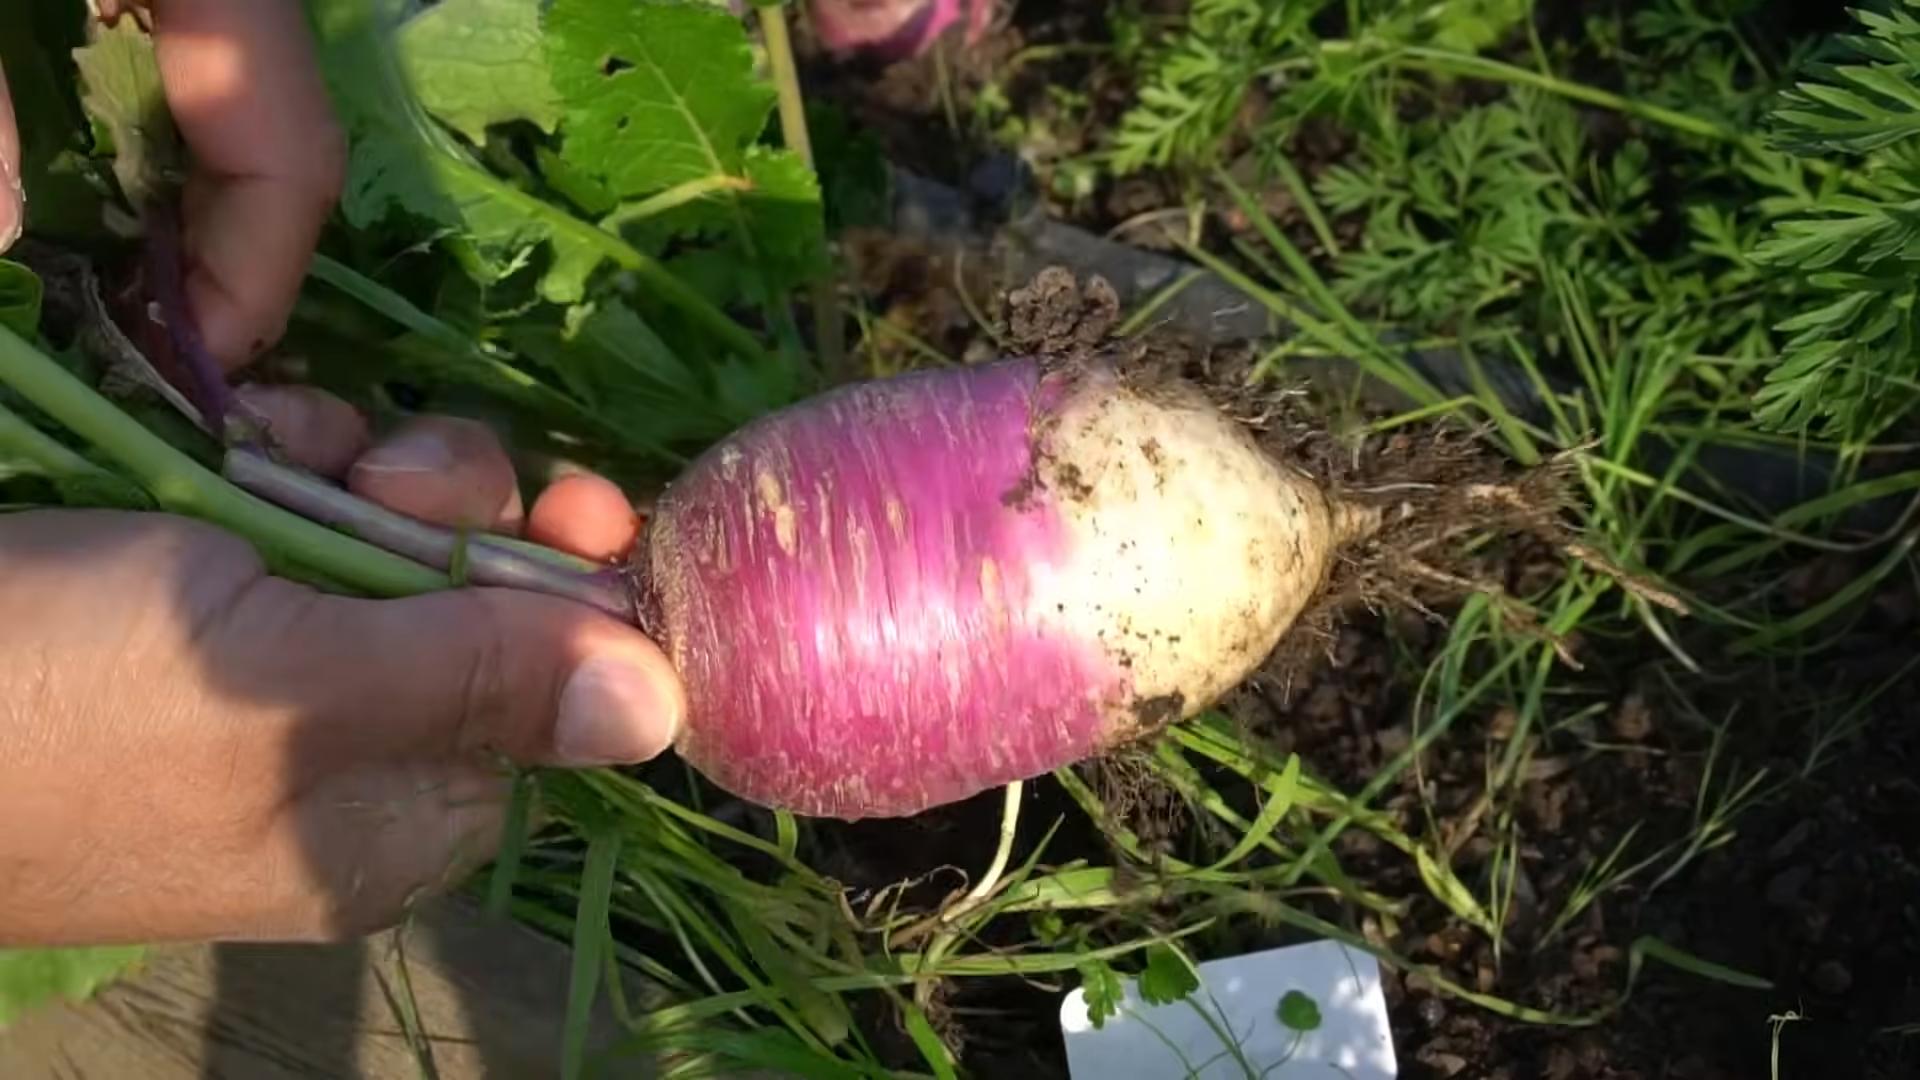
- When to Harvest: The timing of your harvest will depend on the variety of turnip you’re growing and your personal preference. Generally, you can start harvesting turnips when the roots are about 2-3 inches in diameter. For ‘Tokyo Cross’ and ‘Hakurei’, this will be around 30-40 days after planting. ‘Purple Top White Globe’ will take a bit longer.
- How to Harvest: To harvest your turnips, gently loosen the soil around the roots with a trowel or garden fork. Then, grasp the greens near the base of the plant and pull the turnip out of the soil. If the soil is dry, you may need to water it beforehand to make it easier to pull the turnips.
- Storing Your Turnips: After harvesting, remove the greens from the turnips, leaving about an inch of stem attached. Store the turnips in the refrigerator in a plastic bag or container. They should keep for several weeks. The greens can also be stored in the refrigerator, but they will wilt more quickly. I like to use them within a few days of harvesting.
Enjoying Your Homegrown Turnips
Congratulations! You’ve successfully grown turnips in a small space. Now it’s time to enjoy the fruits (or rather, roots) of your labor.
- Eating the Roots: Turnip roots can be eaten raw, cooked, or pickled. They have a slightly peppery flavor that is delicious in salads, soups, stews, and stir-fries. I love roasting them with other root vegetables like carrots and potatoes.
- Eating the Greens: Don’t forget about the greens! Turnip greens are packed with nutrients and have a slightly bitter flavor. They can be eaten raw in salads or cooked like spinach or kale. I often sauté them with garlic and olive oil for a simple and healthy side dish.
Troubleshooting Common Problems
Even with the best care, you might encounter some problems while growing turnips. Here are a few common issues and how to address them:
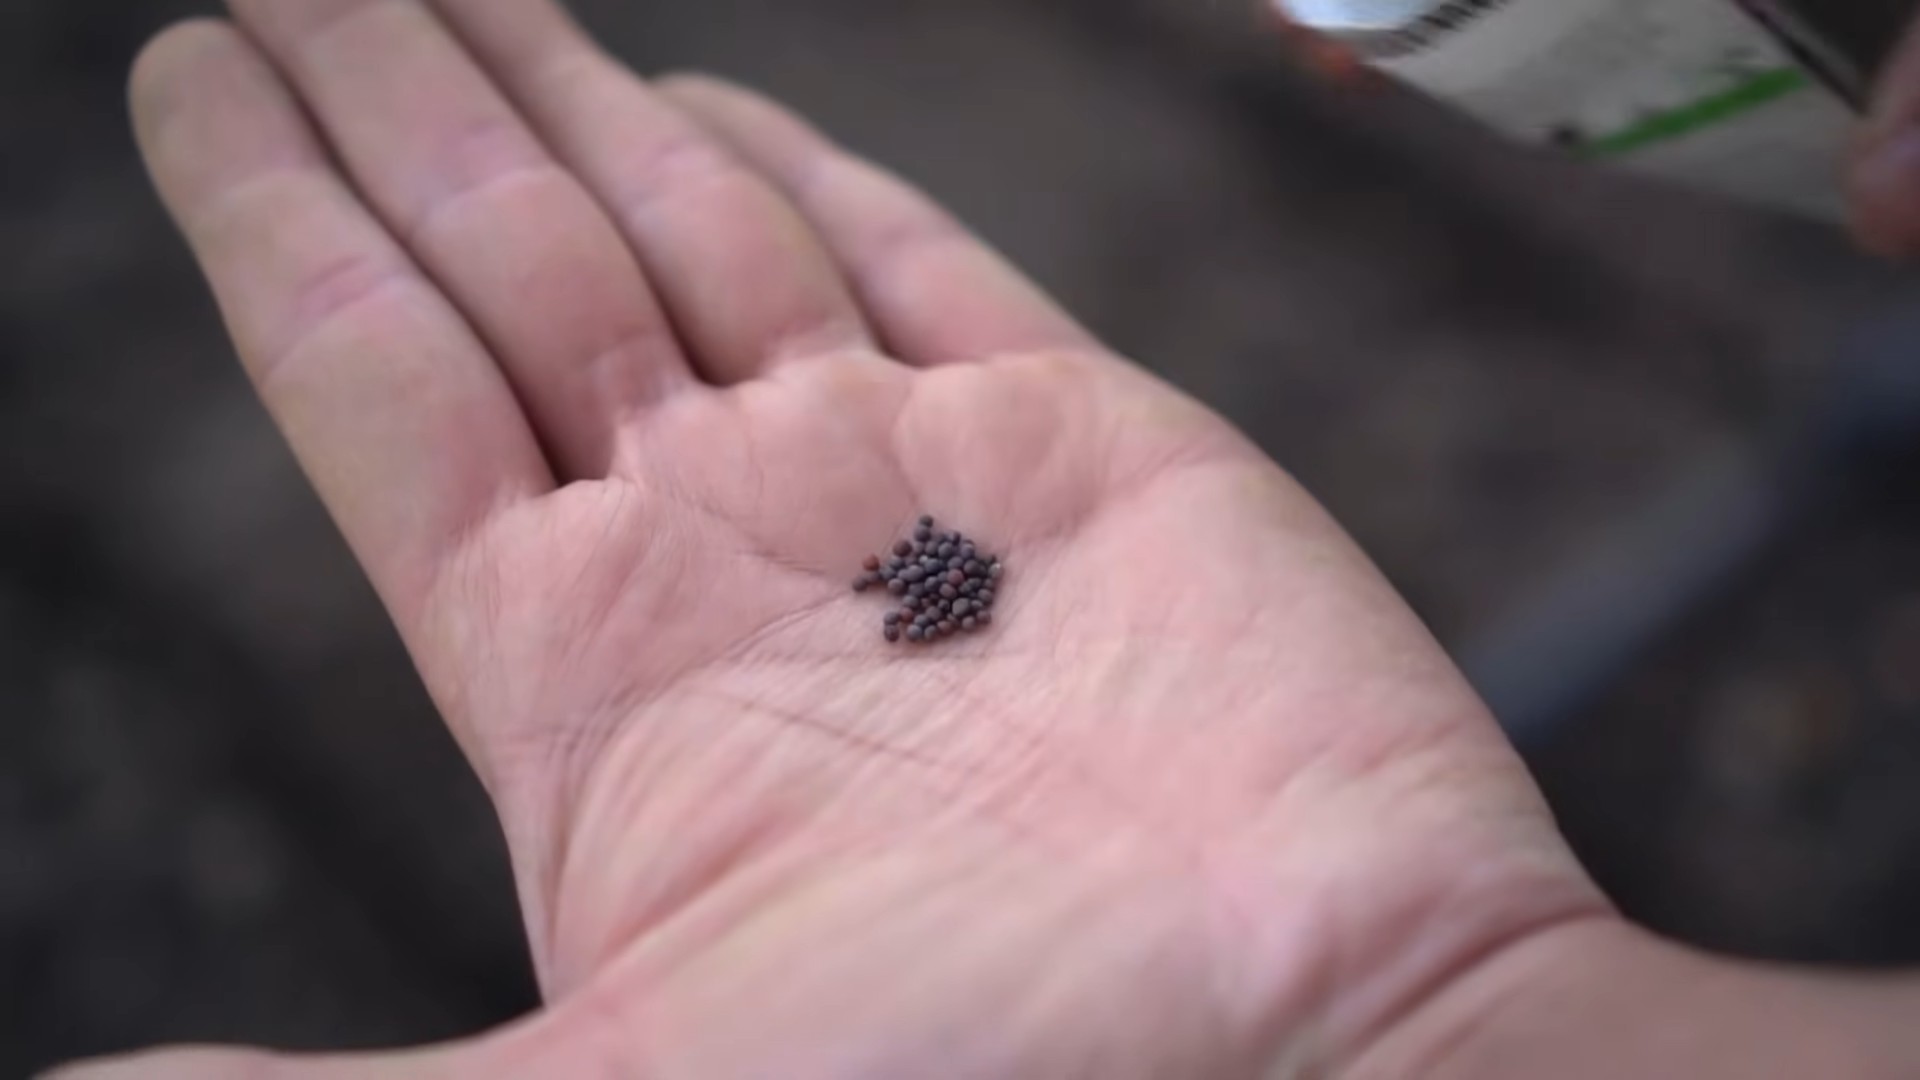
- Poor Germination: If your turnip seeds aren’t germinating well, it could be due to several factors. Make sure the soil is consistently moist but not waterlogged. The soil temperature should be between 60-70°F for optimal germination. Also, make sure your seeds are fresh. Turnip seeds can lose their viability over time.
Choosing the Right Turnip Variety First things first, let’s talk about varieties. Not all turnips are created equal, especially when space is a concern. You’ll want to opt for smaller, faster-maturing varieties. Here are a few of my favorites:
- ‘Tokyo Cross’: This is a super-fast grower, maturing in just about 30 days! The roots are small and round, perfect for quick harvests.
- ‘Hakurei’: Another excellent choice, ‘Hakurei’ turnips are mild and sweet, and their greens are delicious too! They mature in around 35 days.
- ‘Purple Top White Globe’: While slightly larger than the others, this variety is still manageable in containers and offers a classic turnip flavor. Expect about 50-60 days to maturity.
Preparing Your Growing Space
Okay, now that we’ve picked our turnip stars, let’s get our growing space ready. This is crucial for success, so pay close attention!
- Container Selection: Choose containers that are at least 6-8 inches deep. Turnips need room for their roots to develop. I prefer using wide, shallow containers rather than tall, narrow ones. This allows for better root development and air circulation. You can use plastic pots, terracotta pots, or even repurposed containers like old buckets or tubs. Just make sure they have drainage holes!
- Soil Preparation: Turnips love well-drained, fertile soil. I recommend using a good quality potting mix. You can also amend your potting mix with compost or well-rotted manure to boost its nutrient content. Avoid using garden soil directly in containers, as it can become compacted and doesn’t drain as well. A good mix I like to use is 2 parts potting mix, 1 part compost, and 1 part perlite for extra drainage.
- Sunlight: Turnips need at least 6 hours of sunlight per day. If you’re growing them indoors or on a shady balcony, you might need to supplement with grow lights. I’ve had great success using LED grow lights, which are energy-efficient and provide the right spectrum of light for plant growth.
Planting Your Turnip Seeds
Alright, time to get those seeds in the ground! This is the fun part.
- Sowing the Seeds: Sow the turnip seeds directly into your prepared containers. Sprinkle the seeds evenly over the surface of the soil, spacing them about 1-2 inches apart. You can also sow them in rows if you prefer.
- Covering the Seeds: Gently cover the seeds with a thin layer of soil, about ¼ inch deep. Turnip seeds are small and don’t need to be buried too deep.
- Watering: Water the soil gently but thoroughly after planting. You want to keep the soil consistently moist but not waterlogged. I like to use a watering can with a gentle rose attachment to avoid disturbing the seeds.
- Germination: Keep the soil moist and warm, and you should see seedlings emerge in about 5-7 days.
Caring for Your Turnip Plants
Now that your turnip seedlings are up and growing, it’s time to provide them with the care they need to thrive.
- Thinning: Once the seedlings have a few true leaves, you’ll need to thin them out. This means removing some of the seedlings to give the remaining ones enough space to grow. Aim for a spacing of about 3-4 inches between plants. Don’t throw away the thinned seedlings! You can eat them as microgreens.
- Watering: Water your turnip plants regularly, especially during dry spells. The soil should be consistently moist but not soggy. Overwatering can lead to root rot, so be careful. I usually check the soil moisture by sticking my finger about an inch deep. If it feels dry, it’s time to water.
- Fertilizing: Turnips are relatively light feeders, but they will benefit from occasional fertilization. I like to use a balanced organic fertilizer, such as fish emulsion or compost tea. Apply the fertilizer according to the package directions. Avoid over-fertilizing, as this can lead to excessive foliage growth at the expense of root development.
- Weeding: Keep your containers free of weeds. Weeds compete with your turnip plants for nutrients and water. Gently pull out any weeds that appear.
- Pest Control: Turnips can be susceptible to certain pests, such as aphids and flea beetles. Inspect your plants regularly for signs of infestation. If you spot any pests, you can try spraying them with insecticidal soap or neem oil. I prefer using organic pest control methods whenever possible.
Harvesting Your Turnips
The moment we’ve all been waiting for – harvest time!
- When to Harvest: The timing of your harvest will depend on the variety of turnip you’re growing and your personal preference. Generally, you can start harvesting turnips when the roots are about 2-3 inches in diameter. For ‘Tokyo Cross’ and ‘Hakurei’, this will be around 30-40 days after planting. ‘Purple Top White Globe’ will take a bit longer.
- How to Harvest: To harvest your turnips, gently loosen the soil around the roots with a trowel or garden fork. Then, grasp the greens near the base of the plant and pull the turnip out of the soil. If the soil is dry, you may need to water it beforehand to make it easier to pull the turnips.
- Storing Your Turnips: After harvesting, remove the greens from the turnips, leaving about an inch of stem attached. Store the turnips in the refrigerator in a plastic bag or container. They should keep for several weeks. The greens can also be stored in the refrigerator, but they will wilt more quickly. I like to use them within a few days of harvesting.
Enjoying Your Homegrown Turnips
Congratulations! You’ve successfully grown turnips in a small space. Now it’s time to enjoy the fruits (or rather, roots) of your labor.
- Eating the Roots: Turnip roots can be eaten raw, cooked, or pickled. They have a slightly peppery flavor that is delicious in salads, soups, stews, and stir-fries. I love roasting them with other root vegetables like carrots and potatoes.
- Eating the Greens: Don’t forget about the greens! Turnip greens are packed with nutrients and have a slightly bitter flavor. They can be eaten raw in salads or cooked like spinach or kale. I often sauté them with garlic and olive oil for a simple and healthy side dish.
Troubleshooting Common Problems
Even with the best care, you might encounter some problems while growing turnips. Here are a few common issues and how to address them:
- Poor Germination: If your turnip seeds aren’t germinating well, it could be due to several factors. Make sure the soil is consistently moist but not waterlogged. The soil temperature should be between 60-70°F for optimal germination. Also, make sure your seeds are fresh. Turnip seeds can lose their viability over time.
- Slow Growth: If your turnip plants are growing slowly, it could be due to a lack of sunlight or nutrients. Make sure they’re getting at least 6 hours of sunlight per day. Fertilize them with a balanced organic fertilizer.
- Root Rot: Root rot is a fungal disease that can occur if the soil is too wet. Make sure your containers have good drainage. Avoid overwatering. If you suspect root rot, you can try treating the soil with a fungicide.
- Pest Infestations: As mentioned earlier, turnips can be susceptible to pests like aphids and flea beetles. Inspect your plants regularly and take action promptly if you spot any pests.
Tips for Maximizing Your Harvest
Want to get the most out of your small-space turnip garden? Here are a few extra tips:
- Succession Planting: Plant new turnip seeds every few weeks to ensure a continuous harvest throughout the growing season.
- Companion Planting: Plant turnips alongside other vegetables that benefit them. Good companion plants for turnips include beans, peas, and radishes.
- Vertical Gardening: If you’re really short on space, consider using vertical gardening techniques. You can grow turnips in hanging baskets or vertical planters.
- Microgreens:
Conclusion
So, there you have it! Growing turnips in small spaces is not only achievable but also incredibly rewarding. We’ve walked you through the process, highlighting the key steps and considerations for maximizing your yield, even with limited room. From selecting the right container and soil to understanding the specific needs of your turnip varieties, you’re now equipped with the knowledge to embark on this exciting gardening adventure.
But why is this DIY trick a must-try? Beyond the obvious benefit of fresh, homegrown produce, growing your own turnips offers a unique connection to your food. You control the entire process, ensuring that your turnips are free from harmful pesticides and bursting with flavor. Plus, the satisfaction of harvesting something you’ve nurtured from seed to table is simply unparalleled. It’s a fantastic way to engage with nature, even in the heart of a bustling city.
Growing turnips in small spaces is also a sustainable choice. By reducing your reliance on store-bought produce, you’re minimizing your carbon footprint and supporting a more localized food system. And let’s not forget the cost savings! Homegrown turnips are significantly cheaper than their supermarket counterparts, making this a budget-friendly way to add nutritious vegetables to your diet.
Don’t be afraid to experiment with different varieties of turnips to find your favorites. Consider adding companion plants like marigolds or nasturtiums to deter pests and attract beneficial insects. You can also try succession planting, sowing new seeds every few weeks to ensure a continuous harvest throughout the growing season. For a spicier kick, try growing Japanese turnips, known for their peppery flavor. If you prefer a milder taste, consider the ‘Golden Ball’ variety.
Variations to consider:
* **Vertical Gardening:** If you’re truly limited on horizontal space, explore vertical gardening options. Turnips can be grown in stacked planters or hanging baskets, adding a touch of greenery to your balcony or patio.
* **Hydroponics:** For a more advanced approach, consider hydroponic gardening. This method involves growing turnips in nutrient-rich water without soil, allowing for precise control over growing conditions and potentially faster growth rates.
* **Container Size Experimentation:** While we’ve recommended specific container sizes, don’t be afraid to experiment. Smaller containers might work for smaller turnip varieties, while larger containers could accommodate multiple plants.We’re confident that you’ll find growing turnips in small spaces to be a fun, fulfilling, and delicious experience. Now it’s your turn to get your hands dirty! Grab your seeds, prepare your containers, and get ready to enjoy the fruits (or rather, the roots) of your labor.
We’d love to hear about your experiences! Share your tips, tricks, and photos with us in the comments below. Let’s create a community of small-space turnip growers and inspire others to embrace the joy of homegrown produce. What varieties did you try? What challenges did you face, and how did you overcome them? Your insights could be invaluable to other aspiring gardeners. So, go ahead, give it a try, and let us know how it goes! Happy gardening!
Frequently Asked Questions (FAQs)
What is the best time of year to start growing turnips in small spaces?
The best time to start growing turnips depends on your climate. Turnips are a cool-season crop, meaning they thrive in cooler temperatures. In most regions, the ideal time to plant turnips is in early spring or late summer/early fall. For a spring crop, sow seeds 4-6 weeks before the last expected frost. For a fall crop, sow seeds 6-8 weeks before the first expected frost. Check your local weather forecast and planting guides for specific recommendations for your area. Avoid planting during the hottest months of summer, as high temperatures can cause turnips to bolt (go to seed) prematurely, resulting in bitter-tasting roots.
What type of soil is best for growing turnips in containers?
Turnips prefer well-draining, fertile soil with a slightly acidic to neutral pH (around 6.0 to 7.0). A good potting mix for containers should be lightweight and retain moisture without becoming waterlogged. You can create your own mix by combining equal parts of:
* Compost: Provides essential nutrients and improves soil structure.
* Peat moss or coconut coir: Helps retain moisture.
* Perlite or vermiculite: Improves drainage and aeration.Avoid using garden soil in containers, as it can be too heavy and compact, hindering root growth. Before planting, amend the soil with a slow-release fertilizer to provide a steady supply of nutrients throughout the growing season.
How much sunlight do turnips need when grown in containers?
Turnips need at least 6 hours of direct sunlight per day to thrive. Choose a location for your containers that receives ample sunlight, such as a sunny balcony, patio, or windowsill. If you don’t have access to enough natural light, you can supplement with grow lights. Position the grow lights a few inches above the plants and provide 12-14 hours of light per day. Rotate the containers regularly to ensure that all sides of the plants receive adequate sunlight.
How often should I water my container-grown turnips?
Water turnips regularly, especially during dry periods. The soil should be consistently moist but not waterlogged. Check the soil moisture by sticking your finger about an inch deep. If the soil feels dry, it’s time to water. Water deeply, allowing the water to drain out of the bottom of the container. Avoid overhead watering, as this can promote fungal diseases. Instead, water at the base of the plants. Reduce watering frequency during cooler weather.
What are some common pests and diseases that affect turnips, and how can I prevent them?
Turnips can be susceptible to several pests and diseases, including:
* **Aphids:** Small, sap-sucking insects that can weaken plants. Control aphids by spraying them with a strong stream of water or using insecticidal soap.
* **Flea beetles:** Small, jumping beetles that chew holes in leaves. Cover plants with row covers to prevent flea beetle infestations.
* **Root maggots:** Fly larvae that feed on turnip roots. Rotate crops and use diatomaceous earth to control root maggots.
* **Clubroot:** A fungal disease that causes swollen, distorted roots. Prevent clubroot by maintaining a soil pH of 7.0 or higher and practicing crop rotation.To prevent pests and diseases, choose disease-resistant varieties, practice good sanitation (remove dead leaves and debris), and provide adequate air circulation.
How do I know when my turnips are ready to harvest?
Turnips are typically ready to harvest 50-60 days after planting, depending on the variety. The size of the roots will vary depending on the variety, but generally, they should be about 2-3 inches in diameter. To check for ripeness, gently pull back the soil around the base of the plant and examine the root. If the root is the desired size and firm to the touch, it’s ready to harvest. You can also harvest the turnip greens at any time for a continuous supply of leafy greens.
Can I eat both the turnip roots and the greens?
Yes, both the turnip roots and the greens are edible and nutritious. The roots have a slightly sweet and peppery flavor, while the greens have a more pungent, mustard-like taste. The roots can be eaten raw, roasted, boiled, or mashed. The greens can be eaten raw in salads or cooked like spinach. Both the roots and greens are rich in vitamins, minerals, and fiber.
How do I store harvested turnips?
To store harvested turnips, remove the greens and wash the roots thoroughly. Allow the roots to dry completely before storing them in a cool, dark, and humid place, such as a refrigerator or root cellar. Store the turnips in a plastic bag or container to prevent them from drying out. Properly stored turnips can last for several months. The greens can be stored in the refrigerator for up to a week.
Can I grow turnips in containers indoors?
Yes, you can grow turnips in containers indoors, but you’ll need to provide them with adequate light and ventilation. Choose a sunny windowsill or supplement with grow lights. Ensure that the containers have drainage holes and use a well-draining potting mix. Water regularly and fertilize every few weeks. Indoor-grown turnips may not grow as large as outdoor-grown turnips, but you can still enjoy a harvest of fresh, homegrown produce.
Leave a Comment