
Hanging sweet potato harvest – the words alone conjure images of lush, cascading vines overflowing with vibrant, earthy treasures! Have you ever dreamed of harvesting your own sweet potatoes, but thought you didn’t have the space? Or perhaps you’re simply looking for a unique and visually stunning way to grow your own food? Well, get ready to ditch the traditional garden bed because I’m about to share some incredible DIY tricks that will have you harvesting a bountiful hanging sweet potato harvest in no time!
The practice of growing sweet potatoes dates back thousands of years, with evidence suggesting cultivation as early as 750 BC in Peru. These nutrient-rich tubers have been a staple food source for countless cultures, prized not only for their delicious flavor but also for their resilience and adaptability. Now, we’re taking this ancient crop and giving it a modern twist!
Let’s face it, not everyone has access to a sprawling backyard. Apartment dwellers, balcony gardeners, and even those with limited mobility can often feel excluded from the joys of growing their own food. That’s where these DIY hanging sweet potato tricks come in. By utilizing vertical space, we can maximize our yields and create a beautiful, edible display. Plus, growing sweet potatoes in containers helps to control soil conditions and minimize pest problems. So, whether you’re a seasoned gardener or a complete beginner, these hacks will empower you to enjoy the satisfaction of harvesting your own homegrown sweet potatoes, right from your own hanging garden!
DIY Hanging Sweet Potato Harvest: From Vine to Table
Alright, let’s dive into a fun and rewarding project: growing sweet potatoes in hanging baskets! I’ve found this method to be surprisingly effective, space-saving, and just plain cool. Plus, harvesting is a breeze. Get ready to enjoy some homegrown goodness!
What You’ll Need
Before we get our hands dirty, let’s gather the essentials. Here’s a list of what you’ll need to create your own hanging sweet potato garden:
* Sweet Potato Slips: These are sprouts grown from a sweet potato. You can buy them online or at a local nursery, or even grow your own (more on that later!). Look for healthy slips with good root development.
* Hanging Baskets: Choose baskets that are at least 12 inches in diameter and depth. The bigger, the better, as sweet potatoes need room to grow. Wire baskets with coco coir liners work great, but you can also use plastic hanging pots.
* Potting Mix: Use a high-quality, well-draining potting mix. Avoid garden soil, as it can become compacted in containers. I like to use a mix specifically formulated for vegetables.
* Slow-Release Fertilizer: Sweet potatoes are heavy feeders, so a slow-release fertilizer will provide them with the nutrients they need throughout the growing season. Look for a balanced formula.
* Watering Can or Hose: Essential for keeping your sweet potatoes hydrated.
* Gloves: To protect your hands from the soil.
* Trowel or Small Shovel: For planting the slips.
* Optional:
* Coco Coir or Peat Moss: To improve water retention in the potting mix.
* Perlite or Vermiculite: To improve drainage.
* Mycorrhizae: Beneficial fungi that can help your sweet potatoes absorb nutrients.
Growing Your Own Sweet Potato Slips (Optional but Recommended!)
If you’re feeling ambitious, you can grow your own sweet potato slips. It’s a fun way to start the process and save some money. Here’s how:
1. Choose a Sweet Potato: Select a healthy, organic sweet potato. Avoid any with soft spots or blemishes.
2. Prepare the Sweet Potato: You have two options:
* Water Method: Suspend the sweet potato in a jar or glass of water, with the bottom half submerged. You can use toothpicks to hold it in place.
* Soil Method: Bury the sweet potato horizontally in a container filled with moist potting mix, leaving the top exposed.
3. Provide Warmth and Light: Place the sweet potato in a warm, sunny location.
4. Wait and Watch: In a few weeks, you should start to see sprouts (slips) emerging from the sweet potato.
5. Harvest the Slips: Once the slips are 6-8 inches long, gently twist them off the sweet potato.
6. Root the Slips: Place the slips in a glass of water, allowing them to develop roots. This usually takes about a week.
7. Plant the Slips: Once the roots are an inch or two long, they’re ready to be planted in your hanging baskets.
Planting Your Sweet Potato Slips
Now for the fun part – planting! Follow these steps to get your sweet potato slips off to a great start:
1. Prepare the Hanging Basket: If you’re using a wire basket with a coco coir liner, make sure the liner is securely in place.
2. Fill the Basket with Potting Mix: Fill the basket with potting mix, leaving a few inches of space at the top.
3. Add Slow-Release Fertilizer: Mix the slow-release fertilizer into the potting mix according to the package directions.
4. Plant the Slips: Gently dig a small hole in the potting mix for each slip. Plant the slips about 4-6 inches apart, burying the roots and the bottom part of the stem.
5. Water Thoroughly: Water the newly planted slips thoroughly, until water drains out of the bottom of the basket.
6. Hang the Basket: Choose a location that receives at least 6-8 hours of sunlight per day. Make sure the basket is securely hung and can support the weight of the mature sweet potato plant.
Caring for Your Hanging Sweet Potato Plants
Once your sweet potato slips are planted, it’s important to provide them with the care they need to thrive. Here’s what you need to do:
1. Water Regularly: Sweet potatoes need consistent moisture, especially during hot weather. Water deeply whenever the top inch of soil feels dry to the touch. Avoid overwatering, as this can lead to root rot.
2. Fertilize as Needed: Even with slow-release fertilizer, you may need to supplement with liquid fertilizer during the growing season. Use a balanced fertilizer diluted to half strength, and apply it every few weeks.
3. Prune the Vines: Sweet potato vines can grow quite long, so you may need to prune them to keep them from becoming too unruly. You can also prune the vines to encourage the plant to put more energy into producing tubers.
4. Watch for Pests and Diseases: Sweet potatoes are generally pest-resistant, but they can be susceptible to certain pests and diseases, such as aphids, spider mites, and fungal diseases. Inspect your plants regularly and take action if you notice any problems. Insecticidal soap or neem oil can be effective for controlling many pests. For fungal diseases, ensure good air circulation and avoid overwatering.
5. Provide Support: As the sweet potatoes grow, the vines may become heavy and need support. You can use stakes or trellises to support the vines and keep them off the ground.
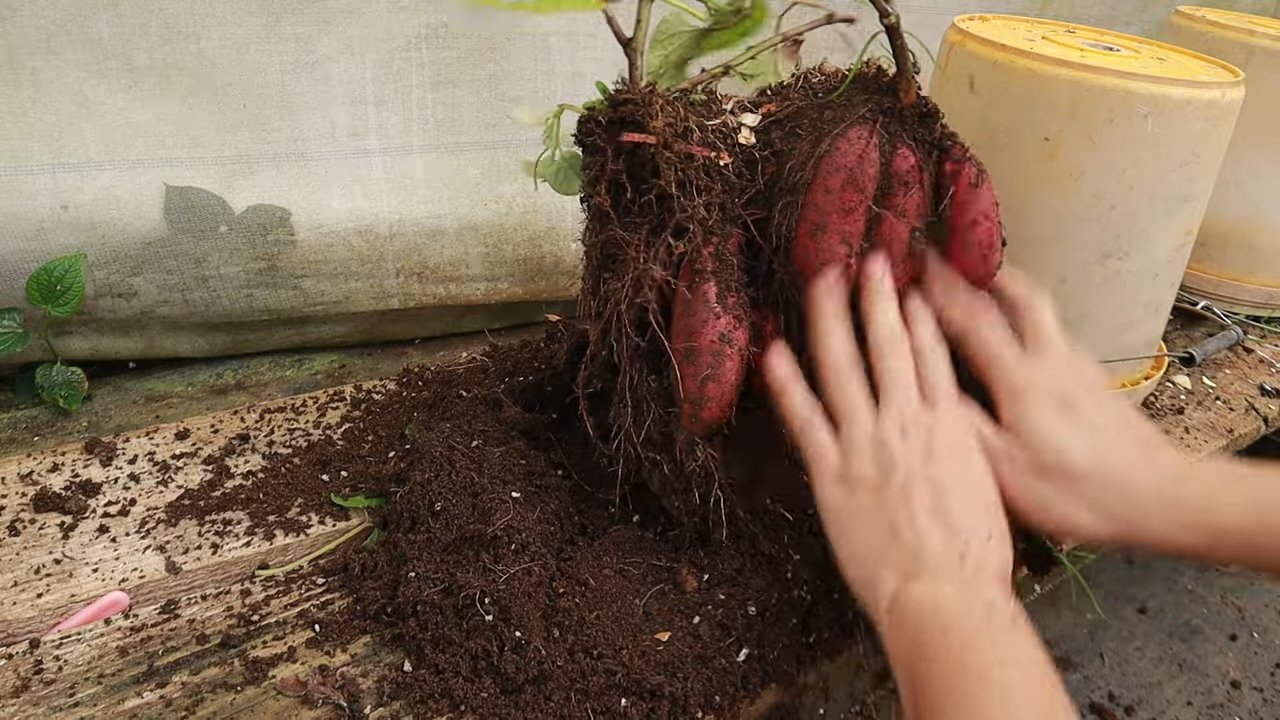
Harvesting Your Hanging Sweet Potatoes
The moment you’ve been waiting for! Harvesting your own sweet potatoes is incredibly satisfying. Here’s how to know when and how to harvest:
1. Timing is Key: Sweet potatoes are typically ready to harvest about 90-120 days after planting. The leaves will start to turn yellow and the vines may begin to die back.
2. Check for Maturity: You can gently dig around the base of the plant to check the size of the sweet potatoes. If they’re a good size (about the size of your fist or larger), they’re ready to harvest.
3. Harvesting: The beauty of growing sweet potatoes in hanging baskets is that harvesting is super easy! Simply tip the basket over and gently remove the sweet potatoes from the soil. You may need to loosen the soil around the potatoes to make them easier to remove.
4. Curing: Curing is an important step in the sweet potato harvesting process. It helps to heal any cuts or bruises on the potatoes and improves their flavor and storage life. To cure sweet potatoes, place them in a warm, humid location (80-85°F and 85-90% humidity) for about a week. A greenhouse or a warm room with a humidifier works well.
5. Storing: After curing, store your sweet potatoes in a cool, dry, and dark place (55-60°F). They should keep for several months.
Troubleshooting
Even with the best care, you may encounter some challenges when growing sweet potatoes. Here are some common problems and how to address them:
* Yellowing Leaves: This could be a sign of nutrient deficiency, overwatering, or underwatering. Check the soil moisture and fertilize if necessary.
* Slow Growth: This could be due to lack of sunlight, poor soil, or cool temperatures. Make sure your sweet potatoes are getting enough sunlight and that the soil is well-draining and fertile.
* Pests: Inspect your plants regularly for pests and take action if you notice any problems.
* Root Rot: This is caused by overwatering. Make sure the soil is well-draining and avoid watering too frequently.
Enjoy Your Harvest!
Congratulations! You’ve successfully grown your own sweet potatoes in hanging baskets. Now it’s time to enjoy the fruits (or rather, tubers) of your labor. Sweet potatoes are incredibly versatile and can be used in a variety of dishes, from sweet potato fries to sweet potato pie. Enjoy!

Conclusion
So, there you have it! Transforming your sweet potato harvest into stunning, space-saving hanging planters is not just a practical solution for storage; it’s a beautiful way to extend the joy of your garden indoors. This DIY trick is a must-try for several compelling reasons. First, it’s incredibly resourceful, utilizing the natural sprouting tendencies of sweet potatoes to create living art. Instead of simply storing your harvest in a dark, cool place, you’re actively encouraging growth and adding a touch of vibrant greenery to your home. Second, it’s a conversation starter! Imagine the delight of your guests when they see these unique, cascading vines adorning your living space. It’s a testament to your creativity and resourcefulness as a gardener.
But beyond the aesthetic appeal, this method offers practical benefits. By allowing the sweet potatoes to sprout, you’re essentially pre-germinating them for future planting. You can carefully detach the slips (the sprouts) and root them in water to create new sweet potato plants for next year’s garden. This ensures a continuous cycle of homegrown goodness.
Why is this DIY trick a must-try? Because it combines beauty, practicality, and sustainability in one simple project. It’s a way to celebrate your harvest, extend the growing season, and add a unique touch to your home decor.
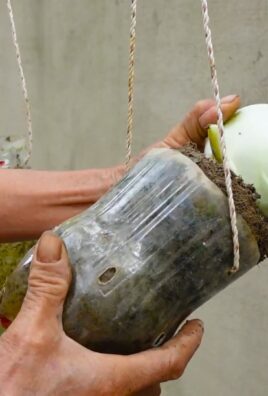
Don’t be afraid to experiment with variations! Try using different varieties of sweet potatoes to create a diverse range of foliage colors and textures. You can also add decorative elements to your hanging planters, such as colorful ribbons, twine, or even small, lightweight ornaments. Consider using different types of containers for your sweet potatoes. While traditional baskets work well, you could also repurpose old buckets, metal containers, or even woven bags. Just ensure that the container has adequate drainage to prevent waterlogging.
Another fun variation is to incorporate other vining plants into the arrangement. Trailing herbs like rosemary or thyme can add a fragrant element, while flowering vines like nasturtiums can provide pops of color. Be mindful of the light and water requirements of any companion plants you choose.
We strongly encourage you to give this DIY sweet potato hanging planter trick a try. It’s a rewarding project that will bring beauty and joy to your home. And most importantly, share your experience with us! We’d love to see your creations and hear about any tips or tricks you discover along the way. Post photos of your hanging sweet potato planters on social media using [Your Hashtag Here] and let’s inspire others to embrace this creative and sustainable gardening practice. Let’s transform our sweet potato harvests into living works of art!
FAQ
What type of sweet potatoes work best for hanging planters?
Generally, any variety of sweet potato can be used for creating hanging planters. However, varieties that tend to produce longer, more trailing vines are particularly well-suited. Beauregard, with its vigorous growth habit, is a popular choice. Jewel sweet potatoes also work well and offer a slightly different foliage color. Experiment with different varieties to see which ones thrive best in your environment and produce the most visually appealing vines. Keep in mind that the size of the sweet potato will also influence the size of the planter you create. Larger sweet potatoes will require larger containers.
How much light do hanging sweet potato planters need?
Sweet potatoes are sun-loving plants, so they need plenty of light to thrive. Ideally, your hanging sweet potato planter should receive at least 6 hours of direct sunlight per day. If you don’t have a spot that receives that much sunlight, you can supplement with artificial grow lights. A south-facing window is often the best location, but east- or west-facing windows can also work if they provide sufficient light. If the vines start to look leggy or pale, it’s a sign that they’re not getting enough light. Rotate the planter regularly to ensure that all sides receive equal exposure.
How often should I water my hanging sweet potato planter?
The watering frequency will depend on several factors, including the size of the sweet potato, the type of container, the temperature, and the humidity. As a general rule, water when the top inch of soil feels dry to the touch. Avoid overwatering, as this can lead to root rot. Ensure that your container has adequate drainage to prevent water from accumulating at the bottom. During hot, dry weather, you may need to water more frequently. During cooler, more humid weather, you may need to water less frequently. Check the soil moisture regularly and adjust your watering schedule accordingly.
Can I eat the sweet potatoes after they’ve sprouted?
While you can technically eat the sweet potatoes after they’ve sprouted, their texture and flavor may be affected. The sprouting process draws energy from the sweet potato, which can make it less sweet and more fibrous. Additionally, the sweet potato may start to develop a slightly bitter taste. If you do choose to eat the sprouted sweet potato, be sure to remove any sprouts or eyes before cooking. However, the primary purpose of this DIY project is to create a decorative planter, not to produce edible sweet potatoes. It’s best to use fresh, unsprouted sweet potatoes for cooking.
How do I propagate new sweet potato plants from the sprouts?
Propagating new sweet potato plants from the sprouts (slips) is a relatively easy process. Once the sprouts are several inches long, carefully detach them from the sweet potato. Place the slips in a glass of water, ensuring that the bottom portion of the stem is submerged. Change the water every few days to prevent bacterial growth. Within a week or two, the slips should start to develop roots. Once the roots are about an inch long, you can transplant the slips into individual pots filled with well-draining potting mix. Keep the soil moist and provide plenty of light. After a few weeks, the new sweet potato plants will be ready to be transplanted into your garden.
What kind of soil should I use for my hanging sweet potato planter?
Use a well-draining potting mix that is rich in organic matter. A mixture of peat moss, perlite, and vermiculite is a good option. You can also add compost or other organic amendments to improve the soil’s fertility and drainage. Avoid using garden soil, as it can be too heavy and may not drain well. The soil should be slightly acidic to neutral, with a pH between 6.0 and 7.0.
How long will my hanging sweet potato planter last?
The lifespan of your hanging sweet potato planter will depend on several factors, including the variety of sweet potato, the growing conditions, and your care. Generally, the planter will last for several months, or even up to a year, if properly cared for. As the sweet potato continues to sprout and grow, it will eventually deplete its energy reserves. At this point, the vines may start to decline. You can extend the lifespan of the planter by providing regular fertilization and ensuring that it receives adequate light and water. You can also propagate new plants from the sprouts to create a continuous cycle of growth.
Can I fertilize my hanging sweet potato planter?
Yes, fertilizing your hanging sweet potato planter can help to promote healthy growth and vibrant foliage. Use a balanced liquid fertilizer diluted to half strength. Apply the fertilizer every two to four weeks during the growing season. Avoid over-fertilizing, as this can lead to excessive foliage growth and reduced sweet potato production. Look for a fertilizer that is specifically formulated for vegetables or flowering plants.
Are there any pests or diseases that affect sweet potato plants?
Sweet potato plants are generally resistant to pests and diseases, but they can be susceptible to certain problems. Common pests include aphids, spider mites, and sweet potato weevils. Diseases include fungal infections such as root rot and stem rot. Inspect your plants regularly for signs of pests or diseases. If you notice any problems, take action promptly to prevent them from spreading. You can use insecticidal soap or neem oil to control pests. Ensure that your plants have good air circulation to prevent fungal diseases.
Can I grow sweet potatoes indoors year-round using this method?
While it’s possible to grow sweet potatoes indoors year-round using this method, it may require some adjustments to your care routine. Sweet potatoes need plenty of light, so you may need to supplement with artificial grow lights during the winter months. You’ll also need to adjust your watering and fertilization schedule to account for the changes in temperature and humidity. With proper care, you can enjoy the beauty and benefits of a hanging sweet potato planter year-round.


Leave a Comment