
Harvesting Watermelons at Home can feel like winning the lottery! Imagine sinking your teeth into a juicy, sweet watermelon you’ve nurtured from a tiny seed right in your own backyard. But how do you know when that glorious moment has arrived? That’s the million-dollar question, isn’t it?
For centuries, watermelons have been a symbol of summer, abundance, and pure joy. Originating in Africa, these refreshing fruits have traveled the globe, becoming a beloved treat in countless cultures. From elaborate watermelon carvings in Asian festivals to simple backyard picnics in America, the watermelon holds a special place in our hearts (and stomachs!).
Let’s be honest, nobody wants to slice into a watermelon only to discover it’s pale, tasteless, and disappointing. That’s where these DIY tricks and hacks come in! I’m going to share my tried-and-true methods for harvesting watermelons at home at the peak of their ripeness. Forget the guesswork and say goodbye to bland watermelons forever. With these simple tips, you’ll be enjoying the sweetest, most flavorful watermelons you’ve ever tasted, all thanks to your own green thumb. Get ready to impress your friends and family with your watermelon-growing prowess!
Harvesting Watermelons at Home: A Beginner’s Guide
Okay, so you’ve poured your heart and soul (and probably a lot of water!) into growing watermelons. Now comes the exciting part: harvesting! But how do you know when those beauties are ripe and ready to be plucked from the vine? Don’t worry, I’m here to guide you through the process. It’s not rocket science, but there are a few key things to look for to ensure you’re enjoying the sweetest, juiciest watermelon possible.
Understanding Watermelon Ripening
Before we dive into the harvesting steps, let’s quickly cover what happens as a watermelon ripens. This will help you understand *why* we’re looking for certain signs.
* **Sugar Development:** As the watermelon matures, it converts starches into sugars. This is what gives it that delicious sweetness we all crave.
* **Flesh Color Change:** The flesh inside the watermelon will transition from a pale pink or white to a vibrant red or pink, depending on the variety.
* **Vine Attachment Changes:** The vine connecting the watermelon to the main plant will start to dry and brown as the fruit ripens.
* **Ground Spot Development:** The “ground spot,” where the watermelon rests on the ground, will change color.
Signs Your Watermelon is Ready to Harvest
Here’s a handy checklist of things to look for when determining if your watermelon is ripe:
* **The Tendril Test:** Look for the tendril closest to the watermelon stem. When this tendril turns brown and dries up, it’s a good indicator that the watermelon is nearing ripeness.
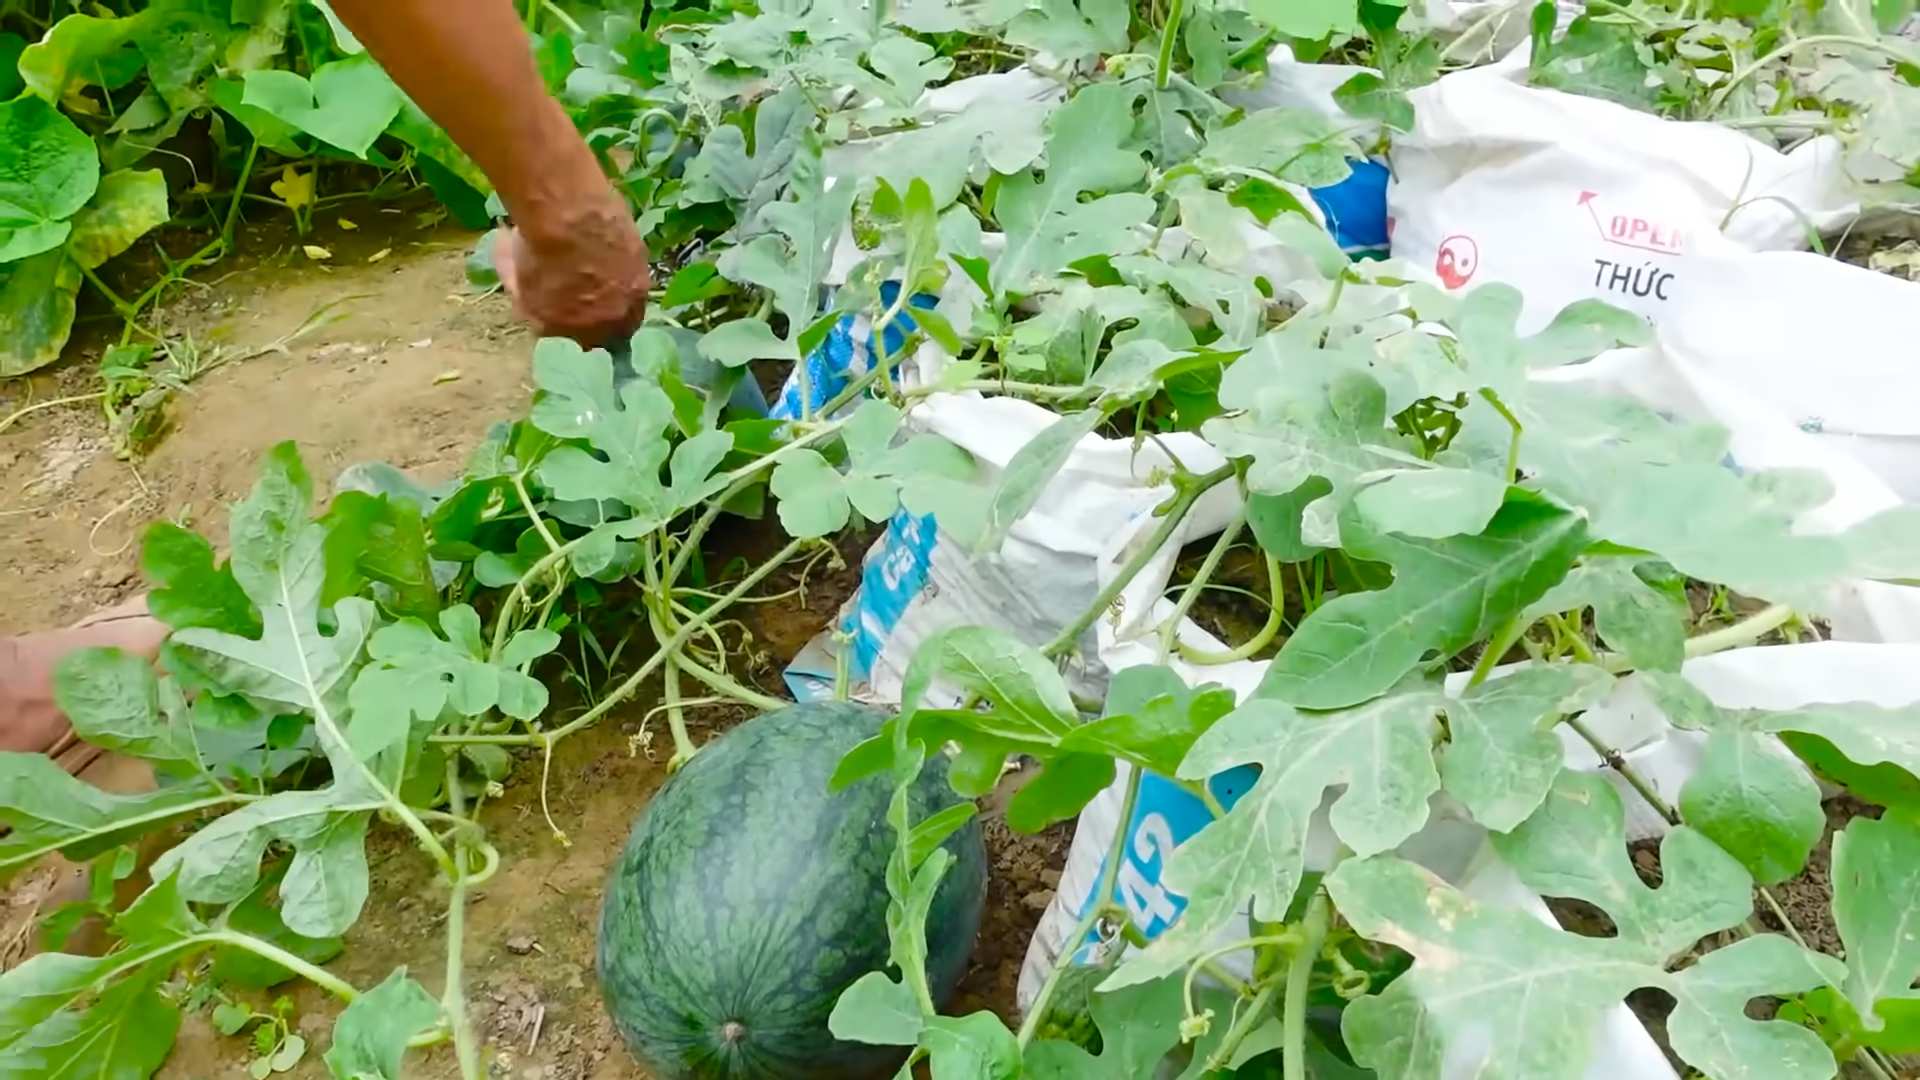
* **The Ground Spot Check:** The ground spot should change from a pale white or green to a creamy yellow or even a deep orange. This is a crucial sign!
* **The Thump Test:** This is the classic method! Give the watermelon a gentle thump. A ripe watermelon will sound deep and hollow. An unripe watermelon will sound dull and solid. It takes some practice to get the hang of this, but you’ll get there!
* **The Skin Appearance:** The skin should be dull and waxy, not shiny. The color should be consistent for the variety you’re growing.
* **Days to Maturity:** Check the seed packet or plant tag for the “days to maturity.” This is an estimate of how long it takes for the watermelon to ripen after planting. Keep in mind that weather conditions can affect this timeline.
Harvesting Your Watermelon: Step-by-Step Guide
Alright, let’s get down to business! Here’s how to harvest your watermelon:
1. **Gather Your Supplies:** You’ll need a sharp knife or pruning shears. Make sure they’re clean to prevent the spread of disease. I like to use my trusty pruning shears – they’re easy to handle and give a clean cut.
2. **Inspect the Watermelon:** Before you cut anything, double-check all the signs of ripeness we discussed earlier. Make sure the tendril is dry, the ground spot is the right color, and the thump sounds right.
3. **Cut the Stem:** Using your knife or pruning shears, carefully cut the stem of the watermelon, leaving about 2-3 inches of stem attached to the fruit. This helps prevent rot and extends the shelf life of your watermelon. Be careful not to damage the watermelon itself!
4. **Gently Lift the Watermelon:** Lift the watermelon carefully and place it in a safe spot. Watermelons can be heavy, so be sure to lift with your legs, not your back!
5. **Repeat for Other Ripe Watermelons:** Check your other watermelons and harvest any that are ready.
What to Do After Harvesting
Now that you’ve harvested your watermelon, here’s what to do next:
1. **Clean the Watermelon:** Gently wipe down the watermelon with a clean, damp cloth to remove any dirt or debris.
2. **Store the Watermelon:** You can store uncut watermelons at room temperature for about a week. For longer storage, refrigerate them. Cut watermelons should always be refrigerated.
3. **Enjoy Your Harvest!** The best part! Slice it up and enjoy the fruits (or vegetables!) of your labor.
Troubleshooting: Common Problems and Solutions
Sometimes, things don’t go exactly as planned. Here are a few common problems you might encounter and how to deal with them:
* **Watermelon is Ripe but the Tendril is Still Green:** This can happen, especially if the weather has been unusual. Rely on the other signs of ripeness, such as the ground spot and the thump test. If you’re still unsure, it’s better to err on the side of caution and wait a few more days.
* **Watermelon is Overripe:** An overripe watermelon will have a soft, mushy texture and may taste bland or even fermented. Unfortunately, there’s not much you can do to salvage an overripe watermelon. You can try using it to make juice or smoothies, but the flavor won’t be as good.
* **Watermelon is Not Sweet Enough:** This could be due to a number of factors, such as poor soil, insufficient sunlight, or harvesting too early. Make sure your soil is rich in nutrients and that your watermelons are getting at least 6-8 hours of sunlight per day. And, of course, be patient and wait until they’re fully ripe before harvesting!
Tips for Growing Even Better Watermelons Next Year
Want to improve your watermelon-growing game for next year? Here are a few tips:
* **Choose the Right Variety:** Select a watermelon variety that is well-suited to your climate and growing conditions.
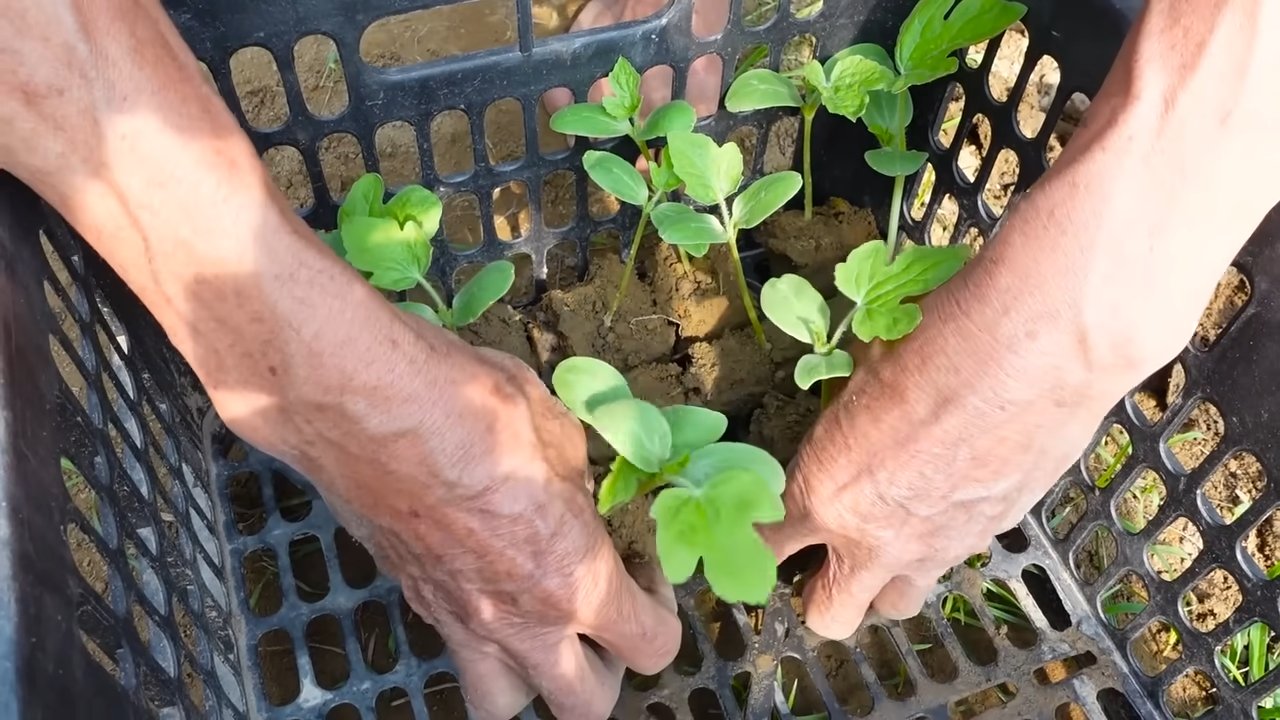
* **Prepare the Soil:** Watermelons need well-drained, fertile soil. Amend your soil with compost or other organic matter before planting.
* **Provide Plenty of Sunlight:** Watermelons need at least 6-8 hours of sunlight per day.
* **Water Regularly:** Watermelons need consistent watering, especially during hot, dry weather.
* **Fertilize Appropriately:** Fertilize your watermelons with a balanced fertilizer according to the package directions.
* **Protect from Pests and Diseases:** Keep an eye out for pests and diseases and take action to control them if necessary.
A Deeper Dive: The Science Behind the Sweetness
Let’s get a little nerdy for a moment and talk about the science behind watermelon sweetness. The sugar content of a watermelon is primarily determined by two factors: genetics and environmental conditions.
* **Genetics:** Different watermelon varieties have different sugar levels. Some varieties are naturally sweeter than others.
* **Environmental Conditions:** Sunlight, temperature, and water availability all play a role in sugar development. Watermelons need plenty of sunlight to produce sugars through photosynthesis. Warm temperatures also promote sugar production. However, excessive heat can actually inhibit sugar development. Water stress can also reduce sugar levels.
By understanding these factors, you can take steps to optimize your growing conditions and maximize the sweetness of your watermelons.
The Importance of the Ground Spot
I want to emphasize the importance of the ground spot. It’s often overlooked, but it’s one of the most reliable indicators of ripeness. The ground spot is the area of the watermelon that rests on the ground. As the watermelon ripens, the ground spot changes color from a pale white or green to a creamy yellow or even a deep orange. This color change indicates that the watermelon has stopped growing and is focusing on developing sugars.
If the ground spot is still white or green, the watermelon is likely not ripe yet. Be patient and wait until the ground spot has turned yellow or orange before harvesting.
The Art of the Thump Test
The thump test is a classic method for determining watermelon ripeness, but it can be tricky to master. The idea is that a ripe watermelon will sound deep and hollow when you thump it, while an unripe watermelon will sound dull and solid.
Here are a few tips for performing the thump test:
* **Use Your Knuckles:** Gently thump the watermelon with your knuckles, not your fingertips.
* **Listen Carefully:** Pay attention to the sound. A ripe watermelon will resonate more than an unripe one.
* **Compare to Other Watermelons:** If you have multiple watermelons, thump them all and compare the sounds.
* **Practice Makes Perfect:** The more you practice, the better you’ll become at distinguishing between ripe and unripe watermelons.
Don’t be discouraged if you don’t get it right away. It takes time and experience to develop an ear for the thump test.
Beyond the Basics: Advanced Watermelon Growing Techniques
If you’re ready to take your watermelon-growing skills to the next level, here are a few advanced techniques to consider:
* **Grafting:** Grafting involves joining two different plants together to combine their desirable traits. For example, you can graft a watermelon onto a disease-resistant rootstock.
* **Pruning:** Pruning can help improve air circulation and sunlight penetration, which can lead to larger, sweeter watermelons.
* **Pollination:** Watermelons require pollination to produce fruit. If you’re growing water
Conclusion
So, there you have it! Mastering the art of harvesting watermelons at home isn’t just about saving money; it’s about connecting with the food you eat and experiencing the sheer joy of nurturing something from seed to table. It’s about biting into a perfectly ripe, juicy watermelon that you personally selected and harvested, knowing you avoided the disappointment of a bland, underripe store-bought melon.
This DIY trick, using the tendril test, the ground spot check, and the thump test, is a game-changer. It empowers you to confidently determine when your watermelon is at its peak ripeness, ensuring a sweet and satisfying reward for your gardening efforts. Forget the guesswork and the frustration of cutting into a watermelon only to find it’s not quite ready. This method is simple, effective, and, frankly, a must-try for any home gardener.
But don’t stop there! Experiment with different watermelon varieties. Try growing heirloom watermelons for a unique flavor profile. Consider companion planting to improve your watermelon’s growth and flavor. You could even try fermenting the rind for a delicious and probiotic-rich treat! The possibilities are endless.
And remember, gardening is a journey, not a destination. There will be successes and failures, but each experience is a learning opportunity. Don’t be discouraged if your first few watermelons aren’t perfect. Keep practicing, keep experimenting, and keep learning.
We are confident that this guide will help you enjoy the fruits (literally!) of your labor. Now, it’s your turn! Head out to your garden, put these tips into practice, and experience the satisfaction of harvesting your own perfectly ripe watermelons.
We’d love to hear about your experiences! Share your photos, tips, and stories in the comments below. Let us know what watermelon varieties you’re growing, what challenges you’ve faced, and what successes you’ve celebrated. Together, we can create a community of watermelon-loving gardeners who are passionate about growing and enjoying their own delicious, homegrown fruit. Happy harvesting!
Frequently Asked Questions (FAQs)
What if the tendril is brown, but the ground spot is still white?
This is a common scenario, and it requires a bit of judgment. While a brown tendril is a good indicator, the ground spot is equally important. If the tendril is brown but the ground spot is still pale or white, it likely needs a few more days. The ground spot should be a creamy yellow color, indicating that the watermelon has stopped ripening on the vine and is ready to be harvested. Monitor the ground spot closely and check again in a day or two. You can also use the thump test as an additional indicator. A dull, hollow sound is what you’re looking for.
How long does it typically take for a watermelon to ripen after the tendril turns brown?
This depends on the watermelon variety and the weather conditions. Generally, it takes about a week to ten days after the tendril closest to the watermelon turns brown for the watermelon to reach peak ripeness. However, warmer temperatures can accelerate the ripening process, while cooler temperatures can slow it down. Consistent monitoring of the ground spot and the sound of the thump is crucial during this period.
Can I harvest a watermelon if the tendril is still green?
It’s generally not recommended to harvest a watermelon if the tendril is still green. A green tendril indicates that the watermelon is still actively growing and ripening on the vine. Harvesting it at this stage will likely result in an underripe and less flavorful watermelon. Patience is key! Wait for the tendril to turn brown and dry before considering harvesting.
What if I don’t have a ground spot on my watermelon?
Some watermelon varieties may not develop a distinct ground spot. In these cases, rely more heavily on the tendril test and the thump test. The skin of the watermelon should also lose its glossy appearance and become slightly duller as it ripens. If the tendril is brown and the thump test produces a dull, hollow sound, it’s likely ready to harvest, even without a prominent ground spot.
Is the thump test reliable?
The thump test is a helpful indicator, but it’s not foolproof. It takes practice to develop an ear for the right sound. A ripe watermelon will typically produce a dull, hollow sound when thumped, while an unripe watermelon will sound more solid and high-pitched. The key is to compare the sound of different watermelons in your garden to get a better sense of what a ripe watermelon sounds like.
What’s the best time of day to harvest watermelons?
The best time of day to harvest watermelons is in the morning, after the dew has dried but before the heat of the day sets in. This is when the watermelon’s sugar content is at its highest, resulting in the sweetest flavor. Avoid harvesting watermelons in the heat of the afternoon, as they may be stressed and less flavorful.
How should I store a harvested watermelon?
A whole, uncut watermelon can be stored at room temperature for about a week. However, for optimal flavor and texture, it’s best to store it in a cool, dry place, such as a basement or garage. Once cut, watermelon should be refrigerated immediately in an airtight container. Cut watermelon will stay fresh in the refrigerator for about 3-5 days.
Can I ripen a watermelon after it’s been harvested?
Unfortunately, watermelons do not ripen further after they have been harvested. Unlike some fruits, watermelons stop ripening once they are removed from the vine. Therefore, it’s crucial to ensure that your watermelon is fully ripe before harvesting it. This is why using the tendril test, ground spot check, and thump test are so important.
What are some common mistakes people make when harvesting watermelons?
One of the most common mistakes is harvesting watermelons too early, resulting in an underripe and bland fruit. Another mistake is relying solely on one indicator, such as the size of the watermelon, without considering the other signs of ripeness. It’s also important to handle watermelons carefully during harvesting to avoid bruising or damaging the fruit.
How do I know if my watermelon is overripe?
An overripe watermelon may have a soft or mushy texture. The skin may also be dull and discolored. When you thump an overripe watermelon, it may sound more muffled than hollow. While an overripe watermelon may still be edible, it will likely not be as flavorful or enjoyable as a perfectly ripe one.
What are some watermelon varieties that are easy to grow for beginners?
Some watermelon varieties that are known for being relatively easy to grow for beginners include Sugar Baby, Bush Sugar Baby, and Black Diamond. These varieties are generally more compact and require less space than some of the larger watermelon varieties. They are also known for their good flavor and relatively short growing season.
How can I prevent pests and diseases from affecting my watermelon crop?
To prevent pests and diseases from affecting your watermelon crop, it’s important to practice good gardening hygiene. This includes removing weeds and debris from around your watermelon plants, providing adequate spacing between plants to allow for good air circulation, and watering your plants at the base to avoid wetting the foliage. You can also use organic pest control methods, such as insecticidal soap or neem oil, to control common watermelon pests.
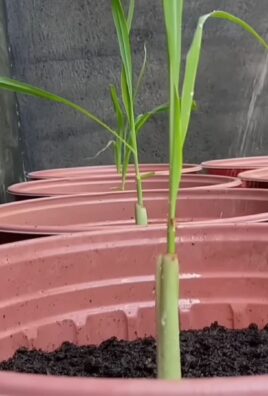
Is it possible to grow watermelons in containers?
Yes, it is possible to grow watermelons in containers, but it requires careful planning and attention. Choose a large container (at least 20 gallons) and use a high-quality potting mix. Select a compact or bush-type watermelon variety that is well-suited for container growing. Provide adequate sunlight (at least 6-8 hours per day) and water regularly. You may also need to provide support for the vines as they grow.
What are the benefits of growing my own watermelons?
There are many benefits to growing your own watermelons. You’ll have access to fresh, delicious, and locally grown fruit. You’ll also have control over the growing process, ensuring that your watermelons are free from harmful pesticides and chemicals. Growing your own watermelons can also be a rewarding and enjoyable experience, connecting you with nature and providing a sense of accomplishment. And of course, you’ll save money compared to buying watermelons from the store!
Leave a Comment