
Basil jar kitchen hack: Ever dream of having fresh, fragrant basil readily available right in your kitchen, no matter the season? I know I have! There’s something incredibly satisfying about snipping off a few leaves of homegrown basil to add that perfect touch to your pasta, pizza, or pesto. But let’s be honest, keeping basil alive and thriving can sometimes feel like a Herculean task, especially indoors.
For centuries, herbs like basil have been cherished not only for their culinary uses but also for their medicinal properties and even their symbolic meanings. In some cultures, basil represents love and good fortune! But beyond the romantic notions, the practicality of having fresh herbs at your fingertips is undeniable. That’s where this simple, yet ingenious, basil jar kitchen hack comes in.
This DIY trick is a game-changer because it addresses the common challenges of growing basil indoors: inconsistent watering, inadequate drainage, and lack of humidity. Forget about constantly monitoring the soil moisture or battling those pesky fungus gnats. This method creates a mini-ecosystem that promotes healthy root growth and provides the perfect environment for your basil to flourish. I’m so excited to share this easy and effective way to enjoy fresh basil all year round!
DIY Self-Watering Basil Jar: Keep Your Herbs Happy!
Hey there, fellow plant lovers! Are you tired of your basil wilting faster than you can say “pesto”? I know I was! That’s why I’m super excited to share this simple and effective DIY self-watering basil jar hack. It’s a game-changer for keeping your herbs happy and healthy, even if you’re a bit forgetful about watering (like me!). This project is perfect for beginners, requires minimal supplies, and will have you enjoying fresh basil all season long.
What You’ll Need:
* A wide-mouth mason jar (quart size is ideal, but adjust based on your basil plant’s size)
* A smaller plastic pot (that fits comfortably inside the mason jar with some space around it)
* Cotton rope or strips of cotton fabric (for wicking water)
* Potting mix (specifically formulated for herbs)
* Gravel or small rocks (for drainage)
* Your basil plant (either a starter plant from the store or a cutting you’ve rooted)
* Scissors
* Water
Step-by-Step Instructions:
Let’s get started! This project is so easy, you’ll be amazed at how quickly you can create your own self-watering basil oasis.
1. Prepare the Wicking System: This is the heart of our self-watering system. The wicking material will draw water from the reservoir in the mason jar up to the soil, keeping your basil consistently moist.
* Cut your cotton rope or fabric strips into lengths that are long enough to reach the bottom of the mason jar and extend up through the drainage holes of the plastic pot, with a bit extra to spread out in the soil. I usually aim for about 12-15 inches, but adjust based on the height of your jar and pot.
* If you’re using fabric strips, braid them together to create a thicker wick. This will help with water absorption.
* Thread the rope or fabric wicks through the drainage holes of the plastic pot. Make sure you have enough wicks to cover the bottom of the pot – I usually use 3-4 for a standard-sized pot. Leave a good amount of the wick hanging out of the bottom of the pot (at least 6 inches).
2. Create a Drainage Layer: This step is crucial for preventing root rot. Basil hates sitting in soggy soil, so good drainage is essential.
* Pour a layer of gravel or small rocks into the bottom of the plastic pot. This layer should be about 1-2 inches thick.
* The gravel will create space for excess water to drain away from the roots, preventing them from becoming waterlogged.
3. Add Potting Mix: Now it’s time to add the soil that will nourish your basil plant.
* Fill the plastic pot with potting mix, leaving about an inch of space at the top.
* Gently press down on the soil to compact it slightly.
* Make sure the wicks are still sticking up through the soil. Spread the top part of the wicks out a bit on the surface of the soil. This will help them draw water more effectively.
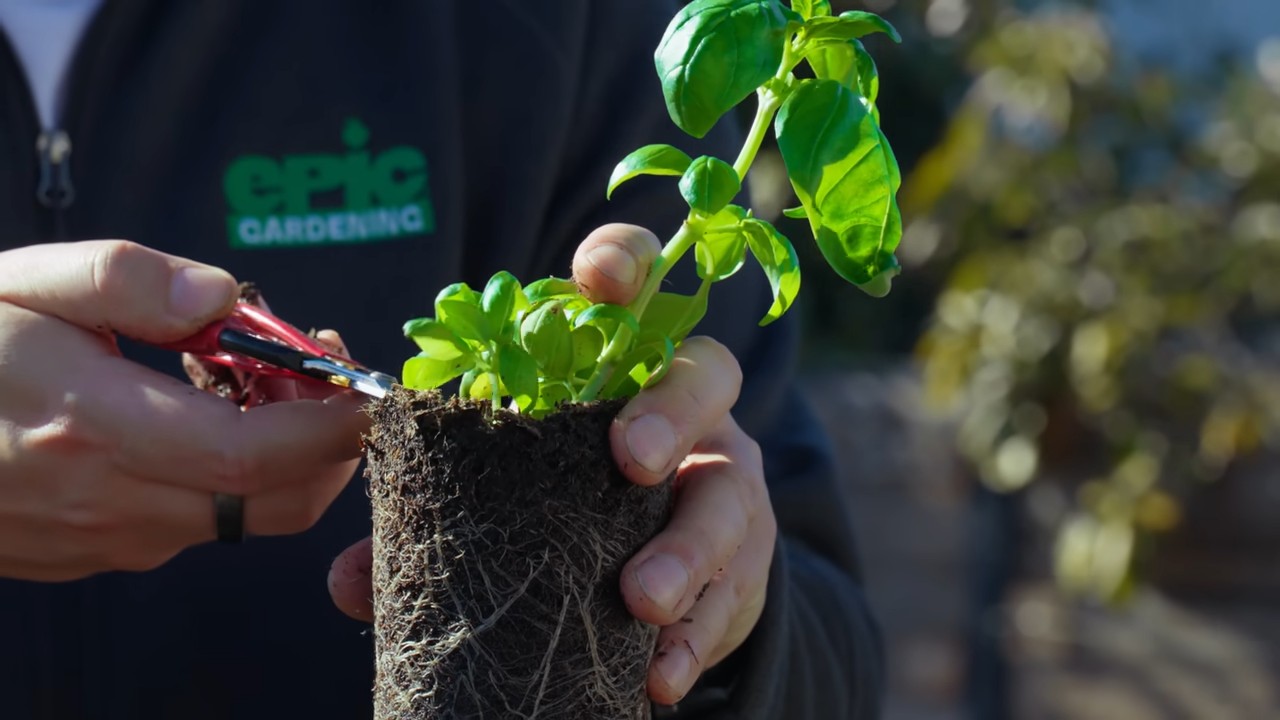
4. Plant Your Basil: Carefully remove your basil plant from its original container.
* Gently loosen the roots of the basil plant with your fingers. This will encourage them to grow outwards into the new soil.
* Dig a hole in the center of the potting mix in the plastic pot.
* Place the basil plant in the hole and gently backfill with potting mix.
* Make sure the top of the basil’s root ball is level with the surface of the potting mix.
* Water the soil lightly to help settle the plant.
5. Assemble the Self-Watering Jar: Now for the magic!
* Carefully lower the plastic pot into the mason jar.
* Make sure the bottom of the plastic pot doesn’t touch the bottom of the mason jar. The wicks should be dangling freely in the jar.
* Add water to the mason jar, filling it until the water level is just below the bottom of the plastic pot. You don’t want the pot sitting directly in the water, just close enough for the wicks to do their job.
6. Monitor and Adjust: Keep an eye on your self-watering basil jar for the first few days.
* Check the water level in the mason jar regularly and refill as needed. How often you need to refill will depend on the size of your plant, the temperature, and the humidity.
* If the soil seems too dry, you can try adding more wicks or using a thicker wicking material.
* If the soil seems too wet, you can try using fewer wicks or a thinner wicking material.
* Make sure your basil plant is getting enough sunlight. Basil needs at least 6 hours of sunlight per day.
Troubleshooting Tips:
Even with the best intentions, sometimes things don’t go exactly as planned. Here are a few common issues you might encounter and how to fix them:
* Basil is wilting even with water in the jar: This could be due to a few things. First, make sure the wicks are actually making contact with the water. Second, the wicks might not be wicking effectively. Try using a thicker wicking material or adding more wicks. Third, the plant might be getting too much sun or not enough humidity. Move it to a different location or mist it with water regularly.
* Soil is constantly soggy: You might be overwatering the jar. Let the water level drop a bit before refilling. Also, make sure you have adequate drainage in the plastic pot. If the gravel layer is too thin, add more. You can also try using fewer wicks.
* Mold growing on the soil surface: This is usually a sign of overwatering or poor air circulation. Scrape off the mold and let the soil dry out a bit. Improve air circulation by placing a small fan near the plant.
* Basil leaves are turning yellow: This could be a sign of nutrient deficiency. Fertilize your basil plant with a liquid fertilizer diluted to half strength.
Choosing the Right Potting Mix:
The type of potting mix you use is crucial for the success of your self-watering basil jar. You want a mix that drains well but also retains enough moisture to keep the basil plant happy.
* Avoid using garden soil: Garden soil is too dense and doesn’t drain well, which can lead to root rot.
* Look for a potting mix specifically formulated for herbs: These mixes are typically lighter and have better drainage than general-purpose potting mixes.
* Consider adding perlite or vermiculite: These amendments will improve drainage and aeration.
Choosing the Right Basil Variety:
While this self-watering jar will work for most basil varieties, some are better suited for container gardening than others.
* Genovese basil: This is the classic basil variety used for pesto. It’s a good choice for container gardening.
* Thai basil: This variety has a slightly anise-like flavor and is great for Asian dishes. It also does well in containers.
* Lemon basil: This variety has a lemony flavor and aroma. It’s a bit more delicate than other basil varieties, so it might require a bit more attention.
* Dwarf basil: This variety is compact and bushy, making it a great choice for small spaces.
Maintaining Your Basil Plant:
Once your self-watering basil jar is set up, there are a few things you can do to keep your basil plant thriving.
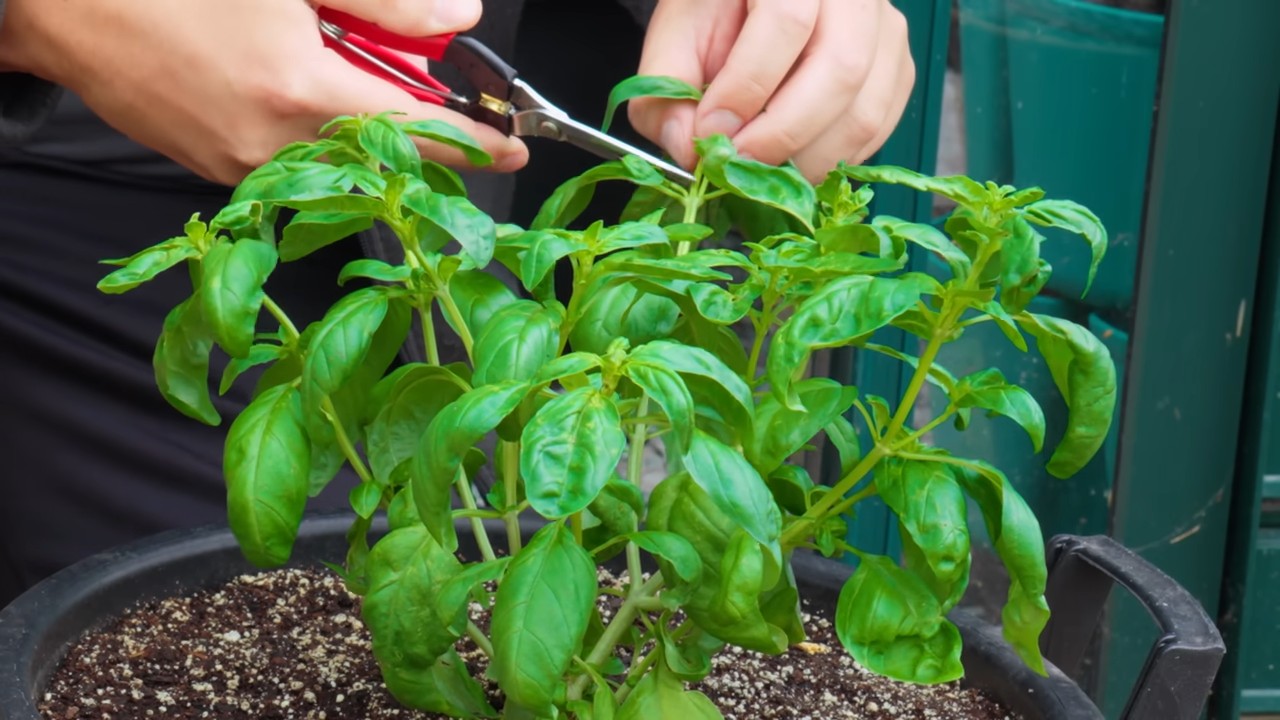
* Pinch off the flower buds: Basil plants tend to bolt (produce flowers) when they’re stressed. Pinching off the flower buds will encourage the plant to produce more leaves.
* Harvest regularly: Harvesting basil leaves regularly will also encourage the plant to grow bushier.
* Fertilize occasionally: Basil plants need nutrients to grow. Fertilize your plant with a liquid fertilizer diluted to half strength every few weeks.
* Rotate the plant: Rotate the plant regularly to ensure that all sides get equal sunlight.
Why This Hack Works:
The beauty of this self-watering system lies in its simplicity. The cotton wicks act as a bridge, drawing water from the reservoir in the mason jar up to the soil. This provides a consistent supply of moisture to the basil plant, preventing it from drying out. The drainage layer in the plastic pot prevents the roots from sitting in soggy soil, which can lead to root rot. It’s a win-win!
Beyond Basil: Other Herbs to Try
While I’ve focused on basil, this self-watering jar method works wonders for other herbs too! Consider trying it with:
* Mint (be careful, mint can be invasive!)
* Parsley
* Chives
* Oregano
* Thyme
Just remember to adjust the watering frequency based on the specific needs of each herb.
Conclusion
So, there you have it! This simple basil jar kitchen hack is more than just a clever trick; it’s a game-changer for anyone who loves fresh basil but hates watching it wilt away in the fridge. We’ve shown you how easy it is to keep your basil vibrant and ready to use for weeks, not days. Think of all the pesto you can make, the pizzas you can top, and the salads you can elevate with that fresh, aromatic flavor.
This method isn’t just about extending the life of your basil; it’s about reducing food waste, saving money, and ensuring you always have fresh herbs on hand to enhance your culinary creations. It’s a small change that makes a big difference in the kitchen.
But don’t just take our word for it! We encourage you to try this basil jar kitchen hack yourself. Experiment with different types of basil – Genovese, Thai, lemon basil – and see how long they last using this method. You might even find it works wonders for other delicate herbs like mint or cilantro (though results may vary, basil tends to be the most receptive).
Consider these variations to personalize the hack to your needs:
* Rooted Basil: If you have basil with roots, you can plant it directly in a small pot with soil and then place that pot inside a larger jar with water. This provides both hydration and nutrients.
* Herb Garden in a Jar: Use a larger jar and plant multiple basil seedlings together for a mini indoor herb garden.
* Infused Water: Use the basil-infused water from the jar to add a subtle basil flavor to your drinking water. This is especially refreshing in the summer.
* Basil Ice Cubes: Freeze the basil-infused water into ice cubes and add them to cocktails or iced tea for a burst of flavor.
We’re confident that once you try this method, you’ll never go back to storing basil any other way. It’s efficient, effective, and incredibly simple.
We’d love to hear about your experiences with this basil jar kitchen hack! Share your tips, variations, and success stories in the comments below. Let us know how long your basil lasted, what dishes you used it in, and any other insights you have. Your feedback will help other readers discover the magic of this simple yet powerful technique. Let’s build a community of basil-loving cooks who are committed to freshness and sustainability! So go ahead, give it a try, and let us know what you think!
Frequently Asked Questions
Why does this basil jar kitchen hack work so well?
The key to this method’s success lies in providing the basil with consistent hydration and protection from the drying effects of the refrigerator. Basil, like many herbs, thrives in a humid environment. By placing the basil stems in water, you’re essentially giving it a continuous supply of moisture. The jar acts as a mini-greenhouse, trapping humidity and preventing the basil leaves from drying out and wilting. The plastic bag (optional, but recommended) further enhances this effect by minimizing air circulation and reducing moisture loss. This combination of hydration and humidity creates the ideal environment for preserving basil’s freshness.
How long will basil last using this method?
Typically, basil stored using this basil jar kitchen hack can last for 2-3 weeks, sometimes even longer, depending on the initial freshness of the basil and the conditions in your refrigerator. Factors like the temperature of your fridge and how often you open the door can affect the longevity. Regularly changing the water every 1-2 days is crucial to prevent bacterial growth and keep the basil hydrated. Keep an eye on the leaves; if you notice any signs of browning or wilting, it’s time to use the basil.
What if my basil starts to turn black or brown?
If you notice your basil leaves turning black or brown, it could be due to a few reasons. One possibility is that the water isn’t being changed frequently enough, leading to bacterial growth. Another reason could be that the basil was already starting to deteriorate before you stored it. Make sure to start with the freshest basil possible. Also, avoid overcrowding the jar, as this can restrict airflow and promote spoilage. If only a few leaves are affected, you can remove them and continue storing the rest of the basil.
Can I use this method for other herbs?
While this method works exceptionally well for basil, it can also be used for other herbs like mint, parsley, and cilantro. However, the results may vary. Herbs with thicker stems, like rosemary and thyme, tend to last longer on their own and may not benefit as much from this method. Delicate herbs like dill and chives may become slimy if stored in water for too long. Experiment with different herbs to see what works best for you.
Is it necessary to use a plastic bag over the basil?
Using a plastic bag is not strictly necessary, but it significantly enhances the effectiveness of the basil jar kitchen hack. The bag helps to trap humidity and prevent the basil leaves from drying out, extending their lifespan. If you prefer not to use plastic, you can try using a reusable silicone bag or simply placing the jar in a less drafty part of your refrigerator. However, be aware that the basil may not last as long without the added humidity.
What type of jar is best for this method?
Any clean jar or container that can hold water and accommodate the height of your basil stems will work. Mason jars are a popular choice due to their wide mouth and airtight seal (though you don’t need to seal it completely). You can also use recycled glass jars from pasta sauce or pickles. The size of the jar will depend on the amount of basil you’re storing. Make sure the jar is tall enough to support the basil stems and prevent the leaves from touching the bottom.
How often should I change the water?
It’s recommended to change the water every 1-2 days to prevent bacterial growth and keep the basil hydrated. Fresh water will also help to remove any debris or sediment that may have accumulated in the jar. When changing the water, gently rinse the basil stems to remove any slime or residue.
Can I store basil in the refrigerator without water?
While you can store basil in the refrigerator without water, it will typically wilt and dry out much faster. Wrapping the basil in a slightly damp paper towel and placing it in a plastic bag can help to extend its lifespan, but it won’t last as long as when stored in water. The basil jar kitchen hack provides the optimal combination of hydration and humidity for preserving basil’s freshness.
Does this method work for all types of basil?
Yes, this method generally works well for all types of basil, including Genovese, Thai, lemon basil, and purple basil. However, the longevity may vary slightly depending on the variety. Genovese basil, which is the most common type, tends to last the longest.
What if I don’t have a refrigerator? Can I still use this method?
While the refrigerator provides the ideal cool and humid environment for preserving basil, you can still use this method at room temperature. However, the basil will not last as long. Place the jar in a cool, dark place away from direct sunlight. Change the water more frequently, at least once a day. You can also try adding a few ice cubes to the water to keep it cool.

Leave a Comment