
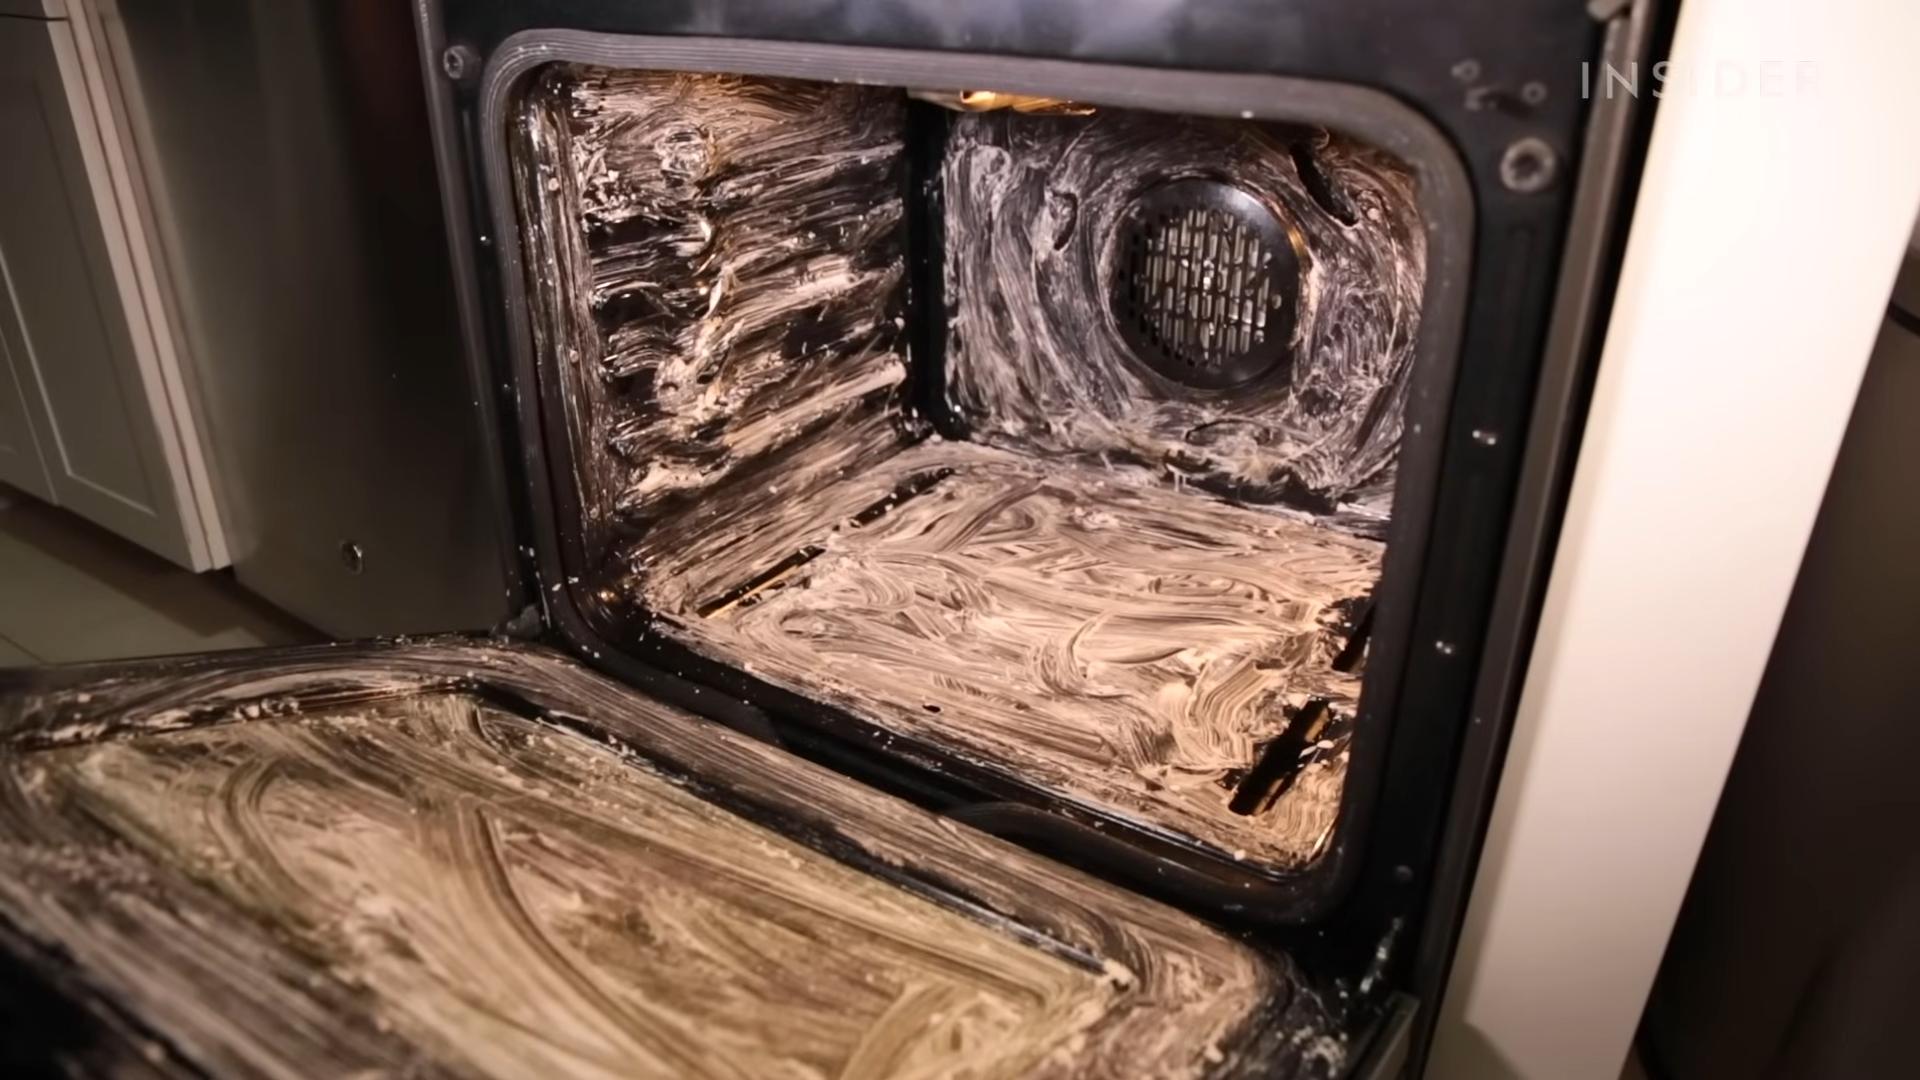
Easy Oven Cleaning Method: Is your oven looking less like a culinary haven and more like a burnt offering site? Let’s face it, oven cleaning is one of those chores we all dread. It’s right up there with scrubbing grout and folding fitted sheets! But what if I told you there’s an easy oven cleaning method that doesn’t involve harsh chemicals, hours of scrubbing, or a hazmat suit?
Historically, keeping cooking surfaces clean has been a constant challenge. From wood-fired ovens in ancient Rome to the modern marvels we have today, the struggle against baked-on grime is real. Our grandmothers probably had their own secret concoctions, passed down through generations. Now, we’re bringing that spirit of resourceful cleaning into the 21st century with a simple, effective, and eco-friendly approach.
Why do you need this DIY trick? Because nobody wants to spend their precious weekend wrestling with a greasy oven! This method not only saves you time and energy but also protects your health and the environment by avoiding harsh chemicals. Plus, a clean oven cooks more efficiently and can even improve the taste of your food. So, ditch the elbow grease and get ready to discover the secret to a sparkling clean oven with minimal effort. Let’s get started!
DIY Oven Cleaning: The Baking Soda and Vinegar Volcano Method
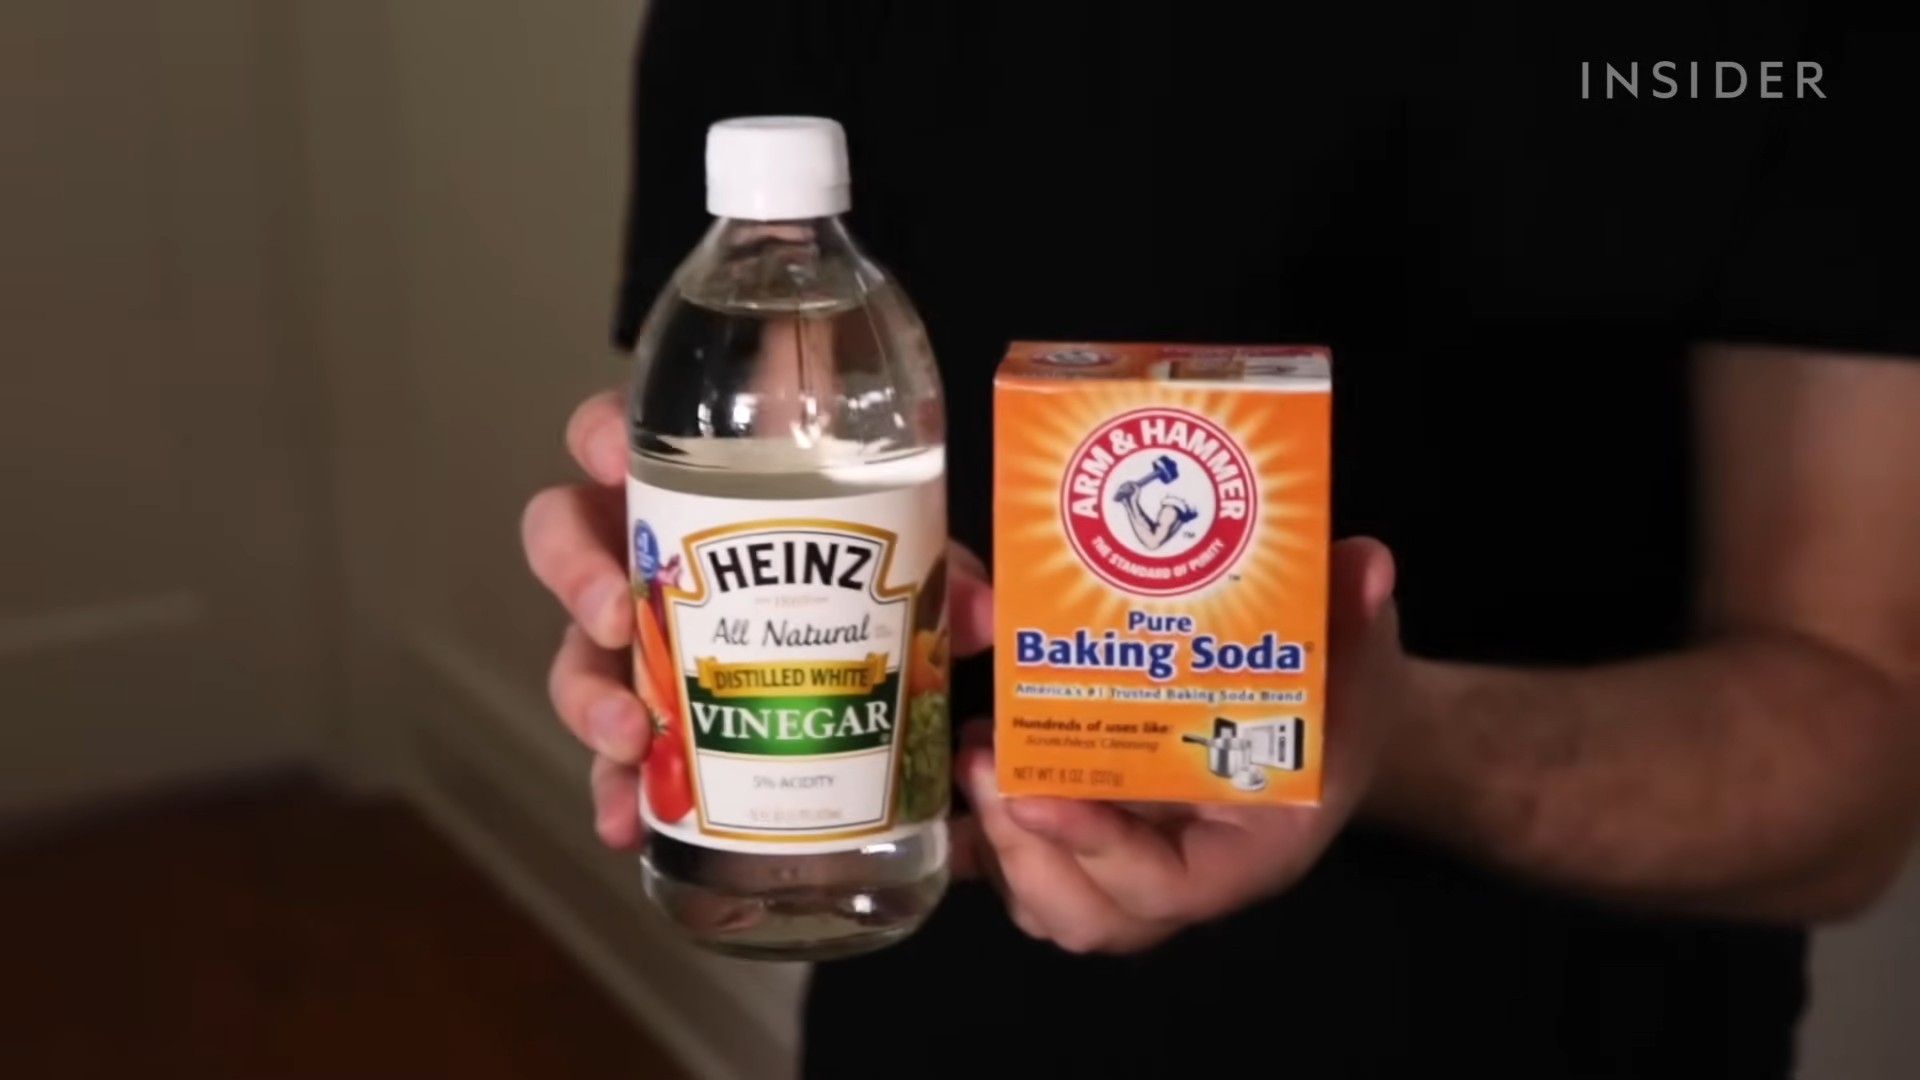
Okay, let’s be honest, cleaning the oven is the chore we all dread. But it doesn’t have to be a Herculean task involving harsh chemicals and hours of scrubbing. I’m going to share my favorite, super-effective, and surprisingly fun method using just baking soda and vinegar! It’s like a mini science experiment that leaves you with a sparkling clean oven.
What You’ll Need
Before we dive in, let’s gather our supplies. This is a pretty low-key operation, so you probably have most of these things already:
* Baking soda (the star of the show!)
* White vinegar (the supporting actor!)
* Water
* A spray bottle
* A bowl
* Rubber gloves (trust me, you’ll want these)
* A spatula or scraper (plastic is best to avoid scratching)
* Sponges or cloths
* Paper towels (for the final wipe-down)
* A trash bag or container for disposing of the gunk
Prepping Your Oven
Before we unleash the baking soda volcano, we need to do a little prep work. This will make the whole process smoother and more effective.
1. Remove the Oven Racks: Take out all the oven racks and set them aside. We’ll deal with them separately later. You can soak them in hot, soapy water in your sink or bathtub while the baking soda does its magic inside the oven.
2. Clear Out Loose Debris: Use a dry cloth or paper towels to wipe up any loose crumbs or food particles from the bottom of the oven. This will prevent them from turning into a soggy mess when we add the baking soda paste.
3. Protect Your Floor: Lay down some old newspapers or a drop cloth around the base of your oven. This will catch any drips or spills and save you from having to clean your kitchen floor afterward.
Making the Baking Soda Paste
This is where the magic begins! We’re going to create a powerful cleaning paste that will loosen all that baked-on grime.
1. Mix Baking Soda and Water: In your bowl, combine about 1/2 cup of baking soda with enough water to form a thick, spreadable paste. You want it to be the consistency of frosting. Add the water gradually, mixing as you go, to avoid making it too runny.
2. Adjust Consistency: If the paste is too thick, add a little more water, a teaspoon at a time, until you reach the desired consistency. If it’s too runny, add a little more baking soda.
Applying the Baking Soda Paste
Now for the fun part! We’re going to coat the inside of the oven with our baking soda paste.
1. Coat the Oven Interior: Using your rubber gloves (remember, trust me!), spread the baking soda paste all over the inside surfaces of your oven. This includes the bottom, sides, top, and door. Avoid the heating elements!
2. Focus on Problem Areas: Pay extra attention to areas with heavy buildup or baked-on spills. Apply a thicker layer of paste to these spots.
3. Don’t Forget the Door: Make sure to coat the inside of the oven door with the paste as well.
4. Let it Sit (Important!): This is the key to the whole process. Let the baking soda paste sit in your oven for at least 12 hours, or even better, overnight. The longer it sits, the more time it has to break down the grime. I usually apply it before I go to bed and let it work its magic while I sleep.
Cleaning the Oven Racks
While the baking soda is working its magic inside the oven, let’s tackle those racks.
1. Soak the Racks: Fill your sink or bathtub with hot, soapy water. Add a generous amount of dish soap.
2. Submerge the Racks: Place the oven racks in the soapy water and let them soak for at least a few hours, or even overnight. This will loosen the baked-on grease and food particles.
3. Scrub the Racks: After soaking, use a scrub brush or sponge to scrub the racks clean. You may need to use a little elbow grease, especially for stubborn spots.
4. Rinse and Dry: Rinse the racks thoroughly with clean water and dry them with a towel.
The Vinegar Reaction and Cleaning
Okay, it’s time for the grand finale! We’re going to unleash the vinegar and watch the baking soda volcano in action.
1. Fill Your Spray Bottle: Fill your spray bottle with white vinegar.
2. Spray the Baking Soda Paste: Spray the baking soda paste inside your oven with vinegar. You’ll see it start to fizz and bubble – that’s the chemical reaction happening, breaking down the grime even further.
3. Let it Fizz: Let the vinegar and baking soda react for a few minutes.
4. Wipe Away the Grime: Using a damp sponge or cloth, wipe away the baking soda paste and loosened grime. You may need to use a spatula or scraper to remove stubborn spots.
5. Rinse and Repeat: Rinse your sponge or cloth frequently with clean water. You may need to repeat the wiping process several times to remove all the baking soda residue.
6. Tackle Stubborn Spots: For any stubborn spots that remain, make a fresh paste of baking soda and water and apply it directly to the area. Let it sit for a few minutes, then scrub and wipe clean.
Final Touches
We’re almost there! Just a few more steps to ensure a sparkling clean oven.
1. Wipe Down with Water: Once you’ve removed all the baking soda paste and grime, wipe down the inside of the oven with a clean, damp cloth to remove any remaining residue.
2. Dry the Oven: Use paper towels to dry the inside of the oven thoroughly.
3. Replace the Racks: Put the clean oven racks back into the oven.
4. Air it Out: Leave the oven door open for a few hours to allow it to air out completely and get rid of any lingering vinegar smell.
Tips and Tricks for a Sparkling Clean Oven
Here are a few extra tips and tricks to help you achieve oven-cleaning success:
* Clean Regularly: The more often you clean your oven, the easier it will be. Try to clean it every few months to prevent buildup from becoming too severe.
* Use Oven Liners: Consider using oven liners to catch spills and drips. This will help keep your oven cleaner in the first place.
* Self-Cleaning Ovens: If you have a self-cleaning oven, you can use that feature occasionally. However, be aware that it can produce strong odors and high heat. I still prefer the baking soda and vinegar method for a more natural and less intense cleaning experience.
* Lemon Power: For a fresh scent and extra cleaning power, you can add a few drops of lemon juice to your vinegar spray.
* Don’t Forget the Glass Door: If your oven door has a glass panel, you can clean it with a glass cleaner or a mixture of vinegar and water.
* Ventilation is Key: Make sure to open windows or turn on your kitchen fan while cleaning your oven to ventilate the area.
* Safety First: Always wear rubber gloves when cleaning your oven to protect your hands from the baking soda and vinegar.
Dealing with Extremely Dirty Ovens
Sometimes, you might be faced with an oven that’s been neglected for a *very* long time. In these cases, you might need to repeat the baking soda and vinegar process a few times. Here’s what I recommend:
1. Repeat the Paste Application: After the first round of cleaning, if you still see a lot of baked-on grime, apply another layer of baking soda paste and let it sit overnight again.
2. Increase the Vinegar Concentration: For stubborn spots, try using undiluted vinegar in your spray bottle.
3. Use a Stiffer Scrubber: If a sponge isn’t cutting it, try using a non-scratch scouring pad or a plastic scraper to remove the grime. Be careful not to scratch the oven surface.
4. Patience is Key: Cleaning an extremely dirty oven can take time and effort. Don’t get discouraged! Just keep repeating the process until you achieve the desired results.
Why This Method Works
You might be wondering why this simple baking soda and vinegar method is so effective. Here’s the science behind it:
* Baking Soda (Sodium Bicarbonate): Baking soda is a mild alkali that helps to dissolve grease and grime. It also has abrasive properties that help to scrub away stubborn stains.
* Vinegar (Acetic Acid): Vinegar is a mild acid that reacts with baking soda to create carbon dioxide gas. This fizzing action helps to lift dirt and grime from the oven
Conclusion
So, there you have it! This easy oven cleaning method isn’t just a cleaning hack; it’s a game-changer for anyone who dreads tackling that greasy, grimy oven. Forget harsh chemicals, hours of scrubbing, and the lingering smell that permeates your kitchen for days. This simple, effective, and surprisingly satisfying method harnesses the power of steam and readily available ingredients to loosen baked-on messes, making cleanup a breeze.
Why is this a must-try? Because it saves you time, money, and a whole lot of elbow grease. Imagine reclaiming your weekend instead of spending it battling oven gunk. Think of the money you’ll save on expensive oven cleaners filled with questionable chemicals. And consider the peace of mind knowing you’re using a safer, more natural approach to cleaning one of the most important appliances in your home.
But the beauty of this method lies not only in its simplicity but also in its adaptability. Feel free to experiment with variations to suit your specific needs and preferences. For instance, if you have particularly stubborn stains, you can add a few drops of essential oils like lemon or tea tree to the water for extra degreasing power and a fresh, clean scent. You could also try using a paste of baking soda and water on heavily soiled areas before steaming, allowing it to sit for a few minutes to further loosen the grime. Another variation is to use distilled white vinegar instead of lemon juice for a slightly different cleaning action. Remember to always test any new cleaning solution in an inconspicuous area first.
This easy oven cleaning method is a true kitchen essential. It’s a testament to the fact that sometimes, the simplest solutions are the most effective. It’s a way to take back control of your cleaning routine and create a healthier, happier home environment.
We wholeheartedly encourage you to give this DIY oven cleaning trick a try. You’ll be amazed at how easily the grime wipes away after the steaming process. And once you’ve experienced the satisfaction of a sparkling clean oven without the harsh chemicals and back-breaking labor, you’ll wonder why you didn’t try it sooner.
Don’t just take our word for it, though. We want to hear about your experiences! Share your before-and-after photos, your tips and tricks, and any variations you’ve tried in the comments below. Let’s create a community of clean oven enthusiasts and help each other conquer the dreaded oven cleaning chore once and for all. Your insights could be invaluable to others who are looking for a better way to keep their ovens sparkling. So, go ahead, give it a try, and let us know what you think! We’re confident you’ll be thrilled with the results.
Frequently Asked Questions (FAQ)
Q: Is this easy oven cleaning method safe for all types of ovens?
A: Generally, yes, this method is safe for most ovens, including electric and gas ovens. However, it’s always a good idea to consult your oven’s manual before trying any new cleaning method. Pay particular attention to any warnings about cleaning the heating elements or specific parts of your oven. If you have a self-cleaning oven, be sure to disable the self-cleaning function before using this steam cleaning method. Also, avoid spraying water directly onto the heating elements, as this could cause damage. If you’re unsure, test the method in a small, inconspicuous area first.
Q: What if I don’t have lemon juice? Can I use something else?
A: Absolutely! Lemon juice is a great natural degreaser and adds a pleasant scent, but you can substitute it with other ingredients. Distilled white vinegar is an excellent alternative and works just as well. You can use the same amount of vinegar as you would lemon juice. Another option is to use a few drops of essential oils known for their cleaning properties, such as lemon, orange, or tea tree oil. Just be sure to use pure essential oils and not fragrance oils. If you don’t have any of these ingredients on hand, plain water will still work, although it might require a bit more scrubbing.
Q: How often should I use this easy oven cleaning method?
A: The frequency depends on how often you use your oven and how much it gets soiled. For most people, cleaning the oven every 1-3 months is sufficient. If you cook frequently or tend to have a lot of spills, you might want to clean it more often. A good rule of thumb is to clean your oven whenever you notice a significant buildup of grease or grime. Regular cleaning will prevent the buildup from becoming too difficult to remove and will keep your oven working efficiently.
Q: What kind of baking dish should I use for the water and lemon juice (or vinegar)?
A: You can use any oven-safe baking dish that is large enough to hold a few cups of water. A glass baking dish, a ceramic dish, or even a metal roasting pan will work fine. Just make sure the dish is sturdy and can withstand the heat of the oven. Avoid using plastic containers, as they could melt or warp. Also, be careful when removing the hot dish from the oven, as it will be very hot. Use oven mitts or pot holders to protect your hands.
Q: How long should I leave the oven on to steam clean?
A: The recommended time is typically 20-30 minutes at a low temperature, around 250-300 degrees Fahrenheit (120-150 degrees Celsius). This allows the water to evaporate and create enough steam to loosen the grime. However, you can adjust the time based on the level of soiling in your oven. If your oven is particularly dirty, you might want to leave it on for a longer period, up to 45 minutes. Just keep an eye on the water level and add more water if necessary.
Q: What’s the best way to wipe down the oven after steaming?
A: After the oven has cooled down slightly, use a damp cloth or sponge to wipe down the interior surfaces. The steam should have loosened the grime, making it easy to wipe away. For stubborn spots, you can use a non-abrasive scrub pad or a paste of baking soda and water. Avoid using harsh chemicals or abrasive cleaners, as they can damage the oven’s interior. Be sure to wipe down all surfaces, including the walls, floor, door, and racks. You may need to rinse the cloth or sponge frequently to remove the grime.
Q: Can I use this method to clean the oven racks as well?
A: Yes, you can definitely use this method to clean the oven racks. While the oven is steaming, you can place the racks in a large sink or tub filled with hot, soapy water. Let them soak for a while to loosen the grime. Then, use a scrub brush or sponge to scrub them clean. For stubborn spots, you can use a paste of baking soda and water. Rinse the racks thoroughly with clean water and dry them before placing them back in the oven. Alternatively, you can place the racks directly in the oven during the steaming process, but be aware that they may take longer to clean.
Q: What if I have a self-cleaning oven? Should I still use this method?
A: While self-cleaning ovens are convenient, they use extremely high temperatures that can sometimes damage the oven or release unpleasant odors. This easy oven cleaning method is a gentler and more natural alternative. It’s perfectly safe to use this method on a self-cleaning oven, but be sure to disable the self-cleaning function before you begin. This will prevent the oven from accidentally activating the self-cleaning cycle while you’re using the steam cleaning method.
Q: My oven is really dirty. Will this method still work?
A: This method works best for ovens that are moderately dirty. If your oven has a significant buildup of baked-on grease and grime, you might need to do a little extra preparation. Before steaming, try applying a paste of baking soda and water to the heavily soiled areas. Let the paste sit for a few hours or even overnight to loosen the grime. Then, proceed with the steaming method as described. You might also need to scrub a bit more vigorously after steaming to remove the stubborn spots. For extremely dirty ovens, you might need to repeat the process a few times to achieve the desired results.

Leave a Comment