
Growing Okra in Containers: Unlock the secrets to a bountiful harvest, even without a sprawling garden! Have you ever dreamed of plucking fresh, vibrant okra right from your patio? I know I have! This often-overlooked vegetable, with its intriguing history and delicious flavor, is surprisingly easy to cultivate in containers, bringing a touch of Southern charm and culinary delight to any space.
Okra, believed to have originated in Ethiopia, has been a staple in cuisines across the globe for centuries. From hearty gumbos in the American South to flavorful curries in India, okra’s versatility is undeniable. But what if you don’t have acres of land to dedicate to this fascinating plant? That’s where container gardening comes in!
In this DIY guide, I’m going to share my tried-and-true tricks for successfully growing okra in containers. Whether you’re a seasoned gardener or a complete beginner, I’ll walk you through every step, from choosing the right container and soil to providing the perfect amount of sunlight and water. Imagine the satisfaction of harvesting your own okra, knowing you nurtured it from seed to table. With these simple hacks, you can enjoy fresh, homegrown okra no matter how limited your space may be. Let’s get started and transform your balcony, patio, or even a sunny windowsill into a thriving okra oasis!
Growing Asparagus: A Beginner’s Guide to a Bountiful Backyard Harvest
Asparagus! Just the word conjures up images of elegant spring dinners and fresh, vibrant flavors. And guess what? You don’t need a sprawling farm to enjoy homegrown asparagus. With a little patience and some know-how, you can cultivate your own asparagus patch right in your backyard. I’m going to walk you through everything you need to know, from choosing the right spot to harvesting those delicious spears. Let’s get started!
Choosing the Right Asparagus Variety
Before we even think about digging, let’s talk asparagus varieties. Different varieties thrive in different climates and offer varying yields and spear thicknesses. Here are a few popular choices:
* Jersey Knight: This is a widely recommended variety known for its high yields, disease resistance, and all-male plants (meaning no unwanted seedlings popping up everywhere). It’s a great choice for beginners.
* Jersey Giant: Similar to Jersey Knight, but produces slightly larger spears. Also an all-male variety.
* Purple Passion: If you want something a little different, Purple Passion offers beautiful purple spears that turn green when cooked. It’s known for its sweeter flavor.
* Mary Washington: An older heirloom variety, still popular for its reliability and good flavor. It’s more susceptible to disease than the Jersey varieties.
I personally recommend starting with Jersey Knight or Jersey Giant. They’re reliable, productive, and relatively easy to grow.
Preparing Your Asparagus Bed: Location, Location, Location!
Asparagus is a perennial, meaning it will come back year after year. So, choosing the right location is crucial. Think long-term! Here’s what asparagus needs:
* Full Sun: Asparagus needs at least 6-8 hours of direct sunlight per day. The more sun, the better the spears will grow.
* Well-Drained Soil: Asparagus hates soggy feet! The soil needs to drain well to prevent root rot. If you have heavy clay soil, you’ll need to amend it significantly.
* Space: Asparagus plants can get quite large, so give them plenty of room to spread out. Allow at least 4 feet between rows and 1-2 feet between plants within a row.
* Protection: Choose a spot that’s sheltered from strong winds, which can damage the ferns.
Soil Preparation: The Key to Success
This is arguably the most important step. Asparagus needs rich, well-drained soil with a slightly acidic to neutral pH (around 6.5-7.0). Here’s how to prepare your soil:
1. Clear the Area: Remove all grass, weeds, rocks, and debris from the area where you’ll be planting.
2. Amend the Soil: This is where the real work begins. Dig in plenty of organic matter, such as compost, well-rotted manure, or peat moss. Aim for a soil that’s loose and crumbly. I usually add a good 4-6 inches of compost to my asparagus beds.
3. Test the pH: Use a soil testing kit to check the pH. If the soil is too acidic (below 6.5), add lime to raise the pH. If it’s too alkaline (above 7.0), add sulfur to lower the pH. Follow the instructions on the soil testing kit and any amendments you use.
4. Dig a Trench: Dig a trench that’s about 12-18 inches wide and 6-8 inches deep. This is where you’ll plant your asparagus crowns.
Planting Your Asparagus Crowns: The Big Day!
Now for the exciting part! You’ll be planting asparagus crowns, which are essentially dormant root systems. You can purchase these from nurseries or online retailers.
1. Soak the Crowns: Before planting, soak the asparagus crowns in water for about an hour. This will help rehydrate them and give them a good start.
2. Create Mounds: In the bottom of the trench, create small mounds of soil about 12-18 inches apart. These mounds will support the crowns.
3. Place the Crowns: Place each crown on top of a mound, spreading the roots out like a spider. Make sure the crown is facing upwards.
4. Cover with Soil: Gently cover the crowns with about 2-3 inches of soil. Don’t bury them too deep!
5. Water Thoroughly: Water the newly planted crowns thoroughly to settle the soil.
Caring for Your Asparagus Patch: Patience is a Virtue
Asparagus takes time to establish. Don’t expect to harvest anything in the first year! Here’s how to care for your asparagus patch:
* Watering: Keep the soil consistently moist, especially during dry periods. Water deeply and less frequently, rather than shallowly and often.
* Weeding: Keep the asparagus bed free of weeds. Weeds compete with the asparagus for nutrients and water. Hand-pull weeds carefully to avoid damaging the asparagus roots.
* Fertilizing: Fertilize your asparagus patch in early spring with a balanced fertilizer, such as 10-10-10. Follow the instructions on the fertilizer package. You can also side-dress with compost throughout the growing season.
* Mulching: Apply a layer of mulch around the asparagus plants to help retain moisture, suppress weeds, and regulate soil temperature. Straw, wood chips, or shredded leaves are good choices.
* Adding Soil: As the asparagus ferns grow, gradually fill in the trench with soil. By the end of the first growing season, the trench should be completely filled in.
Harvesting Your Asparagus: The Reward for Your Patience
This is the moment you’ve been waiting for! But remember, patience is key.
* Year 1: No harvesting! Let the plants establish themselves.
* Year 2: Still no harvesting, but you can harvest a few spears if the plants are vigorous. Limit the harvest to a week or two.
* Year 3 and Beyond: Now you can start harvesting regularly!
How to Harvest Asparagus
1. Harvest Time: Harvest asparagus spears when they are about 6-8 inches tall and the tips are still tightly closed.
2. Harvesting Method: You can either snap the spears off at ground level or cut them with a sharp knife. I prefer to snap them off, as this is less likely to damage the crown.
3. Harvesting Frequency: Harvest spears every day or two during the peak harvesting season, which typically lasts for 6-8 weeks in the spring.
4. Stop Harvesting: Stop harvesting when the spears become thin and spindly. This indicates that the plants need to replenish their energy reserves.
Fall Cleanup: Preparing for Winter
After the harvesting season is over, the asparagus ferns will turn yellow and brown. This is normal.
1. Cut Back the Ferns: In the fall, after the ferns have completely died back, cut them back to ground level.
2. Clean Up Debris: Remove any fallen leaves or debris from the asparagus bed.
3. Mulch: Apply a fresh layer of mulch to protect the crowns from the cold winter weather.
4. Fertilize (Optional): You can apply a light application of fertilizer in the fall to help replenish the soil nutrients.
Troubleshooting Common Asparagus Problems
Even with the best care, you might encounter some problems. Here are a few common issues and how to deal with them:
* Asparagus Beetles: These small, colorful beetles can damage the spears and ferns. Hand-pick them off the plants or use an insecticidal soap.
* Asparagus Rust: This fungal disease causes orange or brown pustules on the ferns. Improve air circulation by spacing the plants properly and removing any infected ferns.
* Crown Rot: This fungal disease causes the crowns to rot. Ensure good drainage and avoid overwatering.
* Weeds: As mentioned earlier, weeds can be a major problem. Keep the asparagus bed free of weeds by hand-pulling or using a hoe.
Enjoying Your Homegrown Asparagus
Now that you’ve harvested your own asparagus, it’s time to enjoy the fruits (or rather, vegetables) of your labor! Asparagus is incredibly versatile and can be cooked in many different ways. Here are a few ideas:
* Steamed: Steaming asparagus is a quick and easy way to cook it. Simply steam the spears for a few minutes until they are tender-crisp.
* Roasted: Roasting asparagus brings out its natural sweetness. Toss the spears with olive oil, salt, and pepper, and roast them in a preheated oven at 400°F (200°C) for about 10-15 minutes.
* Grilled: Grilled
Conclusion
So, there you have it! Growing okra in containers is not only possible, it’s surprisingly rewarding. We’ve walked through the steps, from selecting the right container and soil to nurturing your plants and harvesting those delicious pods. But why should you bother with this DIY project? Because fresh, homegrown okra is simply superior. The flavor is brighter, the texture is more tender, and you have the satisfaction of knowing exactly where your food came from. Plus, it’s a fantastic way to add a touch of Southern charm to your patio, balcony, or even a sunny windowsill.
This method is a must-try for anyone with limited garden space, or for those who simply want to keep their okra plants closer at hand. Imagine stepping outside to harvest a few pods for a quick gumbo or a batch of crispy fried okra – the convenience is unbeatable!
But don’t stop there! Feel free to experiment with different varieties of okra. Clemson Spineless is a classic choice, but there are also beautiful red varieties like Burgundy okra that add a pop of color to your garden. You can also try companion planting in your containers. Marigolds can help deter pests, while basil can enhance the flavor of your okra. Consider adding a small trellis or stake to support taller varieties as they grow.
And remember, success with container gardening often comes down to observation. Keep an eye on your plants, adjust your watering schedule as needed, and don’t be afraid to experiment with different fertilizers.
We’re confident that you’ll find growing okra in containers to be a fun and fulfilling experience. So, grab your supplies, get your hands dirty, and prepare to enjoy the taste of homegrown goodness. We encourage you to try this DIY trick and share your experiences with us! Let us know what varieties you’re growing, what challenges you’ve faced, and what tips you’ve discovered. Share your photos and stories in the comments below – we can’t wait to see your container okra gardens thrive! Happy gardening!
Frequently Asked Questions (FAQs)
What size container is best for growing okra?
The ideal container size for growing okra is at least 10 gallons, but larger is generally better. A 15-20 gallon container will provide ample space for the roots to develop and support healthy plant growth. Okra plants can grow quite tall, so a larger container also helps to prevent them from tipping over in windy conditions. Make sure the container has drainage holes to prevent waterlogging, which can lead to root rot.
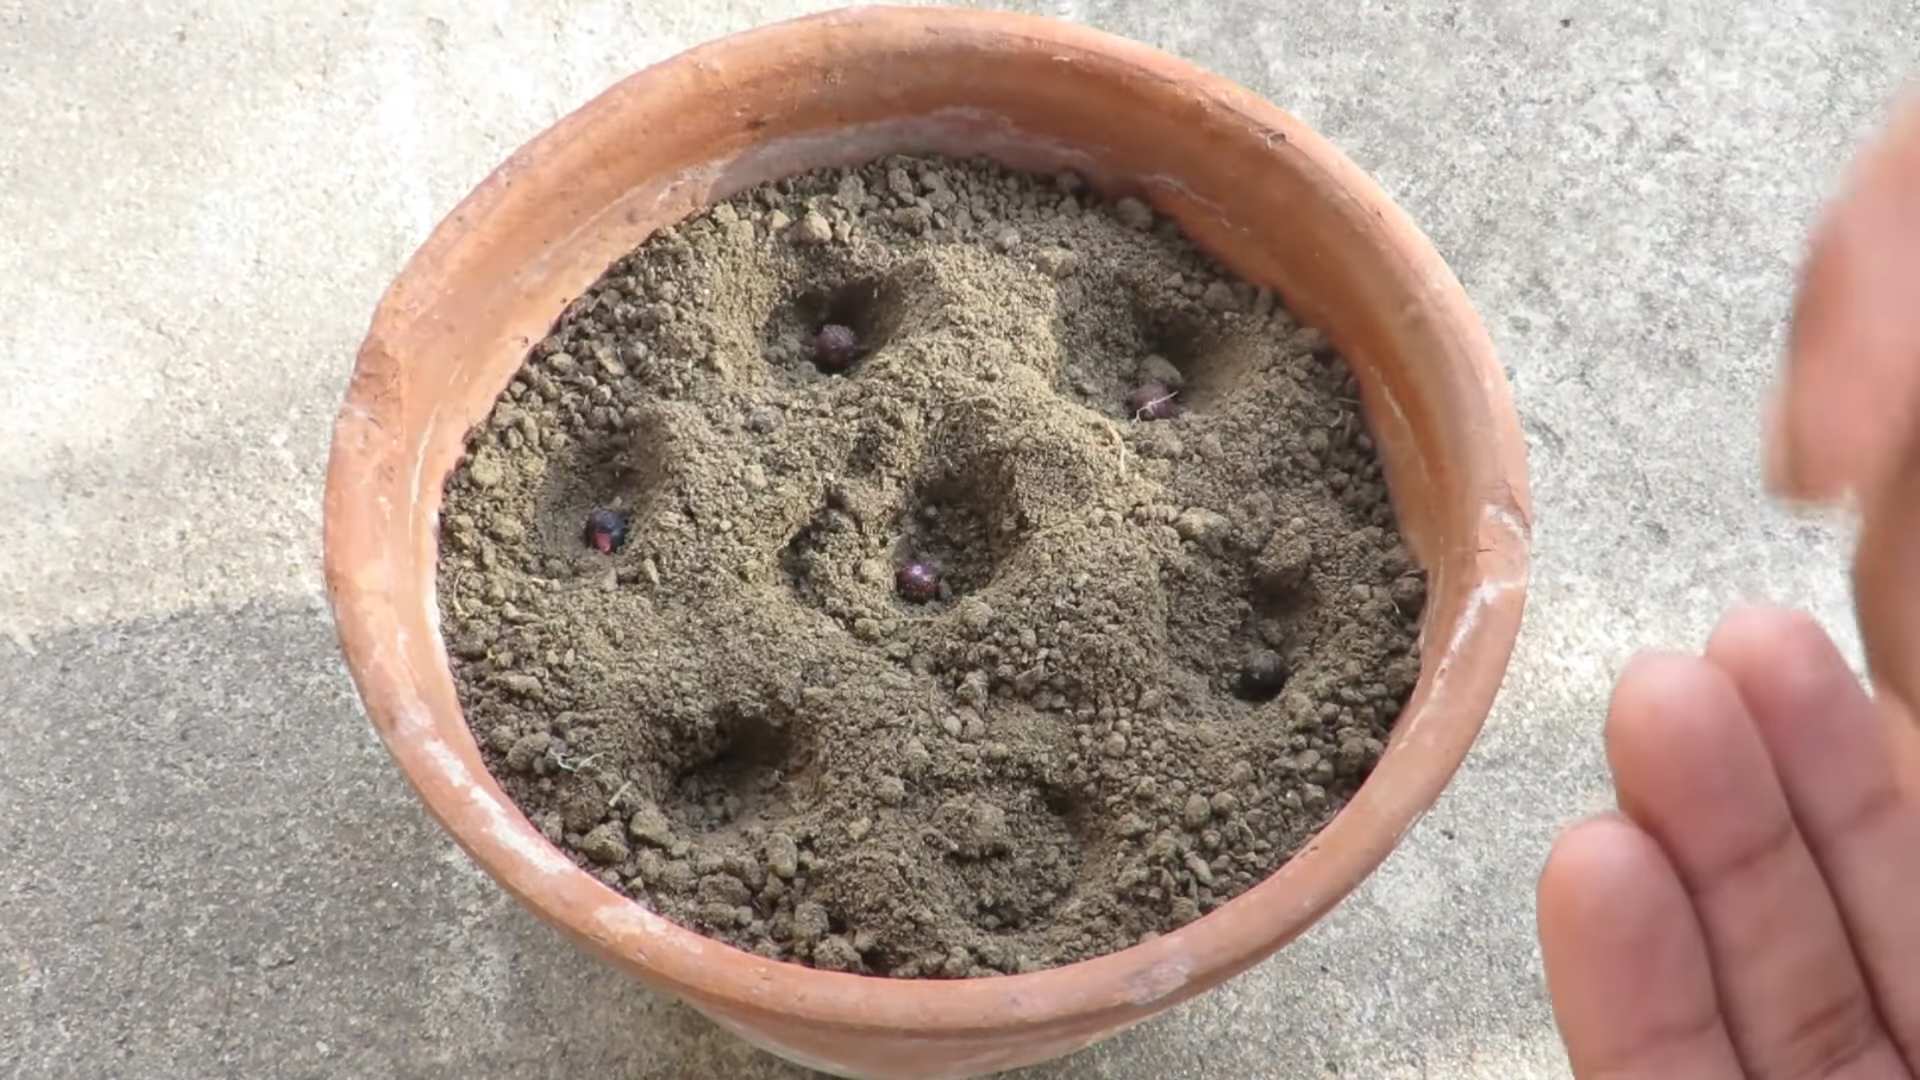
What type of soil should I use for container okra?
Use a high-quality potting mix that is well-draining and rich in organic matter. Avoid using garden soil, as it can become compacted in containers and hinder root growth. A good potting mix will retain moisture while still allowing excess water to drain away. You can also amend the potting mix with compost or aged manure to provide additional nutrients. Consider adding perlite or vermiculite to improve drainage and aeration.
How often should I water my container okra?
Okra plants need consistent moisture, especially during hot weather. Water deeply whenever the top inch of soil feels dry to the touch. The frequency of watering will depend on the weather conditions, the size of the container, and the type of potting mix you’re using. In general, you may need to water daily during hot, dry spells. Avoid overwatering, as this can lead to root rot. Check the drainage holes to ensure that water is draining properly.
How much sunlight does okra need?
Okra requires at least 6-8 hours of direct sunlight per day to thrive. Choose a location for your container okra that receives plenty of sunlight throughout the day. If you live in a particularly hot climate, you may need to provide some afternoon shade to prevent the plants from getting scorched. Insufficient sunlight can result in leggy growth, reduced flowering, and smaller pods.
What kind of fertilizer should I use for okra?
Okra is a heavy feeder and benefits from regular fertilization. Use a balanced fertilizer (e.g., 10-10-10) or a fertilizer specifically formulated for vegetables. Apply the fertilizer according to the package instructions, usually every 2-3 weeks during the growing season. You can also supplement with compost tea or liquid seaweed extract to provide additional nutrients. Avoid over-fertilizing, as this can lead to excessive foliage growth at the expense of pod production.
How do I deal with pests and diseases on my container okra?
Common pests that can affect okra include aphids, spider mites, and flea beetles. Regularly inspect your plants for signs of infestation and take action promptly. You can often control pests by spraying the plants with a strong stream of water or by using insecticidal soap or neem oil. Diseases such as powdery mildew and root rot can also affect okra. Ensure good air circulation around the plants and avoid overwatering to prevent these problems. If you notice signs of disease, remove affected leaves or plants and treat with an appropriate fungicide.
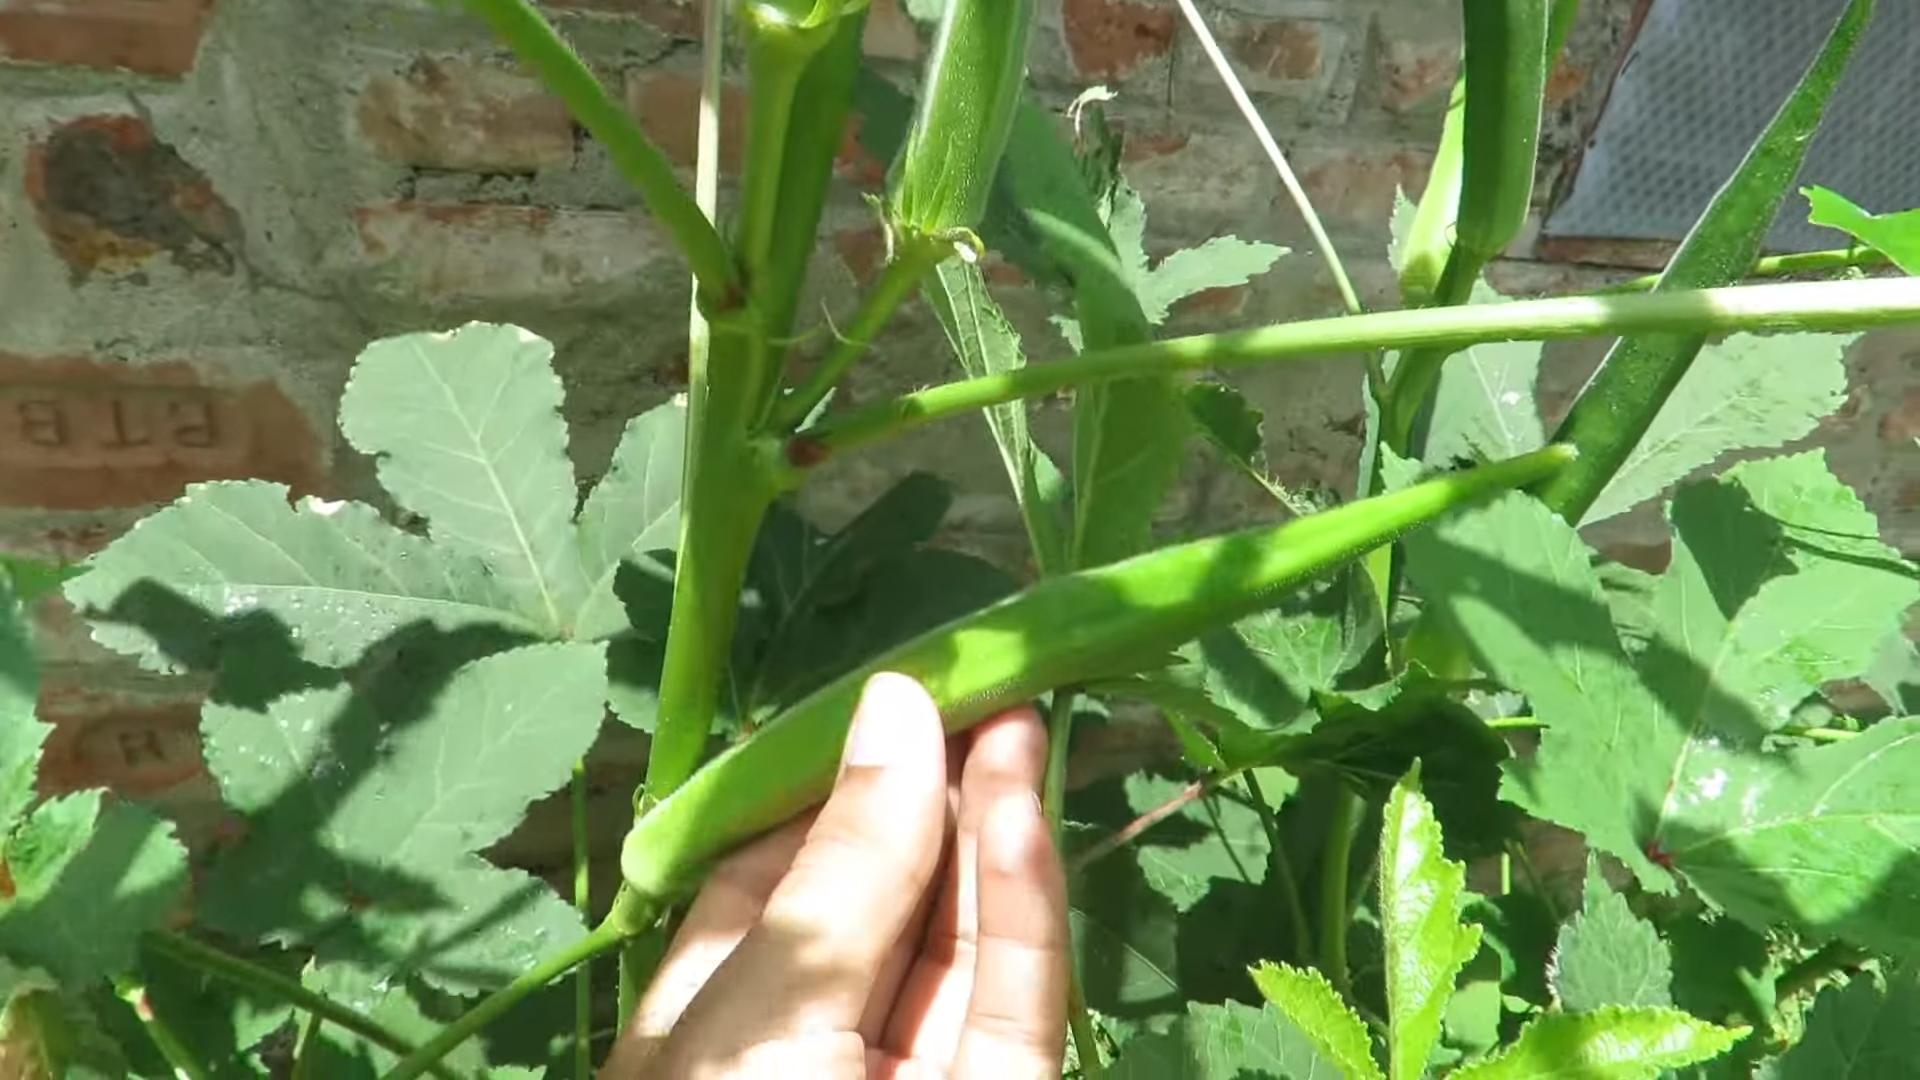
When should I harvest my okra pods?
Okra pods are best harvested when they are young and tender, typically 2-4 inches long. Check your plants daily during the harvest season, as the pods can grow quickly. Use a sharp knife or pruning shears to cut the pods from the plant, leaving a short stem attached. Overripe pods become tough and fibrous. Regular harvesting encourages the plant to produce more pods.
Can I grow okra indoors?
While it’s possible to grow okra indoors, it can be challenging to provide the plant with the necessary sunlight and space. If you want to try growing okra indoors, choose a sunny south-facing window or use grow lights to supplement natural light. You’ll also need a large container and a well-draining potting mix. Be prepared to pollinate the flowers by hand, as there may not be enough pollinators indoors.
What are some good companion plants for okra in containers?
Several plants can benefit okra when grown together in containers. Marigolds help deter pests, while basil can enhance the flavor of the okra. Other good companion plants include peppers, tomatoes, and eggplant. Avoid planting okra near beans or cabbage, as they can compete for nutrients.
How do I save okra seeds for next year?
To save okra seeds, allow some of the pods to mature fully on the plant. The pods will become dry and brown. Once the pods are completely dry, harvest them and remove the seeds. Store the seeds in a cool, dry place in an airtight container. Okra seeds can remain viable for several years if stored properly.

Leave a Comment