
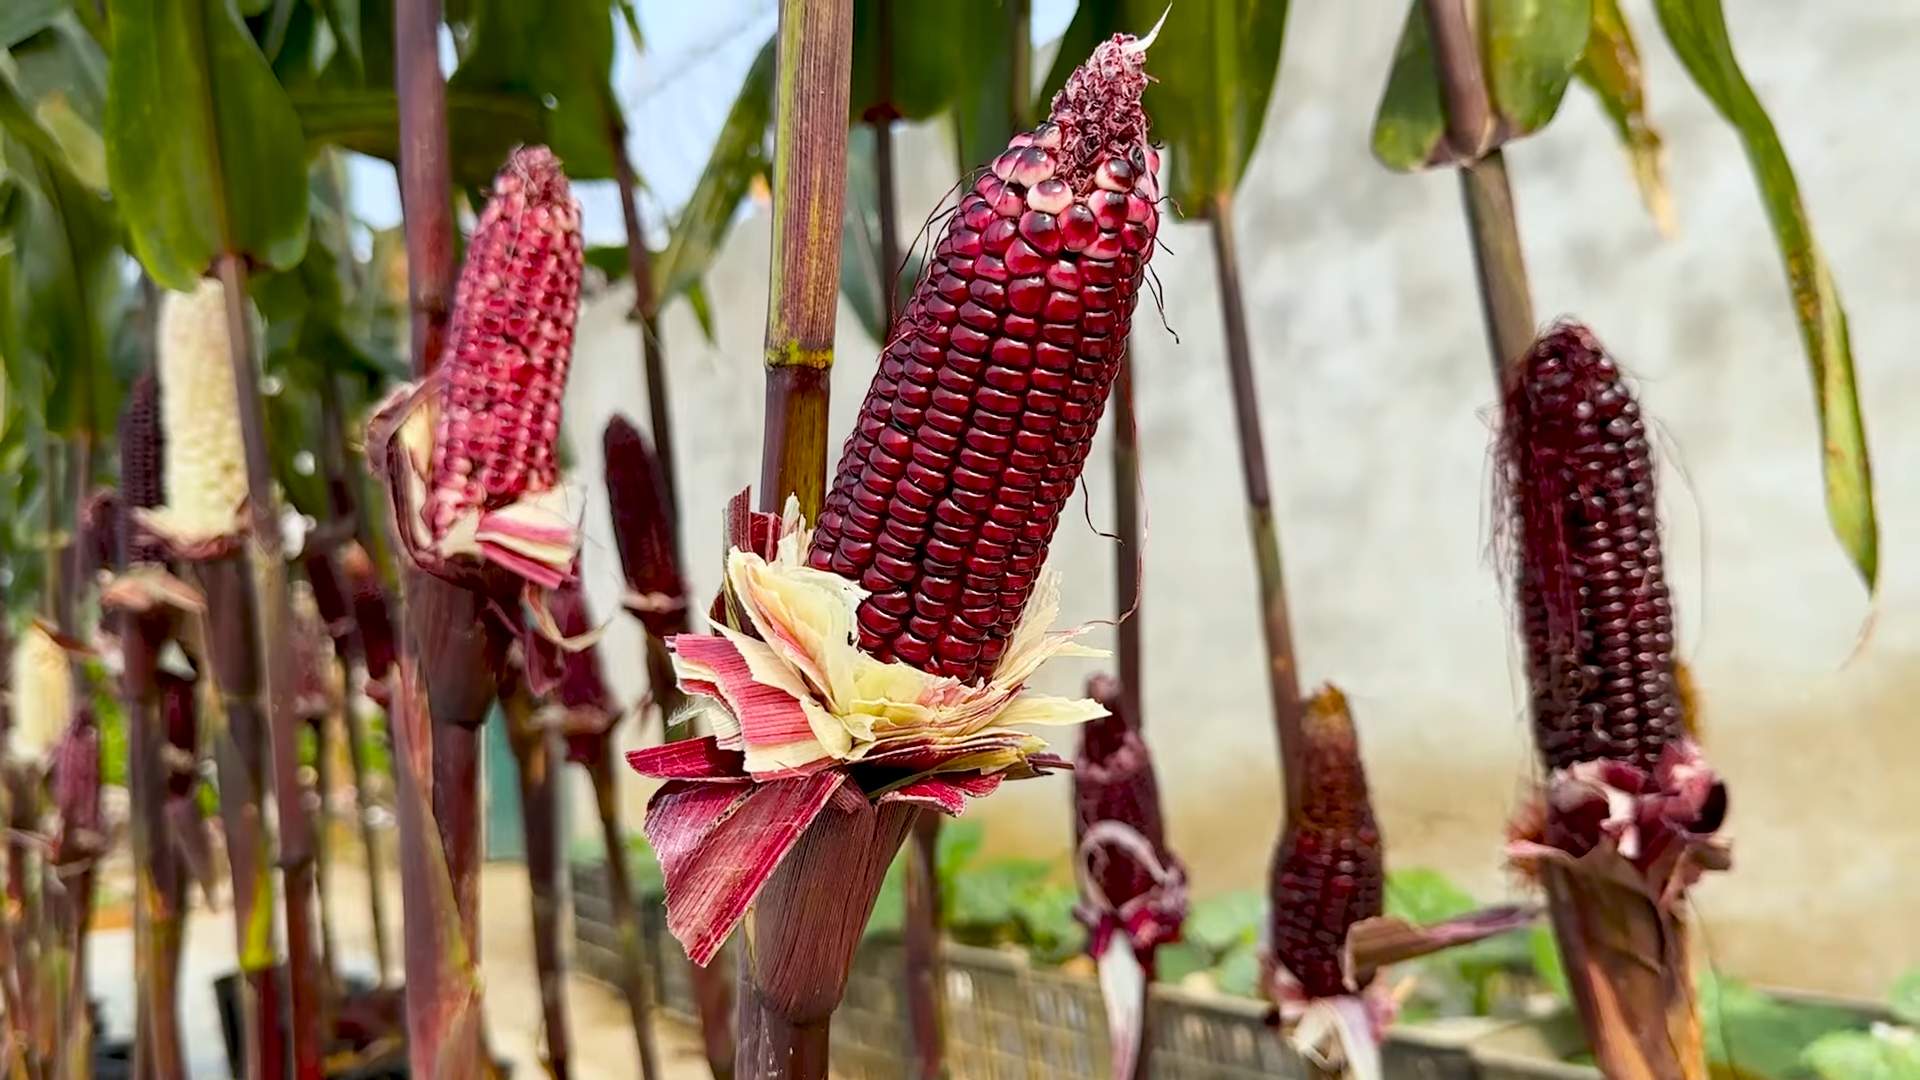
Rooftop Corn Growing Easy: Imagine stepping onto your rooftop and harvesting fresh, juicy corn – right in the heart of the city! Sounds like a dream, doesn’t it? Well, it doesn’t have to be! This DIY guide will unlock the secrets to successful rooftop corn growing, even if you’re a complete beginner.
Corn, a staple in diets worldwide, has a rich history dating back thousands of years to ancient Mesoamerica. It was a sacred crop, deeply intertwined with the culture and survival of civilizations like the Mayans and Aztecs. While traditionally grown in vast fields, the spirit of innovation allows us to adapt this ancient grain to modern urban environments.
Why should you try rooftop corn growing? Well, for starters, it’s incredibly rewarding to nurture your own food source. Plus, fresh, homegrown corn tastes infinitely better than anything you’ll find in the supermarket. But more importantly, in a world where space is a premium, especially in urban areas, maximizing your rooftop space for gardening is a smart and sustainable choice. This DIY project is perfect for anyone looking to add a touch of green to their city life, reduce their carbon footprint, and enjoy the delicious taste of homegrown goodness. I’m excited to share these easy-to-follow tips and tricks that will have you enjoying a bountiful harvest in no time! Let’s get started with rooftop corn growing easy!
Rooftop Corn Growing: A Beginner’s Guide to Bountiful Harvests
Hey there, fellow gardening enthusiasts! Ever dreamt of having fresh, homegrown corn without a sprawling farm? Well, you’re in luck! I’m going to walk you through the surprisingly simple process of growing corn right on your rooftop. It’s a rewarding experience, and trust me, nothing beats the taste of corn you’ve grown yourself.
Choosing the Right Corn Variety
Before we dive into the nitty-gritty, let’s talk corn varieties. Not all corn is created equal, especially when it comes to rooftop gardening. We need to consider factors like size, maturity time, and disease resistance.
* Dwarf Varieties: These are your best bet for rooftop growing. They’re compact and won’t topple over in the wind. Look for varieties like ‘On Deck’ or ‘Trinity’.
* Early Maturing Varieties: Shorter growing seasons are ideal for rooftop gardens. Varieties that mature in 70-80 days are perfect.
* Disease Resistance: Opt for varieties known to resist common corn diseases like rust and smut.
Gathering Your Supplies
Alright, let’s get our hands dirty! Here’s what you’ll need to get started:
* Large Containers: Think big! Each corn plant needs at least 12 inches of space in diameter and depth. I recommend using containers that are at least 18 inches wide and 18 inches deep.
* High-Quality Potting Mix: Don’t skimp on the soil! Use a well-draining potting mix amended with compost. Avoid using garden soil, as it can compact in containers.
* Corn Seeds: Choose your desired variety based on the criteria we discussed earlier.
* Slow-Release Fertilizer: This will provide your corn plants with a steady supply of nutrients throughout the growing season.
* Watering Can or Hose: Essential for keeping your corn plants hydrated.
* Trellis or Stakes (Optional): For taller varieties, these will provide support and prevent them from falling over.
* Bird Netting (Optional): To protect your precious corn from hungry birds.
Planting Your Corn
Now for the fun part – planting!
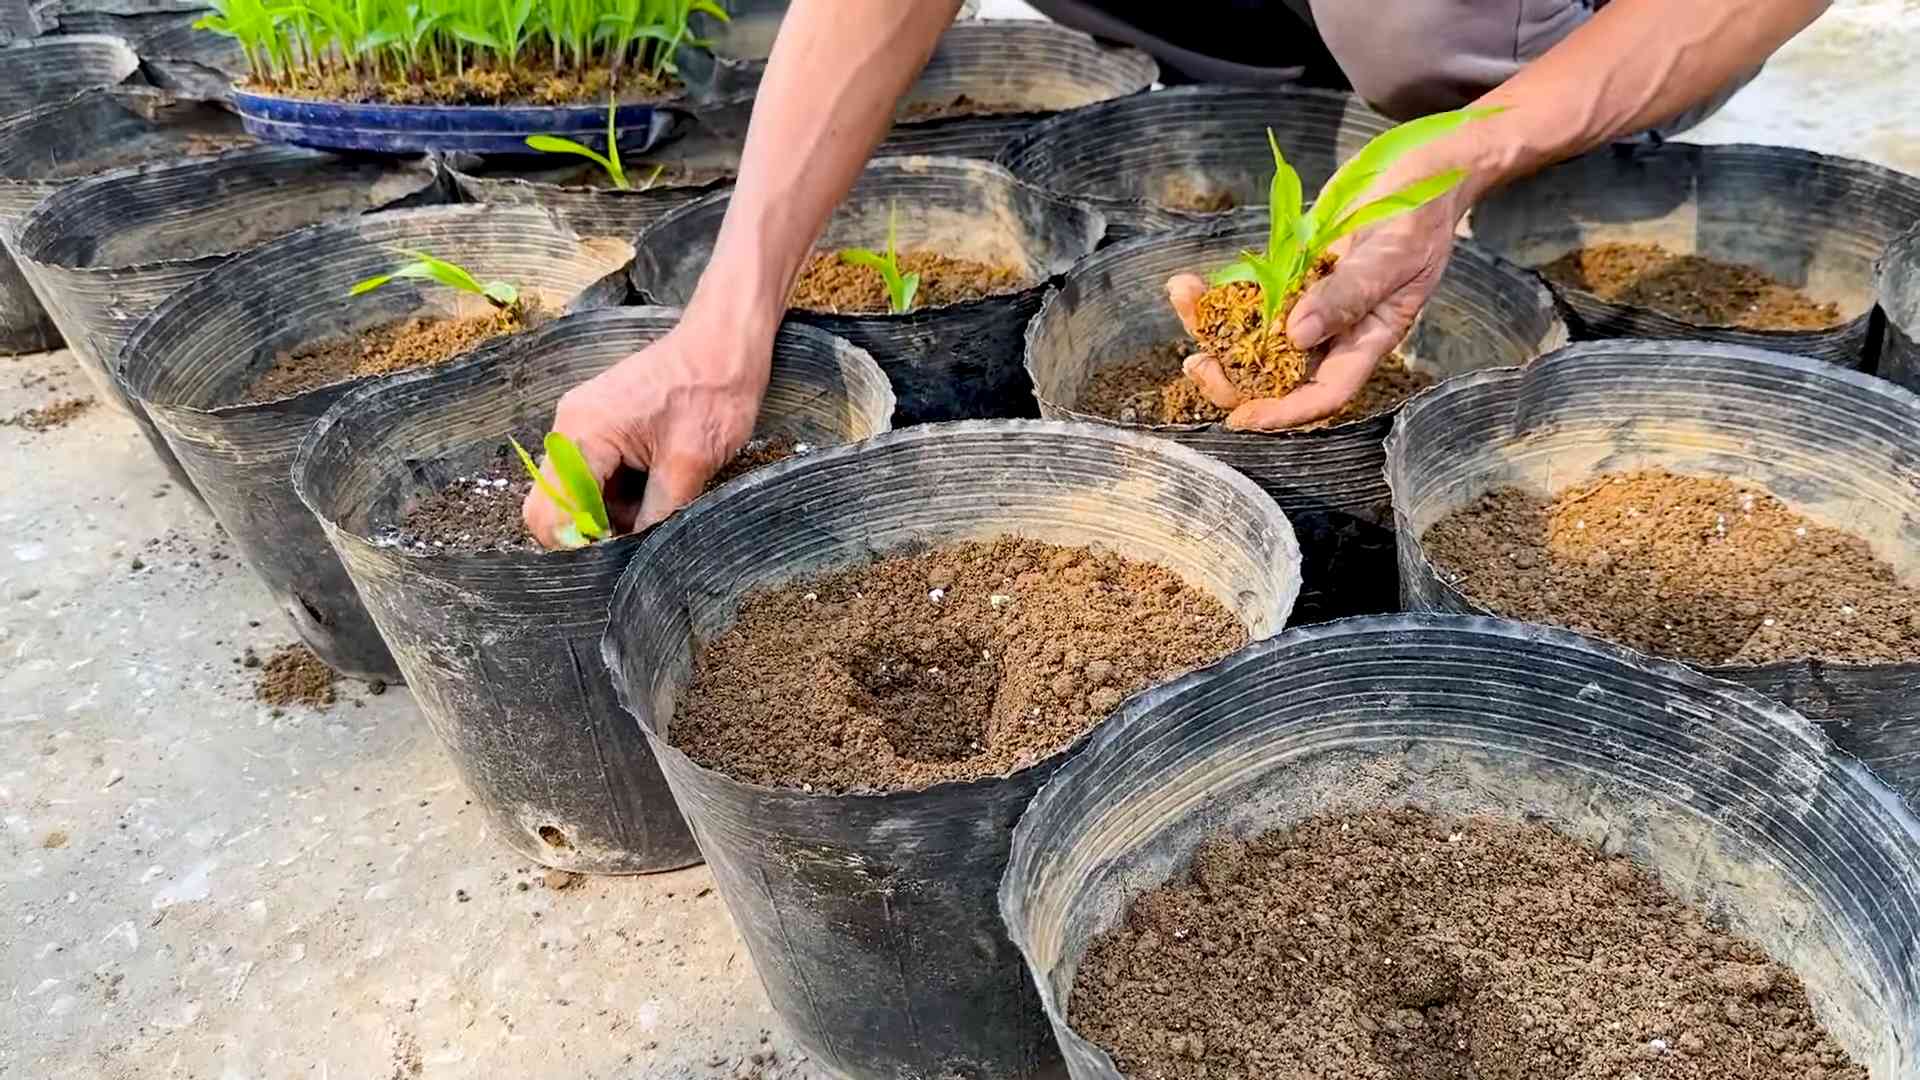
1. Prepare Your Containers: Fill your containers with the potting mix, leaving about an inch of space at the top.
2. Sow the Seeds: Plant the corn seeds about 1-2 inches deep and 4-6 inches apart. I usually plant 3-4 seeds per container and thin them out later, keeping the strongest plant.
3. Water Thoroughly: Gently water the soil until it’s evenly moist. Avoid overwatering, as this can lead to root rot.
4. Provide Sunlight: Place your containers in a location that receives at least 6-8 hours of direct sunlight per day. This is crucial for corn growth.
Caring for Your Corn Plants
Once your corn plants have sprouted, it’s time to provide them with the care they need to thrive.
1. Watering: Corn plants need consistent moisture, especially during hot weather. Water deeply whenever the top inch of soil feels dry to the touch.
2. Fertilizing: Apply a slow-release fertilizer according to the package instructions. You can also supplement with liquid fertilizer every few weeks.
3. Thinning: Once the seedlings are a few inches tall, thin them out to one plant per container if you planted multiple seeds.
4. Pollination: Corn is wind-pollinated, so you’ll need to help it along, especially if your rooftop is sheltered. Gently shake the stalks of the plants when the tassels (the male flowers at the top) are shedding pollen. You can also hand-pollinate by collecting pollen from the tassels and dusting it onto the silks (the female flowers that emerge from the developing ears).
5. Pest and Disease Control: Keep an eye out for pests like aphids and corn earworms. Treat infestations with insecticidal soap or neem oil. Prevent fungal diseases by ensuring good air circulation and avoiding overwatering.
6. Support: If your corn plants are getting tall and wobbly, provide them with support using trellises or stakes.
Harvesting Your Corn
The moment we’ve all been waiting for – harvest time!
1. Check for Ripeness: The silks will turn brown and dry, and the ears will feel plump and full.
2. Test the Kernels: Gently peel back the husk and puncture a kernel with your fingernail. If the liquid is milky, the corn is ready to harvest. If it’s clear, it needs more time.
3. Harvest Carefully: Grasp the ear firmly and twist it downward to snap it off the stalk.
Troubleshooting Common Problems
Even with the best care, you might encounter some challenges along the way. Here are some common problems and how to address them:
* Poor Pollination: If your ears are small and have missing kernels, it’s likely due to poor pollination. Try hand-pollinating or shaking the stalks more frequently.
* Pest Infestations: Regularly inspect your plants for pests and treat them promptly.
* Nutrient Deficiencies: Yellowing leaves can indicate a nutrient deficiency. Amend the soil with fertilizer or compost.
* Wind Damage: Protect your plants from strong winds by providing support or moving them to a more sheltered location.
Section 1: Container Selection and Preparation
Choosing the right container is paramount for success. I’ve learned this the hard way! Too small, and your corn will be stunted. Too shallow, and the roots won’t have enough room to develop.
1. Size Matters: As I mentioned before, aim for containers that are at least 18 inches in diameter and depth. Larger is always better, as it provides more room for the roots to grow and access nutrients.
2. Material Considerations: Plastic, terracotta, and even fabric pots can work. Plastic is lightweight and retains moisture well, but it can get hot in direct sunlight. Terracotta is breathable but can dry out quickly. Fabric pots are a good compromise, as they provide good drainage and aeration.
3. Drainage is Key: Ensure your containers have adequate drainage holes to prevent waterlogging. If the holes are too small, you can drill additional ones.
4. Lining (Optional): If you’re using terracotta pots, you might want to line them with plastic to help retain moisture. Just make sure to leave the drainage holes uncovered.
5. Cleaning: Before planting, clean your containers thoroughly with soap and water to remove any dirt or debris.
Section 2: Soil Preparation and Amendment
The soil is the foundation of your rooftop corn garden. A well-draining, nutrient-rich soil mix is essential for healthy growth.
1. Avoid Garden Soil: I cannot stress this enough! Garden soil is too heavy and compact for container gardening. It doesn’t drain well and can suffocate the roots.
2. Use a High-Quality Potting Mix: Look for a potting mix that contains a blend of peat moss, perlite, and vermiculite. These ingredients provide good drainage, aeration, and water retention.
3. Amend with Compost: Compost is a fantastic soil amendment that adds nutrients and improves soil structure. Mix in about 25-50% compost into your potting mix.
4. Consider Adding Slow-Release Fertilizer: This will provide your corn plants with a steady supply of nutrients throughout the growing season. Follow the package instructions for application rates.
5. pH Testing (Optional): Corn prefers a slightly acidic soil pH of around 6.0-6.8. You can test your soil pH using a soil testing kit and adjust it if necessary.
Section 3: Pollination Techniques for Rooftop Corn
Since we’re growing corn on a rooftop, we need to be a little more proactive about pollination. Wind pollination might not be as effective in a confined space.
1. Understanding Corn Pollination: Corn is monoecious, meaning it has separate male and female flowers on the same plant. The male flowers are the tassels at the top of the plant, and the female flowers are the silks that emerge from the developing ears.
2. Hand-Pollination: This is the most reliable method for ensuring good pollination on a rooftop. Use a small brush or cotton swab to collect pollen from the tassels and gently dust it onto the silks. Repeat this process every day for several days.
3. Shaking the Stalks: Gently shake the stalks of the plants when the tassels are shedding pollen. This will help release the pollen and distribute it to the silks.
4. Timing is Crucial: Pollination is most effective when the silks are fresh and receptive. They will be sticky and slightly moist.
5. Planting in Blocks: Planting your corn in a block formation, rather than a single row, can improve pollination rates
Conclusion
So, there you have it! Growing your own corn, even on a rooftop, is not only possible but surprisingly rewarding. This DIY rooftop corn growing method opens up a world of possibilities, transforming your unused space into a miniature farm and providing you with the freshest, sweetest corn you’ve ever tasted. Forget the store-bought varieties that have traveled miles and lost their flavor; imagine biting into a juicy ear of corn, harvested just moments before, bursting with sunshine and homegrown goodness.
This isn’t just about saving money (though that’s a definite perk!). It’s about connecting with your food, understanding where it comes from, and enjoying the satisfaction of nurturing something from seed to table. It’s about adding a touch of green to your urban landscape and creating a conversation starter that will impress your friends and neighbors.
But the best part? This method is incredibly adaptable. Feel free to experiment with different corn varieties. Try growing sweet corn, of course, but also consider dent corn for making your own cornmeal or even ornamental corn for adding a splash of color to your rooftop garden. You can also adjust the size of your containers to fit your available space. If you’re short on room, consider using smaller containers and focusing on a few high-yielding plants. If you have more space, go big and create a mini cornfield!
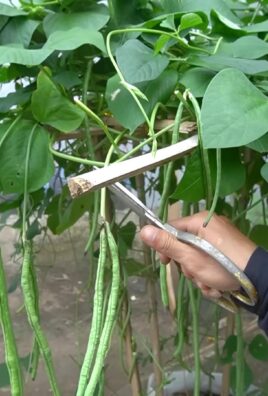
Don’t be afraid to get creative with your container design, either. Use repurposed materials like old tires, wooden crates, or even large plastic bins. Just make sure your containers have adequate drainage to prevent waterlogging. You can also companion plant with beans and squash to create a “Three Sisters” garden, a traditional Native American planting method that benefits all three plants. The beans provide nitrogen to the soil, the squash shades the soil and suppresses weeds, and the corn provides a support for the beans to climb.
This DIY rooftop corn growing technique is a must-try for anyone looking to add a touch of nature to their urban life and enjoy the unparalleled taste of homegrown corn. It’s a fun, educational, and ultimately delicious project that will bring joy to your life and fresh corn to your table.
We encourage you to give this method a try and share your experiences with us! Let us know what varieties you grow, what challenges you face, and what successes you celebrate. Share your photos and tips in the comments below. We can’t wait to see your rooftop corn gardens flourish! This is more than just a recipe; it’s a community of growers sharing their knowledge and passion for homegrown food. So, grab your seeds, get your hands dirty, and start growing your own delicious rooftop corn today! You won’t regret it.
Frequently Asked Questions (FAQ)
What kind of corn is best for rooftop growing?
The best corn varieties for rooftop growing are typically shorter, more compact varieties that are well-suited to container gardening. Sweet corn varieties like ‘Golden Bantam’, ‘Sugar Baby’, and ‘Honey Select’ are popular choices. These varieties are relatively short and produce delicious, sweet ears of corn. Dent corn varieties, used for making cornmeal, can also be grown, but they tend to be taller and require larger containers. Ornamental corn is another option, adding visual appeal to your rooftop garden. Consider your space limitations and desired end product when choosing your corn variety. Also, look for varieties that are known for their disease resistance, as container-grown plants can be more susceptible to certain diseases.
How much sunlight does rooftop corn need?
Corn requires a significant amount of sunlight to thrive. Aim for at least 6-8 hours of direct sunlight per day. If your rooftop doesn’t receive that much sunlight, you may need to supplement with grow lights. Insufficient sunlight can lead to stunted growth, poor ear development, and reduced yields. Observe your plants closely and adjust their position as needed to maximize sunlight exposure. Consider using reflective surfaces, such as white paint or aluminum foil, to bounce sunlight onto your plants.
What size containers are needed for growing corn on a rooftop?
Corn plants have extensive root systems and require large containers to support their growth. A minimum container size of 12-15 gallons per plant is recommended. Larger containers are even better, as they provide more room for the roots to grow and help retain moisture. Ensure that your containers have adequate drainage holes to prevent waterlogging, which can lead to root rot. Consider using fabric pots, which allow for better aeration and drainage.
How often should I water my rooftop corn?
Corn plants are heavy drinkers and require consistent watering, especially during hot weather. Water deeply and regularly, ensuring that the soil is moist but not waterlogged. Check the soil moisture level daily and water when the top inch of soil feels dry to the touch. The frequency of watering will depend on the weather conditions, the size of your containers, and the type of soil you’re using. During periods of drought or extreme heat, you may need to water your plants twice a day.
What kind of fertilizer should I use for rooftop corn?
Corn is a heavy feeder and requires a nutrient-rich soil to thrive. Use a balanced fertilizer with a ratio of 10-10-10 or 14-14-14. Apply fertilizer according to the package instructions, typically every 2-3 weeks. You can also supplement with organic fertilizers, such as compost, worm castings, or fish emulsion. Avoid over-fertilizing, as this can lead to excessive vegetative growth and reduced ear production.
How do I pollinate my rooftop corn?
Corn is wind-pollinated, meaning that the pollen from the tassels (male flowers) needs to be transferred to the silks (female flowers) by the wind. In a rooftop garden, where wind may be limited, you may need to hand-pollinate your corn. To do this, gently shake the tassels over the silks, or use a small paintbrush to collect pollen from the tassels and apply it to the silks. Repeat this process every day for several days to ensure adequate pollination.
How do I know when my rooftop corn is ready to harvest?
The time to harvest corn depends on the variety and the growing conditions. Generally, sweet corn is ready to harvest about 20-25 days after the silks appear. The silks will turn brown and dry, and the ears will feel plump and full. To check for ripeness, peel back a portion of the husk and puncture a kernel with your fingernail. If the liquid that comes out is milky, the corn is ready to harvest. If the liquid is clear, the corn is not yet ripe. If the liquid is doughy, the corn is overripe.
What are some common pests and diseases that affect rooftop corn?
Common pests that can affect rooftop corn include corn earworms, aphids, and spider mites. Diseases that can affect corn include corn smut, rust, and leaf blight. Monitor your plants regularly for signs of pests or diseases and take appropriate action. You can use organic pest control methods, such as insecticidal soap or neem oil, to control pests. To prevent diseases, ensure that your plants have good air circulation and avoid overwatering.
Can I grow corn in the same container year after year?
It’s generally not recommended to grow corn in the same container year after year, as this can deplete the soil of nutrients and increase the risk of pests and diseases. It’s best to rotate your crops or replenish the soil with fresh compost and nutrients each year. You can also consider using a cover crop, such as clover or buckwheat, to improve the soil health.
What are some creative ways to use my rooftop corn harvest?
Beyond simply boiling or grilling your fresh corn, there are countless ways to enjoy your rooftop harvest. You can make corn on the cob, creamed corn, corn chowder, corn salsa, or even corn bread. You can also dry your corn and grind it into cornmeal for making tortillas, polenta, or cornbread. Get creative and experiment with different recipes to discover your favorite ways to enjoy your homegrown corn!


Leave a Comment