
Rubber band uses household items in ways you never imagined? Absolutely! I’m constantly amazed by the simple yet ingenious ways we can repurpose everyday objects to make our lives easier and our homes more efficient. For centuries, humans have been finding creative solutions to problems using whatever resources were available. Think about it – from ancient civilizations using natural dyes to modern-day upcycling, resourcefulness is in our DNA.
But let’s be honest, sometimes we get stuck in a rut, using things only for their intended purpose. That’s where these DIY tricks come in! This article is packed with clever rubber band uses household hacks that will save you time, money, and maybe even a little frustration.
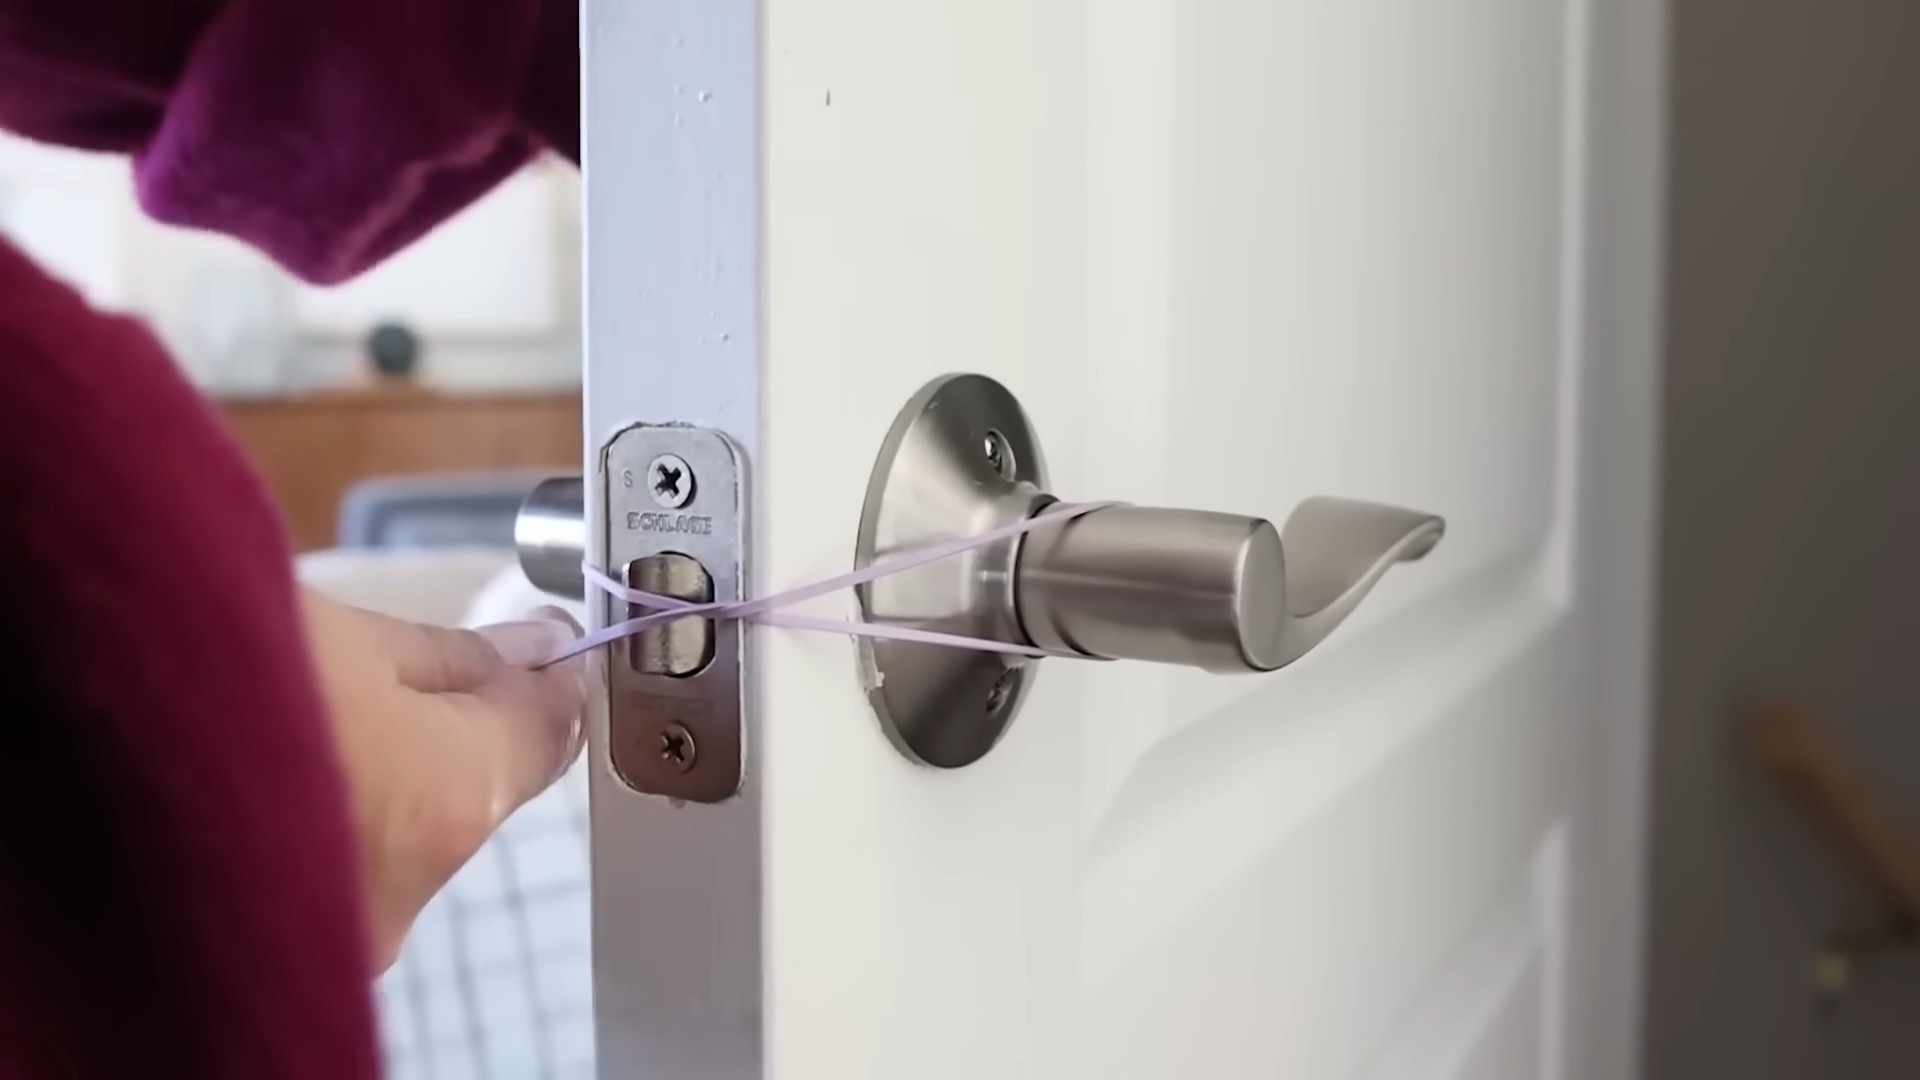
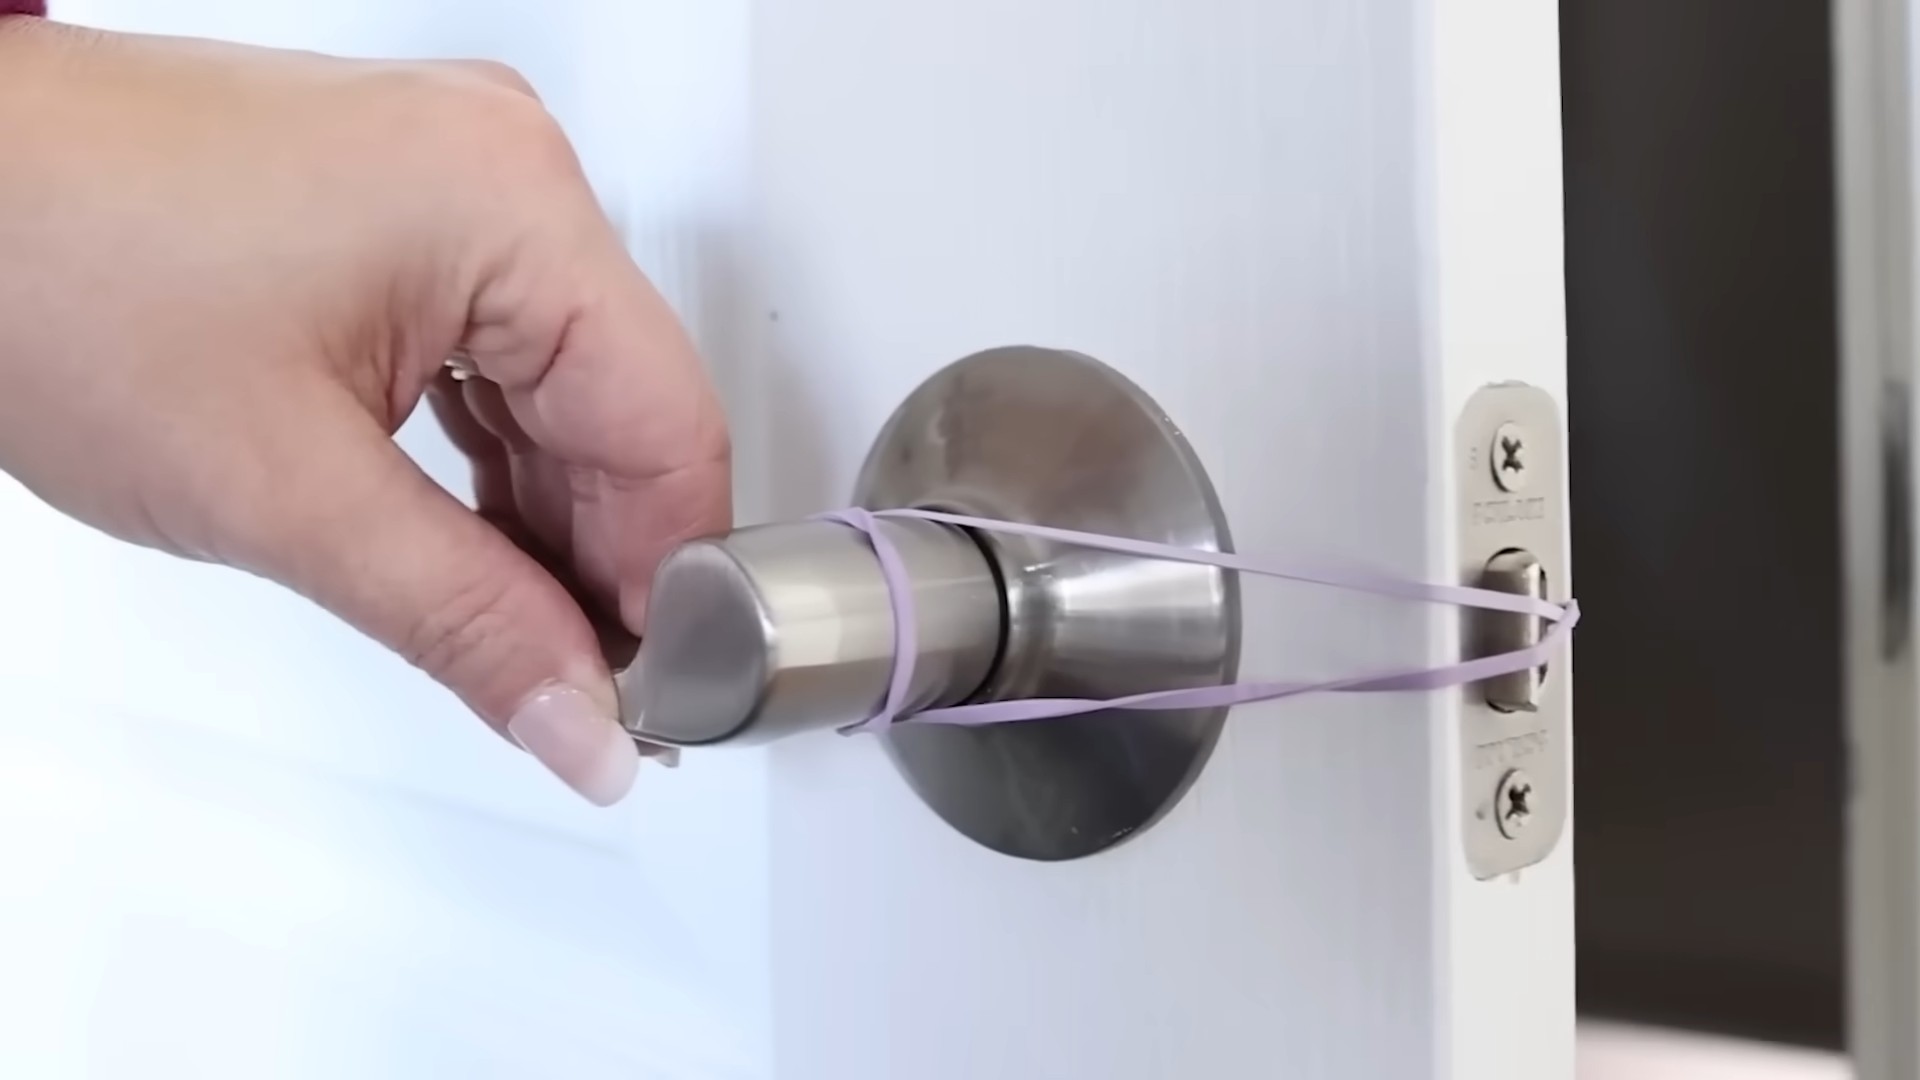
Are you tired of struggling to keep cabinet doors closed? Or perhaps you’re looking for a way to improve your grip on slippery tools? Maybe you just want to organize your cords and cables once and for all? These are just a few of the problems that a simple rubber band can solve. So, grab a handful of these stretchy wonders and get ready to unlock their hidden potential. You’ll be surprised at how many everyday annoyances can be tackled with this humble household staple!
DIY Concrete Countertops: A Step-by-Step Guide
Hey there, fellow DIY enthusiasts! I’m super excited to share one of my favorite home improvement projects with you: creating your own concrete countertops. It might seem intimidating, but trust me, with a little patience and these detailed instructions, you can achieve a stunning, modern look for your kitchen or bathroom without breaking the bank. Let’s get started!
Materials You’ll Need
Before we dive in, let’s gather all the necessary materials. This will save you time and frustration later.
* Concrete Mix: I recommend a high-strength concrete mix specifically designed for countertops. Look for one that’s fiber-reinforced to minimize cracking. Quikrete 5000 is a popular and reliable choice. Calculate the amount you need based on the dimensions of your countertop and the concrete mix’s coverage rate (usually found on the bag). It’s always better to have a little extra!
* Melamine Boards: These will form the mold for your countertop. I usually go for ¾-inch thick melamine because it’s sturdy and has a smooth, non-porous surface that will result in a nice, even finish.
* Screws: Use screws that are long enough to securely hold the melamine boards together, but not so long that they poke through. 1 ¼-inch screws are usually a good bet.
* Silicone Caulk: This is crucial for sealing the seams of your mold and preventing concrete from leaking out. Choose a paintable silicone caulk.
* Concrete Sealer: A good quality concrete sealer is essential for protecting your countertop from stains and water damage. I prefer a food-safe sealer if it’s for a kitchen countertop.
* Concrete Pigment (Optional): If you want to add color to your countertop, you’ll need concrete pigment. Choose a color that complements your kitchen or bathroom decor.
* Reinforcement (Optional): Wire mesh or rebar can add extra strength, especially for larger countertops.
* Release Agent: A concrete release agent will help you remove the countertop from the mold once it’s cured. You can use a commercial release agent or even a vegetable oil spray.
* Mixing Tools: You’ll need a concrete mixer (rent one if you don’t have one), a wheelbarrow or large mixing tub, a shovel or hoe, and buckets.
* Finishing Tools: These include a trowel, a float, sandpaper (various grits), and a concrete polisher (optional, but recommended for a super smooth finish).
* Safety Gear: Don’t forget safety glasses, gloves, and a dust mask! Concrete dust can be harmful to your eyes and lungs.
Building the Mold
This is where the magic begins! The mold is what will give your countertop its shape, so accuracy is key.
1. Measure and Cut the Melamine: Carefully measure the dimensions of your desired countertop. Remember to account for any overhangs or special features. Cut the melamine boards to size using a circular saw or table saw. Make sure your cuts are straight and clean.
2. Assemble the Mold: Assemble the melamine boards to form a box that represents the shape of your countertop. The bottom of the mold will be the top surface of your countertop, so make sure it’s perfectly smooth and level.
3. Secure the Mold: Use screws to securely fasten the melamine boards together. Pre-drill pilot holes to prevent the melamine from splitting.
4. Seal the Seams: Apply a generous bead of silicone caulk to all the seams of the mold, both inside and outside. Smooth the caulk with your finger or a caulk smoothing tool to create a watertight seal. This is super important to prevent leaks and ensure a clean, crisp edge on your countertop. Let the caulk dry completely before moving on.
5. Add Reinforcement (Optional): If you’re using wire mesh or rebar, cut it to size and place it inside the mold. Make sure it’s positioned so that it will be embedded in the concrete, but not too close to the surface. You can use small pieces of concrete or plastic spacers to elevate the reinforcement.
6. Apply Release Agent: Apply a generous coat of concrete release agent to the inside of the mold. This will make it much easier to remove the countertop once it’s cured. If you’re using vegetable oil spray, apply a thin, even coat.
Mixing and Pouring the Concrete
Now for the fun part! Mixing and pouring the concrete can be a bit messy, so be prepared.
1. Mix the Concrete: Follow the instructions on the concrete mix bag to mix the concrete properly. Add water gradually until you achieve a thick, but pourable consistency. If you’re using concrete pigment, add it to the water before mixing it with the concrete. Mix thoroughly to ensure the pigment is evenly distributed.
2. Pour the Concrete: Carefully pour the concrete into the mold, starting at one end and working your way to the other. Pour in layers, about 2-3 inches thick.
3. Vibrate the Concrete: After each layer, vibrate the concrete to remove air bubbles and consolidate the mixture. You can use a concrete vibrator, or simply tap the sides of the mold with a rubber mallet. This step is crucial for creating a strong, durable countertop with a smooth surface.
4. Screed the Surface: Once the mold is full, use a screed board (a straight piece of wood or metal) to level the surface of the concrete. Drag the screed board across the top of the mold, removing any excess concrete.
5. Trowel the Surface: After screeding, use a trowel to smooth the surface of the concrete. Work in circular motions to create a smooth, even finish.
Curing the Concrete
Curing is a critical step in the concrete countertop process. It allows the concrete to properly hydrate and gain strength.
1. Cover the Countertop: Cover the countertop with plastic sheeting to prevent it from drying out too quickly.
2. Keep it Moist: Mist the countertop with water several times a day for the first few days of curing. This will help the concrete hydrate properly.
3. Cure for at Least 7 Days: Allow the countertop to cure for at least 7 days, or even longer if possible. The longer it cures, the stronger it will be.
Demolding and Finishing
Almost there! Now it’s time to reveal your masterpiece and give it the final touches.
1. Remove the Mold: After the concrete has cured, carefully remove the mold. Start by unscrewing the melamine boards. You may need to gently tap the boards with a rubber mallet to loosen them.
2. Inspect the Countertop: Once the mold is removed, inspect the countertop for any imperfections. Fill any small holes or cracks with a concrete patching compound.
3. Grind the Surface: Use a concrete grinder with progressively finer grits of diamond grinding pads to smooth the surface of the countertop. Start with a coarse grit (e.g., 60 grit) and gradually work your way up to a finer grit (e.g., 400 grit). This step can be dusty, so wear a dust mask and eye protection.
4. Polish the Surface (Optional): If you want a super smooth, glossy finish, use a concrete polisher with polishing pads. Start with a medium grit polishing pad and gradually work your way up to a high grit polishing pad.
5. Sand the Edges: Use sandpaper to smooth the edges of the countertop. Start with a coarse grit sandpaper and gradually work your way up to a finer grit sandpaper.
6. Clean the Countertop: Thoroughly clean the countertop with a concrete cleaner to remove any dust or debris.
7. Apply Sealer: Apply several coats of concrete sealer to protect the countertop from stains and water damage. Follow the manufacturer’s instructions for application. Allow each coat to dry completely before applying the next.
Installation
The final step is to install your beautiful new concrete countertop!
1. Prepare the Cabinets: Make sure your cabinets are level and sturdy.
2. Apply Adhesive: Apply a bead of construction adhesive to the top of the cabinets.
3. Position the Countertop: Carefully lift the countertop and position it on the cabinets.
4. Secure the Countertop: Use screws to secure the countertop to the cabinets from underneath.
5. Caulk the Seams: Apply a bead of silicone caulk to the seams between the countertop and the backsplash or walls.
And there you have it! Your very own DIY concrete countertop. Enjoy your new, stylish, and durable addition to your home. Remember, patience is key, and don’t be afraid to experiment. Happy DIY-ing!
Conclusion
So, there you have it! This simple yet incredibly effective DIY rubber band trick is a game-changer for anyone looking to simplify their life and tackle everyday challenges with a touch of ingenuity. We’ve explored how a humble rubber band, something most of us have lying around the house, can be transformed into a versatile tool capable of solving a surprising number of problems. From keeping your cutting board steady to creating a makeshift phone stand, the possibilities are truly endless.
What makes this DIY approach so compelling is its sheer accessibility. You don’t need to be a seasoned crafter or possess a workshop full of specialized tools. All you need is a rubber band and a little bit of imagination. This makes it a perfect project for anyone, regardless of their skill level or available resources. Plus, it’s a fantastic way to reduce waste and repurpose items you already own, contributing to a more sustainable lifestyle.
But the benefits extend beyond mere practicality. There’s a certain satisfaction that comes from solving a problem with your own resourcefulness. It’s empowering to realize that you don’t always need to buy expensive gadgets or rely on complicated solutions. Sometimes, the simplest answer is the best answer, and this rubber band trick is a prime example of that.
Why is this DIY rubber band trick a must-try? Because it’s cheap, easy, effective, and surprisingly versatile. It’s a skill that can come in handy in countless situations, from the kitchen to the office to the great outdoors. It’s a testament to the power of simple solutions and the ingenuity of the human mind.
Looking for variations? Consider using different sizes and thicknesses of rubber bands to suit different tasks. For example, a thicker rubber band might be better for securing heavier items, while a thinner one might be more suitable for delicate tasks. You can also experiment with combining multiple rubber bands for added strength or flexibility. Try using colored rubber bands to color-code items or add a touch of personality to your creations. Get creative and see what you can come up with!
We encourage you to try this DIY rubber band trick for yourself and discover the many ways it can make your life easier. Don’t be afraid to experiment and adapt the techniques to suit your specific needs. And most importantly, share your experiences with us! We’d love to hear about the creative ways you’ve used rubber bands to solve problems and simplify your life. Leave a comment below and let us know what you’ve discovered. Let’s build a community of resourceful individuals who are passionate about finding simple solutions to everyday challenges. Embrace the power of the rubber band and unlock its hidden potential!
Frequently Asked Questions (FAQ)
What kind of rubber band works best for these tricks?
The type of rubber band you use will depend on the specific task. For general purposes, standard-sized rubber bands are usually sufficient. However, for heavier-duty applications, you might want to opt for thicker, wider rubber bands. These provide more strength and grip. Conversely, for delicate tasks or when you need more flexibility, thinner rubber bands are a better choice. Consider the size and weight of the object you’re working with when selecting your rubber band. Experimenting with different sizes and thicknesses is key to finding the perfect fit for each situation. Also, consider the material. Natural rubber bands are generally more durable and have better elasticity than synthetic ones.
Are there any safety precautions I should take when using rubber bands?
Yes, safety should always be a priority. Avoid stretching rubber bands excessively, as they can snap and potentially cause injury, especially to the eyes. Always wear safety glasses when working with rubber bands under tension. Be mindful of children and pets, as rubber bands can be a choking hazard. Never aim a stretched rubber band at anyone. When using rubber bands to secure sharp objects, ensure they are securely fastened to prevent accidental cuts or punctures. Dispose of broken rubber bands properly to prevent them from becoming a hazard to wildlife.
Can I reuse rubber bands, or should I discard them after each use?
Rubber bands can definitely be reused, which is one of the great things about them! However, their lifespan depends on how frequently they are used and the conditions they are exposed to. Over time, rubber bands can lose their elasticity and become brittle, especially if exposed to sunlight or extreme temperatures. Before reusing a rubber band, inspect it for any signs of wear and tear, such as cracks, tears, or loss of elasticity. If the rubber band appears damaged, it’s best to discard it and use a fresh one. Proper storage can also extend the lifespan of your rubber bands. Store them in a cool, dry place away from direct sunlight.
What are some other creative uses for rubber bands that weren’t mentioned in the article?
The possibilities are truly endless! Here are a few more ideas:
* Bookmarking: Use a rubber band to mark your page in a book.
* Cable Management: Keep your cords and cables organized by bundling them together with rubber bands.
* Jar Opener: Wrap a rubber band around the lid of a stubborn jar for extra grip.
* Paintbrush Grip: Wrap a rubber band around the handle of a paintbrush for a more comfortable grip.
* DIY Stamps: Wrap rubber bands around a block of wood to create a unique stamp.
* Securing Zippers: If a zipper pull breaks, use a rubber band as a temporary replacement.
* Preventing Slipping Hangers: Wrap rubber bands around the ends of hangers to prevent clothes from slipping off.
How can I store rubber bands to keep them from drying out and cracking?
Proper storage is crucial for extending the life of your rubber bands. The key is to protect them from factors that can cause them to degrade, such as sunlight, heat, and humidity. Store your rubber bands in an airtight container or resealable bag to prevent them from drying out. Place the container in a cool, dark, and dry place, such as a drawer or cupboard. Avoid storing them near heat sources, such as radiators or ovens, or in direct sunlight. You can also add a small packet of silica gel to the container to absorb any excess moisture. By following these simple storage tips, you can keep your rubber bands in good condition for longer.
Are there any eco-friendly alternatives to traditional rubber bands?
Yes, there are several eco-friendly alternatives to traditional rubber bands that are made from sustainable materials. Look for rubber bands made from natural rubber, which is a renewable resource. Some companies also produce rubber bands made from recycled rubber or other plant-based materials. These alternatives are biodegradable and compostable, making them a more environmentally friendly choice. When purchasing rubber bands, look for products that are labeled as eco-friendly or sustainable. You can also consider using reusable alternatives, such as silicone bands or fabric ties, which can be used over and over again. By choosing eco-friendly options, you can reduce your environmental impact and contribute to a more sustainable future.

Leave a Comment